
What is a UIBezierPath in Swift?
And how to create your own pie chart

In this article, we will create a pie chart using the UIBezierPath class that helps us create custom geometries.
In just 100 lines of code, we will create our own UI element that you can reuse in your future applications.
The source code of the project is available at the bottom of the article.
Let’s Start
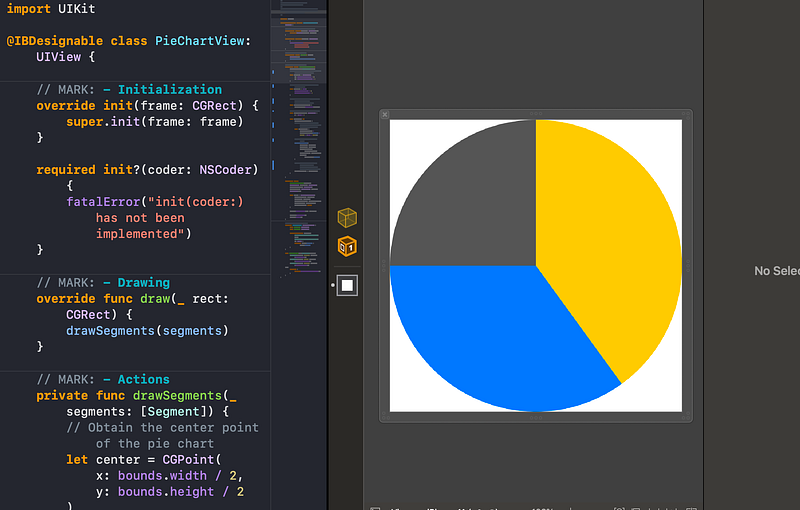
First, let’s create a UIView subclass called PieChartView:
We mark it as @IBDesignable to be able to easily debug it without needing to build and run the project. If you are not familiar with the declaration, feel free to quickly familiarize yourself with it in my article “What are @IBDesignable and @IBInspectable in Swift?”
Our pie chart will have colored segments, so we need to create a property to manage them:
Here we have the Segment struct conforming to Comparable. (We will want to figure out later which segment takes a higher percentage of the available space.) We also define the segments property as having a didSet property observer to trigger updates whenever the property changes.
Let’s now jump straight into the core of this tutorial: drawing the pie chart’s geometry:
We do two things here:
- Create the
drawSegments(_ segments:)method that calculates the starting and ending angle of all segments and draws each one sequentially - Override the
draw(_ rect:)method and call thedrawSegments(_ segments:)method
Let’s take a closer look at the drawSegments(_ segments:) method implementation:
To draw a segment, we need the following things:
- Center of the pie chart
- Radius of the pie chart
- The starting angle (in radians) of the segment
- The ending angle (in radians) of the segment
We can see how we easily obtain the center and the radius. The starting and ending angles are, however, more tricky.
This is our logic for finding angles of each segment:
- Start with 3 * .pi / 2 angle. This is going to be the beginning of the first segment.
- Iterate over segments.
- Calculate the ending angle of each segment, taking into account the ratio of the segment.
- Draw the current segment using the obtained properties.
- Set the
startAngleproperty to theendAngleof the last-drawn segment. - Repeat from step 3 until all segments are drawn.
It’s time to create the method that will create a UIBezierPath and draw a particular segment:
- Create a path for our segment.
- Close the segment with a line.
- Prepare the provided
colorto fill our segment. - Fill the segment with the
color.
The finishing step is to include that method inside the drawSegments(_ segments:) method. Now the final implementation looks like this:
The pie chart is done! We can now easily debug it using a .xib file:
Resources
Download the completed project on GitHub.
Thanks for reading!


