What Are Golden Tests and When to Use Them (Automated Testing 101)
Introduction
One of the challenges of app development is ensuring that your UI’s appearance is consistent across different devices (and platforms) and that no changes happen to a widget or screen when you work on another part of the app. This is where golden testing comes in. Golden testing is a technique that involves comparing the current appearance of a UI component to a “golden” reference image that represents the expected appearance. In this article, we’ll look closer at golden testing for mobile app development, its advantages, disadvantages, and when to use it.
If you want to see how to implement golden testing check out my article Flutter golden testing with the alchemist package.
Table of contents
- What is golden testing?
- How to do golden testing?
- Advantages golden testing
- Disadvantages golden testing
- When to use golden testing and when not to
- Conclusion

What is golden testing?
Golden testing is a technique used in software testing to verify that the output of a piece of the software remains unchanged over time. In a golden test, a snapshot of a widget or a group of widgets is compared against a previously stored “golden” version of the same snapshot which was verified manually.
How to do golden testing
Following, the general steps of golden testing get explained:
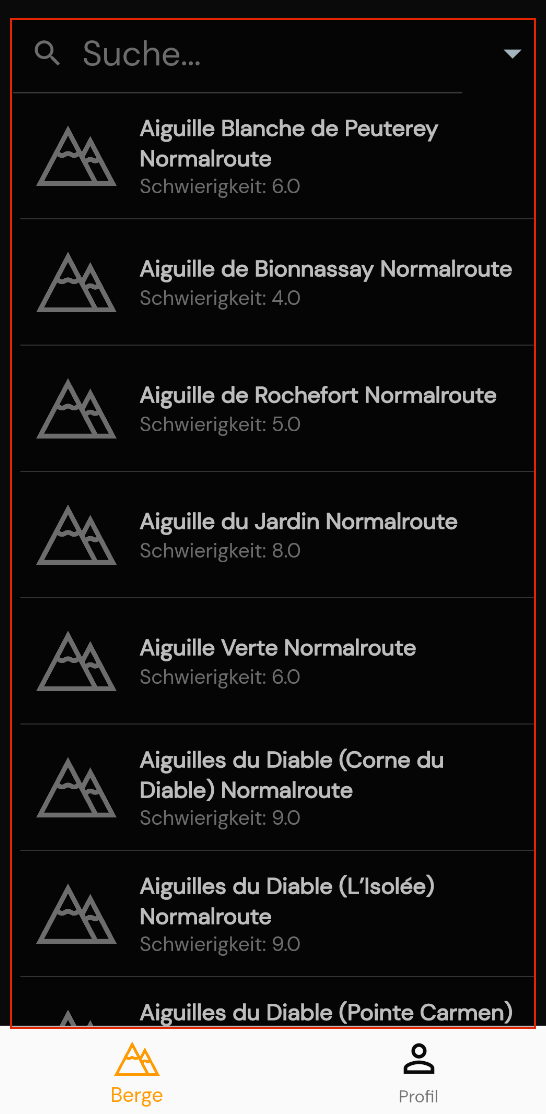
1. You have to define the area that should be considered in the test. This can range from a single widget over a group of widgets to a whole screen. In the following, I give you an example of my app Gipfelstürmer (Check it out if you are interested in high-altitude hiking in the Alps.).
On the overview screen, you see a collection of summit tours that you can filter and sort. Now, I want to ensure that the appearance of the overview screen does not change unintended. From the whole screen that is shown below in the screenshot, I want to test the upper row which includes an icon, a text field, and a dropdown button, and the list below which contains a certain number of mountain cards.
2. After choosing my desired test scope I have to write the test code that includes these widgets.
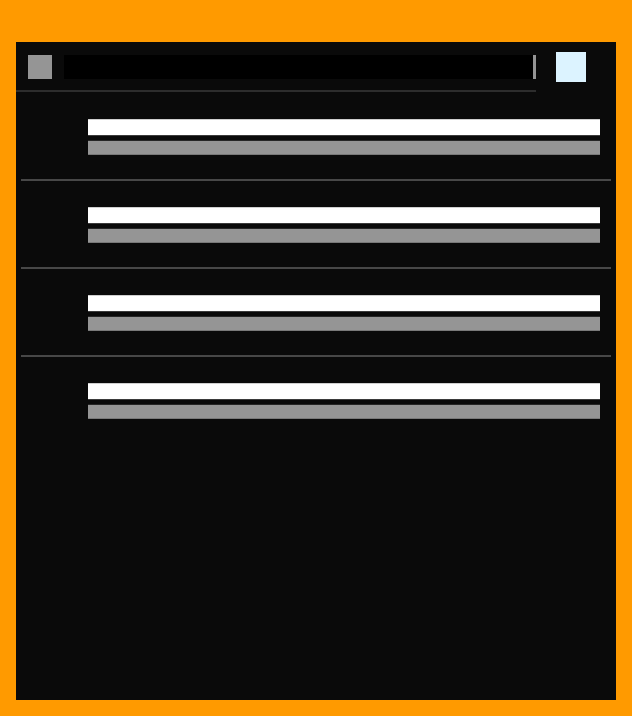
3. Afterward, I create a golden snapshot from it and verify manually if it looks the way I want it to. You have to pay attention because different operating systems render differently. A Windows device renders the same screen slightly differently than a Mac which will lead to an unwanted failure. Therefore, a platform-independent snapshot is created which is the only image that has to be checked into your git system. Because the platform-independent snapshot looks abstract it makes sense also to verify the platform-dependent snapshots. In the following picture, you can see a platform-independent snapshot of the described elements.
3. Now you have to run these tests regularly, e.g. before merging a new feature. If you have made intended changes to the area of consideration you have to update your golden snapshots. If not you just run the tests.
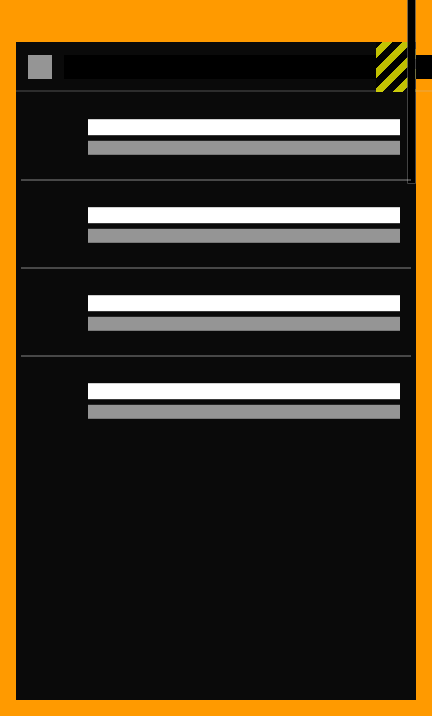
Now, if the test-created snapshots match the golden ones the test passes, indicating that the appearance hasn’t changed unexpectedly. If the snapshots don’t match, the test fails, indicating that the widget’s appearance has changed and requires further investigation. The test does also fail if an overflow appears somewhere. This could be the case if an added text can be displayed on large devices but does overflow on smaller ones. Therefore, it is often useful to do the same golden test for different device sizes.
In the following picture, you can see how the failure picture of the same golden test for a smaller device width looks. When an overflow occurs, the test fails.
Advantages golden testing
Golden testing offers several advantages that make it a valuable tool in Flutter and app development in general. Here are five key benefits:
- Testing across multiple device sizes: Golden testing can be used to test the visual appearance of widgets across multiple device sizes. This makes it possible to ensure that the app’s UI looks consistent across small and large screens, which is particularly important for apps that target an audience with small device sizes.
- Early detection of visual regressions: Golden testing enables developers to catch visual changes early in the development cycle. By comparing against a known “good” version of a widget’s appearance, golden tests can identify regressions quickly and efficiently.
- Automated testing: Golden tests can be automated and run as part of a continuous integration (CI) pipeline. This makes it easy to detect visual regressions automatically and ensures that the app’s UI remains consistent across builds.
- Efficient testing: Golden tests are efficient because they only test the visual appearance of a widget, not its functionality. This makes it possible to test a large number of widgets quickly and efficiently.
- Improved collaboration: Golden testing can help improve collaboration between designers and developers. By using golden tests to validate the visual appearance of a widget, developers can work more closely with designers to ensure that the app’s UI meets design specifications.
- Improved code quality: Because your widgets have to be testable, they have to be better separated which often improves the code quality.
Disadvantages golden testing
While golden testing offers several advantages, there are also some potential disadvantages to consider. Here are some of the main drawbacks:
- Time-consuming setup: Setting up golden testing requires creating golden images and maintaining them over time. Sometimes you have to change your code to make your widgets testable (which often also improves your code quality), This can be time-consuming, especially for complex widgets or large apps with many widgets to test.
- Limited scope: Golden testing only verifies the visual appearance of a widget, not its functionality. This means that it can’t catch bugs or errors that affect the behavior of the widget but don’t impact its appearance.
- Limited flexibility: Golden testing can be inflexible when it comes to handling dynamic content or edge cases. If the widget’s appearance changes based on user input or other external factors, the golden test may fail even if the change is intended.
- Limited value for small apps or prototypes: Golden testing may be less valuable for small apps or prototypes, where visual changes are easier to detect and debugging is less time-consuming.
- Not part of code coverage: Golden tests do not increase your code coverage. For developers that have to include a certain code coverage in a limited time, other forms of automated testing can be more interesting.
- False positives: Golden tests can produce false positives if the golden image itself is incorrect or outdated. This can lead to wasted time and effort in debugging what appears to be a regression but is actually a problem with the test setup.
When to use golden testing and when not to
Golden testing can be a valuable tool for ensuring consistent and reliable UI development in Flutter. However, it’s not always the best approach for every situation. Here are some guidelines for when to use golden tests and when not to:
Avoid using golden tests when:
- You’re working on a small app or prototype where visual changes are easier to detect and debugging is less time-consuming
- You’re working on a widget that has complex or dynamic behavior that can’t be captured by a static image
- You’re only interested in the code coverage
- You’re not interested in the visual appearance of a widget but only in its functionality
Use golden tests when:
- You’re working on an app that targets multiple platforms or devices and need to ensure consistency across them
- You want to ensure a consistent visual appearance of your UI components over time
- You want to detect visual regressions early in the development cycle
- You want to automate the testing process to improve efficiency
- You’re working on a large app and want to ensure that changes in one part of the app do not influence other parts of the app
- You’re working with a design team that has strict visual design requirements
Conclusion
Golden testing is a powerful technique for ensuring consistent UI development in Flutter and also for app development in general. By comparing the current appearance of a UI component to a “golden” reference image, we can catch visual regressions early in the development cycle and ensure that our app’s appearance is consistent across different devices and platforms. However, golden testing isn’t a silver bullet and has some potential drawbacks, such as the time it takes to set up and maintain the tests, that it is not included in the code coverage, and its limited scope. But if you want to avoid unintended UI changes and to verify that your app looks good on different device sizes golden testing is the right fit for you!
Do you have questions or see more (dis-)advantages in golden testing? Please let me know in the comments. Any further feedback is highly appreciated!
If you liked the article clap (50x), highlight, comment, and share it. Not only but especially technical articles got disadvantaged by the new Medium Partner Program incentives. If you want to support your favorite (technical) writers on Medium, remember to interact with the articles. You find more information about this here: The New Medium Partner Program is Bad for Quality Writing!
Also, check out my other articles:
- What is the difference between MVC and MVVM (for Flutter)?
- SOLID: Single Responsibility Principle (SRP) — Why Uncle Bob’s definition is not good enough
- 16 ideas to improve your Flutter skills (advanced roadmap)
- How much automated testing should be done in software development?
- 8 Flutter packages that make your life easier (2023)


