
Want Your Photos to ‘Pop’ More? Blacken Your Blacks
How to easily achieve this result using global adjustments in Adobe Lightroom (or when shooting)

Photography is all about light. However, I see a lot of good photography that could be even better if there was one simple change: darker darks.
A lot of photographers have been taught to make their photos as bright and cheery as possible while editing. That works well in many situations. This can be especially true for wedding photography, where you often want to create a “light” mood.
However, you can take your photography to the next level by enriching your blacks, which can help colours stand out more, eliminate unnecessary details, as well as make your black/white images look bolder. It can also add a certain mood, even in strong daylight.
This particular edit also helps direct the eye to your subjects, eliminating unnecessary details.
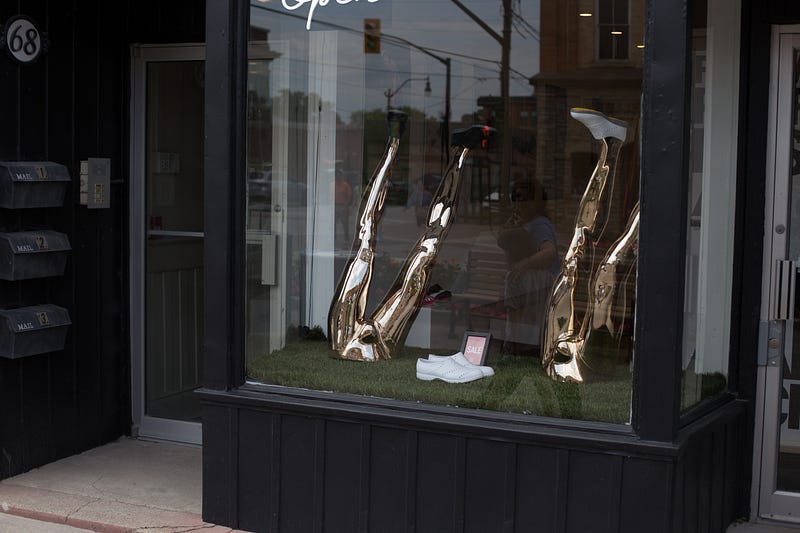
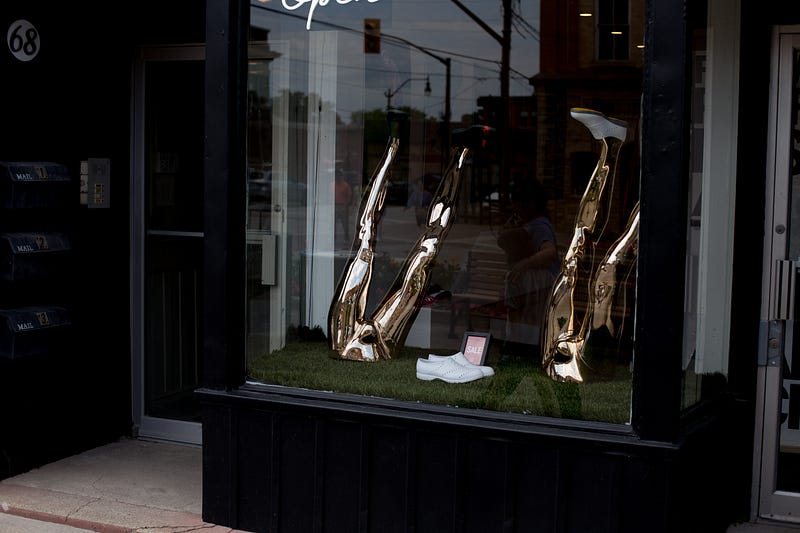
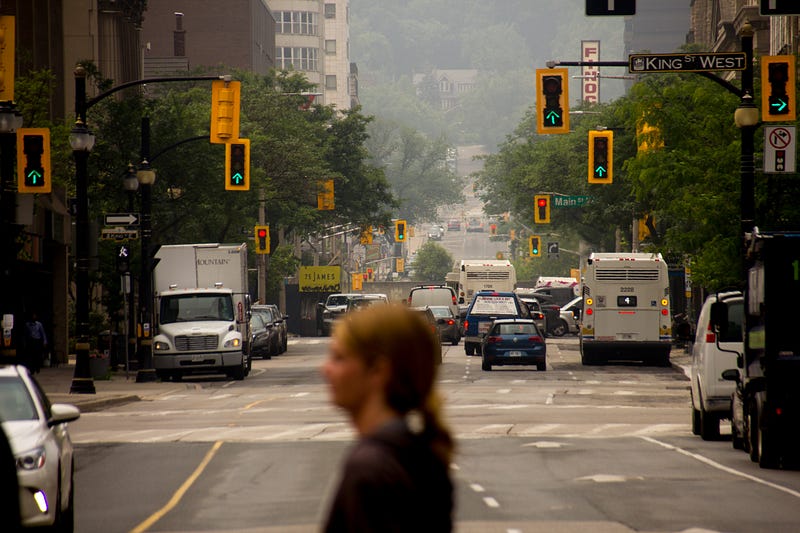
As you can see, by darkening the darks in this image, I also reduced the reflections in the window. Of course, you may choose to include reflections if there’s something you’d like to keep in there. (Here are some good examples of urban reflection photos.)
Here’s an example of a b/w image that I manually adjusted in Lightroom 5, which I still use (yes, I know I’m long overdue for an upgrade. They’re on version 13.0 now. However, I believe the global adjustments work the same.)
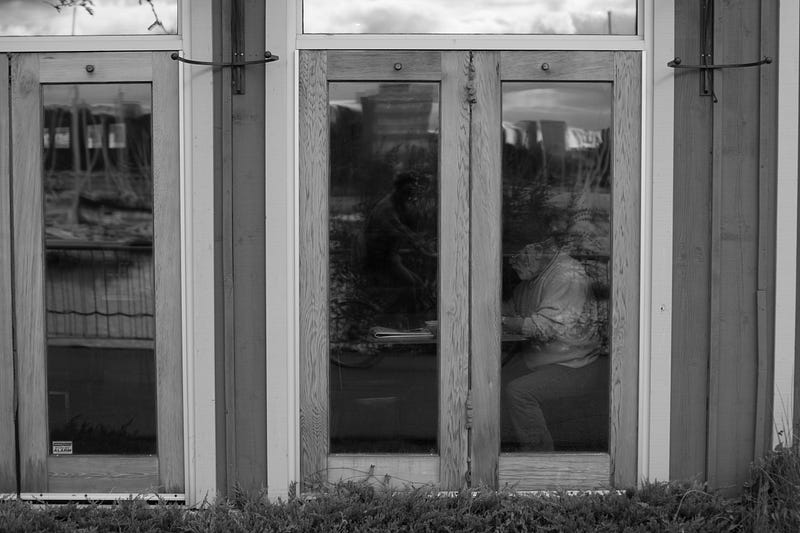
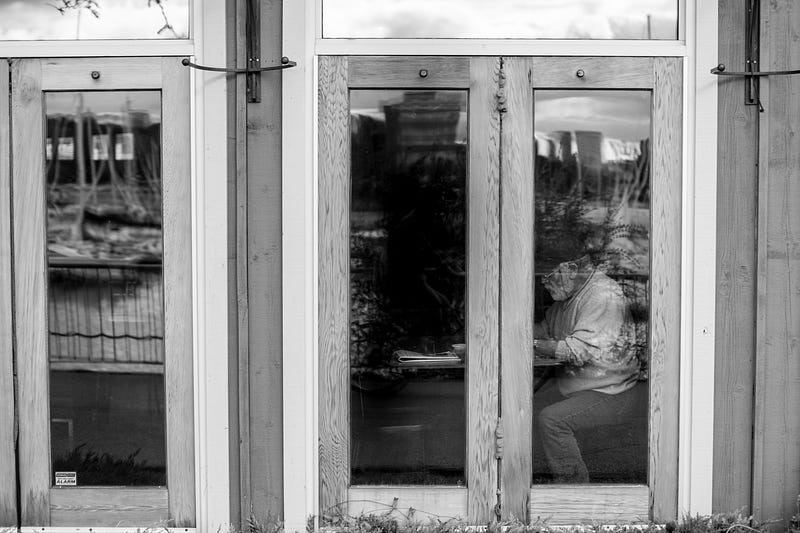
Without reducing the black tones, the subject in this image almost gets lost in the mid-tones in my opinion. You can also see me in the reflection, sitting on my bike to snap the shot (ride-by shootings have become one of my favourite ways to do street photography.)
You can also use blacker blacks to enhance the moodiness of your scene. Here’s a Ferris wheel photo from a local carnival this past summer:
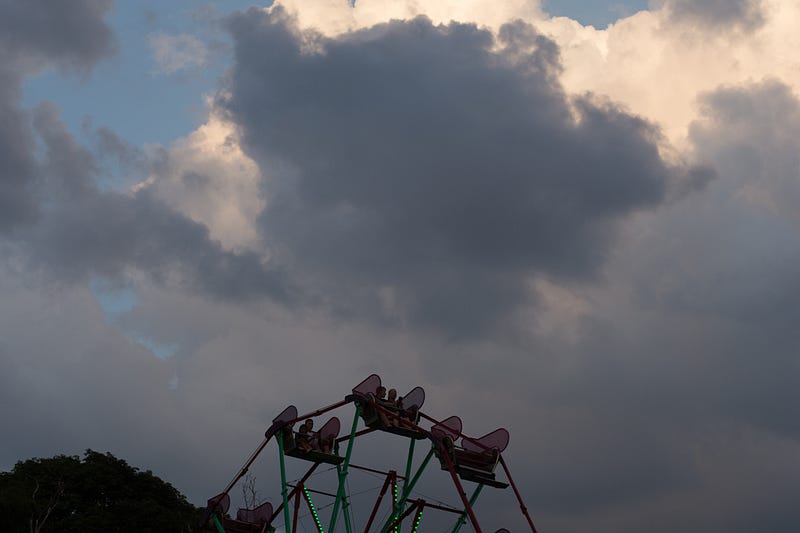
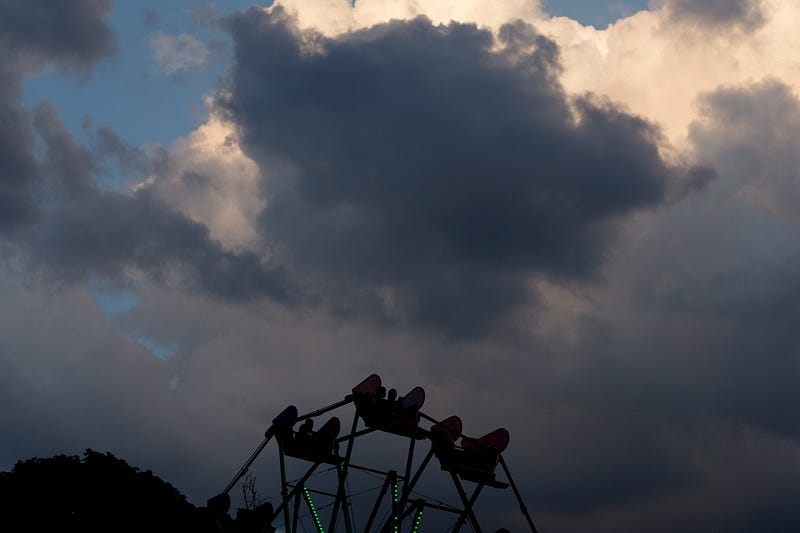
It was already pretty dark, as it was late evening. However, I think decreasing the blacks has made it a little more ominous, which I like.
Use other adjustments, but sparingly
When you decrease your blacks, it doesn’t mean you can’t make any other edits. For example, I also often bump up the whites in Lightroom, which adds more contrast. I did so for some of the examples above, but I used it sparingly.
If you’re not familiar with Lightroom, here’s what the adjustment panel looks like in “develop” mode in LR5:
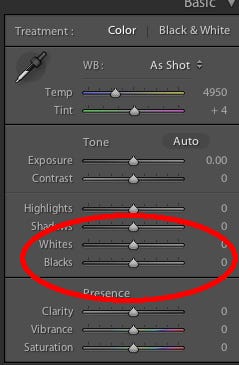
Keep in mind that simply using the contrast slider on its own will not yield the same results as adjusting the blacks/whites manually. Adjusting the black and white sliders separately lets you have more control over the result, kind of like using levels in Photoshop.
Speaking of levels, you can achieve darker darks using Abode Photoshop/Elements. I use version 13 of Elements, although they are on version 2024 which also offers AI edits. (You can also manipulate the “tone curve” in Lightroom for blacker blacks or whiter whites, but it may take some experimenting.)
Here’s another example of an image where I blackened the blacks, bumped up the whites slightly, and “warmed” the image through colour temperature in Lightroom:
Tip for achieving similar results while shooting
While I’m telling you to make your edits blacker, that doesn’t mean you have to do the same while shooting. However, you can, especially when it’s a bright scene to help your points of interest really pop.
By lowering your exposure value (EV) by -1.0 to -2.0, you will blacken your blacks in-camera while still retaining the subject’s highlights. I often set my camera to EV -1.0 or more on a sunny day, because I like the contrast more, and it’s even easier to adjust in editing.
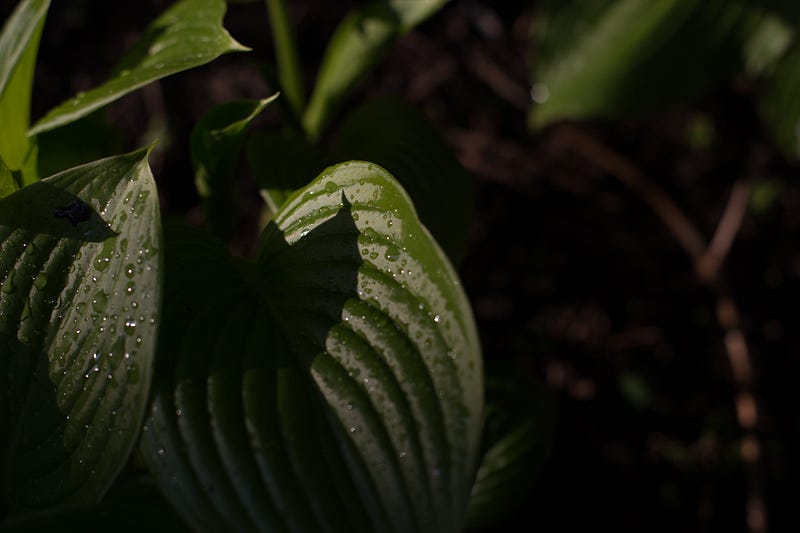
Here are examples of some shots in my garden with my camera set to -3.0 EV. I wanted just the brightest parts of the plants to shine, giving it a high-contrast, moody look.

An alternative to this is to use spot metering. This is when you set your camera to get its light readings from a particular point. If the object is super bright, the camera will correct for that, making mid-tones get darker.
I can’t tell you how to access that setting in your camera, but it’s usually quite straightforward. On my Canon 6D, there’s even a separate button for it.
A matter of aesthetic preference
Hey, maybe you don’t like blacker blacks. Maybe you prefer high-key images, which can also look awesome. Maybe you prefer another photo editing program than Lightroom, which is perfectly fine. (I personally find Lightroom to be very intuitive, and I like the way it works with my RAW image files from my Canon 6D.)
Regardless of what photo editing program you use, blacker blacks can help draw the eye to where you want your viewer to look, without having to manually clone out details that don’t work.
Human eyes tend to disregard dark areas, instead being drawn to light. If you don’t want your viewer’s eyes to wander all over your image, darkening your darks will help direct them to the main focal points.
Reducing shadow detail, whether in-camera or during editing, can actually add impact to your photos. By lowering the blacks, you can make shadows look more mysterious, and even daytime photos can look ominous.
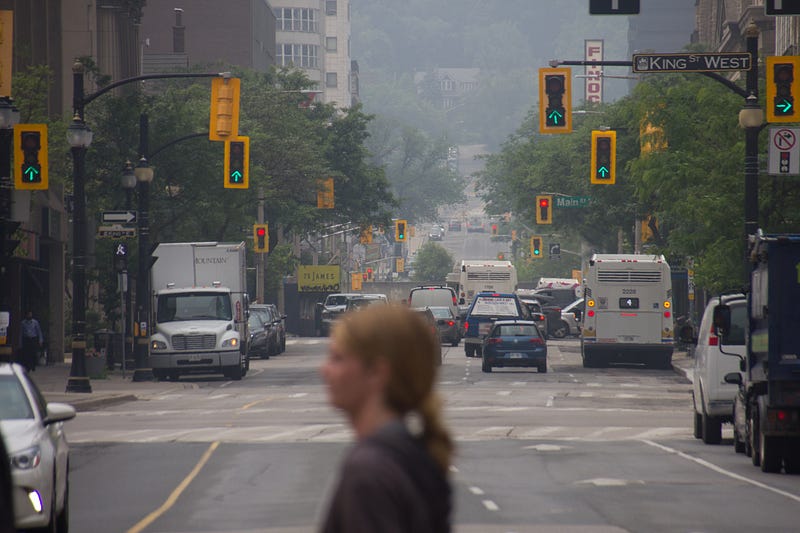
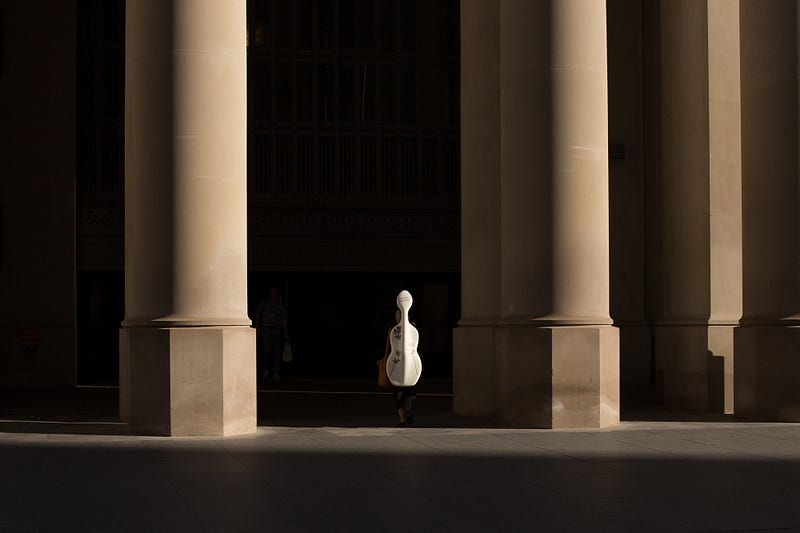
It’s also great for making your well-lit subjects stand out from the background, which may or may not add to the composition. Here’s a scene I shot at Toronto’s Union Station, with the exposure set to a negative EV. (I also blackened the blacks more in editing.)
So remember, while photography is about capturing light, it’s also about controlling how much you capture–or how much you decide to keep. While it might feel counter-intuitive, adding more darkness can turn your image into something that lights up your audience.
Thanks for reading, and let me know what you think of this technique!