
Walk-through — install Kubernetes to your Raspberry Pi in 15 minutes
Here’s something you can do before work, with your morning coffee, or whilst waiting for dinner to cook of an evening. And there’s never been a better time to install Kubernetes to a Raspberry Pi, with the price-drop on the 2GB model — perfect for containers.
I’ll show you how to install Kubernetes to your Raspberry Pi in 15 minutes including monitoring and how to deploy containers.
Updates:
- Dec 2020 — added
cmdline.txtinstructions for cgroups andssh-copy-id - Jan 2021 — added multi-arch
faas-cli publishcommand instead offaas-cli upto use new templates and Docker buildx - Mar 2021 — Raspbian is now Raspberry Pi OS
The bill of materials
I’ll keep this quite simple.
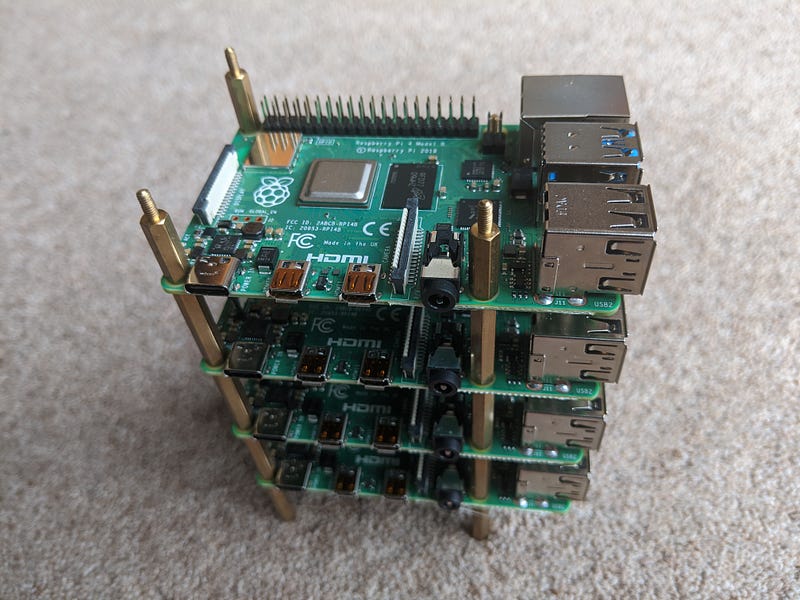
- Raspberry Pi 4, with 2GB or 4GB RAM — the 2GB is the best value, 4GB is best if you don’t plan on doing clustering.
- SD card — 32GB recommended, larger is up to you, but Kubernetes writes to disk a lot and could kill a card, so I tend to prefer buying more smaller cards.
- Power supply — you need the official supply, I know it’s expensive, but that’s for a reason. Don’t be cheap because you’ll buy twice.
- Docker Desktop — if you want to build your own images, you need to cross-compile them from a PC with buildx, do not install docker on your nodes.
If you’d like some links, you can find them in my home-lab post: Kubernetes Homelab with Raspberry Pi and k3sup.
Flash the initial OS
There are so many ways to install an Operating System, but I recommend Raspberry Pi OS and the Lite edition which ships without a UI.
Once you download the image, you can use Etcher.io from our friends at Balena to flash it without even unzipping it. How cool is that?
Before you boot up that RPi, make sure you create a file named ssh in the boot partition. If on a Mac you'll see that gets mounted for you as soon as you eject and re-insert the SD card.
Connect for the first boot
Now connect to the Raspberry Pi over your local network, it will show up as raspberry.local, but if you can’t connect for some reason, then install nmap and run nmap -sP 192.168.0.0/24 to run a network scan.
- Change the password with
passwd pi. - Run
raspi-configand change the memory split to16mb, so that we have all the RAM for Kubernetes, believe me, it needs it.
There’s one more change that’s essential for k3s. Add the following to /boot/cmdline.txt, but make sure that you don’t add new lines.
cgroup_enable=cpuset cgroup_memory=1 cgroup_enable=memoryCopy or create an SSH key
k3sup uses password-less login by default, so that means you can run it from a script or automation without human intervention.
Copy your SSH key to the Raspberry Pi with:
ssh-copy-id pi@raspberrypi.localIf you have no SSH key on your local computer yet, then run ssh-keygen
Get your CLI tools
You do not need to log into your Raspberry Pi again. All tools will be installed on your client (i.e. your laptop) and the RPi will be accessed remotely as a server.
- arkade — a hassle-free way to get Kubernetes apps and CLIs
- kubectl — the Kubernetes CLI
- k3sup — the Kubernetes (k3s) installer that uses SSH to bootstrap Kubernetes
arkade is a portable Kubernetes marketplace which makes it easy to install around 40 apps to your cluster, without worrying about all the gory details and configuration options. arkade also “does the right thing” for instance:
- An app like OpenFaaS uses a helm chart
- A tool like the Kubernetes dashboard only uses plain YAML manifests
- Linkerd for example prefers to use a CLI
arkade abstracts that all away from the user with around 40 apps on offer. On top of that, if an app like Istio is known not to work on your device, it will block you from doing the wrong thing.
We can also use it to download k3sup and kubectl:
# Omit sudo if you wish, then move the arkade binary to /usr/local/bin/
curl -sSL https://get.arkade.dev | sudo sh
arkade get kubectl
arkade get k3supDid you know that you can also specify a version to arkade get? For example: arkade get kubectl --version 1.19.5
k3sup install can be used to install k3s as a server, to begin a new single-node cluster (that’s what we’ll do today). If you have multiple nodes, then the k3sup join command lets you add in additional agents or workers to expand the capacity.
Install Kubernetes with k3sup and k3s
k3s is a lightweight edition of Kubernetes made by Rancher Labs, it’s suitable for production, but also perfect for small devices like our Raspberry Pi. Its memory requirements are around 500MB for a server vs. around 2GB for kubeadm (upstream Kubernetes)
export IP="192.168.0.1" # find from ifconfig on RPi
k3sup install --ip $IP --user pi
In a few moments you’ll receive a kubeconfig file into your local directory, with an instruction on how to use it.
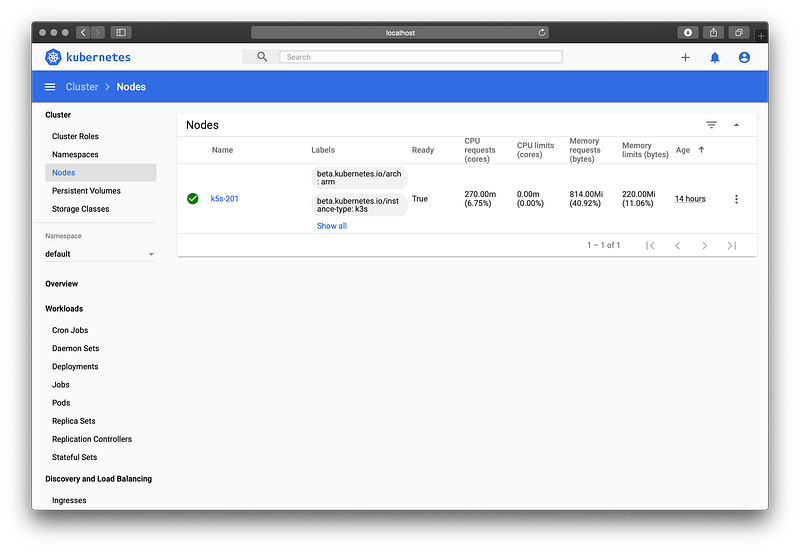
Find the node, and check if it’s ready yet
export KUBECONFIG=`pwd`/kubeconfig
kubectl get node -o wide
You can add -w to most kubectl commands to “watch” or “stream” the output status, so you can save on typing.
By default k3s comes with the metrics-server, which is used for Pod autoscaling and getting memory/CPU for pods and nodes:
kubectl top node
kubectl top pod --all-namespaces
Now let’s install one or two apps, run arkade install to see what's available, but not that not all projects in the CNCF landscape work on ARM devices.
arkade install --helpAvailable Commands:argocd Install argocd
cert-manager Install cert-manager
chart Install the specified helm chart
consul-connect Install Consul Service Mesh
cron-connector Install cron-connector for OpenFaaS
crossplane Install Crossplane
docker-registry Install a Docker registry
docker-registry-ingress Install registry ingress with TLS
gitea Install gitea
gitlab Install GitLab
grafana Install grafana
info Find info about a Kubernetes app
ingress-nginx Install ingress-nginx
ingress-nginx Install ingress-nginx
inlets-operator Install inlets-operator
istio Install istio
jenkins Install jenkins
kafka-connector Install kafka-connector for OpenFaaS
kong-ingress Install kong-ingress for OpenFaaS
kube-image-prefetch Install kube-image-prefetch
kube-state-metrics Install kube-state-metrics
kubernetes-dashboard Install kubernetes-dashboard
linkerd Install linkerd
loki Install Loki for monitoring and tracing
metrics-server Install metrics-server
minio Install minio
mongodb Install mongodb
nats-connector Install OpenFaaS connector for NATS
nfs-client-provisioner Install nfs client provisioner
nginx-inc Install nginx-inc for OpenFaaS
openfaas Install openfaas
openfaas-ingress Install openfaas ingress with TLS
openfaas-loki Install Loki-OpenFaaS and Configure Loki logs provider for OpenFaaS
osm Install osm
portainer Install portainer to visualise and manage containers
postgresql Install postgresql
redis Install redis
registry-creds Install registry-creds
sealed-secrets Install sealed-secrets
tekton Install Tekton pipelines and dashboard
traefik2 Install traefik2Let’s try the Kubernetes dashboard?
arkade install kubernetes-dashboardThe installation script prints out how to use the app, and arkade info can show us the same information later too.
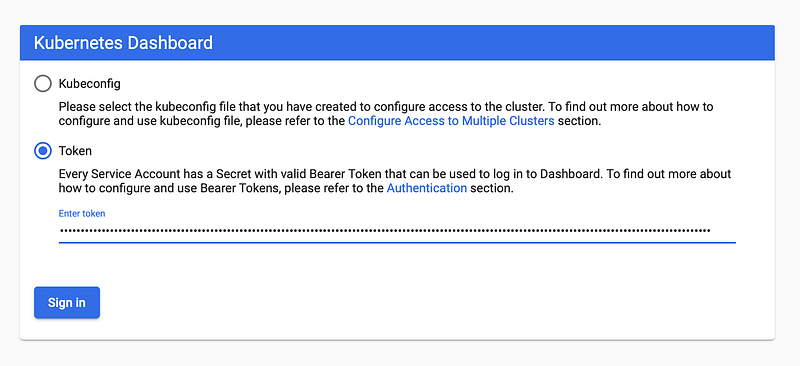
#To forward the dashboard to your local machinekubectl proxy#To get your Token for logging inkubectl -n kubernetes-dashboard describe secret $(kubectl -n kubernetes-dashboard get secret | grep admin-user-token | awk '{print $1}')# Once Proxying you can navigate to the belowhttp://localhost:8001/api/v1/namespaces/kubernetes-dashboard/services/https:kubernetes-dashboard:/proxy/#/loginPaste in your token
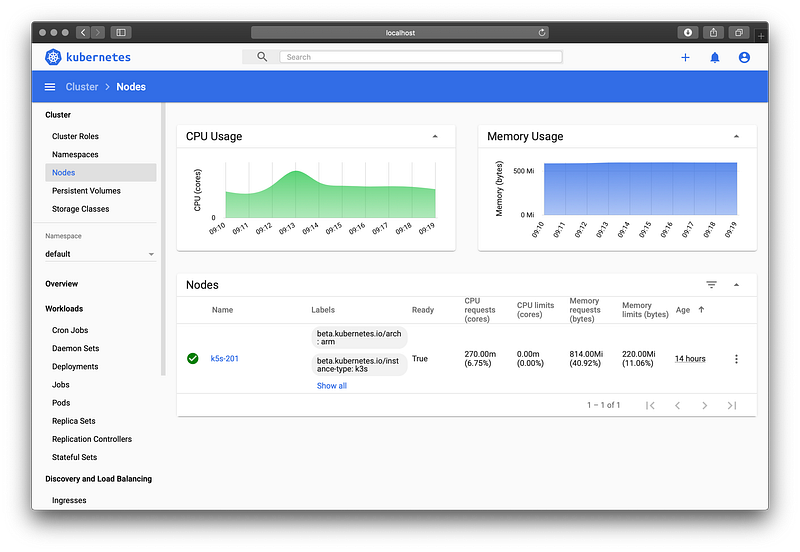
Now enjoy the dashboard:
Let’s install another popular application, openfaas. OpenFaaS gives us a simple way to deploy functions and microservices to Kubernetes with built-in auto-scaling.
arkade get faas-cli
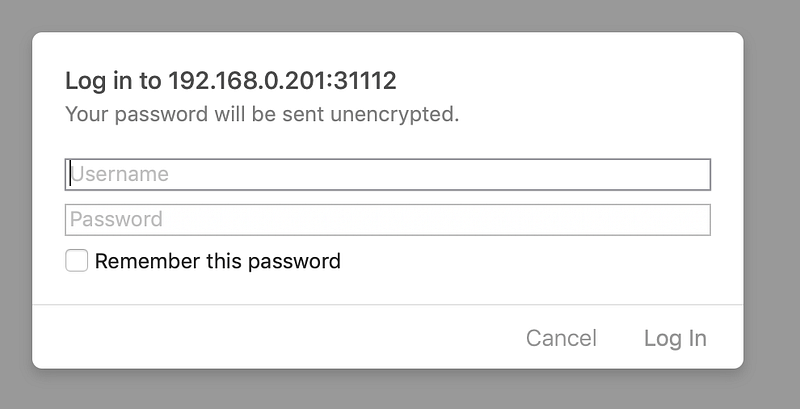
arkade install openfaasLog in using the post-installation information.
The IP of my RPi is 192.168.0.201, so I can access OpenFaaS using a NodePort of 31112.
PASSWORD=$(kubectl get secret -n openfaas basic-auth -o jsonpath="{.data.basic-auth-password}" | base64 --decode; echo)export OPENFAAS_URL=http://192.168.0.201:31112echo -n $PASSWORD | faas-cli login --username admin --password-stdinfaas-cli store list --platform armhf
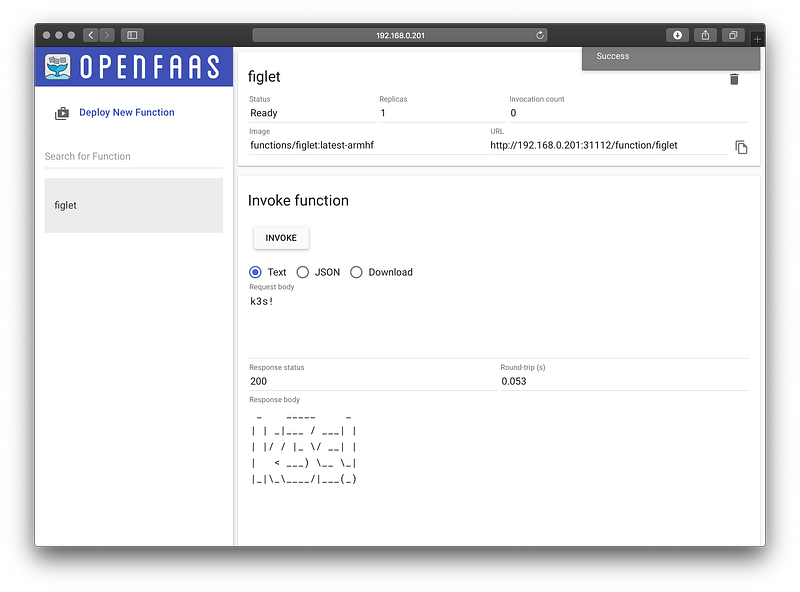
faas-cli store deploy figlet --platform armhf
faas-cli listNow open the OpenFaaS UI and check your figlet function using http://192.168.0.201:31112 or the equivalent.
You can also build your own functions with Python, Go, JavaScript and many other languages.
If you have a Docker Hub login, then you can try the following, but you’ll need to run it on a separate Raspberry Pi, with docker installed (curl -sSL https://get.docker.com | sudo sh)
export USERNAME=alexellis2
docker login -u $USERNAME
faas-cli template store pull golang-http
faas-cli new --lang golang-http --prefix=$USERNAME my-api# Build a local Docker image and push it to the Docker Hub
faas-cli publish -f my-api.yml \
--platforms linux/arm/v7# Deploy the function using the image
faas-cli deploy my-api# Now invoke your functionfaas-cli invoke my-apiDoing multi-arch right
If you’re running 64-bit Ubuntu on your Raspberry Pi, then you’ll need to use --platforms linux/arm64 instead. You can also build for multiple platforms by adding them with a comma between each. Just run faas-cli publish --help to find out an example of how.
You can also edit the function’s code and then run faas-cli publish then faas-cli deploy again:
Contents of: my-api/handler.go
package functionimport (
"net/http"
"github.com/openfaas-incubator/go-function-sdk"
)func Handle(req handler.Request) (handler.Response, error) {
return handler.Response{ Body: []byte(`Run k3s on your RPi!`),
StatusCode: http.StatusOK,
}, nil
}Find out more about OpenFaaS at openfaas.com
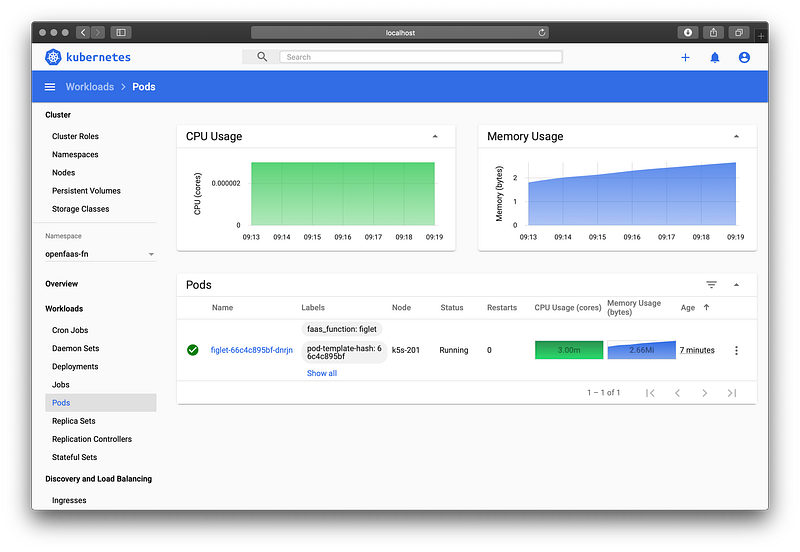
You can also see your functions on the Kubernetes Dashboard:
Get a public IP for your cluster
You can get a public IP for your cluster via a tunnel the inlets-operator for Kubernetes.
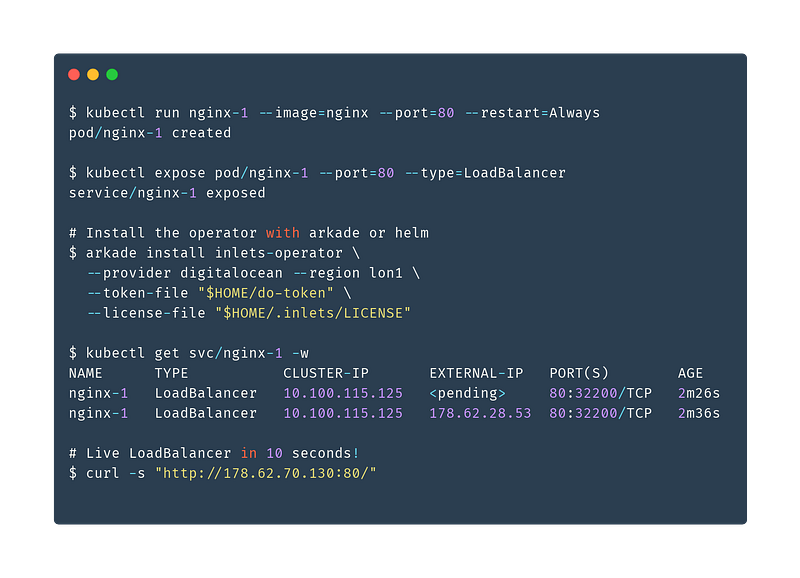
- Expose your local OpenFaaS functions to the Internet
- Expose Your IngressController and get TLS from LetsEncrypt and cert-manager
Build your own homelab cluster for self-hosting
If you’d like to build a resilient homelab, that has multiple master nodes (servers) and uses faster, more reliable network storage, checkout my new workshop available on Gumroad.
In the workshop, you’ll learn how to configure a netbooting server, then boot your Raspberry Pi directly from the network, from there you can install K3s and explore different applications you can add on top. High Availability is essential for self-hosting, so that your cluster can tolerate a host failure.
Wrapping up and next steps
If you want to take things further, you can start adding additional nodes into the cluster, to extend its capacity and to give redundancy.
- Upgrade your Raspberry Pi 4 with a NVMe boot drive
- Five years of Raspberry Pi Clusters
- Star or fork k3sup and arkade on GitHub ⭐️
You can connect with the OpenFaaS community — to talk about Kubernetes, ARM, Raspberry Pi clusters and serverless. Join our Slack workspace today.


