
Using Trello To Boost Writing Productivity
A template to optimize the process of publishing articles online

After writing on medium for almost a year now, there is nothing that sparks my anxiety more than an endless draft list. All those titles and undeveloped ideas make the writing process even more difficult. Thinking of going through the draft list kills my creativity and I end up dwelling on unwritten content for way too long. So I decided to move my workflow on to Trello, a web-based project management tool with creative solutions. However, after scanning the website for writing templates nothing quite matched the process that I had in mind. The process of being more productive while writing and publishing online, it is, after all, a very niche process. So I decided to create a template that would help content creators on any online platform have a quick turnaround on articles. The template helps track write-ups from the idea stage all the way to social media promotion.
Trello Basics
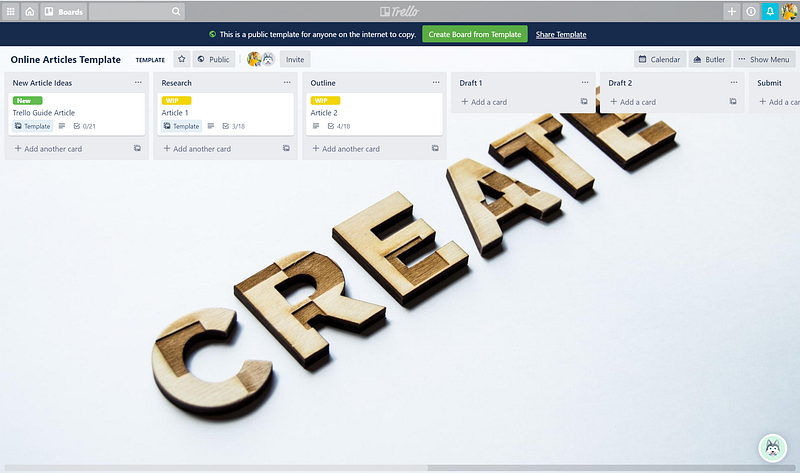
Before getting into the details of the template, let’s get some Trello basics out of the way. After you’ve signed for the website you will be presented with an option to create a board. A Trello board is where all your work is at, it is a representation of your ongoing projects. This is what it looks like on the template I created, you can find it here to follow along.
Each Trello board has two main components and is based on tracking a simple to-do list. So moving tasks from to-do to doing to done. However, a lot more can happen in between those steps especially with writing. So based on that the first main component is a list shown below:
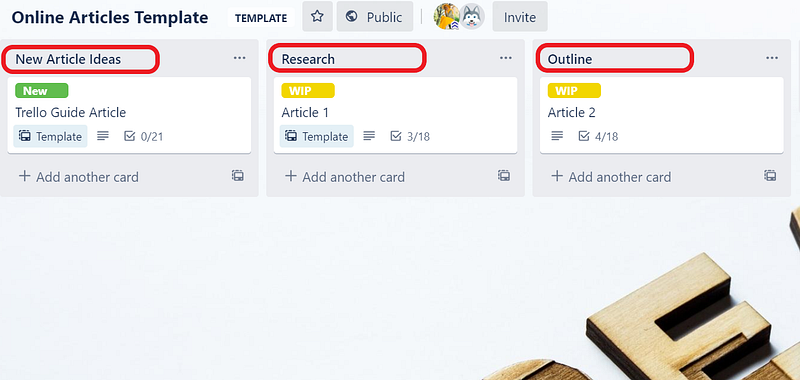
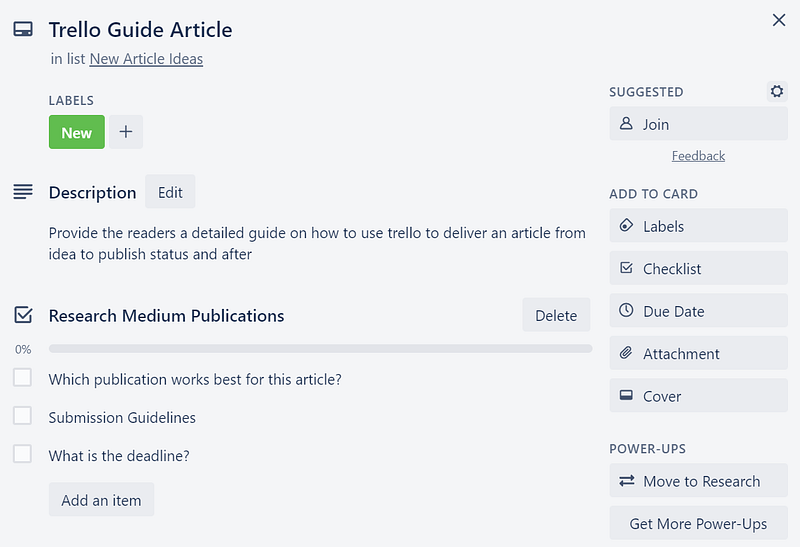
The second main component is a card that represents the tasks that have to be done within each list. In this case, they represent the articles in progress. For example on the picture above, there is a card for the Trello Guide article. Within each card, there are multiple features that you can make use of, like due dates, labels, and checklists as shown below:
There is a full 101 tutorial on how to navigate the Trello Board and make use of its full features here.
Online Articles Template
Now on to the specialized template, it has nine lists to help keep track of the article’s progress.
Checklists
Inside each card, there is a checklist that matches the list that the card is in.

For example, there is a checklist of tasks for the research process that you can use once you move the card to the research list. Similarly, there is a social media marketing checklist of tasks that you can do once the article reaches that stage of the process.
Specialized Cards
- New Article Ideas: instead of having a long list of unwritten drafts, try and brainstorm new ideas on the board first. Write what you want the article to be about in the description and keep adding to it until it has enough meat to make it into a full article.
- Research: after you feel like the idea is fully formed, move it on to the research list. Before beginning to write the article it is essential to do some medium based research first. And for this, there is a specific checklist in each card that helps with the process. First, research the publications, which publications on medium or otherwise will accept this article, and what are their guidelines. Take a good couple of hours to do this, and take note of your findings. An excellent way to do this is to add links as attachments to each card to keep track of your findings. And if no publication exists for your article then you know it should be a self-published one. Second, research your topic itself and get all the information needed on it before you start writing.
- Outline: after you’ve gathered enough information about the publications and your topic, move the card to card to the outline list. Within the card, you will find an outline checklist to help you create a structure for your article. Outlining is very important and helps provide a structure to the article, so spend time on it before you start writing the body.
- Draft 1: this stage is the simplest yet the hardest, one that most of us writers struggle with on a daily basis. Writing. Before creating the board I used to hate the beginning of writing any article because Where do I start? Help! But with the board this stage has become easier because I know where to start, my research is already done, the outline is done. So I can see a vague image of what the article should look like and sound like. I have all the material I need so all I have to do is start the assembly process.
- Draft 2: it is always a good idea to take a break from any writing project before starting the editing process. I like to do this in-between drafts, once the first draft is done I take a break to watch something, eat cake and do something fun. Then start working on the second draft which for me is all about editing. You can add more than two drafts if you feel like the article needs it. Just make sure you add a card onto the board to reflect the thirst draft process.
- Submit: this is the easiest part just hit that send or submit button, and wait for the editors to their magic.
- Publish: if you are self-publishing your draft then you probably go through a specific checklist before you send the article into the internet. Add that checklist in the card as a reference, and go through it once you move the card to the publish list.
- Social Media Marketing: any content creator knows that there is a significant amount of social media marketing that goes into the success of any article. That is why this stage deserves a card in the process, as well as a checklist. Whichever social media platform you use, each one is different. For Facebook, you need an engaging post to invite readers towards the article. For Instagram, you need an appealing photo and a creative caption to drive Instagrammers towards the link in the bio. And for twitter, you need those precious 240 characters promoting all your hard work. And those views and clicks matter hence, it important to give social media a few hours for posts and reader engagement.
- Done: it’s over you can breathe now and move on to the next writing project. Once I believe that I’ve done all I can with marketing an article on social media I move the card to the done list. It is quite satisfying seeing the work-in-progress reach that stage but this list could get busy sometimes so make sure you archive the old cards to leave room for new ones.
Labels
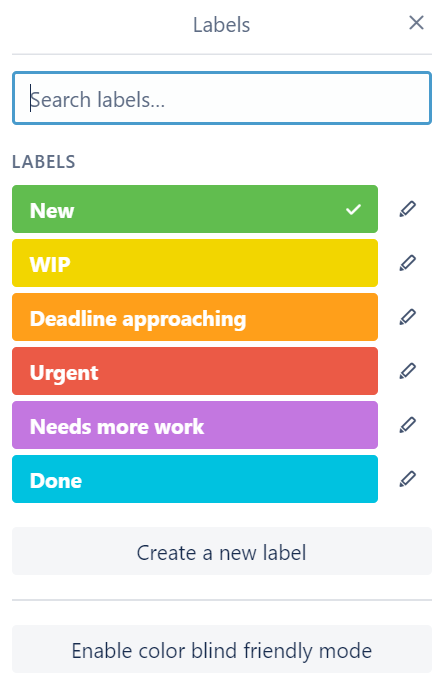
Labels are a creative way to add a personal and colorful touch to the board. You can add a label to a card by clicking on the label button inside each card. I customized a label list to help me keep track of each article’s progress like shown below:
Final Takeaways
I created this template after feeling frustrated for not having a productive workflow for my articles. It has helped me become more organized and less anxious about the writing process. Now when I get an idea for an article the workload doesn’t seem monumental, but structural. I know that if I go through each stage of developing the article one at a time I will finish an article within a reasonable amount of time. It also took away the overwhelming feeling of “oh god there are so many drafts to go through and I don’t even know where to start!.” It helped me organize my ideas while allowing room for my creative process.
Of course, the way you go about using the cards and the checklists would depend on the type of article you’re writing. Some might be fiction, some might be poetry, some might be prompt responses. So make sure you use the board’s features to your advantage and tweak it where you can to fit your style of writing. You can either create a new board from the template I created or you can get creative and make your won!
There are also many videos and tutorials out there that can help you become a pro at using Trello, so make sure you check them out. One of my favorites is 5 Trello Label Tips That Will Make You Look like a Pro!
Good luck writing and have fun being structurally creative!!