Using SAML IdP Group Mappings with AWS Cognito
AWS Cognito is a popular managed authentication service that provides support for integrated SAML 2.0-compliant identity providers (IdPs) such as Azure Active Directory, Okta, Auth0, OneLogin, and others.
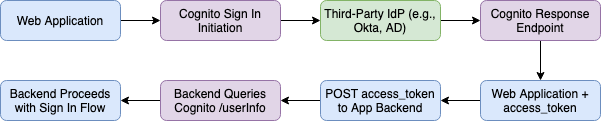
One use case for Cognito is to serve as a middleware or proxy layer between an identity provider and a backend web application. Instead of implementing support for SAML directly into the application (and dealing with the proper security configuration and variety of standards), developers can use Cognito to do the heavy lifting.
Many IdPs also support using groups for user management. This allows a user to rely on their Active Directory, Okta, or other IdP groups for user RBAC rather than manually configuring access locally within your application.
Fortunately, these group mappings can be passed from the IdP, through Cognito, and to your backend application. AWS wrote a blog post to highlight how Cognito can be used to collect group mappings, but they stopped short of explaining how to actually pass the group mappings to a backend application via the “/userInfo” Cognito endpoint.
Cognito Setup
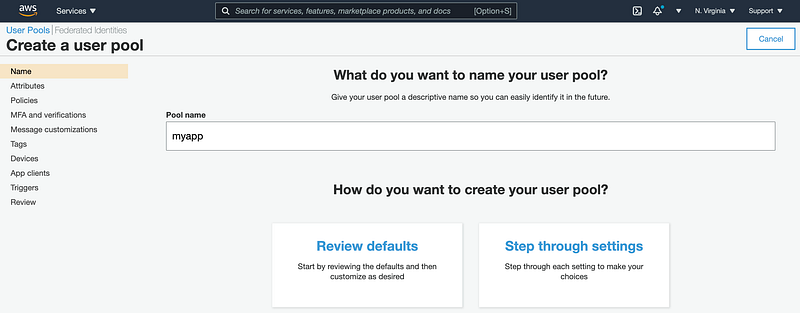
First, a user pool must be configured in Cognito with the correct settings to support collection of the user’s groups and passing of the profile information.
I won’t walk through the entire process of configuring a user pool, because it is well-documented and not the core focus of this post, but here are a couple things to note:
- You should set the user’s email address as a required attribute if you plan to map validated users to your backend database.
- Make note of the Pool ID because it will be used later when configuring the third-party IdP
- If you are creating a production application, be sure to set the SES Email provider and domain names, since the sandbox allotment in Cognito will not be sufficient for production use.
Creating Custom Attributes
To collect the groups from the IdP, you must configure and enable a custom attribute within Cognito. This can be done from the “Attributes” page:
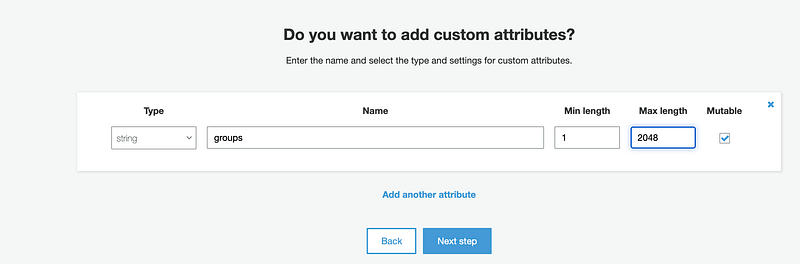
- I recommend naming the attribute “groups” because let’s not get too fancy.
- I set the groups to the maximum size of 2048 characters because sometimes users coming from enterprise IdPs have a lot of groups. If you exceed this limit, some IdPs, like Okta, support using “starts with” or regex patterns to filter which group names are sent in the SAML response to Cognito.
- Ensure the “type” is “string” and “Mutable” is checked.
- Be sure to save!
- Once saved, note that the “Name” changes to “custom:groups”. This is important because it will be the name of the field used later when accessing the “userInfo” endpoint.
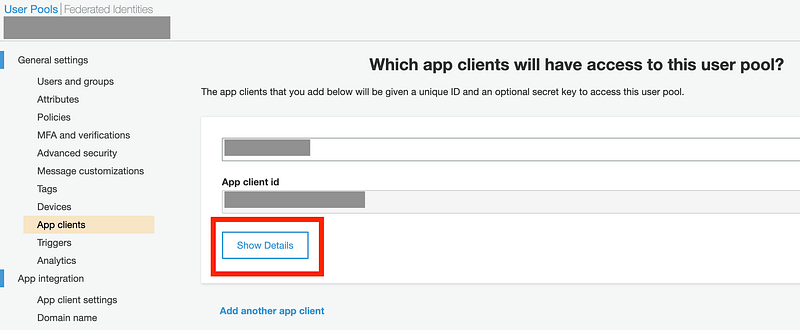
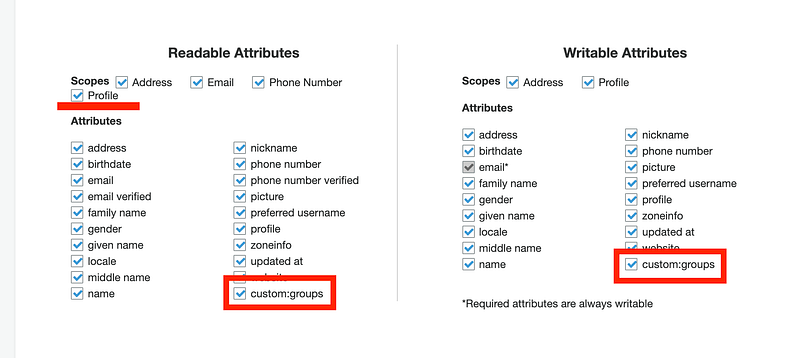
Enabling the Custom Attribute
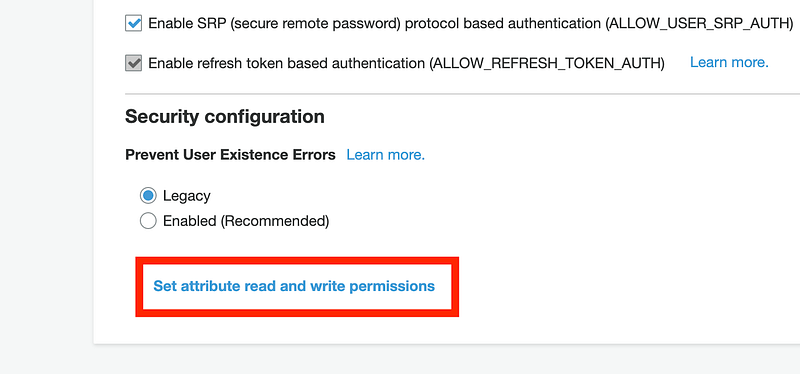
Once you create the “custom:groups” attribute, you need to activate it for the app client. Navigate to “App Clients” and then click “Show Details” and then “Set attribute read and write permissions.”
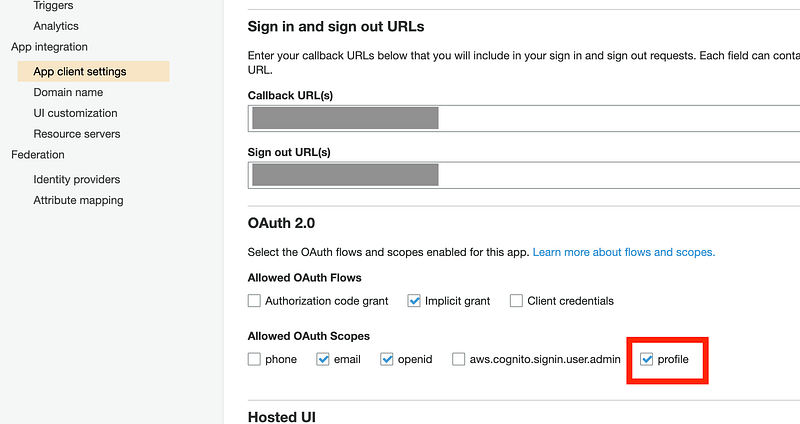
Configure App Client Settings
On the “App Clients” settings page, ensure that “profile” is selected under “Allowed OAuth Scopes.” Without this setting, the additional custom attributes, including “groups,” passed by the IdP, will not be accessible to your backend via the “userInfo” endpoint.
Third-Party IdP Setup
Don’t sign out of the Cognito console just yet; we’ll come back to it shortly. But first we need to configure the third-party IdP. I will use Okta as an example for this post, but Active Directory, OneLogin, and Auth0 all have similar configuration options.
Create a New Application
Go through the application setup process to create a new application using the following settings (replace the bold parts with your settings):
- Single Sign On URL: https://YOUR-DOMAIN.auth.us-east-1.amazoncognito.com/saml2/idpresponse
- The same value can be used for “Recipient URL,” “Destination URL,” “Sign Out URL,” and other similar fields.
- Audience Restriction: urn:amazon:cognito:sp:us-east-1_ABCdef123
- Name ID Format: Email (note: this may be “User name” or another value depending on how you configured Cognito).
Be sure to configure any other required fields according to your IdP’s documentation.
Attribute Statements
For Cognito to recognize the user and pass the required fields to your backend application, the IdP must pass certain attributes. The names of these attributes are configurable, but they must match across Cognito and the third-party IdP.

Group Attribute Statements
Each IdP handles this a bit differently, but most allow you to pass the group names along using a similarly-named attribute definition. In Okta’s case, you can define groups like this:
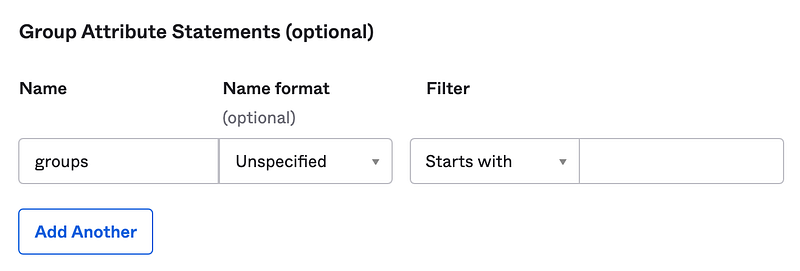
In Okta, I added my user to two groups, “test-group-one” and “test-group-two” for testing purposes.
IdP Metadata
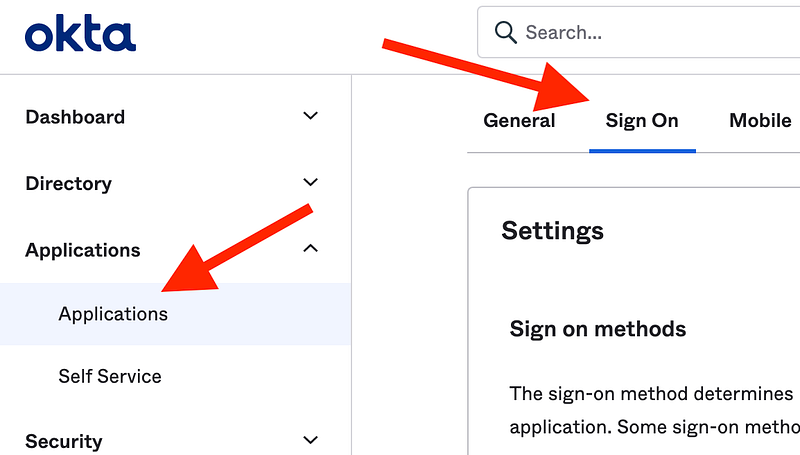
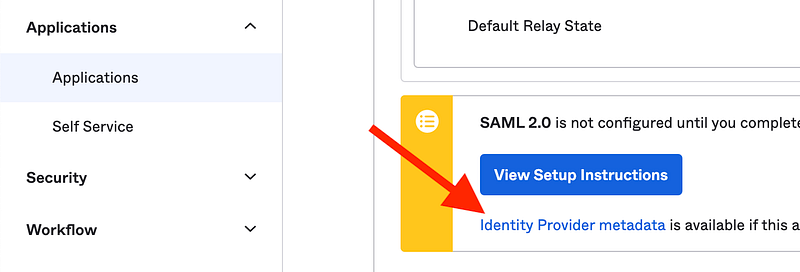
Now, you must get the IdP metadata to create an IdP mapping in Cognito. Most IdPs allow you to export an XML file or provide a configuration URL. Okta provides both options, which can be accessed from the “Sign On” tab of the application.
Back to Cognito
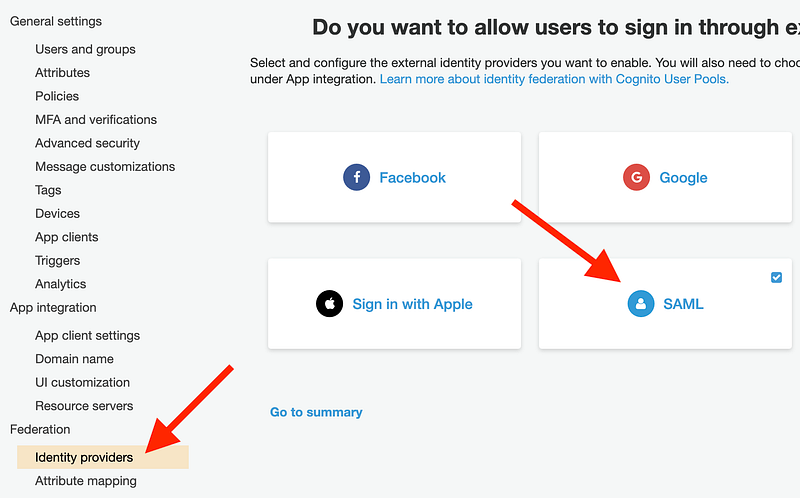
Add an Identity Provider
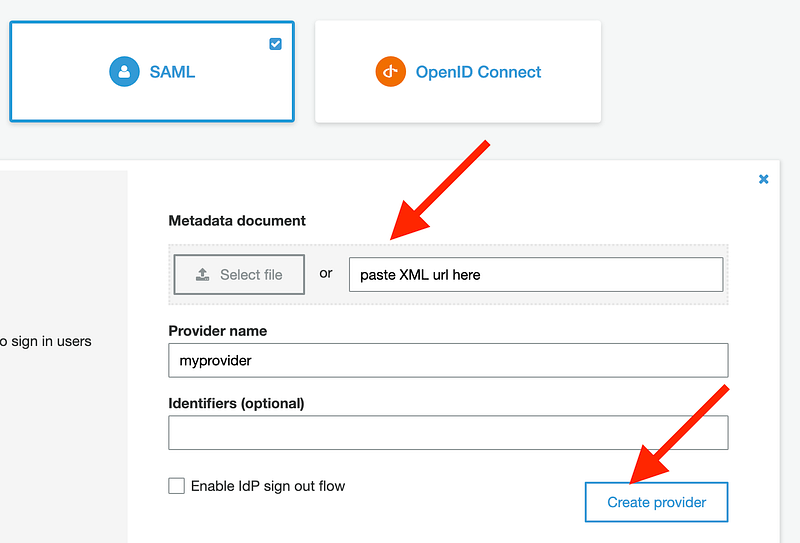
Now that you have the third-party IdP metadata URL, you can create an identity provider in Cognito. This is done via the “Federation” > “Identity Providers” page. From there, select “SAML” and create a new provider using the URL you obtained from Okta.
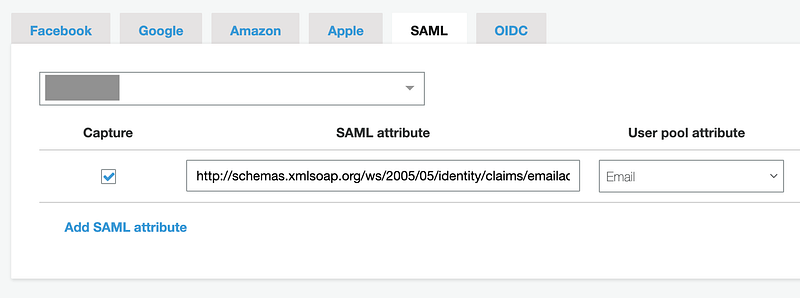
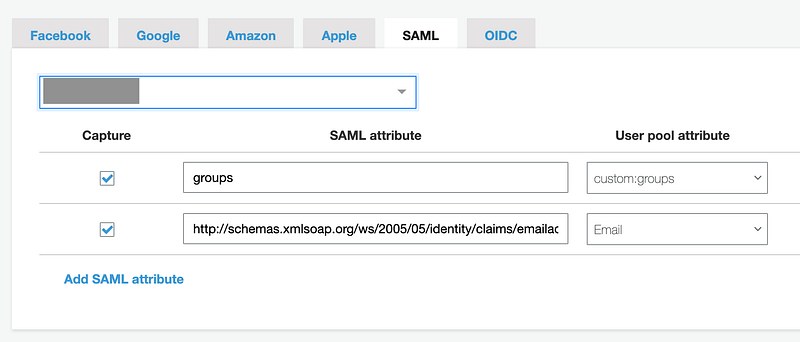
Define Attribute Mappings
You now need to tell Cognito which attributes from the provider should be collected and mapped to attributes in Cognito. This is done from the “Attribute mapping” page. Select your new provider from the list and then enter each of the attributes to collect. These should match the same names as entered earlier in Okta. For example, I am collecting the user’s email address under the attribute name “http://schemas.xmlsoap.org/ws/2005/05/identity/claims/emailaddress”.
Be sure to also define the “groups” attribute and map it to the “custom:groups” user pool attribute.
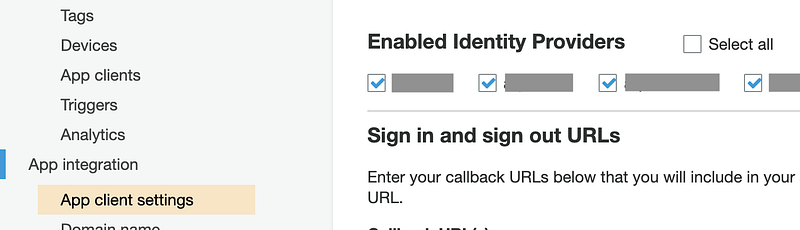
Enable the Identity Provider in the App Client
The final step is to return to the “App client settings” page and enable the new third-party IdP.
Frontend + Backend Changes
Depending on how your frontend environment is configured (single-page app, JQuery, framework, etc.), you will need to configure the sign in page to match the page defined in the “Callback URLs” portion of Cognito and then handle the “access_token” that is returned. You can also use the AWS Cognito JS SDK to handle this seamlessly in your application.
Once the access_token is retrieved, it can be sent to your backend API or used to fetch the user’s groups directly by passing the authorization header. This call looks like:
curl -X GET https://YOUR-DOMAIN.auth.us-east-1.amazoncognito.com/oauth2/userInfo -H 'authorization: Bearer <access_token>'The response, if everything worked, will look like:
{
    "sub": "abdef0123-aa12-4c41-961d-12abcd1234b4",
    "email_verified": "true",
    "email": "[email protected]",
    "custom:groups": "[test-group-two, test-group-one]"
}
These custom groups (which came from the groups we created in the Okta IdP), can be parsed and used for RBAC within your application.


