
Using OAuth 2.0 with LINQ to Twitter
If you haven’t heard, Twitter updated their API to v2 with a steady stream of new endpoints for existing and recent services. One of the hottest additions is OAuth 2.0 authorization support. My Twitter API library, LINQ to Twitter, supports Twitter API v2, adding new endpoints as they’re announced. This post explains how LINQ to Twitter supports the Twitter API’s latest endpoints for OAuth 2.0. I’ll explain what OAuth 2.0 is and its benefits. Then I’ll dive straight into how to use OAuth 2.0 in an ASP.NET MVC application. Finally, I’ll follow-up with important configuration information for making the moving parts work together.
Understanding OAuth 2.0
Let’s set the stage for why OAuth is important by looking at all the parties involved: Twitter, Your app, and a user. As you know, Twitter is a social media app that lets people tweet, reply, and do an increasingly more amount of tasks. The user is the person who engages with both Twitter and your app to (hopefully) enhance their experience on Twitter. Your app needs to act on the user’s behalf by using the Twitter API.
The thing is, how does the user know that your app isn’t going to do anything on their account that they don’t want you to do? That’s a problem you have to solve. However, Twitter and other companies need a mechanism in place that protects users by: Not giving out a password, not having the change a password in every app, and being able to disable any app at any time.
OAuth does this by letting the user authorize your app to act on their behalf. It solves the password problem by not giving you the user’s password. It also solves the disablement problem by the user telling Twitter that they want to allow your app to work with their account. At the time they don’t want to use your app anymore, they go to Twitter settings and disable your app. This protects the user and it’s incumbent upon your app to keep the user’s trust.
OAuth 2.0 is easier to implement and more secure than it’s predecessor, OAuth 1.0a. Although all of the Twitter endpoints haven’t migrated to OAuth 2.0 yet, you should prefer to use OAuth 2.0 when it’s available.
For simplicity, in the rest of the document, I’ll just use the term OAuth to refer to OAuth 2.0. Next, lets discuss the authorization process.
Authorizing Your App
So, how does the user authorize your app? By using OAuth with the following process:
- The user tells your app it wants to use it, starting the authorization process— maybe a button click or the app realizes that it doesn’t have a current access code.
- Your app redirects the user to the Twitter authorization page — with shared credentials so that Twitter knows who you are.
- The user logs into Twitter — You never see this part.
- The user tells Twitter that it’s okay for your app to have access to their account — a button click.
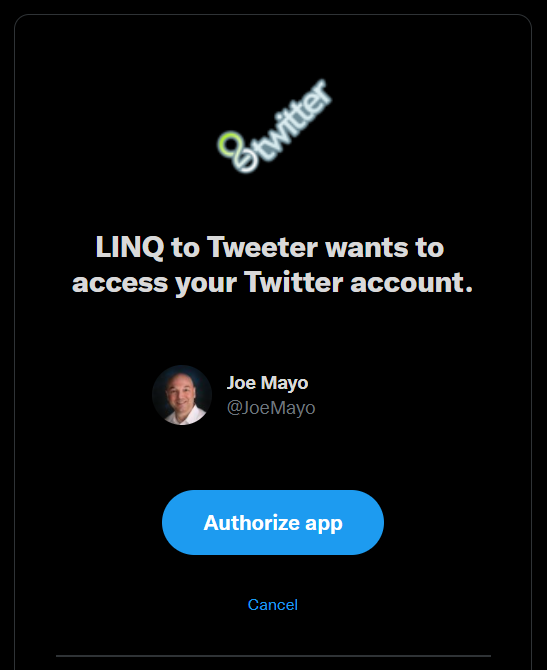
5. Twitter redirects the user back to your app — You get an access code that allows API queries for that user’s account.
What happens when the user disables your app? When you try to use that access code, from step #5, Twitter rejects the operation.
Again, this is a win for the user because they don’t have to change their password on every Twitter app they use and the ability to turn off any app gives them a chance to mitigate problems caused by bad actors.
Coding the Solution
The example in this post uses an ASP.NET MVC application, which is a sample in the LINQ to Twitter GitHub Respository. It uses LINQ to Twitter’s new OAuth 2.0 support to let a user authorize a web app. Here’s what you’ll see for getting this to work — the app:
- checks to see if it needs to log you in and (if so) opens the OAuth page.
- reacts to a link click to begin the OAuth process with Twitter.
- responds to a redirect request from Twitter to complete the process and get a new access token.
- lets you query the Twitter API
The following sections show the code that makes this happen.
Checking for a Current Access Code
In the sample, the Home page checks immediately to see if the user has an access code. If not, it redirect the user to the OAuth2 page, shown below.
The Index action instantiates anOAuth2SessionCredentialStore, which is a LINQ to Twitter type for holding credentials. It checks the result of HasAllCredentials, which checks to see if you have an access code (stored in its AccessCode property). If not, the code redirects the user to the OAuth2 controller to start the authorization process that gets the access code.
Beginning the OAuth Process
Over on the OAuth2 controller view, there’s a link that runs the BeginAsyc method, shown below. This starts the OAuth process and sends the user to Twitter to log in and authorize the app.
The first statement in BeginAsync constructs a URL, named twitterCallbackUrl. The current URL is for Begin, so we need to change that to Complete. The reasoning is that when we send the user to Twitter for authorization, Twitter needs to redirect the user back to this app and twitterCallbackUrl says where that is. Notice that the code assigns twitterCallbackUrl to the RedirectUri property of a new instance of OAuth2SessionCredentialStore, which we’ll discuss soon. The reason for the different naming is that the sample is built to help previous LINQ to Twitter users follow the logic. The old OAuth 1.0a terminology is “Callback”, whereas the new OAuth 2.0 terminology is “Redirect URI”.
The MvcOAuth2Authorizer is a special LINQ to Twitter authorizer for using OAuth 2.0 with ASP.NET MVC. There will be more authorizers for different technologies and, just like MvcOAuth2Authorizer, will inherit the LINQ to Twitter OAuth2Authorizer. This extensibility is available in case you and other developers need to support LINQ to Twitter on any future technology that doesn’t have an authorizer yet.
Authorizers need a place to access credentials for building queries to the Twitter OAuth API, which are called credential stores. The example above, instantiates an OAuth2SessionCredentialStore. Since this is ASP.NET, we need a way to maintain state between the time we send the user to Twitter for authorization and when Twitter redirects the user back. So, we use ASP.NET session state to make sure we don’t lose credentials. The OAuth2SessionCredentialStore inherits the LINQ to Twitter OAuth2CredentialStore. If you preferred to manage state another way, you could use this extensibility point to manage your own credential state.
When you build a Twitter app, you create a project in the Twitter Developer Portal. There, you’ll configure OAuth 2.0 along with credentials: ClientID and ClientSecret. Then set their respective properties as shown in the OAuth2SessionCredentialStore.
Finally, you need to set scopes, via the List<string> Scopes property. A scope specifies a privilege required for a specific Twitter API query. You can figure out the scopes for a specific endpoint from either the LINQ to Twitter documentation or the Twitter API documentation. An example is the Twitter Recent Search API, whose required scopes are tweet.read and users.read. In the example above, I added all known scopes as of the time of this writing. You need to specify the scopes that your app uses at the time of authorization.
Tip: The example uses a lot of scopes, but every app doesn’t require that. You should limit the scopes to only what you need. During authorization, the user sees what scopes you’re asking for and what they do. You’ll have to weigh whether what you’re asking for would make a user (who is understandably concerned about their privacy) not authorize your app.
After instantiation, you can use that authorizer to start the authorization process. Notice that the call to BeginAuthorizeAsync has a string state parameter. This can hold any arbitrary state that you want and Twitter will send that back to you after the user authorizes your app. For OAuth 2.0 security, LINQ to Twitter uses that state to verify that it is the same when Twitter redirects the user back to your app. An additional purpose might be to correlate the begin and complete with a value of your choice. The BeginAuthorizeAsync sends the user to Twitter to authorize your app. The next section describes what happens after that.
Completing the OAuth Process
After the user authorizes your app, Twitter uses the Redirect URI that you sent to redirect the user back to your site. If you recall, that was to the Complete endpoint, which goes to the CompleteAsync action, which gets your access token, described below.
The CompleteAsync action instantiates a MvcOAuth2Authorizer with an instance of OAuth2SessionCredentialStore. Since credentials are already in session state, there wasn’t a need to re-populate.
Upon return from the user authorization process, Twitter sends back the same state as specified in the BeginAuthorizeAsync call. LINQ to Twitter automatically verifies that this value matches. When the state that was sent doesn’t match what was received, LINQ to Twitter throws an exception, explaining that the values didn’t match and warning of a potential CSRF attack.
Another value you get back is the code parameter. LINQ to Twitter needs this code as a parameter for CompleteAuthorizeAsync. This call to CompleteAuthorizeAsync gets the access code you need for querying the Twitter API. Finally, the code redirects the user to the Home page to use the functionality of the sample app.
Tweeting
One of the features of the demo app is to tweet. Here’s an example that gets text from the user and tweets it:
The code above gets tweet text from the SendTweetViewModel. Just like the CompleteAsync action, this code instantiates a MvcOAuth2Authorizer, relying on the OAuth2SessionCredentailStore to retrieve credentials from Session state. Behind the scenes, LINQ to Twitter uses those credentials to make sure commands and queries are authorized.
The only thing left to do is call TweetAsync, to … tweet. The code populates a SendTweetViewModel with the response to display to the user.
Configuring an App
While LINQ to Twitter does the heavy lifting and makes your task a simple method call or LINQ query, there are some configuration tasks that aren’t obvious. Here are some tips and ticks for setting up.
Setting Up your Twitter App
Visit the Twitter Developer Portal and create a new project for your app. I’d give step-by-step, but web sites change so quickly that it would soon become useless. It might take time (varies) for Twitter to approve your app, so be prepared to wait.
Configuring Authentication Settings
There will be a switch for OAuth 2.0 in the apps authentication settings. Turn that on.
There’s also a setting for the type of app. Select Web App if you’re building an ASP.NET MVC app like this demo.
Add a callback URL. In the development environment, the callback URL for the demo app is https://127.0.0.1:44395/OAuth2/Complete. You can figure out the port number by visiting the project, selecting Properties and opening the launchSettings.json file. I launch via IIS Express, so the port number is in the JSON file at iisSettings.iisExpress.sslPort, which is 44395.
It’s important that you use the loopback address, 127.0.0.1, rather than localhost. I’ll discuss this more because that will be more configuration in your project. I want to discuss configuration keys next, while we’re currently discussing the Twitter project configuration.
Remember to click the button to Save your changes.
Configuring OAuth 2.0 Keys
Once you have an app, go to settings and set up keys and tokens. There are different types of authorization, but here we’re talking specifically about OAuth 2.0.
There will be a ClientID, which is a public credential for your app. You’ll also need to generate a ClientSecret. Make a copy of both of these credentials so your app can read them during the OAuth authorization process. This demo app assumes the keys are in the Environment, so put them there if you want to do the same thing.
Tip: Once you generate a ClientSecret and leave the page, you won’t ever be able to retrieve it again. Best practice is to copy the ClientSecret and hold it in a secure place, like a password manager.
Configuring Project Callbacks
Going back to what I said earlier about setting the callback URL to 127.0.0.1, you need to configure your app to use that too. The gotcha here is that ASP.NET MVC configures your app to use localhost by default but Twitter won’t recognize that in a callback URL and you can only use 127.0.0.1. There are two places that you need to make this change in ASP.NET MVC:
- In the Visual Studio project,
editProperties/launchSettings.jsonand change the URLs fromlocalhostto127.0.0.1. - In File Explorer, go to the solution folder and edit
.vs\LinqToTwitter.MVC.CSharp\config\applicationhost.config. Go to/configuration/system.applicationHost/sites/site/bindingsand add newbindingelements for127.0.0.1, like this:
So now, the app will run on 127.0.0.1 and use the proper URL when it builds the callback/redirect during the BeginAsync part of the OAuth process.
Coming Next
So that’s how to use OAuth with an ASP.NET MVC application. Now that this is working, I’ll be looking at the token refresh and revoke scenarios. After that, I’ll expand OAuth 2.0 coverage to additional technologies, with Blazor Server and Blazor Client apps at the forefront.
Here’s where you can find LINQ to Twitter:
- NuGet/ASP.NET — linqtotwitter.aspnet
- NuGet/Multi-Platform — linqtotwitter
- GitHub — Release v6.11.0


