
Using Amazon SES with Node.js
What’s Amazon SES?
As the name and the one-liner under it says, it’s for receiving and sending emails. we will cover sending part of it in this article.
There was a time when we used to spend so much time and resources setting up our SMTP servers for sending that one congratulatory email to the user who newly signed up to our website. AWS’ SES makes it all simple (relatively).
Benefits
- Saved resources and no developer’s time wasted in setting up that SMTP server which is used only when the user forgets the password for their account.
- No hundred lines of code to call your SMTP server.
- fast and simple!
Steps
- Setup SES/ Verify Email
- Setup credentials
- Setup your Email application.
- Move out of Sandbox.
- Use your own domain (optional)
Setup SES/ Verify your email
- Setup SES on your AWS account.
i. Log in to your AWS account at aws.amazon.com or create one if you haven’t yet.
ii. Search for Simple Email Service in your preferred AWS region (normally the one near to you or your userbase)
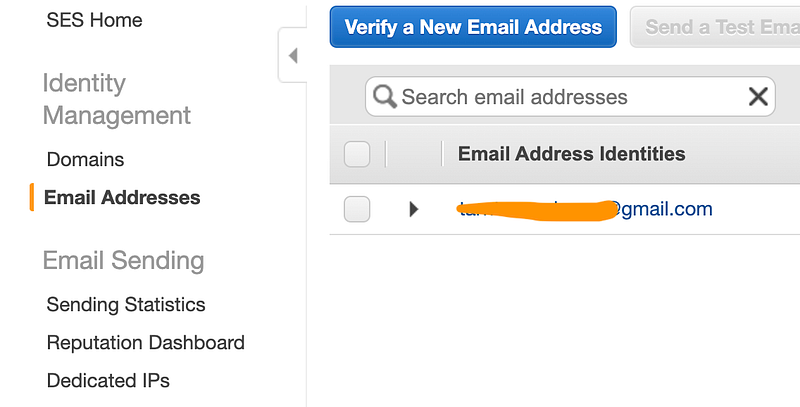
→ iii. On the SES homepage, click on the “Email Addresses” option from the sidebar on the left.
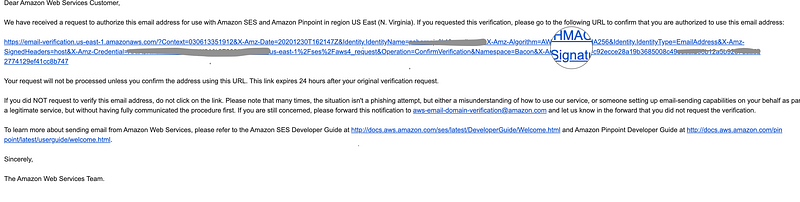
Add the email you want to use for sending an email, You shall receive an Email from [email protected] to verify the email, click on the URL in the mail to verify. (your verified email address will be used as ‘from’ address for the emails you send using AWS-SES).
Setup Credentials
To allow AWS-SDK to send emails on your behalf, We need to create credentials.
i. On the top right corner of AWS Console, Open the accounts menu and click on ‘My Security Credentials’ . On the Page that opened, go to Access keys (access key ID and secret access key) and click on ‘Create New Access Key’.
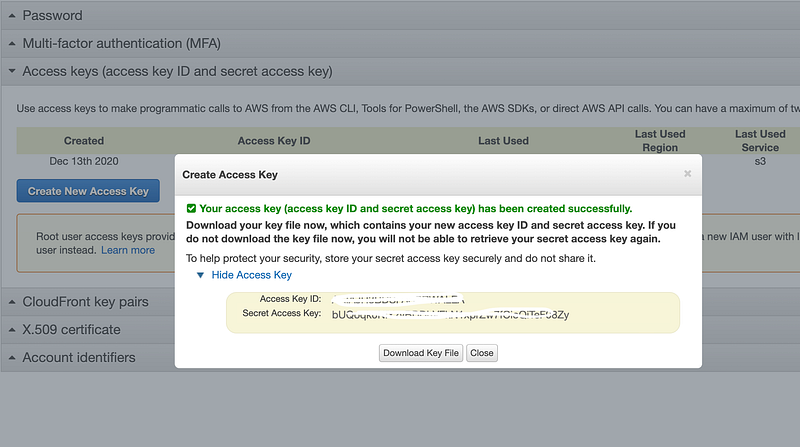
ii. Download the KeyFile or save the Access Key ID and Secret.
iii. We need to set these credentials in our machine, for the AWS-SDK to use.
- In your user home directory, create a folder named
.aws - Create a file named
credentials - paste the access key and secret to the file. (the one we created in the previous step):
[default]
aws_access_key_id=AKISQJEUHDSBQNDKO
aws_secret_access_key=456789ijhVFGTYHji987yTGFR%TY&^YTGHJH
Your new credentials file will look something like this👆
Don’t worry! These are dummy credentials ✌️
[default] : is a tag for the pair of credentials. We can save multiple credentials in the same file and use the tags to differentiate. AWS-SDK will use the credentials with the default tag if nothing is specified in your code.
Setup your Email application
- Initialize a Node.js app with
npm init -yin a folder ornpm initand enter all the required details.
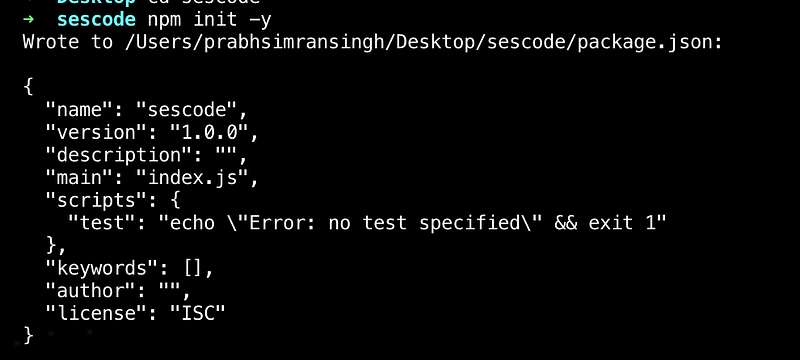
2. Create the main file named index.js as mentioned in our package.json which was created with the help of npm init .
3. Install AWS-SDK which calls the Email service on our behalf. Writeyarn add aws-sdk or npm install aws-sdk --save in the command line.
4. import aws-sdk in your index.js (main) file.
const AWS = require(‘aws-sdk’);
5. Set region for your AWS- SES service. (for example, I verified my email in N. Virginia region) → (us-east-1).
AWS.config.update({ region: ‘us-east-1’ });
6. Set credentials for your AWS-SDK to use.
var credentials = new AWS.SharedIniFileCredentials({profile: ‘work-account’}); AWS.config.credentials = credentials;
In our case, we are using the credentials for the default tag. Hence, we are skipping the above step.
7. Set up your message, from-address, to-address, subject, etc in params object, which shall look something like this 👇
let params = {Destination: {/* required */ToAddresses: [email,/* more items */]
},
Message: {/* required */Body: {/* required */Html: {Charset: "UTF-8",Data: `<h3>Hi ${name}!</h3><br/><p>Your OTP for Something Something Service Hub is:<em> ${otp}</em></p><br/><p>Regards,<br/>Something Something Service Hub Team</p>`},
Text: {Charset: "UTF-8",Data: `Hi ${name}!Your Login OTP is ${otp}`}
},
Subject: {Charset: 'UTF-8',Data: `${otp} is the OTP for Something Something Service Hub!`}
},
Source: fromEmail,/* required */ReplyToAddresses: [fromEmail,/* more items */],
};We can write either HTML or Text in the body, HTML has higher precedence amongst the two.
8. Call SES service using AWS.SES package and pass the parameters.
var sendPromise = new AWS.SES({apiVersion: ‘2010–12–01’}).sendEmail(params).promise();
9. Capture the response.
sendPromise.then(function (data) {console.log(data.MessageId);}).catch(function (err) {console.error(err, err.stack);});Problem!!
Yeah! I know I didn’t talk about it earlier. Although we have done everything correctly, there’s one problem we didn’t talk about. SES only allows you to send emails to verified email accounts. means? Well….I verified our email, we can send as many emails to that address as we want, but not somewhere else.
Solution??
SES assigns us a Sandbox’d Email account service which only sends the email to our verified email addresses. but why? All I need is an Email service to generate a Login OTP and send it.
With great power comes great responsibility — Someone from Marvel Comics .
Why this? Well… All you need to do is remember the unread email count on your Gmail box which is growing day-by-day because of all the spam you receive. AWS doesn’t want people to use it as a spam generator. Then, what should be done?
Move out of Sandbox.
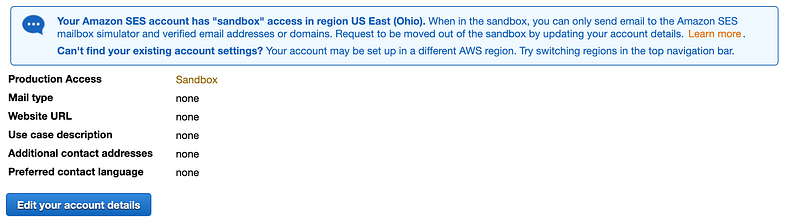
- In SES Console, Go to ‘Sending Statistics’ on the menu on the left.
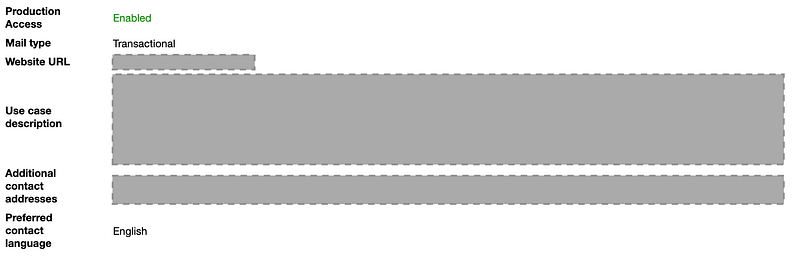
2. You’ll see you have a Sandbox account with a info-box mentioning the same. Click on “Edit your account details”.
3. Fill out the details required, your use case, etc.
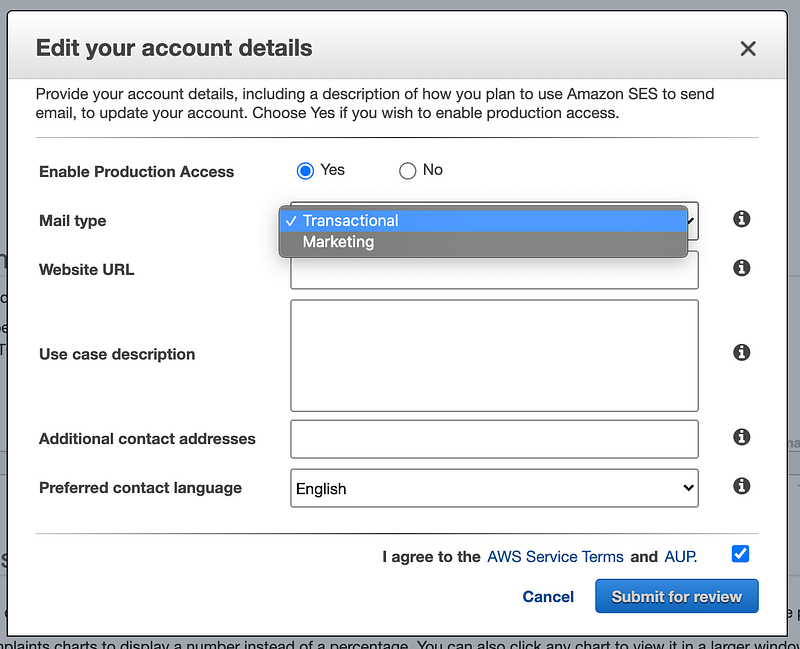
4. Once you fill in all the details, submit your application for review, wait for a few hours for the team to respond and approve your request, and you are good to go.
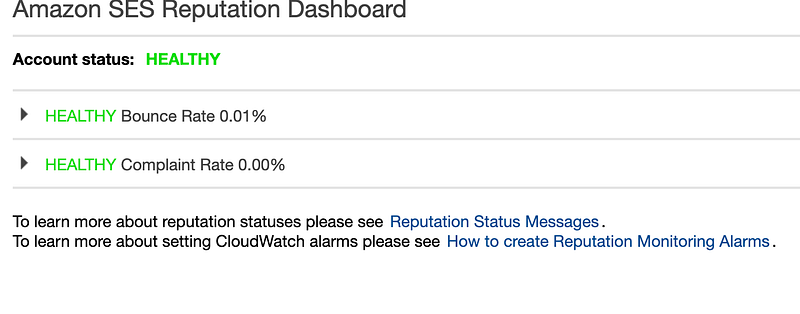
5. but wait! No hurries! We know we got the approval, but that doesn’t mean we can use this for any kind of email we want to send. SES has a dashboard called, “Reputation Dashboard”, which keeps track of all the stats related to your email delivery and complaints. Do take care of it and avoid generating any spam.
6. Now you can send emails to your application users.
Problem?
Another Problem! who trusts an OTP email sent from some random and very common domain, Gmail? yahoo mail? etc?
Use your own domain (optional)
- Purchase a domain from Amazon Registry using Amazon S3.
- Go back to AWS-SES now and click on ‘Domains’ from the menu on the left.
- Click on ‘Verify a New Domain’, Follow the steps.
- Done.
Now you can write any email address with @yourdomain.com as from email in your application.
You can check out the codebase for this at github.com/psharneja.
Note: Using AWS-SDK is not the only way of using SES Service. SES supports SMTP options as well as REST.
We used shared credentials to authenticate. AWS gives us many other options. you can check those at docs.aws.
You can add Cc & Bcc address to your email. You can also use callbacks instead of using promise.
Next time! bye!


