
Unveiling the Functionality of ChatGLM3–6B

In our last discussion, we introduced the deployment of ChatGLM3–6B. Although we have successfully deployed our large language model (LLM) and tested its new features, many questions arise about how these are implemented. Today, let’s delve into the specific functionalities of ChatGLM3–6B, including tool invocation and code interpretation.
Adding Custom Tools
The official documentation outlines the process for adding new tools to enhance the model’s capabilities:
New tools can be added by registering them in
tool_registry.py. This can be done simply by using the@register_tooldecorator. For tool declaration, the function name becomes the tool's name, and the function docstring serves as the tool's description. For tool parameters, useAnnotated[typ: type, description: str, required: bool]to annotate the type, description, and whether they are mandatory.
Let’s try adding a web search tool using SerpApi. SerpApi is a web search API that facilitates various web searches, including Google, Baidu, Bing, etc. To use SerpApi, first, you need to register an account on their website and obtain an API Key from your account settings. This API Key is necessary for conducting web searches through SerpAPI. Next, install the SerpApi Python library: pip install google-search-results. Now, we can write the tool code.
We add a web_search tool in tool_registry.py:
@register_tool
def web_search(
    query: Annotated[str, 'The query text to be queried', True],
) -> str:
    """
    Search the result for input `query` from web
    """
    from serpapi import GoogleSearch

    search = GoogleSearch({
        "q": query,
        "gl": "cn",
        "location": "China",
        "output": "json",
        "api_key": "your serpapi api key"
      })
    try:
        query_result = search.get_dict()
        result = process_response(query_result)
        return result
    except:
        import traceback
        ret = "Error encountered while searching!\n" + traceback.format_exc()
In the code, we use the @register_tool tag to register our tool. The tool method parameters are annotated with Annotated. Then, we call the SerpApi method for web searching. The process_response method is used for parsing the search results, extracting, and returning the first search result content. For specific implementation, refer to LangChain's source code.
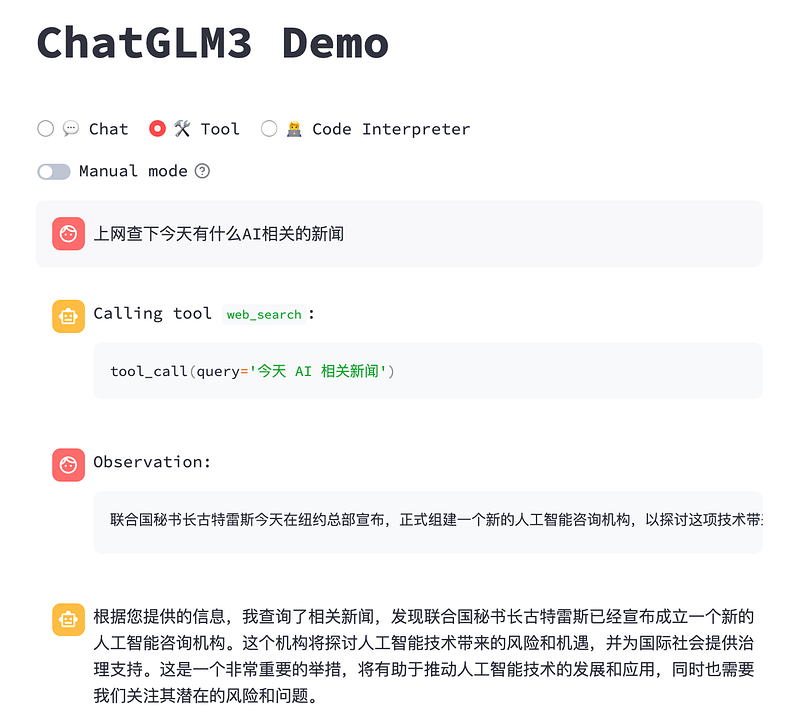
After adding the code, restart the WebUI service to test the new tool and observe its performance:
Using API Interface for Tool Invocation
Next, let’s explore how tools are invoked through the API interface. In the API request parameter messages, in addition to role and content, we now have metadata and tools. metadata is the specific tool name, and tools is a list of all available tools. Essentially, ChatGLM3 draws inspiration from ChatGPT's Function Calling feature. The metadata and tools parameters correspond to Function Calling's function_call and functions, respectively.
In the initial request, we need to pass the tools parameter to inform the LLM of the available tools. Each element in the tools parameter has several attributes:
- name: Tool name
- description: Tool description
- parameters: Tool parameters, including the type, description, and whether they are mandatory (can be formatted in 2 ways, as shown below)
# Format 1
tools = [
    {
        "name": "get_weather",
        "description": "Get the current weather for `city_name`",
        "parameters": [
            {
                "name": "city_name",
                "description": "The name of the city to be queried",
                "type": "str",
                "required": True
            }
        ]
    }
]
# Format 2
tools = [
    {
        "name": "get_weather",
        "description": "Get the current weather for `city_name`",
        "parameters": {
            "type": "object",
            "properties": {
                "city_name": {
                    "description": "The name of the city to be queried"
                }
            },
            "required": ["city_name"]
        }
    }
]
Then, we initiate the API request call through Python code, requiring the installation of OpenAI’s Python library: pip install openai.
import openai

# Setting OpenAI parameters
openai.api_base = "http://localhost:7861/v1"
openai.api_key = "xxx"
system_info = {
    "role": "system",
    "content": "Answer the following questions as best as you can. You have access to the following tools:",
    "tools": tools,
}
messages = [
    system_info,
    {
        "role": "user",
        "content": "Help me check the weather in Beijing",
    }
]
response = openai.ChatCompletion.create(
    model="chatglm3",
    messages=messages,
    temperature=0,
    return_function_call=True
)- We switch the OpenAI API address to the local ChatGLM3 API address. Since it’s a local LLM call, there’s no need for an OpenAI api_key. A placeholder string will suffice.
- We input the system role’s prompt information, including the tools parameter.
- We input the user role’s information as usual, with the role and content parameters.
- We initiate a ChatCompletion request. Note that the model should be set to
chatglm3, and thereturn_function_callparameter should be true to enable tool invocation by the LLM.
After sending the initial request, let’s look at how the tool is invoked:
import json
from tool_register import dispatch_tool

function_call = json.loads(response.choices[0].message.content) # Returns information of `get_weather` tool
tool_response = dispatch_tool(function_call["name"], function_call["parameters"])
messages = response.choices[0].history  # Retrieve conversation history
messages.append(
    {
        "role": "observation",
        "content": tool_response,  # Tool execution result
    }
)
response =
 openai.ChatCompletion.create(
    model="chatglm3",
    messages=messages,
    temperature=0,
)
print(response.choices[0].message.content)- The LLM selects a tool from the toolset based on the user’s query, here
get_weather. - The
dispatch_toolmethod is used to execute the tool. There are many ways to implement thedispatch_toolmethod, and functional programming can conveniently realize this feature. - The tool execution results are added to the conversation history through the
observationrole, effectively returning the tool execution results to the LLM. - Another ChatCompletion request is initiated for the LLM to generate the final answer, which is then printed.
This is how tools are invoked using the API. For more details, refer to the official source code.
Code Interpreter
By examining the sample code of the code interpreter, we find that its general flow is as follows: User poses a question -> LLM generates code -> Extracts the generated code -> Calls code execution tool -> Executes code using the tool (Jupyter) -> Extracts the execution result from (Jupyter) -> Returns the result to the user.
ChatGLM3 adds three more roles to the existing three (system, user, assistant): observation, interpreter, tool:
# conversation.py
class Role(Enum):
    def __str__(self):
        match self:
            case Role.SYSTEM:
                return ""
            case Role.USER:
                return ""
            case Role.ASSISTANT | Role.TOOL | Role.INTERPRETER:
                return ""
            case Role.OBSERVATION:
                return ""
The tool role is for tool invocation, the interpreter role for code interpretation, and the observation role for observing various results, including LLM outputs, tool responses, and code interpreter execution results. Let's further explore how the code interpreter functionality is implemented:
case '':
    code = extract_code(output_text)
    print("Code:", code)

    display_text = output_text.split('interpreter')[-1].strip()
    append_conversation(Conversation(
        Role.INTERPRETER,
        postprocess_text(display_text),
    ), history, markdown_placeholder)
    message_placeholder = placeholder.chat_message(name="observation", avatar="user")
    markdown_placeholder = message_placeholder.empty()
    output_text = ''
    with markdown_placeholder:
        with st.spinner('Executing code...'):
            try:
                res_type, res = execute(code, get_kernel())
            except Exception as e:
                st.error(f'Error when executing code: {e}')
                return
    print("Received:", res_type, res)
    if res_type == 'text' and len(res) > TRUNCATE_LENGTH:
        res = res[:TRUNCATE_LENGTH] + ' [TRUNCATED]'
    append_conversation(Conversation(
        Role.OBSERVATION,
        '[Image]' if res_type == 'image' else postprocess_text(res),
        tool=None,
        image=res if res_type == 'image' else None,
    ), history, markdown_placeholder)
    message_placeholder = placeholder.chat_message(name="assistant", avatar="assistant")
    markdown_placeholder = message_placeholder.empty()
    output_text = ''
break- Code is extracted from LLM output using the
extract_codemethod, usually from markdown formatted documents. - An
interpreterrole conversation record is added to display the code on the page. - The code is executed, and its results are obtained. An
observationrole conversation record is added to return the execution result to the LLM. The LLM then generates the final answer based on the result and displays it on the page.
Here’s the functionality for extracting code, where markdown code is parsed using regex:
def extract_code(text: str) -> str:
    pattern = r'```([^\n]*)\n(.*?)```'
    matches = re.findall(pattern, text, re.DOTALL)
    return matches[-1][1]
For more details, refer to the official composite demo source code. If you encounter any issues during testing, you can troubleshoot based on the source code.
Conclusion
Indeed, ChatGPT previously implemented functionalities such as tool invocation and code interpretation. However, since it’s closed-source, we couldn’t peek into its workings. ChatGLM3, built on open-source foundations, has made these functionalities accessible, allowing us a deeper understanding of the principles involved. We can also customize and develop further according to our needs, highlighting the charm of open-source. Due to limited research time, there may be oversights in this article. If you find any inaccuracies, please discuss them in the comments section.
Follow me to learn about various artificial intelligence and AIGC technologies. Feel free to share your thoughts and questions in the comments section.