
Unlocking the Potential of JupyterLab: Discover the Powerful Text Editor You Never Knew You Had
Unleash Your Coding Efficiency and Productivity in JupyterLab with a GreatText Editor

This article is the first part of a series. Check out the full series: Part II, Part III, Part IV.
JupyterLab is an open-source web-based interactive coding environment that many would argue is not a complete IDE. One of the many reasons that support this is that JupyterLab does not have a powerful text editor.
JupyterLab allows users to create and share documents that contain live code, equations, visualizations, and narrative text. It provides a flexible and powerful platform for scientific computing, data analysis, and machine learning workflows while enabling users to run code in various environments, from local machines to remote servers and cloud services.
Yet, many data scientists and engineers use it only for experimentation. When it comes to productionize their work, they turn to an IDE to put all the pieces together.
The most popular IDE these days is Microsoft Visual Studio Code. VS Code, among others, offers a powerful text editor, a debugger, and multiple plugins that make working with Git, Docker, or almost any programming language a breeze. But what if I tell you you can have a similar experience in JupyterLab?
In this series of articles, we’ll build a VC Code experience in JupyterLab and create a Docker image that we can use anywhere we want as our custom workspace. Let’s begin!
Part II of this story is out:
Learning Rate is a newsletter for those who are curious about the world of ML and MLOps. If you want to learn more about topics like this subscribe here. You’ll hear from me on the last Sunday of every month with updates and thoughts on the latest MLOps news and articles!
Why should you care?
Before we begin, let’s answer one question: why should you care? You already have Visual Studio Code; why must you build a similar experience in JupyterLab? Moreover, VS Code already has a great editor for Jupyter Notebooks. As a matter of fact, I usually find the VS Code UI for Notebooks better.
Well, if you code locally, you never ssh into a remote machine or use different workstations to do your work, then you probably don’t need this.
However, most of us today need to connect to a remote server to complete our tasks. For example, I use Kubeflow to design and run my ML experiments and pipelines. The coding environment in Kubeflow is usually a Jupyter server.
So, what would you do in such a case? Having a VS Code server can be challenging. You either have to pay a subscription for it or learn to live with the limitations of the code server (a great project, nonetheless). Any alternatives, preferably open-source ones?
This story is for you. At the end of this series, we’ll have a robust coding environment in JupyterLab for Python. Extending it to support more programming languages will be trivial.
Jupyter already has the perfect text editor
It may be a surprise to say that JupyterLab already has a great text editor. Why is that? Jupyter has a terminal emulator; thus, we can install Neovim. Then, we can configure Neovim to look and act however we want.
The ultimate goal for this series of articles is to install Neovim and make it work like a Python IDE. Trust me, in the end, you will have the core pieces you need to move away from VS Code towards a universal text editor, one that you can take with you anywhere.
The finished experience will look something like this:
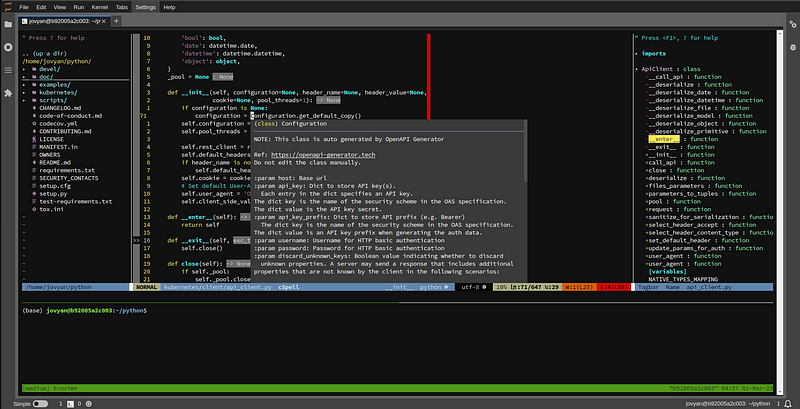
We see a complete IDE experience with a file explorer, a code outline, an integrated terminal, code linting, and IntelliSense with code completion and documentation pop-ups! We even have little quirks like a beautiful status bar and icons for each file according to its contents.
In future articles, we’ll explore every hidden gem, like multiline commenting, the spell checker, navigating the panes, and configuring the plugins in a VS Code native way. For starters, let’s install Neovim and create our initial configuration.
Install Neovim in JupyterLab
The first step towards creating this VS Code-like experience in Jupyter is running a Jupyter server that we can configure. We’ll use the upstream data science image, which we will pull from DockerHub. So, whenever you’re ready, run the following command:
docker run --name jupyter \
    -p 8888:8888 \
    --user root \
    -e GRANT_SUDO=yes \
    jupyter/datascience-notebook:latest
We need sudo access because we will install various Debian packages and plugins. The arguments we pass will grant the default user (jovyan) passwordless access to sudo rights. More about this in the docs.
Next, launch a terminal in JupyterLab and install the latest version of Neovim:
wget https://github.com/neovim/neovim/releases/download/stable/nvim-linux64.deb && sudo dpkg -i nvim-linux64.deb
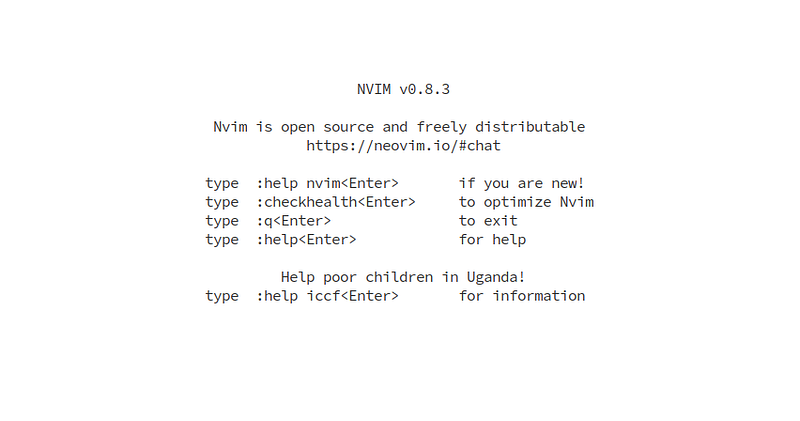
To verify that everything works as expected, run nvim. At the time of writing this, the latest stable version is v0.8.3:
Learn Vim
Neovim is based on Vim, a powerful and highly customizable text editor mainly for Unix-like operating systems. It is designed to be used entirely from the keyboard, with commands based on a combination of keystrokes and mnemonic abbreviations.
So, why Neovim and not Vim? Neovim is a fork of Vim, which means it is based on the same core code as Vim but with additional features and improvements. The primary goal of Neovim is to provide better extensibility, more modern development practices, and a more maintainable codebase than Vim.
There are many advantages of Neovim over Vim, but enumerating them is not the goal of this article. However, if you know how to navigate around Vim, you can transfer this knowledge to Neovim. Thus, let’s see how to learn ViM!
There are many resources available online; however, the best way, in my opinion, is vimtutor. First, install Vim:
sudo apt install vim
Then, run vimtutor in a terminal:
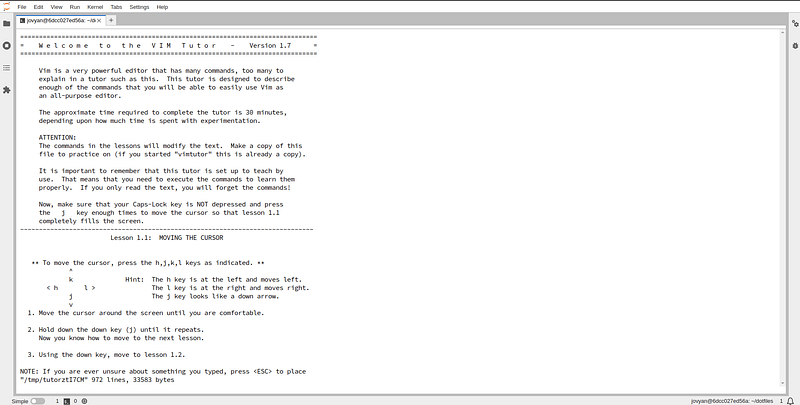
vimtutor has seven lessons covering the fundamental concepts of Vim. Completing this interactive tutorial will give you all the tools you need to start with Vim and Neovim.
In this article, I’ll leave you with this: learn your Vim bindings! Don’t worry if you forget some keystrokes; practice will make everything easier.
In the following article, we’ll start configuring Neovim. We’ll start by configuring the core functionality and looks of the editor. Then, we’ll dive deeper into more specialized plugins that will transform our editor into a feature-packed Python IDE.
About the Author
My name is Dimitris Poulopoulos, and I’m a machine learning engineer working for Arrikto. I have designed and implemented AI and software solutions for major clients such as the European Commission, Eurostat, IMF, the European Central Bank, OECD, and IKEA.
If you are interested in reading more posts about Machine Learning, Deep Learning, Data Science, and DataOps, follow me on Medium, LinkedIn, or @james2pl on Twitter.
Opinions expressed are solely my own and do not express the views or opinions of my employer.


