
Improving Code Quality and Team Efficiency with Husky, Lint-Staged, and CommitLint
Ever shocked by messy code? See how Husky, Lint-Staged & CommitLint transform your team’s workflow! Don’t miss out!
Introduction
During software development, a project often involves more than one developer and can span a significant timeframe, continually increasing in code quantity and functionality. Ensuring that the code adheres to a standard style is crucial. It helps team members stay on the same page, avoiding discrepancies like some preferring semicolons while others don’t or differences in naming conventions. A unified coding standard ensures that all team members produce code that’s consistent and coherent.
Moreover, when working in a team, it’s essential to commit clearly. Clear commits allow others to review and understand each commit’s purpose. Ensuring everyone adheres to commit guidelines will result in a consistent commit history, making it easier to auto-generate CHANGELOGs based on commits.
If you’ve noticed, most well-known open-source repositories on Github have strict guidelines for committing code. We can’t rely solely on developers being careful; strict standards and automated checks are vital to maintain a clean and organized shared repository.
Paying attention to the above issues, I believe, significantly improves code quality and boosts each developer’s productivity. Let’s delve deeper into these issues in this article.
Setup
I’ve prepared a NodeJS project for you, using the NestJS framework written in Typescript. NestJS is currently a popular choice for NodeJS due to its solid architecture (inspired by Angular’s architecture). After using it for a while, I’ve found its support extensive, even for microservices. And since it’s designed after Angular, one feature I particularly like in Nest is Dependency Injection. You can look it up on Google if you’re unfamiliar.
In this project, if you open src/app.controller.ts, you'll find three routes:
import { Controller, Get } from '@nestjs/common';
import { AppService } from './app.service';

@Controller()
export class AppController {
  constructor(private readonly appService: AppService) {}

  @Get()
  getHello(): string {
    return this.appService.getHello();
  }

  @Get('name')
  getName(): string {
    return this.appService.getName();
  }

  @Get('age')
  getAge(): number {
    return this.appService.getAge();
  }
}
At a glance, we can understand their functions: returning “Hello World”, a name, and an age.
Next, to test the project, run the following command:
npm run start:devThen, open a browser and navigate to localhost:3000. Test the three routes /, /name, and /age to ensure everything is running smoothly.
Improving Code Quality with Eslint and Prettier
Many of you might already be familiar with Eslint and Prettier, but some may not know them or might not realize their distinct benefits.
Eslint is a tool that analyzes Javascript code to identify potential errors and can even fix some automatically. VSCode has robust support for Eslint, highlighting errors as you type and offering automatic fixes upon saving.
On the other hand, Prettier is a code formatter. Its primary role is to format code, not to detect errors like Eslint.
You might think that using Prettier seems redundant since Eslint can also format code. However, in practice, there are situations where Eslint falls short, but Prettier excels. In this article, we use Prettier as a “backup” to ensure code is formatted correctly after Eslint does its job. Using both guarantees our code is thoroughly checked for errors and beautifully formatted 😉
Let’s delve deeper into what makes these tools special 😄.
Eslint
With Eslint and robust support from VSCode, you can see error analysis results in real-time as you write code. Try opening src/app.controller.ts and editing it as follows:
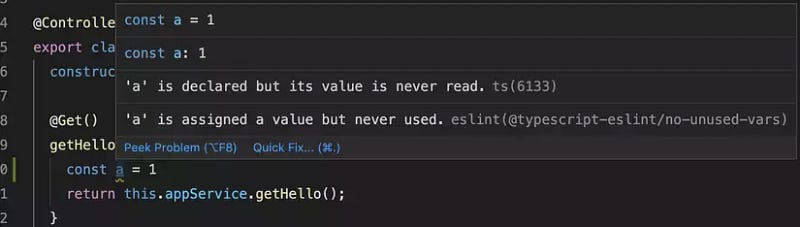
@Get()
  getHello(): string {
    const a = 1
    return this.appService.getHello();
}
You’ll immediately notice an error because the variable ‘a’ is declared but not used.
Now, try modifying it again:
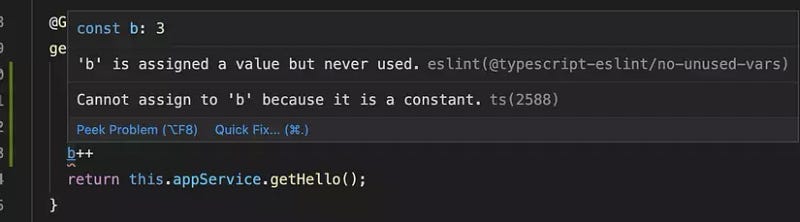
@Get()
  getHello(): string {
    const b = 3
    b++
    return this.appService.getHello();
}
This time, you’ll see an error stating “variable ‘b’ is a const and cannot be reassigned after declaration."
Let’s make another change:
@Get()
  getHello(): string {
    return 123;
}
You’ll get an error stating the method expects a string return, but you're returning a number.

Next, open the .eslintrc.js file and add the following to rules:
rules: {
    '@typescript-eslint/interface-name-prefix': 'off',
    '@typescript-eslint/explicit-function-return-type': 'off',
    '@typescript-eslint/explicit-module-boundary-types': 'off',
    '@typescript-eslint/no-explicit-any': 'off',
    semi: ["error", "always"]
  },
The above rule tells Eslint, “I want a semicolon at the end of every line.” In VSCode, press CMD+SHIFT+P and choose:

In the settings.json file, add:
"editor.codeActionsOnSave": {
      "source.fixAll.tslint": true,
      "source.fixAll.eslint": true
    },
The above paragraph tells VSCode that when saving the file, it will automatically fix the Eslint error, and we have the following result:
This will auto-fix Eslint errors on save. And if you try removing semicolons and saving, VSCode will auto-correct it according to Eslint standards.
Eslint offers many more benefits. It has saved me from many errors at the coding stage, without waiting for the build to complete. It’s a real time-saver.
Now, you might wonder, “What if I don’t use VSCode?” 😂😂
Of course, developers can’t be forced to use VSCode; it’s a matter of preference. Therefore, I’ve predefined a npm run lint command to run Eslint, check, and fix related errors. Test it out! 😃
Another question might be, “What if developers forget to run npm run lint before committing?" We can't always rely on developers remembering this.
Let’s see how we address that soon.
Prettier
Now, modify the app.controller.ts file as follows:
import { Controller, Get } from '@nestjs/common';
import {AppService


} from './app.service';

@Controller()
export class AppController {
  constructor(private readonly appService: AppService) {}

  @Get(      )
  getHello(): string {


    return this.appService.getHello();
  }

  @Get('name')
  getName(): string {


    return this.appService.getName();
  }

  @Get('age')
  getAge(): number {

    return this.appService.getAge();
  }
}
Save the file. As you can see, the file’s format is quite messy 😄. Eslint won’t detect these stylistic issues.
To fix this, we have Prettier. Run the following command:
npm run formatYour file will be beautifully reformatted. To see what Prettier did, open package.json, look for the scripts named format, and you'll see Prettier formats files in the src and test folders and automatically saves them using the --write option.
Now, similar to Eslint, you might ask, “What if developers forget to run format before committing?"
That’s still why I’m writing this article 😂😂. Let’s see how to solve this soon.
Note: If you noticed, we could have configured Eslint to recognize and fix the messy file without needing Prettier. But for this demo, I kept Eslint basic to let Prettier do its job 😄. In reality, even with a meticulous Eslint configuration, I’ve often needed Prettier to get the exact code standard I want.
Let’s dive into today’s main content!
Automation with Lint-staged and Husky
Imagine you have a large project with about a hundred files. In your recent commit, you’ve only modified one file.
If you run npm run lint for Eslint to check the syntax or npm run format for Prettier to format the code, it would operate on the entire source code. However, since you've only changed one file and the rest were formatted in a previous commit, this process can be redundant and time-consuming.
This is where lint-staged comes to the rescue. Using lint-staged allows you to perform tasks on only those files that are git staged. In simpler terms, it focuses only on newly added or currently modified files. So, instead of formatting all 100 files, you only need to format the one you've edited, saving you time.
Let’s get started!
First, you need to install lint-staged. Run the following command:
npm install --save-dev lint-stagedOr, if you prefer yarn (since it’s faster):
yarn add --dev lint-stagedOnce installed, open the package.json file. Under scripts, add the lint-staged configuration at the end:
"lint-staged": {
    "*.ts": [
      "npm run lint",
      "npm run format",
      "git add ."
    ]
}
This configuration defines the npm run lint:staged command, which runs lint-staged. It checks all files with the .ts extension to see if any are git staged. If they are, the specified tasks will be executed in sequence.
Note the inclusion of git add . at the end. This ensures that if any files are changed after the lint-staged process, they are automatically added to Git, eliminating the need for manual addition.
Now, our project should look like this:
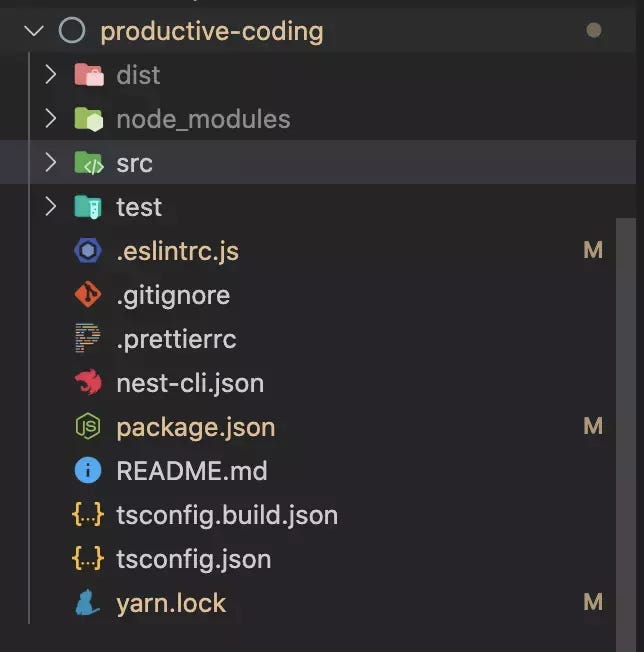
As you can see, neither the src nor the test folders have been modified.
Let’s open src/app.controller.ts and update its content:
import {Controller, Get } from '@nestjs/common';
import { AppService} from './app.service';

@Controller()
export class AppController {
  constructor(
    private readonly appService: AppService

    ) {

  }

  @Get()
  getHello(): string {
    const a = 1;
    return this.appService.getHello();
  }

  @Get('name')
  getName(): string {


    return this.appService.getName()
    ;
  }

  @Get('age')
  getAge(): number {


    return this.appService.getAge();
  }
}
Remember to save your changes. As you can see, our app.controller.ts file now looks much cleaner.
Next, let’s install and set up Husky. Husky is a tool that can detect Git repository operations (like add, commit, etc.) and trigger corresponding actions or prevent commits. Paired with Lint-staged, they’re invaluable in ensuring code committed to the repository has been vetted to maintain code quality.
To install Husky, run:
npm install --save-dev huskyor
yarn add --dev huskyThen, initiate Husky’s configuration with:
npx husky install
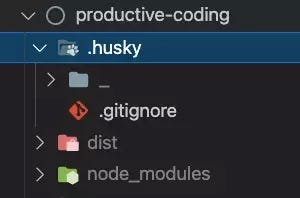
After executing, you’ll notice a new folder named .husky:
To configure Husky to act upon the git commit event, run:
npx husky add .husky/pre-commit "yarn lint-staged"Following this, Husky creates a pre-commit file in the .husky folder containing:
#!/bin/sh
. "$(dirname "$0")/_/husky.sh"

yarn lint-staged
For seamless setup when coding with a team, ensuring Husky is auto-configured without additional steps for team members, add the following script to your package.json:
"scripts": {
...
"postinstall": "husky install"
}
The postinstall scipt will run right after executing npm/yarn install.
Now, let’s test our commit:
git add .
git commit -m "test husky, lint-staged"
Immediately, you should see something like:
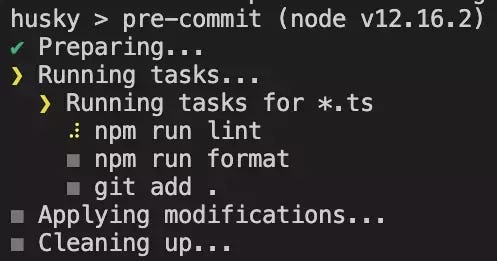
As evident, Husky executes lint-staged and carries out the necessary tasks. Once everything checks out, you'll see the final result, with the lint-staged tasks having been executed solely for the app.controller.ts file because it's the only .ts file currently git staged:
Our code is now ready to be pushed.
Next, let’s modify the .eslintrc.js file by adding the following line to rules:
rules: {
'@typescript-eslint/interface-name-prefix': 'off',
'@typescript-eslint/explicit-function-return-type': 'off',
'@typescript-eslint/explicit-module-boundary-types': 'off',
'@typescript-eslint/no-explicit-any': 'off',
semi: ["error", "always"],
"no-unused-vars": ["error", { "vars": "all" }] // Add this line
},
Above, we’ve added a rule telling Eslint to flag an error if there’s an unused variable. Previously, Eslint would show a warning (in yellow). Now, it will show as a red error ❌.
When we open app.controller.ts, you'll see a red error like this:
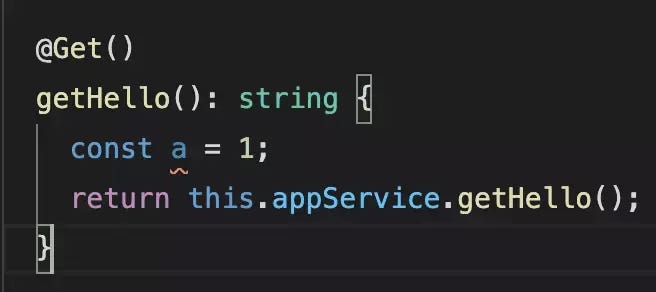
As we can see, VSCode indicates an error where variable a is declared but not used. If someone isn't using VSCode, they won't have this feature. Therefore, we need to check during commits to ensure code always gets an error check, whether we use VSCode or not 😃.
Let’s try committing the code again:
git add .
git commit -m "demo error message"
And the result looks like this:
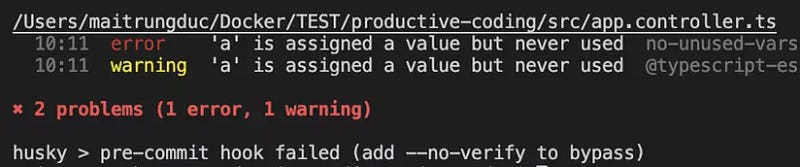
Lint-staged flags an error, and our commit failed.
Now, let’s remove the erroneous line in app.controller.ts and commit again:
git add .
git commit -m "fix unused var"
Now everything seems good 😎😎.
This process illustrates the benefits of utilizing Husky and Lint-staged. It ensures that our code is always checked for errors and formatted correctly before being committed, regardless of the development environment used by the team members.
The question arises: “Can we use this with PHP, Python, etc.?”
If you notice, Eslint is specific to Javascript, while Prettier supports multiple languages. What about PHP or Python?
In such cases, you just need to replace Eslint with a linter relevant to your language. To my knowledge, both PHP and Python have their respective linters, as do many other languages. Husky and Lint-staged are completely independent of Eslint or Prettier and function normally 😉
Standardized Committing with CommitLint
Having clean and standardized code is excellent, but if your commits are messy, it’s a problem.
git commit -m "update something"What’s this something here?
Check the logs, and the modified file is that something 🤣🤣.
Now imagine a team of 10 members, leading to 10 such commits:
git commit -m "update something 1"
git commit -m "update something 2"
...
git commit -m "update something 10"
Then the team leader reviews the code and reacts: 😳😳😳😳😳😳.
That’s where CommitLint steps in, guarding the last gate before the code gets committed to the repository 👺👺.
Using CommitLint ensures all commits follow a standard format. Let’s dive in to see how it operates.
First, install CommitLint:
npm install --save-dev @commitlint/{config-conventional,cli}The above command installs CommitLint and also config-conventional, a commit configuration based on Angular's commit standards. I find this standard reliable, and many renowned repositories on Github use it.
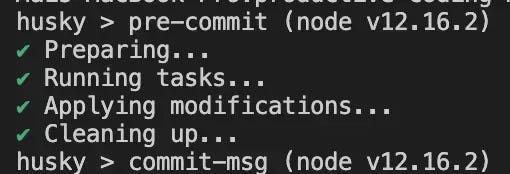
Next, set up Husky to catch events and retrieve the commit message with the following command:
npx husky add .husky/commit-msg ""Then, modify the .husky/commit-msg file like this:
#!/bin/sh
. "$(dirname "$0")/_/husky.sh"

npx --no-install commitlint --edit "$1"
Above we get the commit message of the most recent commit (up to the time we just finished typing git commit if any)
Then, at the root of the project, create a .commitlintrc.js file with the content:
module.exports = {extends: ['@commitlint/config-conventional']};Now, let’s try committing again:
git add .
git commit -m "this is my commit"
And the error displayed is:
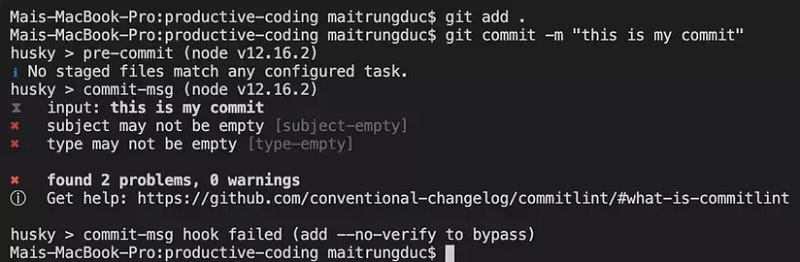
CommitLint reports two errors: an empty subject and type.
Now, let’s look at a standardized Angular commit.
According to Angular’s standards (the one we’re using here), a commit message follows this structure:
type(scope?): subjectHere, type can be:
- build: Changes affecting the build system or external dependencies (e.g., gulp, broccoli, npm)
- ci: Changes to our CI configuration files and scripts (e.g., Gitlab CI, Circle, BrowserStack, SauceLabs)
- chore: Something not affecting production code (e.g., updating npm dependencies)
- docs: Documentation-only changes
feat: A new feature- fix: A bug fix
- perf: A code change improving performance
- refactor: A code change that neither fixes a bug nor adds a feature
- revert: Reverting a previous commit
- style: Changes not affecting code meaning (e.g., whitespace, formatting, missing semi-colons)
- test: Adding or correcting tests.
“scope is optional. If provided, it should refer to the name of the package affected by the current commit. I've noticed scope is commonly used in repositories housing multiple packages, known as monorepo, like the Vue 3 repository, where scope would be the name of a package in the packages directory.
subject refers to the content of the commit.
All these standards are pre-set according to Angular’s conventions. If you want to modify or add your own standards, you’d adjust the .commitlintrc.js file. For guidance, you can refer to the main CommitLint repository.
Let’s now try to adjust our commit according to these standards and see how it goes. Run the following command:
git commit -m "chore: lint commit message"At this point, we’ve successfully committed our changes 💪💪.
I’ve used the type ‘chore’ above because we’re only setting up commitlint in this commit without altering the source code.
For commits where we’ve made multiple changes or want to provide detailed explanations, we can use the message body like so:
git commit -m "chore: lint commit message" -m "This is the message body. In this commit, we added CommitLint to lint commit messages."Now, we’ve finished setting up CommitLint, ensuring every commit to the shared repository adheres to a consistent standard. This makes reviewing history and code much more straightforward. The setup isn’t too complicated, right? 😉
Is Everything Really Okay?
So far, we’ve explored Eslint, Prettier, and set up Husky and Lint-staged for automated runs of Eslint and Prettier before committing, ensuring clean, error-free code.
Additionally, we’ve established CommitLint to ensure each commit is meaningful and standardized 😎😎.
However, one might wonder if everything’s on track. Are there scenarios where someone could accidentally or deliberately commit without running Eslint/Prettier and end up with a random commit message? 🤔🤔
We can observe that direct commits can be made from the repository interface where our source code is stored. Naturally, there’s no Husky, Lint-staged, or CommitLint running in that environment. If overlooked, code errors might slip in, or nonsensical commit names might emerge. Additionally, intentional commits with the --no-verify option will bypass Husky, preventing both CommitLint and Lint-staged from executing:
git commit -m "test dummy message" --no-verifyTo address this, we’ll leverage CICD as a final check to ensure everything is in order when code is committed to the repository.
Let’s proceed 😉
Leveraging Gitlab CI
We’ll use Gitlab CI for our CICD operations, so you’ll need a Gitlab account.
First, create a repository named test-productive-code.
Then, return to your local project. Initially, since you cloned from my repo, you’ll need to redirect origin to the new repository. Run the commands:
git remote rm origin
git remote add origin https://gitlab.com/maitrungduc1410/test-productive-code.git
Remember to replace the username with yours.
Next, push your code with:
git push -u origin masterAfter pushing, check back on Gitlab to ensure the code has been uploaded. Back locally, in the project root, create a file named .gitlab-ci.yml.
Inside the .gitlab-ci.yml file, add the following content:
# do not use "latest" here, if you want this to work in the future
image: node:12.18-alpine

services:
  - docker:19.03.13-dind

# global cache (apply for all jobs in all stages)
cache:
  key: ${CI_COMMIT_REF_SLUG} # only apply for current branch
  paths:
  - node_modules/

stages:
  - install
  - linting

# install npm dependencies so it'll be cache in subsequent jobs
# note: we can't do this in linting stage as in that stage, 2 jobs run concurrently and both need node_modules
install_dependencies:
  stage: install
  script:
    - npm install

# this job make sure commit message is conventional
lint-commit-msg:
  stage: linting
  script:
    - echo "$CI_COMMIT_MESSAGE" | npx commitlint

# this job make sure code is linted
lint-code:
  stage: linting
  script:
    - npm run lint
Let’s dive into what our CICD pipeline consists of:
- Firstly, we have the image
node:12.18-alpine. This is the environment where our code runs. It comes with NodeJS version 12.18 pre-installed on the Alpine Linux distribution. - Next, we have
service: docker:dind. Since Gitlab Runner creates a Docker environment, there's another environment inside it from the imagenode:12.18-alpinewhere our job executes. That's why we needdocker:dind(dind = Docker-in-Docker). - Then, we cache the
node_modulesfolder. This is because we have two jobs: one to run CommitLint and the other for Eslint. Both need to runnpm install, and since it's time-consuming, we created a preliminary job calledinstall_dependencies. Thenode_modulesfolder is cached so that both subsequent jobs can use it for faster execution. - As for the tasks
lint-commit-msgandlint-code, the code speaks for itself. Take a look for details 😉
Now, let’s commit and push the code to see the outcome:
git add .
git commit -m "ci: add CICD pipeline"
git push origin master
Afterwards, revisit your Gitlab repo, refresh and pay attention to the red box:
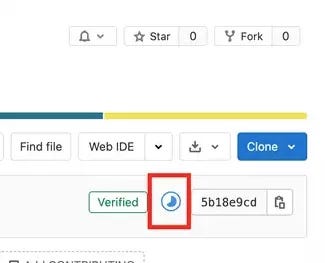
This means our pipeline has started. Clicking on it, you’ll see the following jobs:
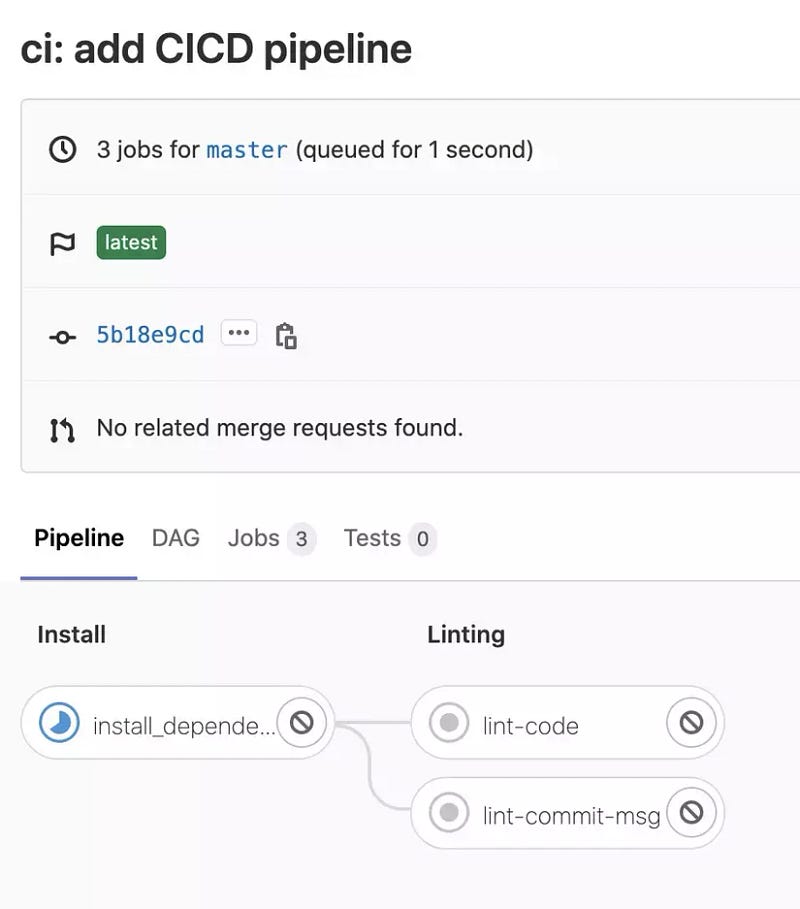
You can click on each job to view its real-time logs.
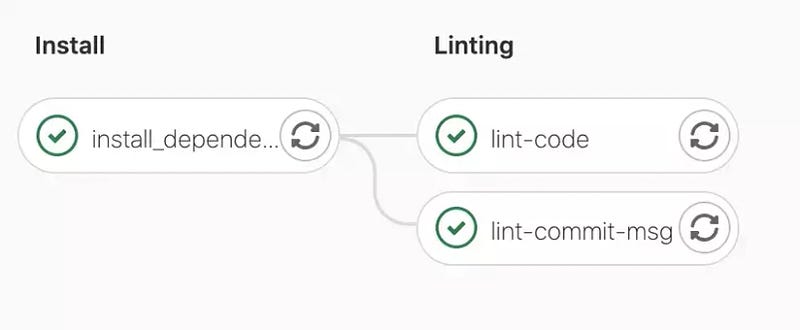
Wait for a few minutes, refresh, and if you see all green checks ✅, it means success 😄:
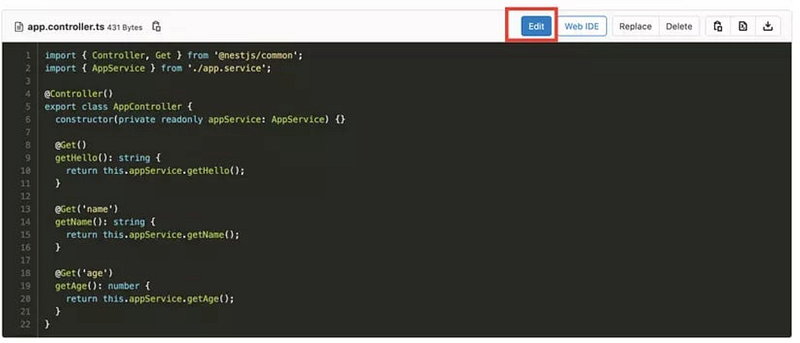
Now, let’s try creating a commit directly from the Gitlab interface by modifying any file content to trigger an Eslint error.
In the Gitlab repo interface, open the file app.controller.ts and click Edit:
Make the following modification (I’ve commented on the line):
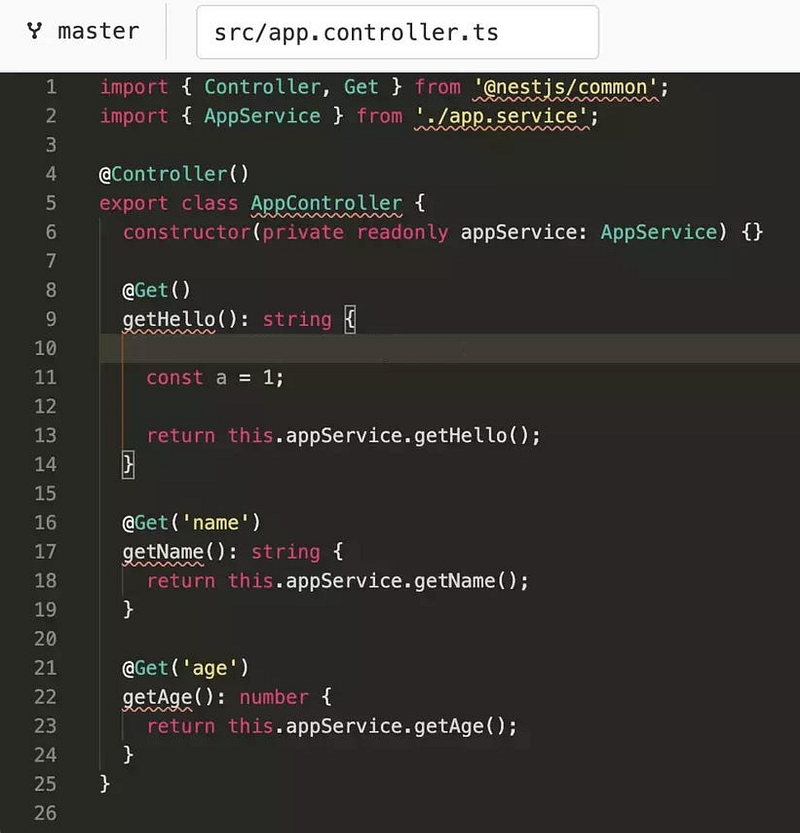
As you see, we added a variable a without using it. Initially, we set an Eslint rule that would flag this as an error 🚫. Running npm run lint will fail if any declared variable is unused.
Below, in the commit message, input any random text and click Commit changes:
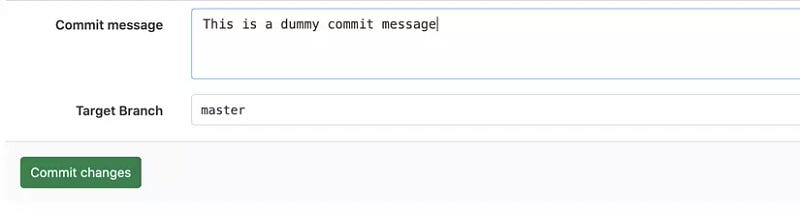
Returning to the main repo page, you’ll notice the pipeline has started. After waiting for a few minutes, the results will be:
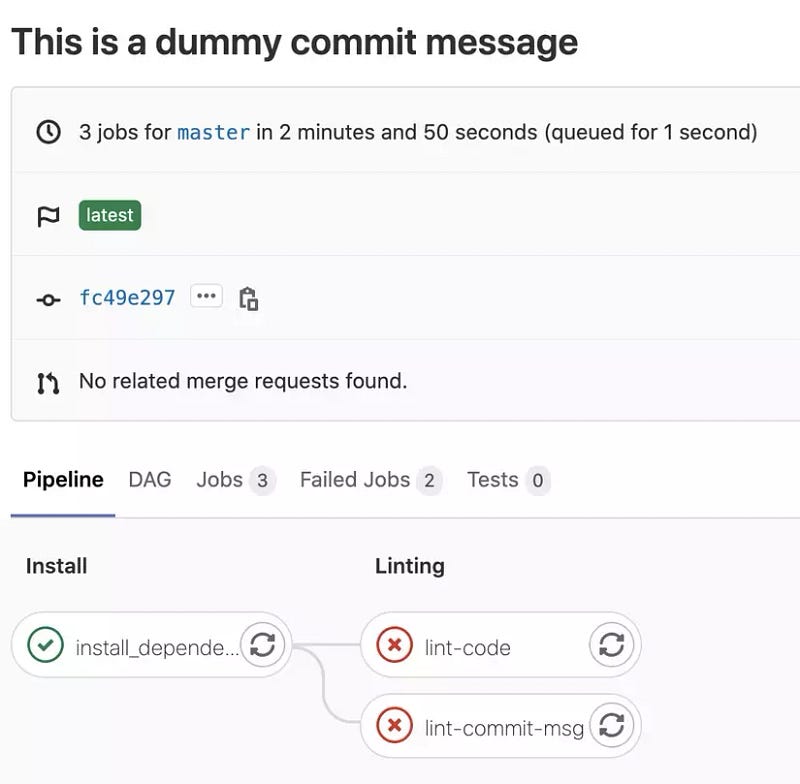
Just as expected, Eslint failed the code check, and CommitLint failed the commit message check 😎😎.
With some straightforward setups, we’ve integrated Gitlab CI to perform final checks whenever code is committed to the main repo.
Though this method doesn’t prevent faulty code from being committed (since CICD runs after the code is committed), we can immediately identify when the CICD pipeline reports a failure, prompting a review of the erroneous sections. Remember, Gitlab sends an email every time a pipeline fails.
Conclusion
In this article, we’ve explored effective tools to ensure clean code, avoid potential errors, and maintain consistency as per our defined standards. CommitLint further enforces standardized commits, aiding code reviews, history checks, and future CHANGELOG generation.
Implementing these standards is crucial to ensure everyone in the team is “on the same page” 🤣🤣. And the larger the team, the more rigorous these standards need to be to avoid ending up with a messy project that’s all over the place 😉.
Adhering to these coding and committing standards helps instill a habit of mindful commit messaging and clean coding. This aids in early error detection and fixing during the coding process. Thus, enhancing efficiency and productivity day by day 🚀🚀.
Thanks for following along. If you have questions, drop them in the comments below. Looking forward to our next discussion ^^.
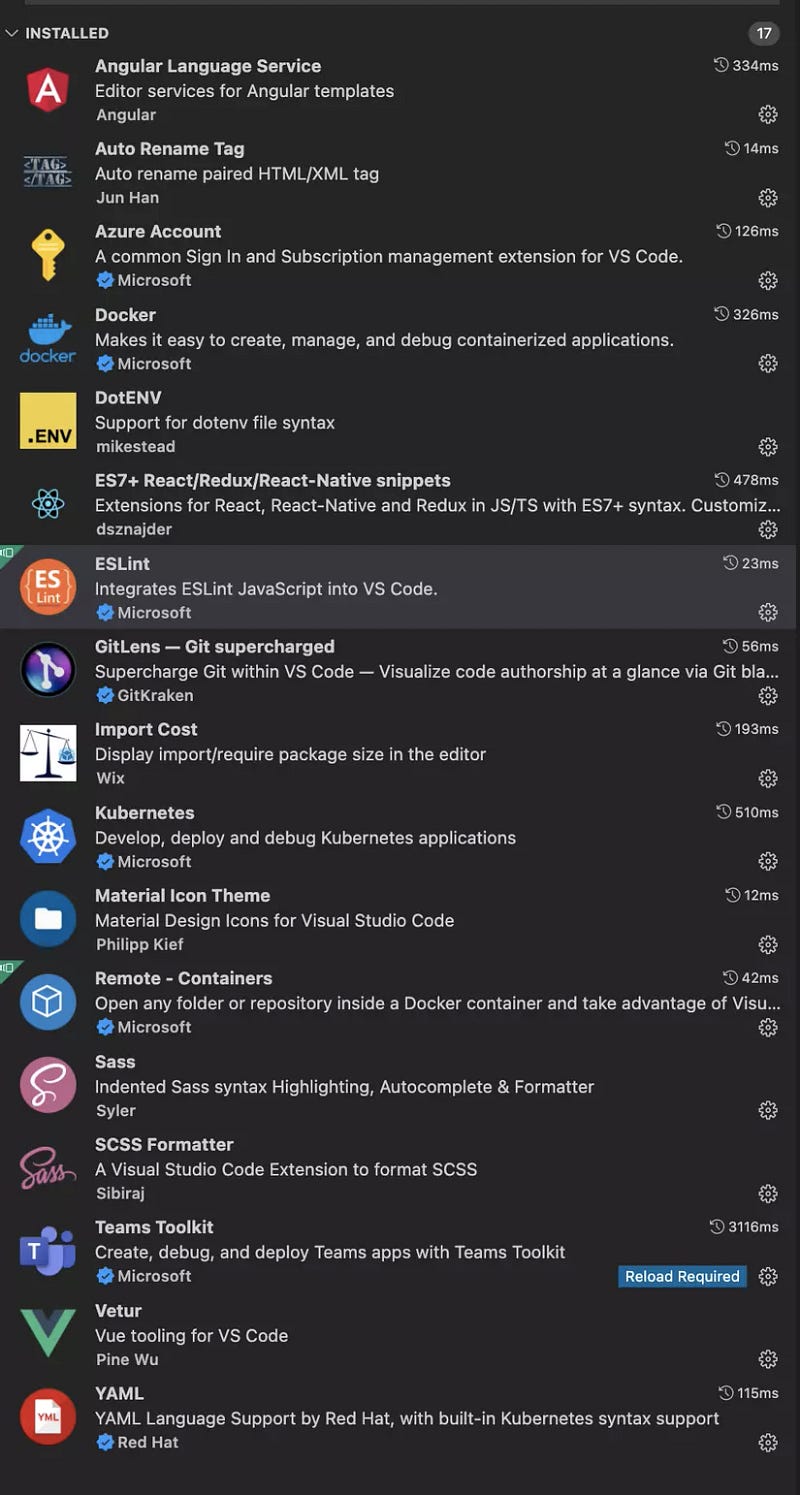
Bonus
Below is a list of my favorite VSCode Extensions. I’ve been using them for quite a while, and they’ve supported me across various platforms: React, Angular, Vue, SCSS, Docker, Kubernetes, and more.
Stackademic
Thank you for reading until the end. Before you go:
- Please consider clapping and following the writer! 👏
- Follow us on Twitter(X), LinkedIn, and YouTube.
- Visit Stackademic.com to find out more about how we are democratizing free programming education around the world.