
Unity: Introduction to Shaders for Beginners
Shaders are one of the most important parts of graphical visualization. In the most simple terms, they are scripts that allow you to use math to determine the color of each pixel rendered. However, as we look closer at shaders we realize how complex they can get and how much freedom they allow the developer. Understanding how to utilize shaders is akin to unlocking a new super power within the Unity engine and to attribute only pixel color to what they can do would be a massive underestimate of their potential.
This article will be a brief introduction into the terminology to get you ready for learning how to create and utilize shaders.
The Shader Pipeline
First and foremost, it’s important to understand that everything happening in a shader is happening in the GPU and not the CPU. When we normally code things, they are loaded into RAM and then use the CPU resources to run. So when you experience lag after trying to run 500 physics based zombies, it’s your CPU that is being bogged down.
This leads directly into the superpower I mentioned earlier. By understanding how to utilize shaders, you can tap into both the CPU and the GPU of a device which can result in very compute intensive operations being possible, aka Compute Shaders. But this article isn’t going to go any further into that subject so lets get back to it.
The shader pipeline is the collection of steps that encompass what the input data needs to go through before the device’s video card renders it. You can think of it as the necessary steps needed before the shader can be finished. Each step handles a very specific task and can be modified or even replaced with custom code.
A simple render pipeline would consist of the following steps:
- Input Assembler: This step takes all the mesh data, vertex positions, UVs, and normals to be assembled and prepped for the next step
- Vertex Shader: This is where you can modify the shape of the object. This happens by taking each vertex and outputting a modified version of it.
- Culling: This step allows you to determine if any portions of the object need to be or not be rendered. Examples of this would be when you accidentally get inside an object in a video game and realize you can see right through it. That is because the backside is culled to save resources. Conversely, when dealing with glass or a window, you would be required to render both sides.
- Rasterizer: This step takes the now modified and visible geometry and converts it to pixels.
- Fragment Shader: During this step, it will take the rasterized pixels and determine what color each pixel should be. This can be as simple as setting all the pixels to one color or as complicated as creating a hologram effect.
- Depth Testing: This step takes each pixel and determines its depth from each other to be sure that the pixels closest to the camera render on top of the pixels further away. This is where you can create effects like being able to see through an object.
- Blending: Within this step the pixels are blended together.
This all leads to what is called the back-buffer. The back-buffer is the final stage where the shader sends the final image to the video card to be drawn. This image is not shown to the user until it is finished, which it is then transferred to the front-buffer.
A Brief Discussion About Render Pipelines in Unity
If you have worked with Unity in the past you may have seen that Unity utilizes different SRPs, scriptable render pipelines. This can sometimes lead to multiple posts and discussion forums on which to use and why. I just wanted to have a quick spot in this article to say that you can use shaders in the Built-in Render Pipeline(BiRP), Universal Render Pipeline(URP), and the High Definition Render Pipeline(HDRP). As of version 2021.3 you can now also use the visual shader graph within all of the render pipelines listed above.
Unity also supplies you with standard shaders for each pipeline. In URP for example, Unity supplies you with the Lit shader, Simple Lit shader, and Unlit shader. When creating shaders, sometimes it’s easier to simply create a shader based off an already made Unity shader. This is especially true when starting off. So lets take a quick moment to break down the use case of each of the three URP shaders that Unity gives us.
- Lit: This shader is the replacement of the BiRP Standard Lit shader and supports normal mapping, occlusion, metallic/specular, and transparency. This shader is useful for creating realistic physics materials like wood, rubber, metal, or even skin.
- Simple Lit: Similar to Lit, this shader replaced the BiRP Mobile/Diffuse shader and is a lighter version of the Lit shader. This one is useful for when you don’t need realistic lighting effects or require a lighter weight shader.
- Unlit: This shader is the most performant of the three but does not allow any lighting effects or shadows. You can, however, bake shadows into the texture but this cannot be done at runtime. This shader is great for computer or tv screens that wouldn’t receive shadows because the emit light and shouldn’t be affected by being in a dark room.
There are other shaders like Unity Terrain specific shaders but these three are going to be the most prevalent for a beginner to start working with.
A Brief Breakdown of Lighting and PBR
I’m not going to go too much in-depth into this topic as it’s something that is nice to know but not required to use and create shaders. When talking strictly about graphics, one problem that needed a solution was how to handle lighting. More specifically how to simulate lighting with the goal of photorealism.
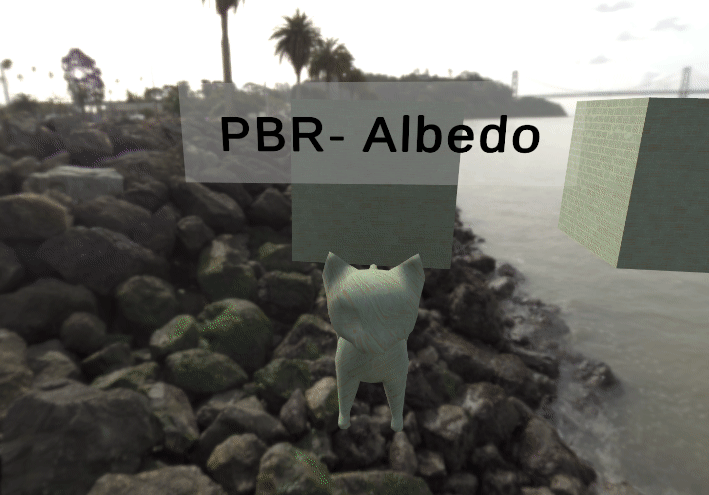
Currently we have what are called PBRs, or physically-based rendering. This is a type of shader that focuses on seven key topics. When you create a Lit shader in URP, you are creating a PBR shader. But before we break down the seven parts of a PBR shader, lets just quickly mention some other ways that lighting simulation can be done.
Lighting Models
There are three famous lighting models that you may just want to keep in the back of your mind.
- Lambert Lighting Model
- Phong Lighting Model
- Blinn-Phong Lighting Model
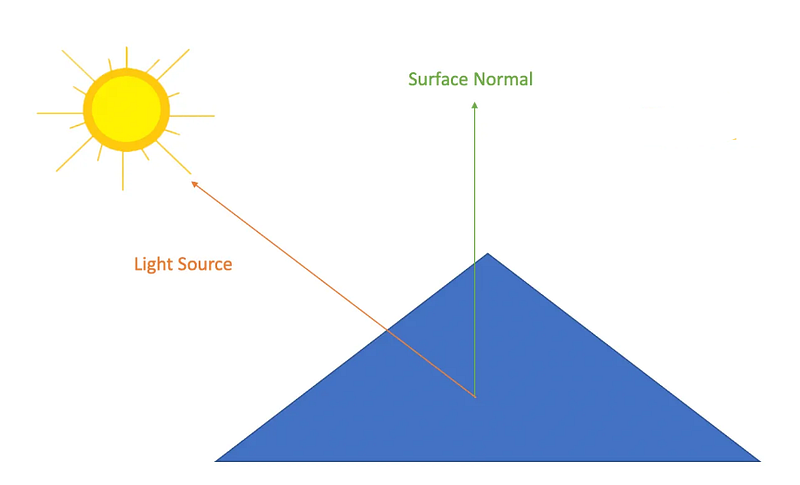
The Lambert Lighting Model is the simplest out of the three. It was developed in 1760 and it only focuses on the direction of the of the face of an object and the direction of the light source. This model does not take the viewer into account. This model can be made into a mathematical calculation. Intensity = NormalVector.LightVector * Color * Strength
The Lambert Lighting Model was really good at creating simple diffuse lighting, however the problem with this lighting model was that it since it didn’t take into account the user’s viewing angle it did not allow specular reflection. This is where the Phong Lighting Model comes into play.
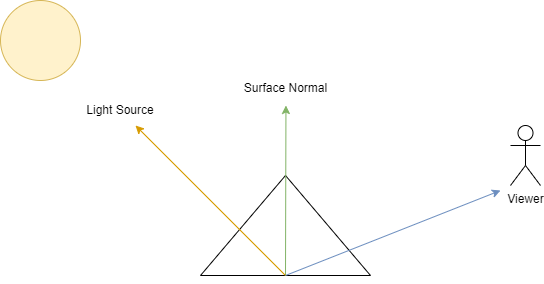
The Phong Lighting Model uses reflection vectors between the object and the viewer to simulate the amount of light that would be reflected back from the light source.
This calculation required a cosine calculation on the angles of reflection and became very resource heavy to accomplish but was considered the better model compared to the Lambert Lighting Model.
Lastly, the updated Blinn-Phong Lighting Model takes the Phong Lighting model and makes it more performant. This updated model uses a halfway vector which sits halfway between the lighting source vector and the viewer vector to lower the amount of calculations. This model thus made specular reflection possible at a much lower resource cost.

So that is the history, now lets look at how PBR takes all that to the next level. PBR is a much more complicated approach but results in much more photo realistic results and is usually what you will see in AA and AAA games. As mentioned earlier, PBR focuses on seven different topics which are the following:
- Reflection: Accomplished by drawing rays from the viewer to the reflective surface and then calculating where it bounces off. This is the reverse calculation of lighting.
- Diffuse: How color and light are distributed across the surface with consideration to what light is absorbed and what light is reflected.
- Translucency/Transparency: How light can move through objects and render them fully or partially see through.
- Conservation of Energy: The concept that ensures objects never reflect more light than they receive.
- Metallicity: The interactions of light on shiny surfaces.
- Fresnel Reflectivity: How reflections on a curved surface become stronger on the edges.
- Sub Surface Scattering: How surfaces have grooves or cracks that can refract the light at different angles.
Conclusion
I know that was a LOT of information, but you can always come back if you ever need a refresher. This article only scratches the surface of what shaders are and can do but it hopefully gave you a friendly introduction to them as a concept. Once you start working with shaders, you will realize how much of a game changer they are!
The Author
If you would like to support me so that I can continue putting out articles and videos please consider becoming a member. If you would like to give a more direct donation, feel free to buy me a coffee Ko-Fi/MikeQ. If you have any questions, complaints, or funny jokes, be sure to throw them in the comments.
Want to know more about me? Feel free to checkout my latest interview with BadVR or connect with me on LinkedIn.