
Ultimate Guide to API Integration in Flutter using Retrofit

Introduction
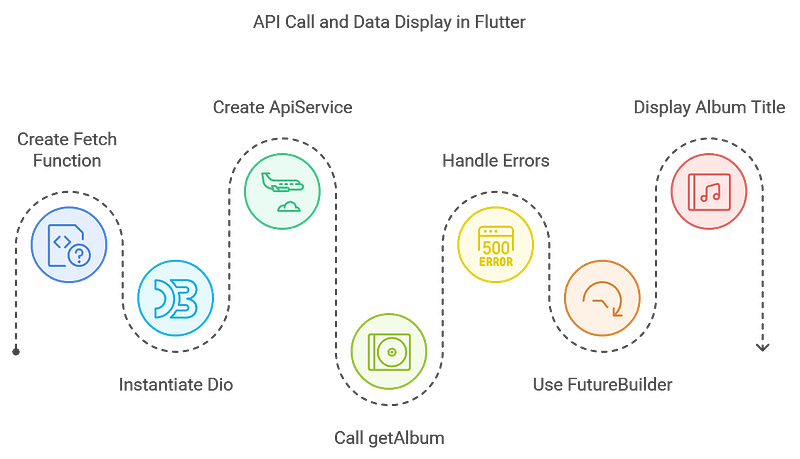
Using HTTP Network Requests developers can easily connect an application to a remote server and interact with data of an API in the process of application development. As a senior Flutter developer, I also use Retrofit to deal with Flutter's APIs. The Square company gives retrofit as a library typical for the Android environment that makes it easy and convenient to send network requests and work with REST APIs. At the beginning of using this library in the project, it was developed primarily for working with Java and Kotlin, but recently its application has become widespread with Flutters. In this subsequent tutorial, let me show you how to include Retrofit in a Flutter application for handling the requests.
Why Retrofit?
Retrofit helps support requests by offering a format on how to format and make requests over the network which reduces most of the unnecessary codes as seen in HTTP requests. According to Retrofit, developers can declare API interfaces, serialization, and network error control which makes Retrofit the most suitable option for the Flutter developer. Here are some key benefits of using Retrofit in Flutter:
- Simplified API calls with fewer lines of code.
- Automatic serialization and deserialization of JSON data.
- Improved maintainability, with each endpoint defined in a single location.
- Easy integration with Dio, another popular HTTP client for Flutter.

Setting Up Retrofit in Flutter
To get started, let’s add the necessary dependencies to our Flutter project. Retrofit requires a few packages to handle HTTP requests and serialization efficiently.
1. Add the Packages
Open your pubspec.yaml file and add these dependencies:
dependencies:
  dio: ^4.0.0
  retrofit: ^2.0.0
  json_annotation: ^4.0.0
dev_dependencies:
  retrofit_generator: ^2.0.0
  build_runner: ^2.0.0
  json_serializable: ^6.0.0
2. Run flutter pub get
This command will download and install the packages. We’re ready to create our Flutter project and set up a model class to map the JSON response from our API.

Creating a Model Class
In any API integration, a model class represents the data structure of the API response. This class enables easy serialization and deserialization of JSON data. In this tutorial, I’ll use a sample API that returns three key-value pairs: userId, id, and title.
- Define the Model
Create a Dart file called
album.dartand define the model classAlbum:
import 'package:json_annotation/json_annotation.dart';

part 'album.g.dart';

@JsonSerializable()
class Album {
  final int userId;
  final int id;
  final String title;

  Album({required this.userId, required this.id, required this.title});

  factory Album.fromJson(Map<String, dynamic> json) => _$AlbumFromJson(json);
  Map<String, dynamic> toJson() => _$AlbumToJson(this);
}Explanation:
@JsonSerializable()is an annotation that tells the generator to create a serialization code for this model.Album.fromJsonmaps JSON data to theAlbumclass fields.Album.toJsonserializes class data back to JSON format.part 'album.g.dart';is a directive that indicates this class has generated code for serialization.
2. Generate the Model Code Run the following command to generate the JSON serialization code:
flutter pub run build_runner build
This command create album.g.dart, which contains the generated serialization code.

Setting Up API Service with Retrofit
Now, let’s create the core part of our project: the API service.
1. Create API Service File
Create a new file called api_service.dart. This file will define our HTTP configuration and set up API endpoints using Retrofit and Dio.
2. Define the API Client
Here’s how to configure the API client in api_service.dart:
import 'package:dio/dio.dart';
import 'package:retrofit/retrofit.dart';
import 'album.dart';

part 'api_service.g.dart';

@RestApi(baseUrl: "https://jsonplaceholder.typicode.com/")
abstract class ApiService {
  factory ApiService(Dio dio, {String baseUrl}) = _ApiService;

  @GET("/albums/1")
  Future<Album> getAlbum();
}Explanation:
@RestApi(baseUrl: "https://jsonplaceholder.typicode.com/")sets the base URL for all API requests.ApiServiceis an abstract class that defines the API client.getAlbum()is an endpoint method decorated with@GET("/albums/1"), specifying that this is a GET request. This method returns anAlbumobject.
3. Generate the API Client Code Run the following command:
flutter pub run build_runner build
This command generates api_service.g.dart, containing the code for making HTTP requests.

Making an API Call in Flutter
Now that we’ve set up our API service, we can create a function to call the API and fetch data.
1. Create a Fetch Function
In your main code file, create a function called fetchAlbum to call the API endpoint:
import 'package:dio/dio.dart';
import 'api_service.dart';
import 'album.dart';

Future<Album> fetchAlbum() async {
  final dio = Dio();
  final client = ApiService(dio);

  try {
    final album = await client.getAlbum();
    print("Album ID: ${album.id}, Title: ${album.title}");
    return album;
  } catch (e) {
    throw Exception("Failed to fetch album: $e");
  }
}Explanation:
ApiService(dio)creates an instance of the API client.client.getAlbum()fetches the album data.try-catchhandles errors gracefully, throwing an exception if the request fails.
2. Display Data in UI
Now, let’s bind this data to the UI. In a Flutter project, we can display data using widgets like FutureBuilder to handle asynchronous data fetching.
3. Using FutureBuilder
Here’s an example of using FutureBuilder in your widget tree to show the album title:
import 'package:flutter/material.dart';

class AlbumScreen extends StatelessWidget {
  @override
  Widget build(BuildContext context) {
    return Scaffold(
      appBar: AppBar(title: Text("Album")),
      body: Center(
        child: FutureBuilder<Album>(
          future: fetchAlbum(),
          builder: (context, snapshot) {
            if (snapshot.connectionState == ConnectionState.waiting) {
              return CircularProgressIndicator();
            } else if (snapshot.hasError) {
              return Text("Error: ${snapshot.error}");
            } else if (snapshot.hasData) {
              final album = snapshot.data!;
              return Text("Title: ${album.title}");
            } else {
              return Text("No data available");
            }
          },
        ),
      ),
    );
  }
}
Benefits of Retrofit in Flutter
Using Retrofit provides several advantages when making HTTP requests in Flutter:
- Reduced Boilerplate Code: Retrofit minimizes the amount of code required for network requests, focusing on defining endpoints and handling responses.
- Error Handling: Retrofit integrates easily with Dio’s advanced error-handling features.
- Improved Readability: Organizing endpoints in a centralized API service makes code more readable and maintainable.

Conclusion
Retrofit flattens complex flutter code to make network requests simpler, organized, and easily readable when integrating API. When you want to implement API calls in the Flutter app, Retrofit has been seen to let you focus on app features or UI in just a few steps. Following this guide, the reader has all the steps and code required to start applying Retrofit in Flutter projects.
Stackademic 🎓
Thank you for reading until the end. Before you go:
- Please consider clapping and following the writer! 👏
- Follow us X | LinkedIn | YouTube | Discord | Newsletter | Podcast
- Create a free AI-powered blog on Differ.
- More content at Stackademic.com


