
UAV Image Preprocessing with Agisoft Metashape
Capturing images with a UAV (unmanned aerial vehicle) is all fun and games until you need to start working on image preprocessing. I wrote some articles on drone autopilot for data collection, and now in this article, I’ll tell you about image preprocessing. If you have multiple images with overlaps taken with UAVs like drones and you want to merge them all into a single image, you can do that with Agisoft Metashape Professional. With its advanced algorithms, it can automatically align images, generate dense point clouds, and create high-quality 3D models, meshes, and orthomosaics. And it is so easy that you are just one click away from exporting an outstanding processed image.
Agisoft Metashape is an advanced photogrammetry software that enables users to process high-quality images captured by UAVs and create precise 3D models, point clouds, and orthomosaics. Before using Agisoft Metashape for drone images, it’s crucial to capture a series of overlapping images using a UAV like a drone, ensuring there is enough overlap (usually 70–80%) between the images to accurately stitch them together. Once you have captured the required images, you can import them into Agisoft Metashape, where the software aligns and matches the images, generating a dense point cloud and creating a mesh with a few clicks. Additionally, you can create a textured mesh using the software and generate an orthomosaic image that accurately reflects the topography of the captured terrain.
Agisoft Metashape is widely used in fields such as surveying, architecture, archaeology, and engineering. It is a powerful tool for creating high-quality 3D models from drone images, and can be used for a wide range of applications, from creating maps to inspecting infrastructure.
It is paid software with two editions: standard and professional. The professional edition is comparatively expensive, but the features in the standard edition can do the job as well. If you are using it for research or other educational purposes, you can get the education license standard edition for $59 from here.
Instructions to use Agisoft Metashape
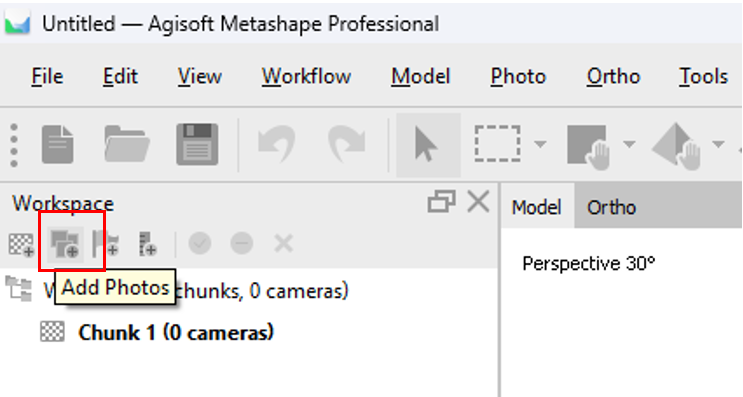
Click on the icon shown by the red rectangle in the image below to add images to the software.
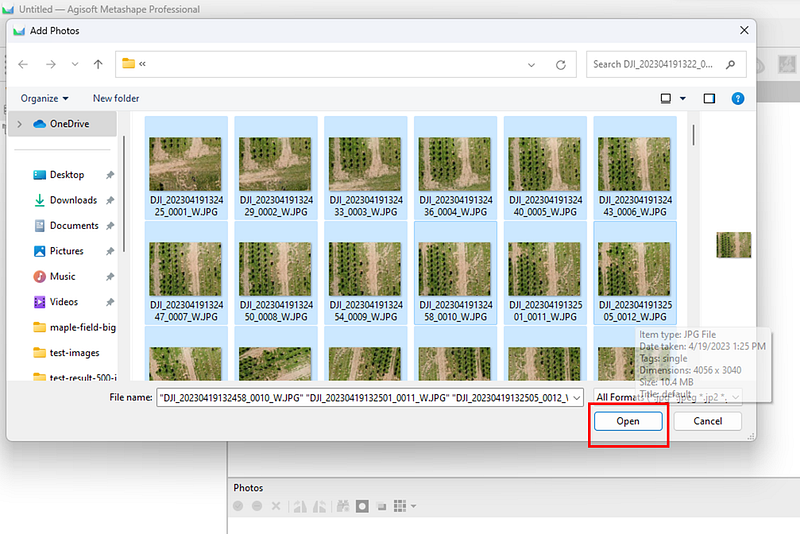
Select all images of the plot captured with the UAV and click on Open.
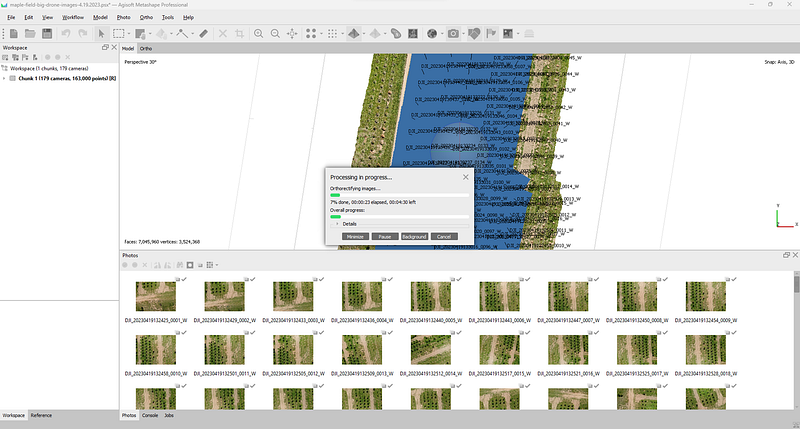
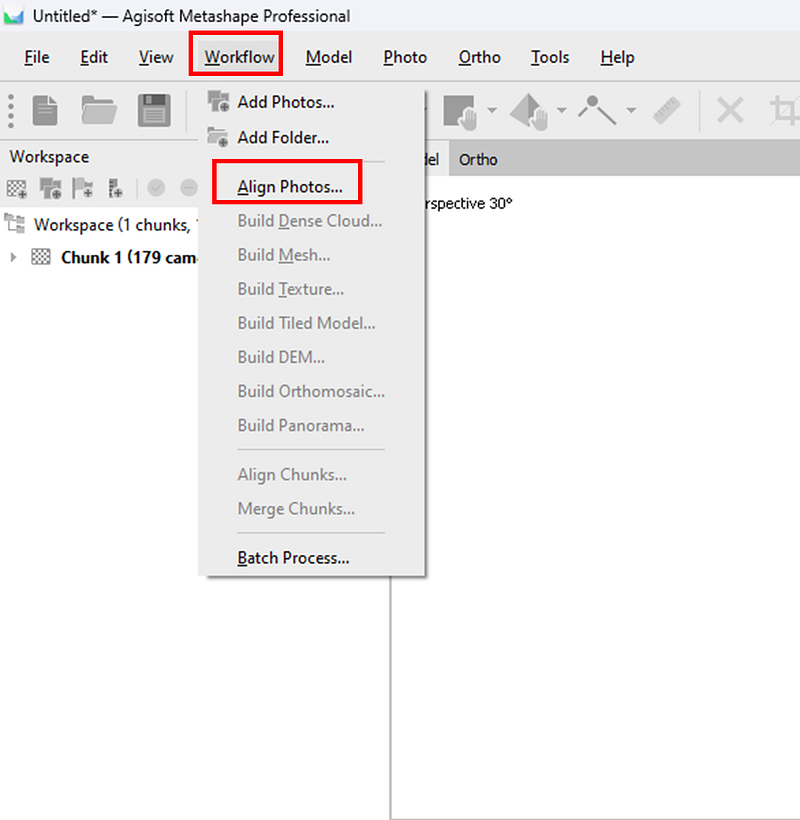
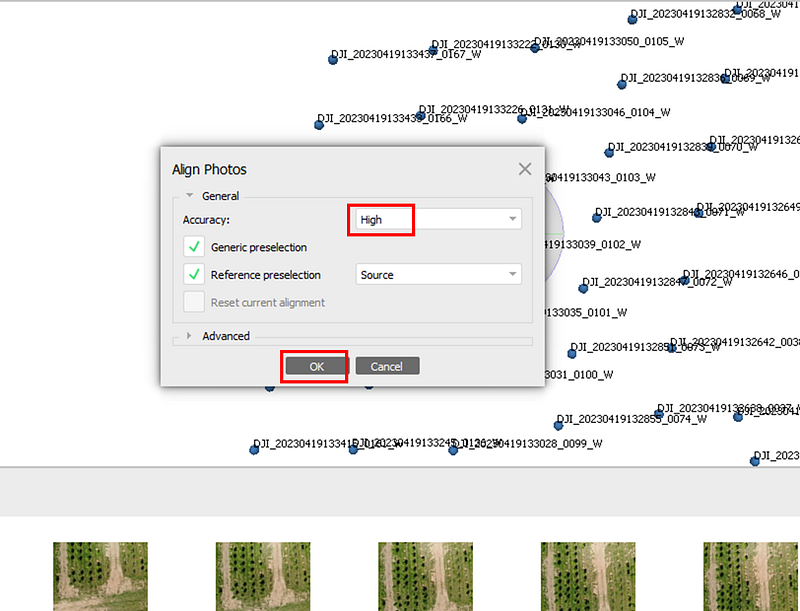
Click on Workflow and select Align Photos. This is the first step. The images will be aligned based on their coordinates.
Select High on Accuracy. Click on OK.
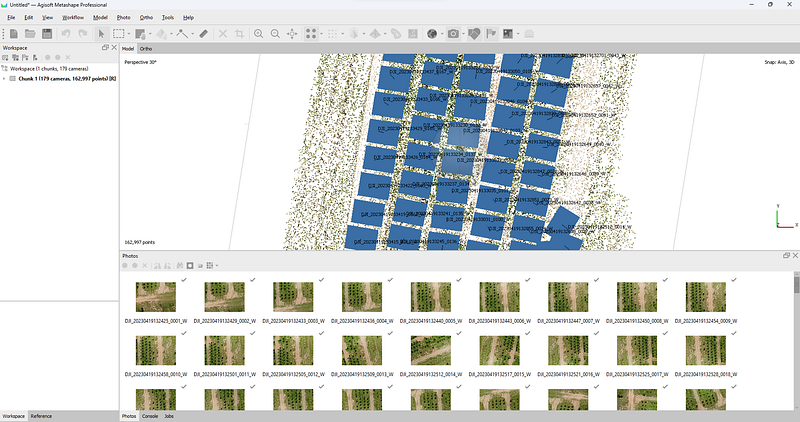
It will look like this once its done. You can see the images being aligned on the basis of their coordinates during capture.
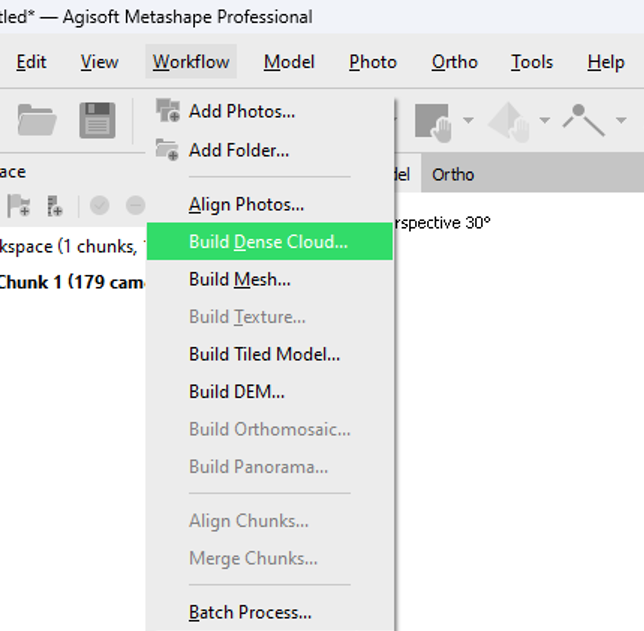
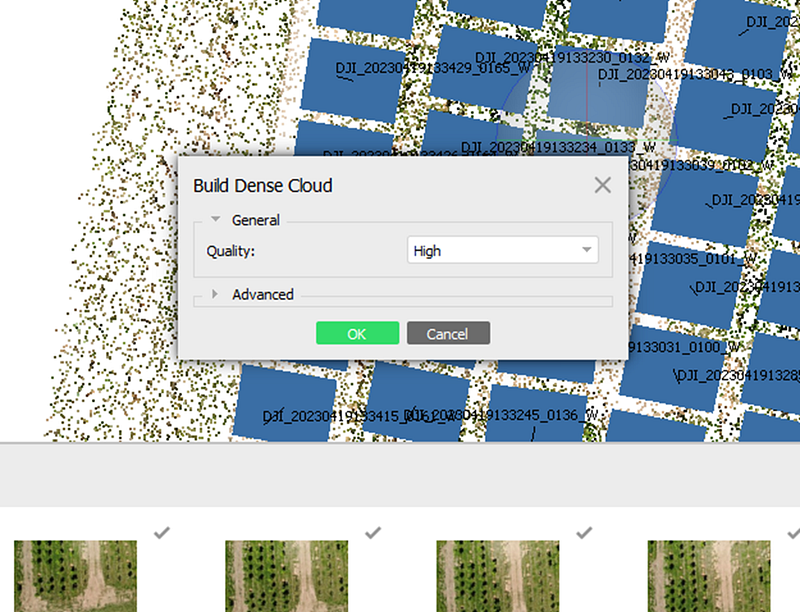
Second step is building dense cloud. Click on Workflow and click on Build Dense Cloud.
It is recommended to set the quality to High.
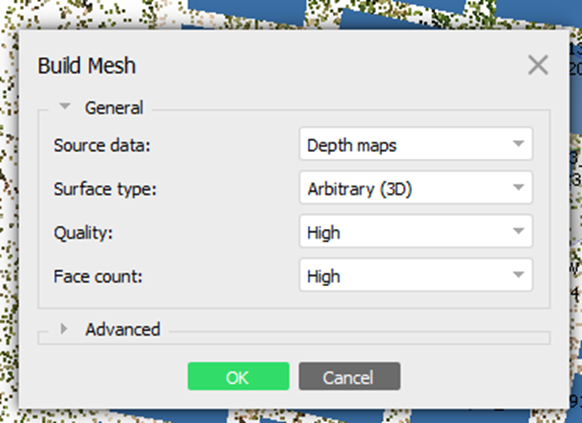
Third step is building mesh. Click on Workflow and then on Build Mesh.
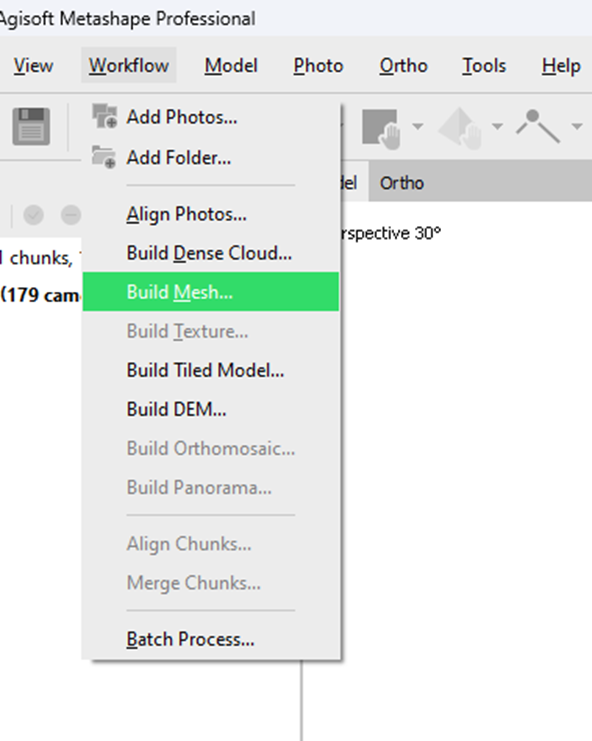
It is recommended to keep the Quality and Face Count to High.
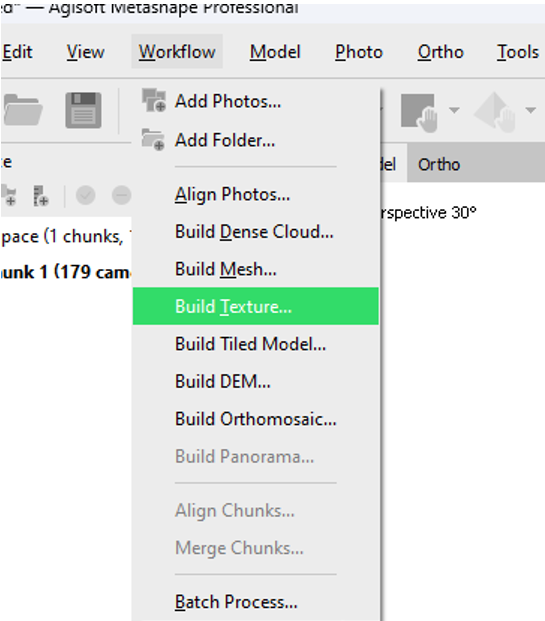
Fourth step is building texture. Click on Workflow and then on Build Texture.
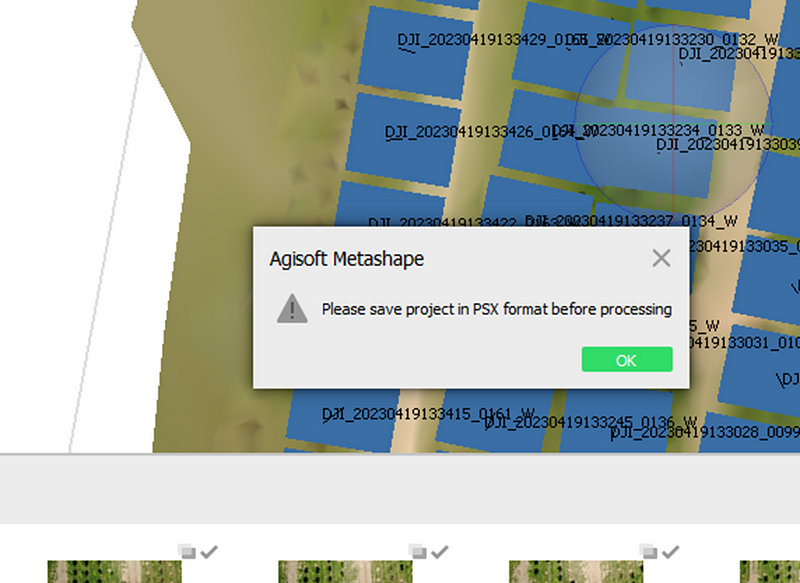
Now, you can click on Build Tiled Model, Build DEM and Build Orthomosaic, one step at a time, in the similar way. When you try to build DEM, you will be asked to save the project in PSX format before processing.
Click on File and then Save. Give the desired name and location. The project will be saved as a new folder in your desired location. All the exported images will be saved in that folder. Once you have built the orthomosaic, choose the appropriate export format from the Export drop-down menu in the Ortho pane. The most common format is GeoTIFF, but other formats are also available.
The final image will look something like this:
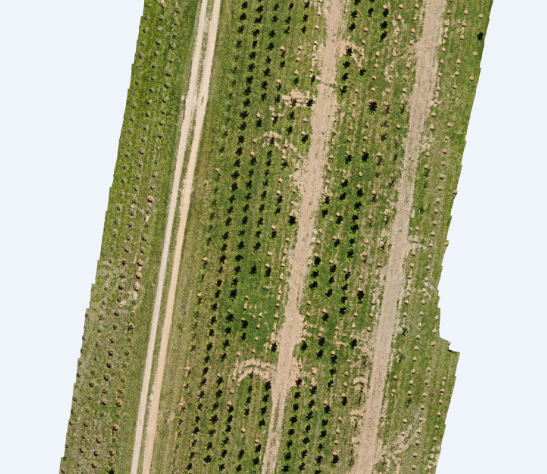
You can improve the quality of the image by flying the UAV at a low altitude and capturing images with high overlap. The exported images can be used to calculate the height of the objects in the frame. The software can be used for multiple things. I could not add other exported images because of the size limitation. I’ll be keeping you all updated about more features of the software in the upcoming articles!


