
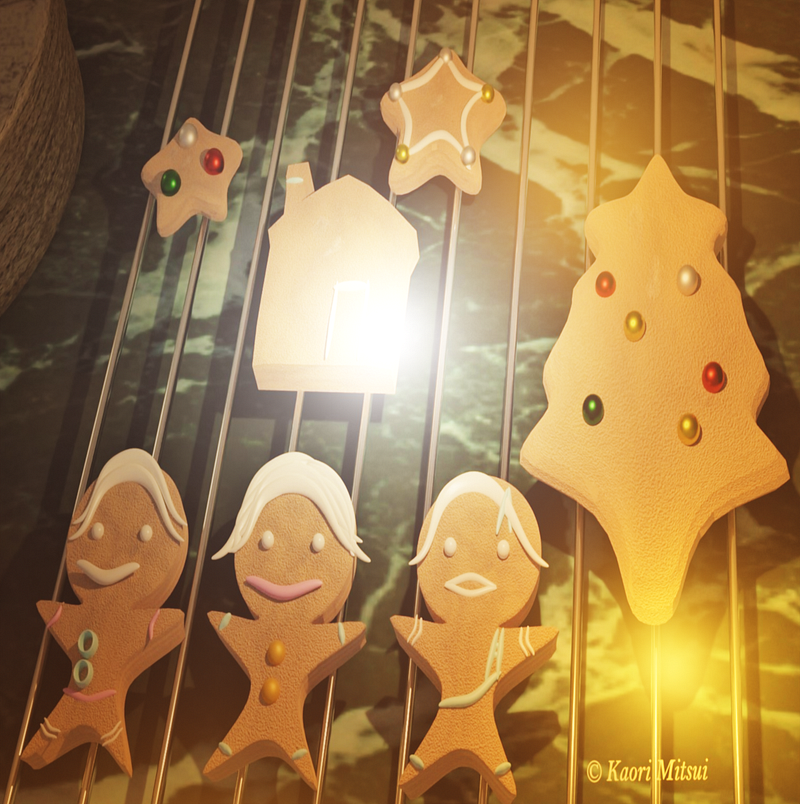
Two kids caught in the camera — How to use the light warmth in Blender
Use Blackbody Node
Some gingerbread cookies were missing.
Some cupcakes were also missing between the end of last year and the beginning of this year.
The worst thing was a spider hidden in the paper bag where precious foods were stored.
The careless acts must be the Kids.
Finally, the videotape was reviewed.
Which one of them?
The surveillance camera set in the kitchen area caught the actions.
The white and the orange flashlights
It was apparent.
A taller one had the white flashlight, and a shorter one had the other.
Culprits were caught in the camera!
They worked together and behaved like they didn’t know a thing afterward.
There were 10 Kids around the house during that time.
While reviewing the videotape, a sheet of paper was pulled out from the drawer and placed on the table — the list of their gifts from 2020. They found who were the sneaky ones.
The Two were the A and J.
And you know what happened to those two afterward after they came home.
They learned to apologize.
Their Time Outs — come back home by 5 p.m., no treats or sweets, relearn cleaning (their room, living room floor, and small places like everyone’s PC keyboards), help mom’s cooking for the next three months, and so on.
Both actually enjoyed helping with their mom’s cooking.
A and J felt their lax behaviors gradually descended and ceased.
Their grades and room teachers’ impressions of their behaviors at school meticulously improved.
So that was a story.
For the featured image, I used the image I created last year and added the flashlights.
Here is how I did:
Find the image I created before and attach it to a flattened cube.
Recap Attaching an Image:
  1) Add a Node called Image Texture,
  2) Select the image you want to use,
  3) Then connect to the Principled BSDF Node.
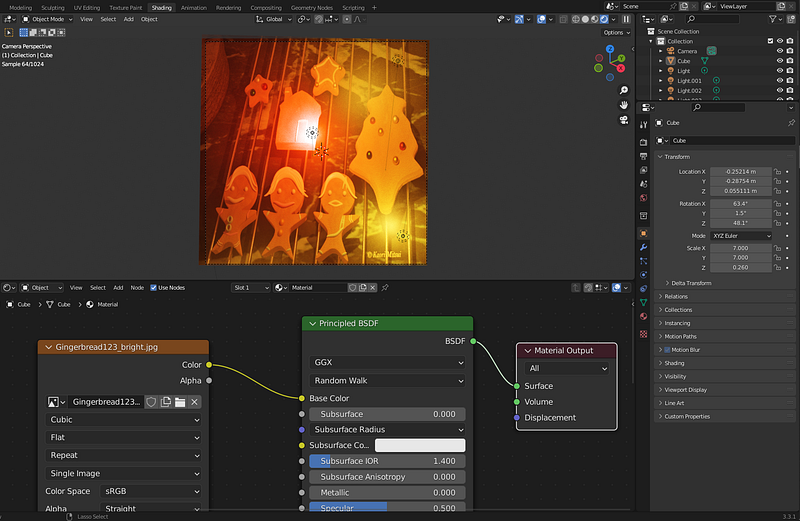
Unlike the image shown above, the image was cropped and didn’t reveal the whole after using Image Texture, so I added one more Node, Texture Coordinate (see below).
I then connected the Generated in the Texture Coordinate to the Image Texture Node.
Then I added two more lights.
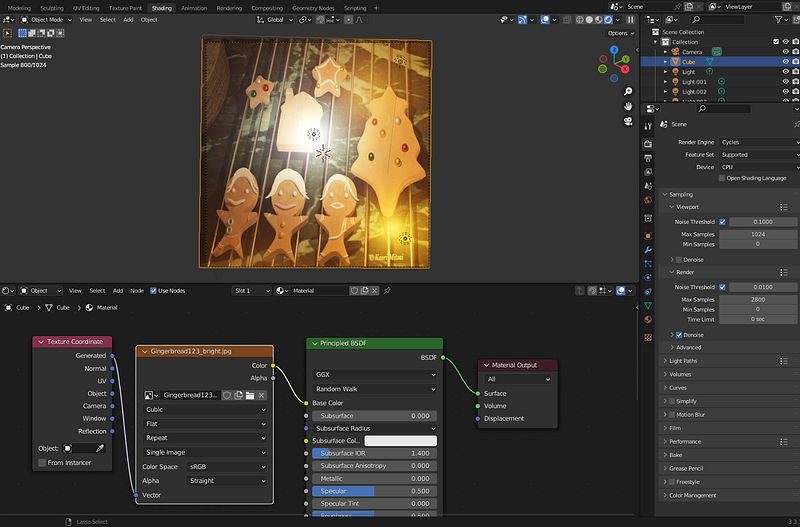
Render Properties — Render Engine — select Cycles
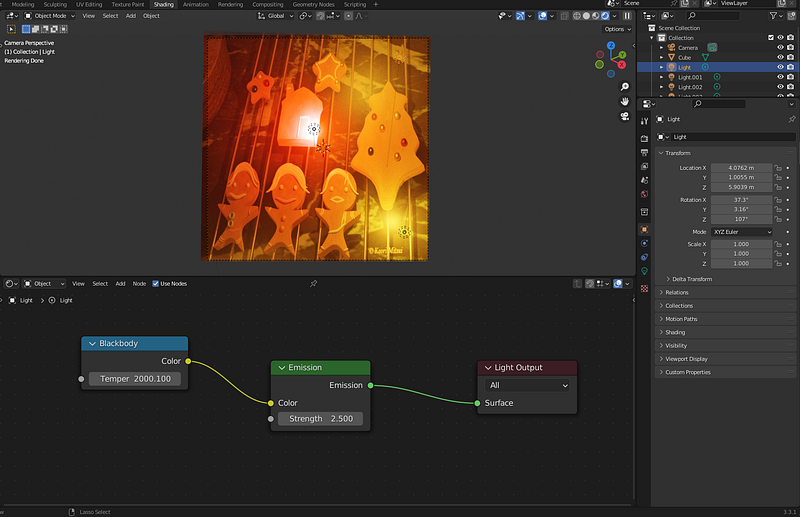
Light on the top
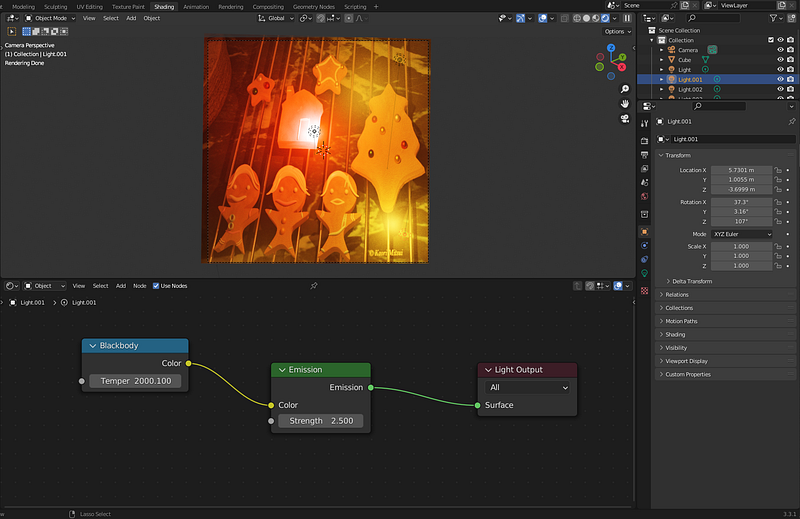
Light on the right bottom
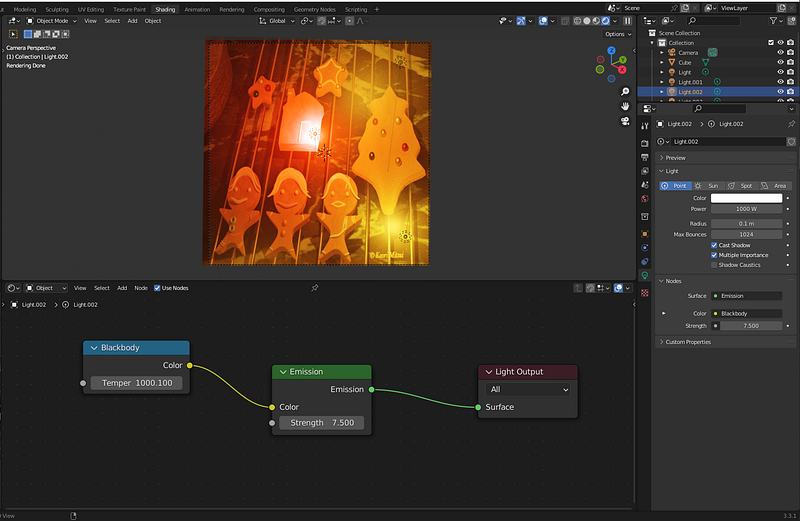
Light on the left side

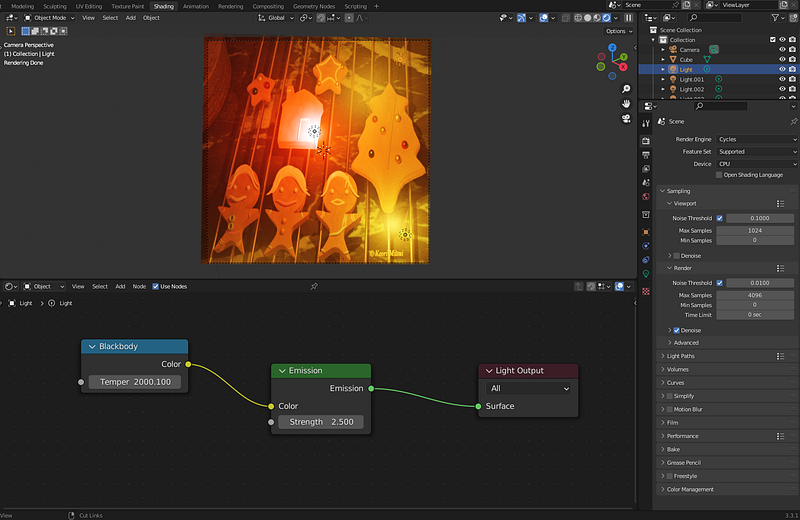
Add a Node, Blackbody. Note: At first I couldn’t use the Nodes function for the lights, so I changed the rendering engine from Evee to Cycles.
If the (temper) value is 1000, as you see above, it becomes reddish.
The type of all three Lights is Point (you can change it under the data object properties).
After changing the temperature value to 6000, it becomes white and brighter, leaving only the closer bottom light noticeable.

Summing-Up This Article
I wrote a flash fiction along with an image. I formed light warmth and modified it using Blender.
Using the Shading window (see the red circle on the top) to add an image on an object/Mesh, add new Nodes, and change the values of Nodes.
To add and search for a Node I want, I clicked Add (see the red circle right below the image).
When I wanted to add the Node, Blackbody, I had to change the rendering engine from Evee to Cycles by clicking a camera/microwave-like icon on the left (see the second top icon in the red circle on your right side).

Thank you for reading and listening!
Becoming a Medium member? Here is the link to support me and other writers with a portion of your membership fee.
If you enjoy writing using prompts, check this out. I made a web application, Writing Prompts & Tips. It offers free “Easy” and “Medium” difficulties.
I use Blender to create images for readers to spot differences. If you haven’t tried it, try it. See how many you can spot!