
Tutorial — How to install a node on Starknet with Docker in 10 minutes
We are going to attack again the node on starknet because my old tutorial has become obsolete. We don’t have any info on the rewards yet, but we do have a few days that would suggest that the token launch is not too far away. Because StarkNet’s ERC20 token contract is deployed on Ethereum.
Who am I

I am deeply enthusiastic about the blockchain industry and would love to share my knowledge and research with you through my articles. My goal is to offer unique perspectives and insights into the world of cryptocurrencies, including cutting-edge projects that are still in their infancy. Let’s explore together the exciting possibilities that blockchain technology can offer!
Discord: Akabane#3147
Telegram: @dr_jackal_Akabane (please join my group, I will answer all your questions in real time)
EN Official Announcement canal
FR Officiel canal d’annoncement
Read every story from Dr_jackal (and thousands of other writers on Medium)
Introduction to Starknet
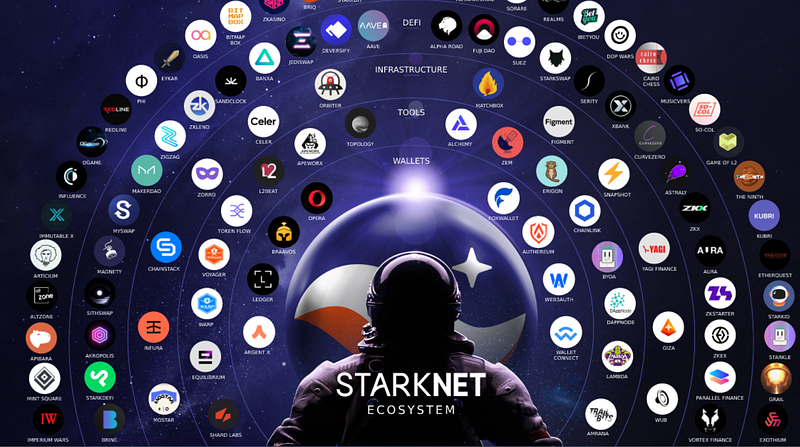
Their scaling solutions use STARK-based validity proofs to ensure an Ethereum-secure, fast and seamless user experience. They support a range of data availability modes.
StarkNet is a permissionless decentralized ZK-Rollup. It operates as an L2 network over Ethereum, enabling any dApp to achieve unlimited scale for its computation — without compromising Ethereum’s composability and security.
Using SHARP (SHARed Prover) technology, their solutions offer the same low marginal gas cost per transaction to all applications, regardless of their size.
EN Official Announcement canal
FR Officiel canal d’annoncement
Part 01: How order and configure your VPS server in 2 minutes (Choose VPS WITH ubuntu 20.04 with Docker)
Before installing the node you need to rent a VPS server The advantages of VPS are that they have high availability and are easy to configure. Of course I’ll explain how to rent a VPS server at a lower cost and especially how to configure it in less than 2 minutes.
Let’s go…
Order your VPS on Contabo by clicking here.
To be completely transparent with you this is an affiliate link that you can use even if you already have an account on Contabo. Thank you in advance.
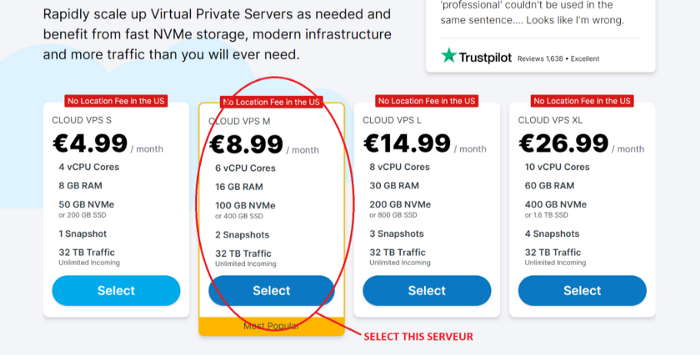
Select Cloud VPS M
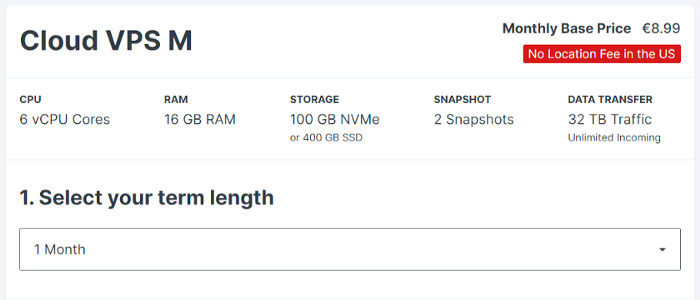
1 month for the rental period, you can extend later if needed
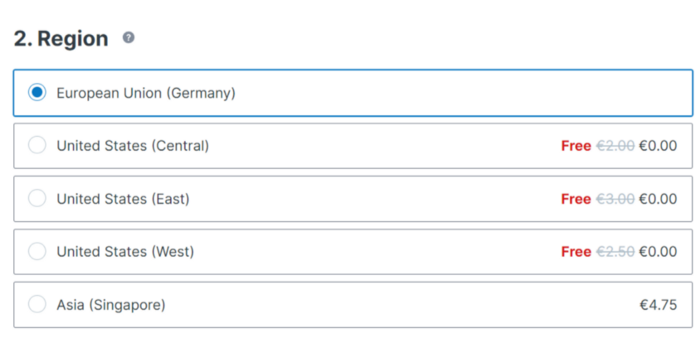
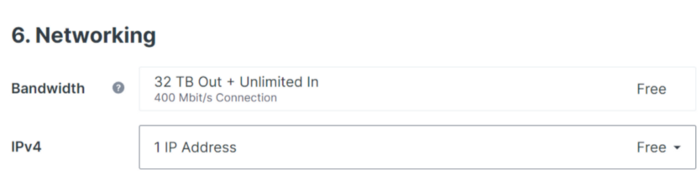
Do not change anything for the geolocation of your VPS server
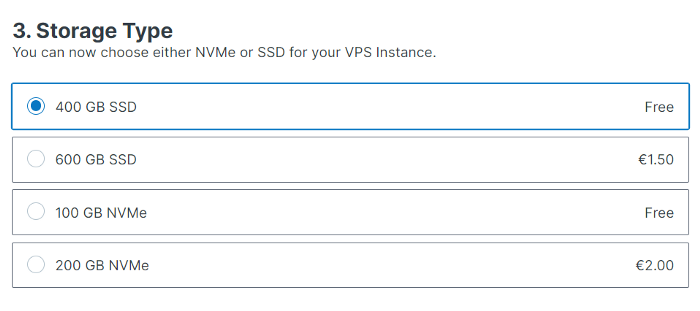
Select 400GB SSD for storage type
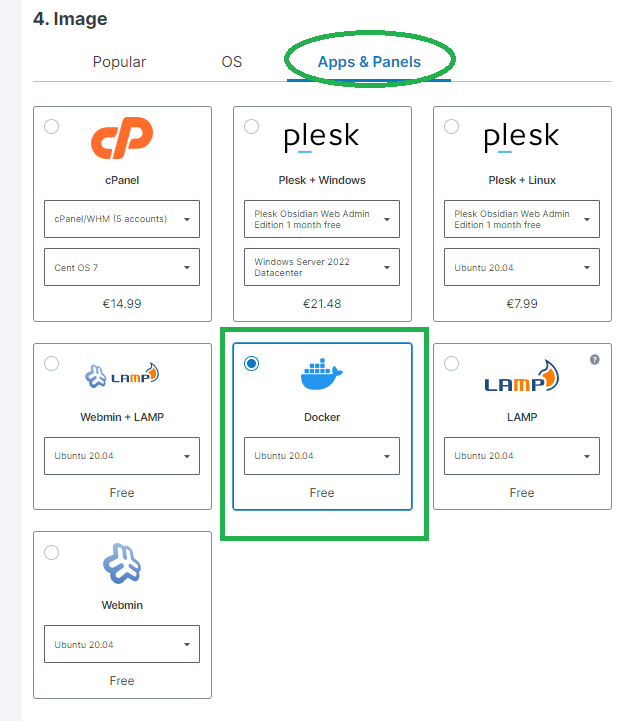
Select Docker With ubuntu 20.04
Select Ubuntu 20.04
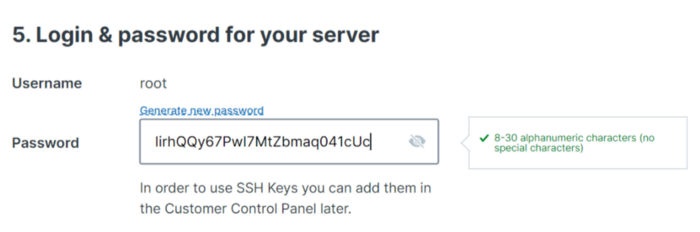
Generate your passport and copy and paste it now into a notepad that will be saved on your computer
Don’t touch anything
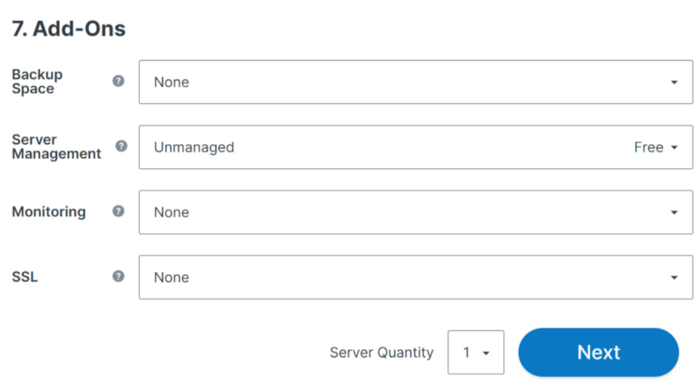
Don’t touch anything and click on “NEXT”
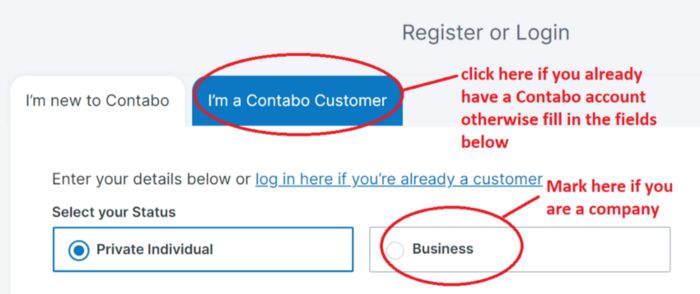
If you are new to Contabo and you are an individual, do not touch anything
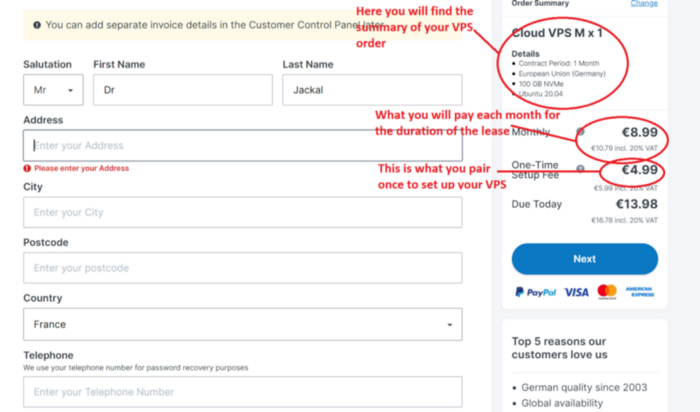
Fill in the fields with your personal data

Finish filling in the last fields with your personal information and click on Next button to proceed to payment
Once you have finished paying for your order. You will receive a first email.
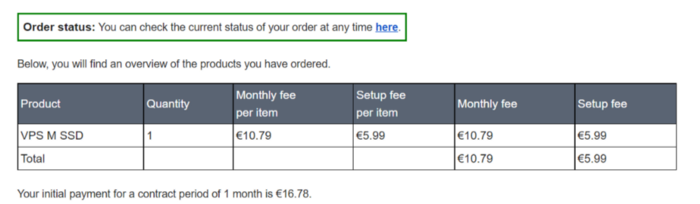
Corresponding to the status of your order
And approximately 15 minutes later you will receive a second email with all the information to connect to your VPS.
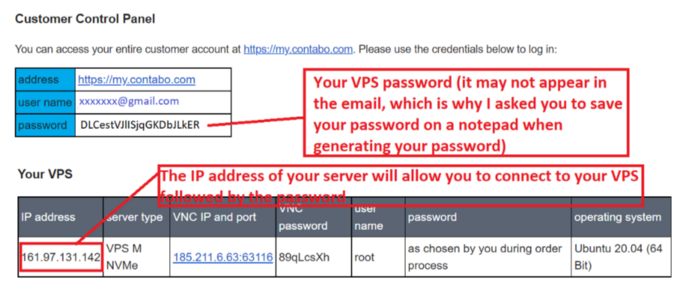
The login details to connect on your VPS
Part 02: How to connect to your VPS
With MacOS:
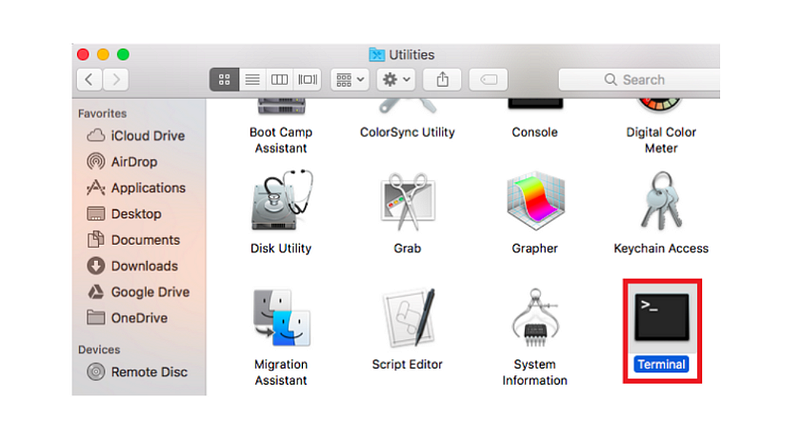
MacOS includes already a SSH command. To connect via SSH from this operating system, first open the Terminal window. You can find this tool by going to “ Application->Utilities->Terminal”.
With Windows :
I invite you to download Putty by clicking “here” (You can directly download the installation file with this link).
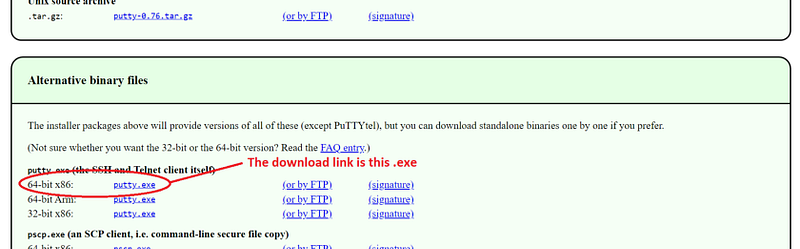
This is the file illustrated in the image above, if you wish to download another one click on this “link”
Now open the .exe file to start the installation of Putty and follow the instructions to complete the installation. At the end of the installation you will have a shortcut to Putty on your desktop.
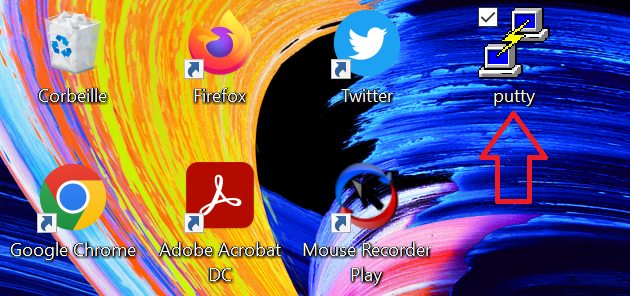
Now launch Putty
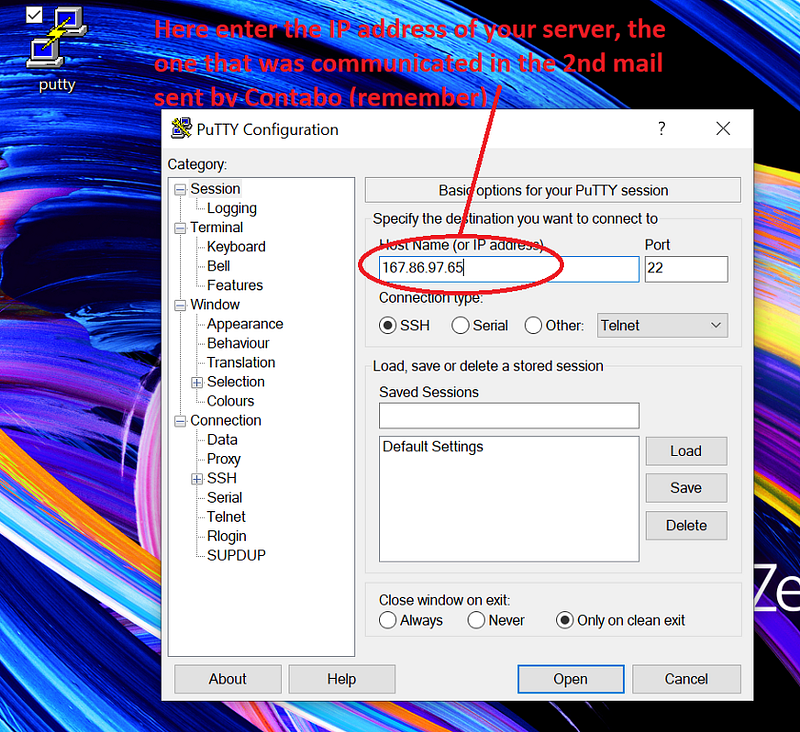
Launch Putty, a new window will open in which you will enter the IP address of your VPS and click on Open
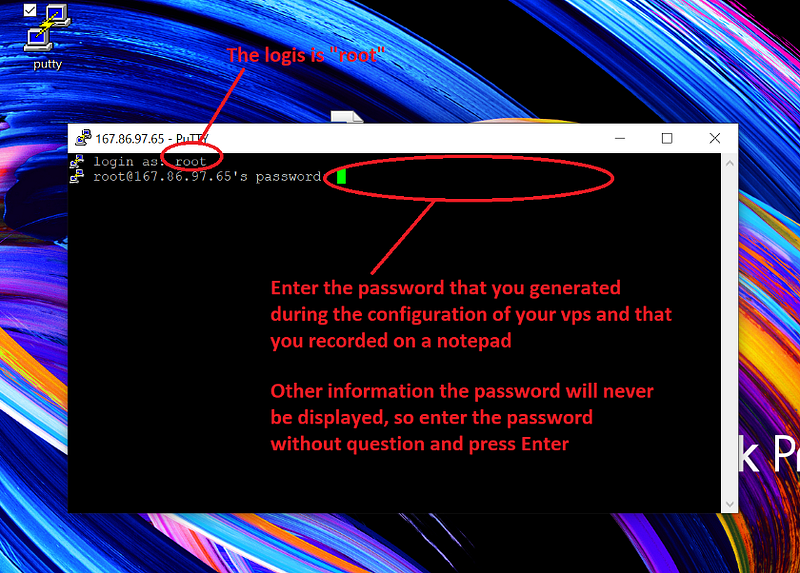
The interface of your server will open and will ask you for the login details.
Now you are finally on your server (see image below):
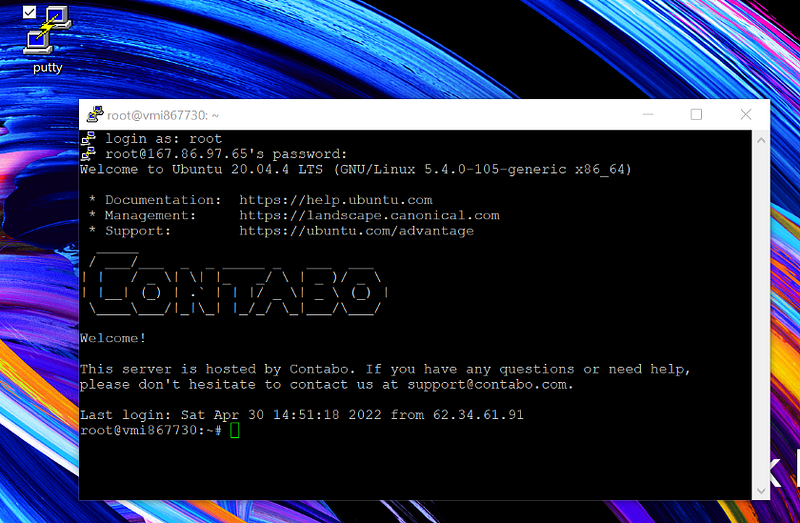
Tip 1: To paste any command that you have already copied above, just right-click where you want to paste the command
Tip 2: Only paste or write a command when your vps server allows it. As soon as “root@vmxxxxxxxxx: “is visible you can write otherwise you have to wait

In this example you have permission to write or paste a command
Now you are ready to get serious. You just have to paste one by one the commands that I put at your disposal below. Take your time and make sure you have taken the order from start to finish. To help you I have put some screenshots showing the result you should get each time you paste a command.
Best of luck…
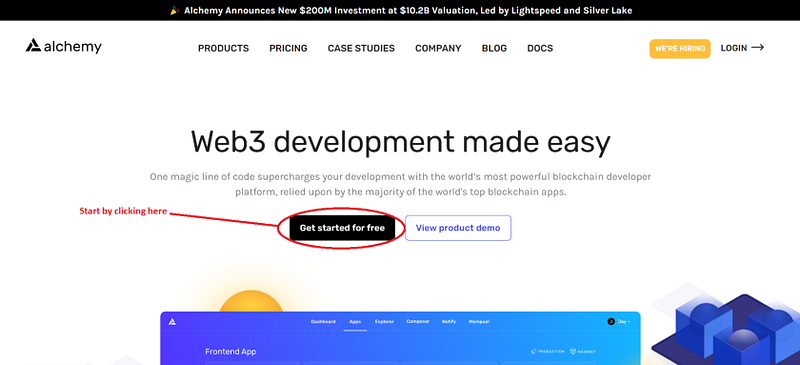
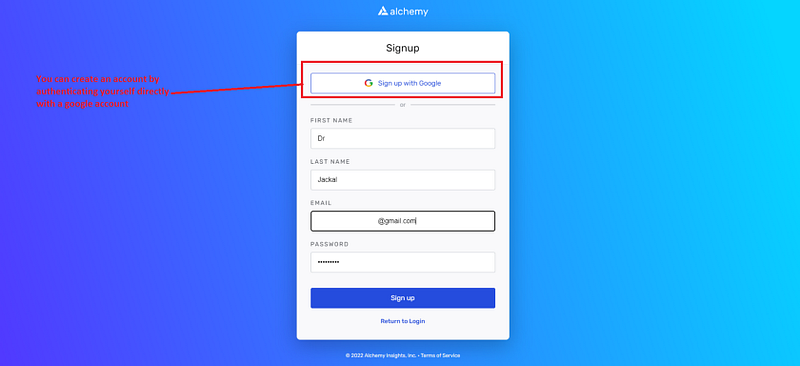
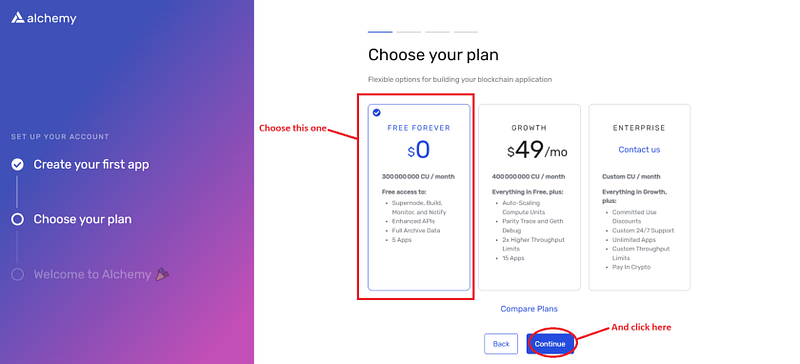
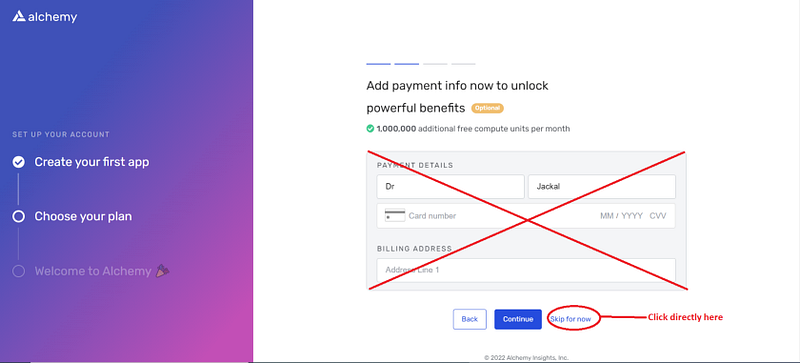
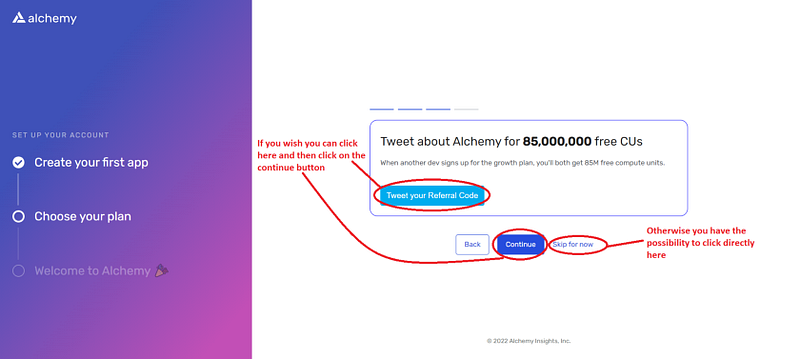
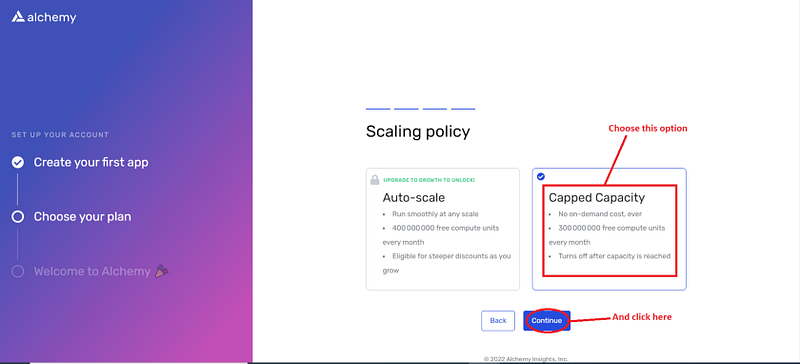
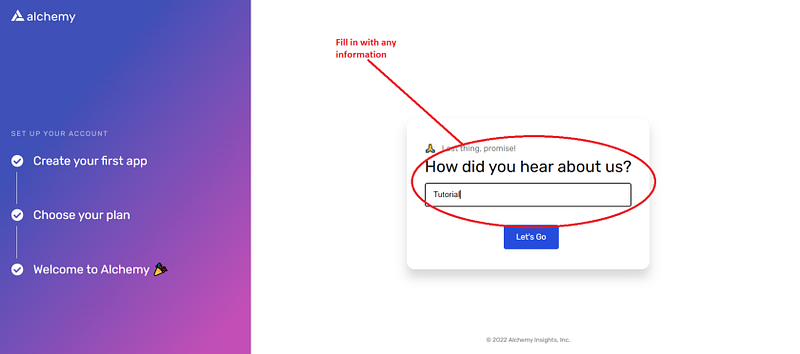
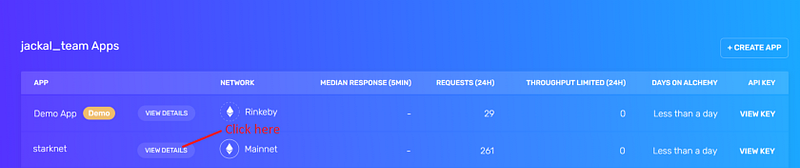
Part 03: Create an account on alchemy in 2 minutes
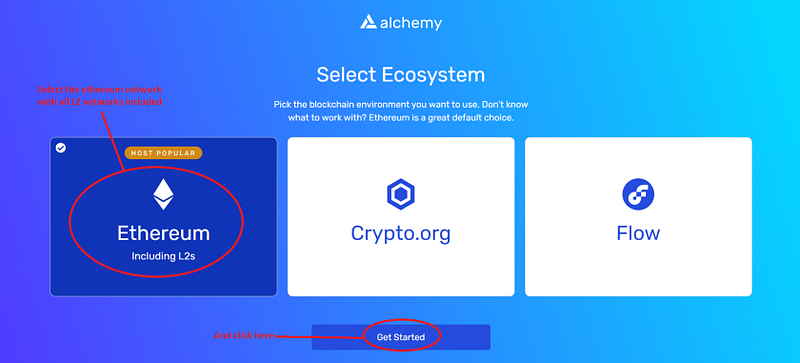
The Starknet network is a Layer 2 of the Ethereum blockchain so it is essential that your Starknet node communicate with the Ethereum layer to work. For that I recommend you to create an Alchemy account to use their Layer 1 Ethereum API
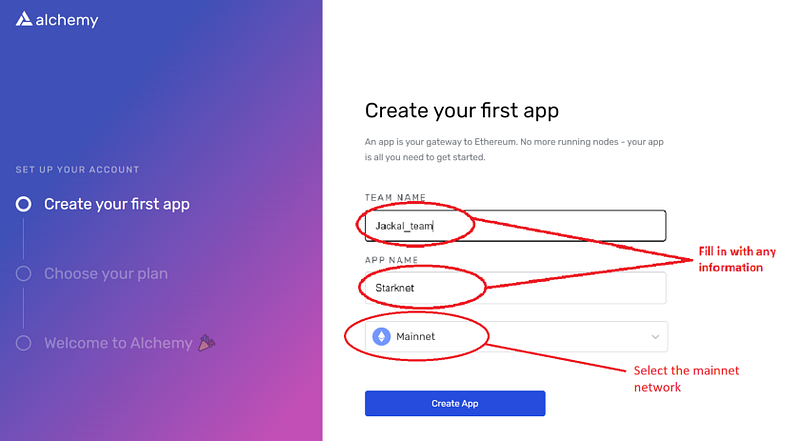
Click here to open an account on Alchemy and followed all 11steps one by one below

Part 03: Preparation
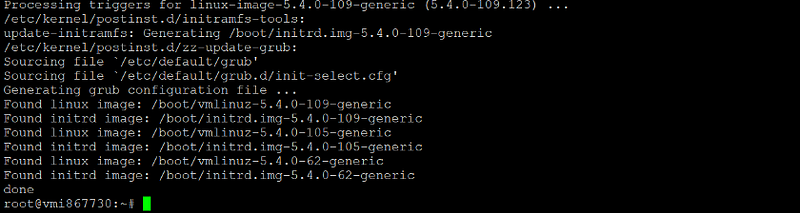
We then proceed to update the packages :
sudo apt update && sudo apt upgrade -y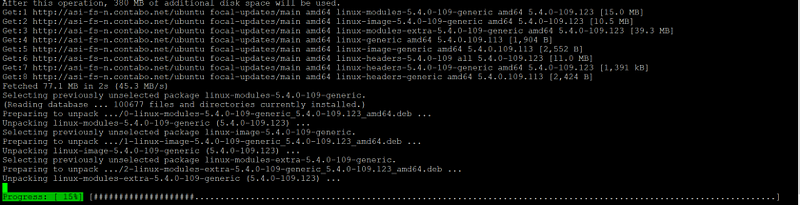
Wait
The required libraries are installed with the following command:
sudo apt install pkg-config curl git build-essential libssl-dev
Press Y and then ENTER on your keyboard

Screen installation
sudo apt install screen

when he asks you to press Y and then ENTER on your keyboard

Part 04: Clone pathfinder github repository
Create a local copy of pathfinder’s github repository with this command:
git clone --branch v0.6.1 https://github.com/eqlabs/pathfinder.git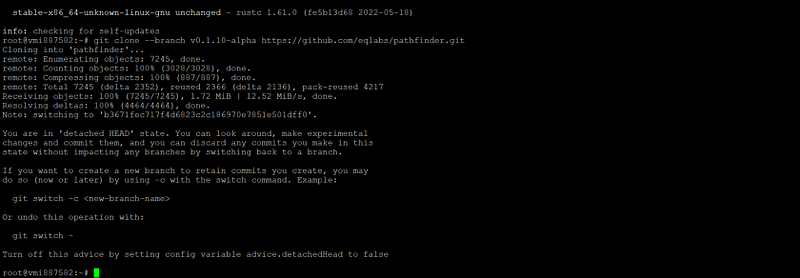
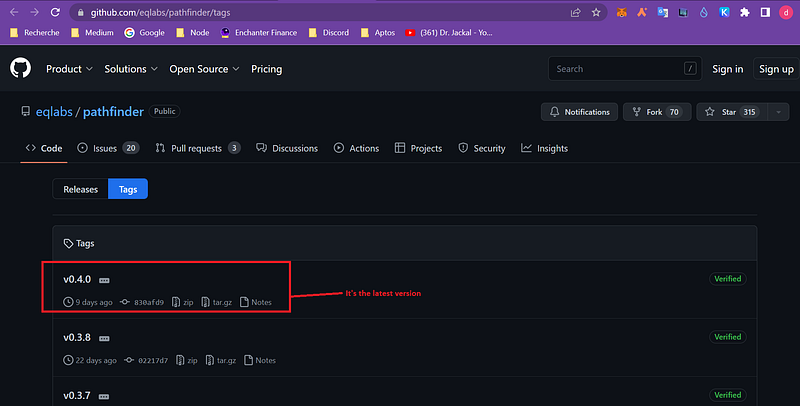
If necessary replace “v0.6.1” with newer version if that exists. You can check here.
Part 05: execute your node with docker
Screen node
screen -S node
And finally you can launch your node with the following command with the API created via Alchemy
mkdir -p $HOME/pathfinder
docker run \
--rm \
-p 9545:9545 \
--user "$(id -u):$(id -g)" \
-e RUST_LOG=info \
-e PATHFINDER_ETHEREUM_API_URL="xxxxxxxxxxxxxxxxxx" \
-v $HOME/pathfinder:/usr/share/pathfinder/data \
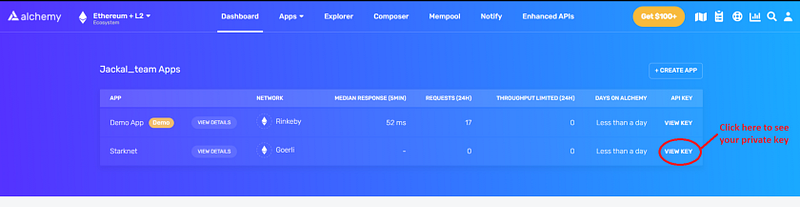
eqlabs/pathfinderReplace xxxxxxxxxx by your HTTP API on alchemy (see image below):
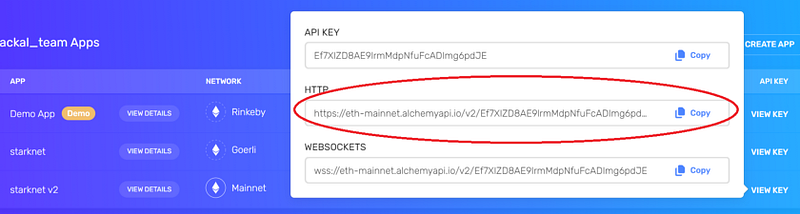
Below you will find a real example:
mkdir -p $HOME/pathfinder
docker run \
  --rm \
  -p 9545:9545 \
  --user "$(id -u):$(id -g)" \
  -e RUST_LOG=info \
  -e PATHFINDER_ETHEREUM_API_URL="https://eth-mainnet.alchemyapi.io/v2/Ef7XIZD8AE9lrmMdpNfuFcADImg6pdJE" \
  -v $HOME/pathfinder:/usr/share/pathfinder/data \
  eqlabs/pathfinder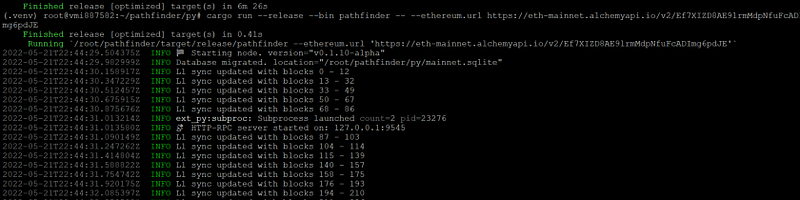
Congratulation your node is running!
Press CTRL+A+D
And close Putty
Part 06: Check the progress of the synchronisation of your node
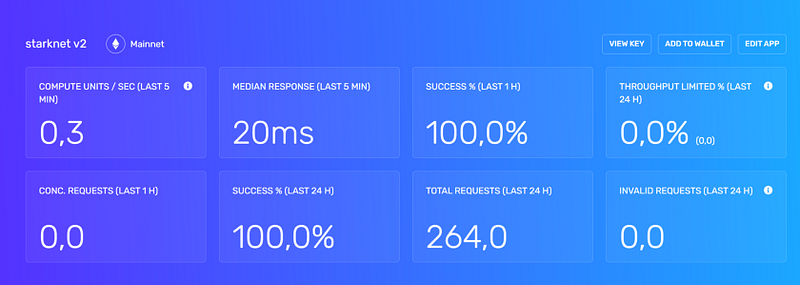
Wait a moment (5 minutes) and go back to your Alchemy account dashboard


To check the progress of the synchronization you can use the command below:
screen -r node
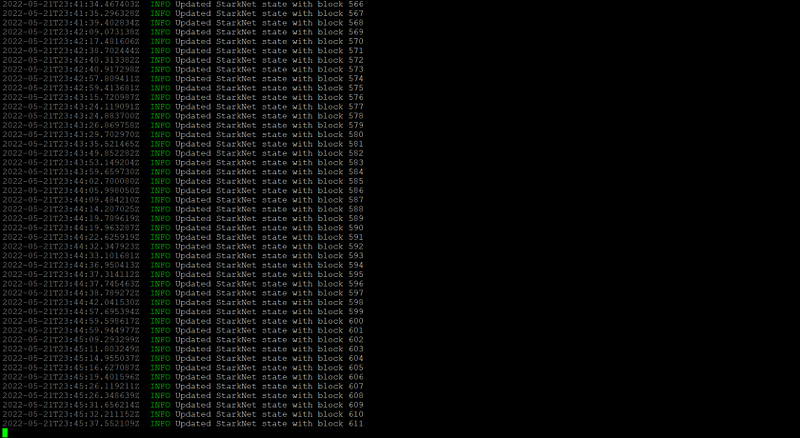
So you can see in the image above that your node is synchronising with the blockchain. For it to be fully synchronised it needs to scan all the blocks up to the last one.
To know the exact number of blocks already generated on starknet you can go directly here.
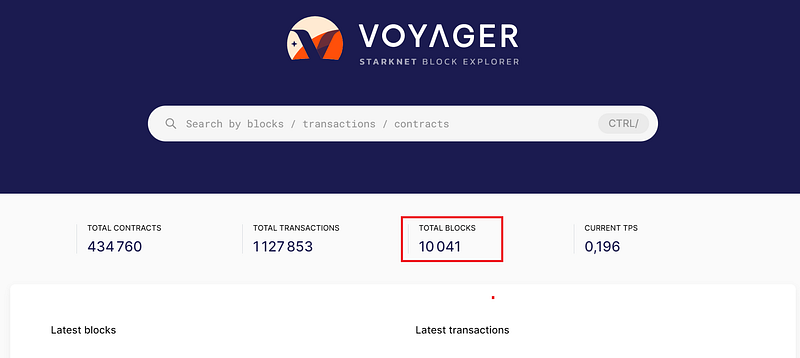
Make sure you are on the Mainnet and not the Goerli
In my case there are 10 041blocks! Congratulations your node is now with the starkware blockchain!!!!
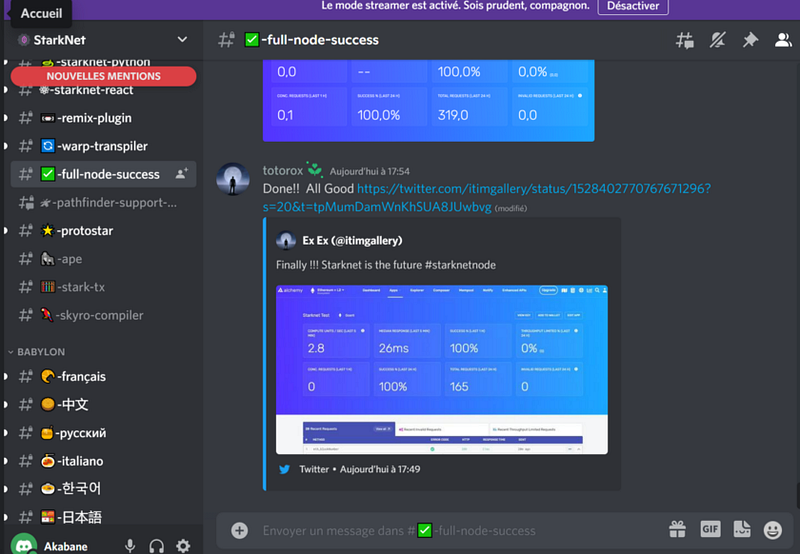
Part 07: Tweet and declare your Node on discord
Tweet your screnshot and send on official dicord in “the full node success” section with the link to your tweet.
Thank you for your time, if you like this kind of content, don’t hesitate to check my other articles and my videos on youtube channel.
Discord: Akabane#3147
Telegram: @dr_jackal_Akabane (please join my group, I will answer all your questions in real time)
EN Official Announcement canal
FR Officiel canal d’annoncement
Get and use your first Bot in the Crypto-world with Chainsniper Coyote Bot

Get and use your first Bot in the Crypto-world with Chainsniper Coyote Bot
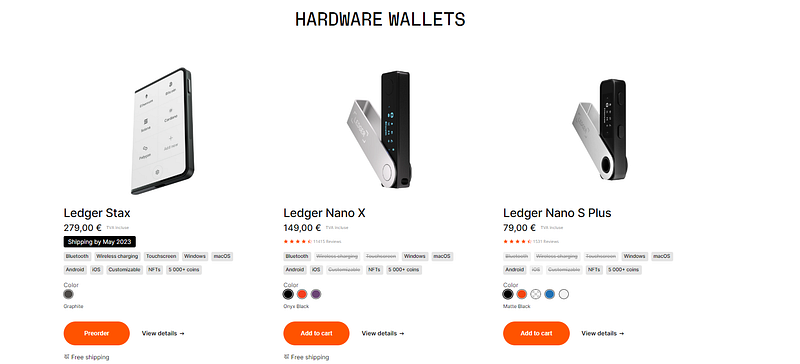
Buy your first Ledger (cold wallet) with my affiliation link:
Don’t forget to check out my recent article about trading bots!
Read every story from Dr_jackal (and thousands of other writers on Medium)


