
Turn Your Graphic Style and Scribbles into Reality with Stable Diffusion — Here’s How!
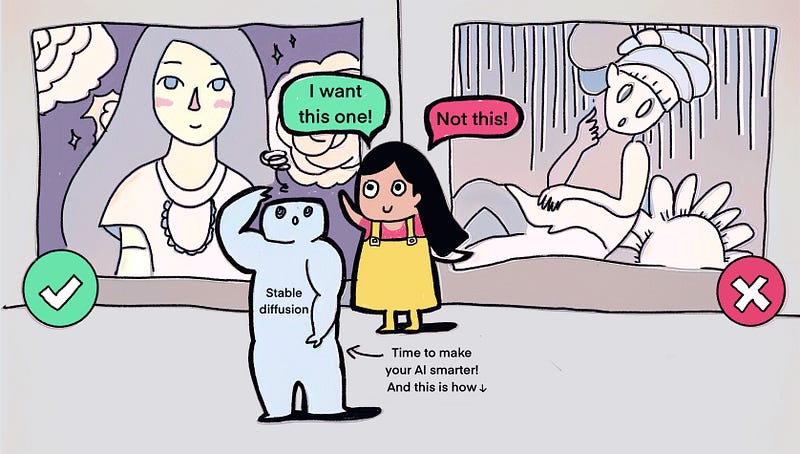
AI makes everyone an artist. It also makes creating a beautiful picture feel like a low-tech thing to do.
And what I said above is definitely NOT TRUE.
Even without talking about the authenticity of AI usage, when we ask AI to draw a thing, it doesn’t always come back to the result we wish for.
After creating the most horrifying creature I could ever imagine, I halted my use of AI tools to generate images for months. But now the software has evolved, and I’ve resumed my research to determine if I can harness AI’s power to support my illustration work. Coincidentally, my iPad screen is broken, providing another good excuse to seek assistance and simplify my illustration work.
To get the AI draw for my style and my scribbles, here are several topics I need to know.
- Which AI tool shall I use and how to use it?
- How do I train a model using my drawing style?
- How do I get the composition closer to my imagination?
- How do I change anything I want in an image?
Which AI Tool to Use and How to Use It?
I chose Stable Diffusion because the tool is free to use and it gives much more flexibility to adjust the image compared to many other tools. I use my husband’s Windows to install the software since his PC is more powerful than my Mac.
Here is the step-by-step guidance to install the tool for PC:
For Mac users:
If this is too long to read, many YouTube videos are showing how to install this tool. I found this tutorial for installing it on Windows and this one for Mac users with my first search attempt.
Do not have a powerful computer to install Stable diffusion?
Scroll down in the section ‘Other Methods I Tested to Mimic My Style Using AI’ to see how can you train your model with Leonardo.ai without downloading any software. It is really easy to use, just lack a little bit of flexibility compared to Stable Diffusion.
How Do I Train a Model Using My Drawing Style?
When researching how to train my art style, I found this video really easy to follow.
The training process is similar to teaching a student to draw, we first need to show them a lot of examples and then they can mimic the works. So I cut 40 of the illustrations into squares using Birme, a tool that can quickly resize your work into the required size. Then I fed the graphics to the copied Dreambooth Stable Diffusion system and created a model according to the tutorial.

By employing the photos and the method from the video, I succeeded in training a system capable of producing graphics in my style, with around 25% being of high quality.
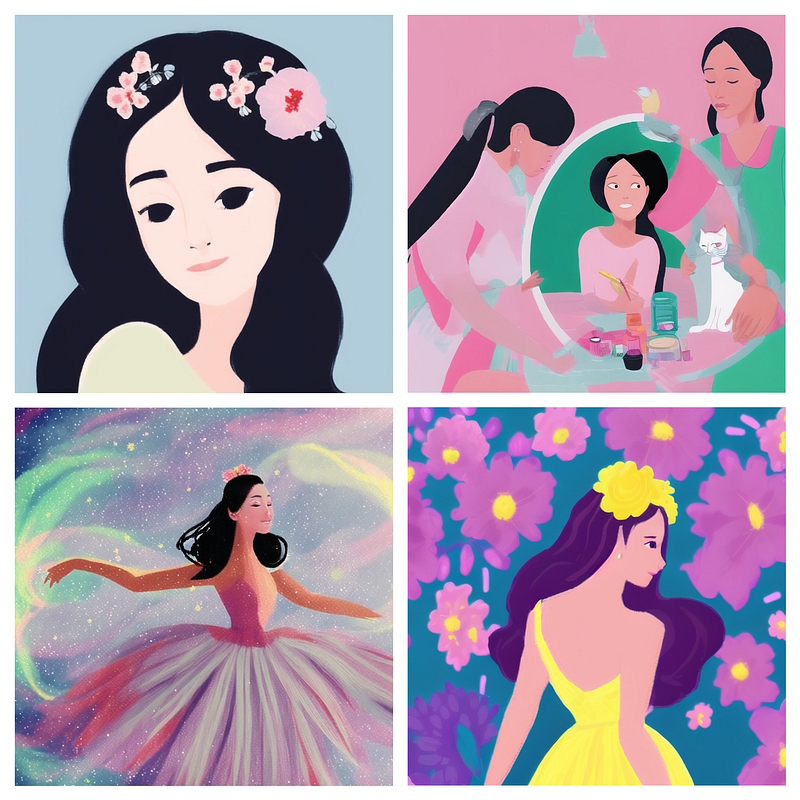
Some small touches would make it look polished, for example, the awkward hands of the girls.
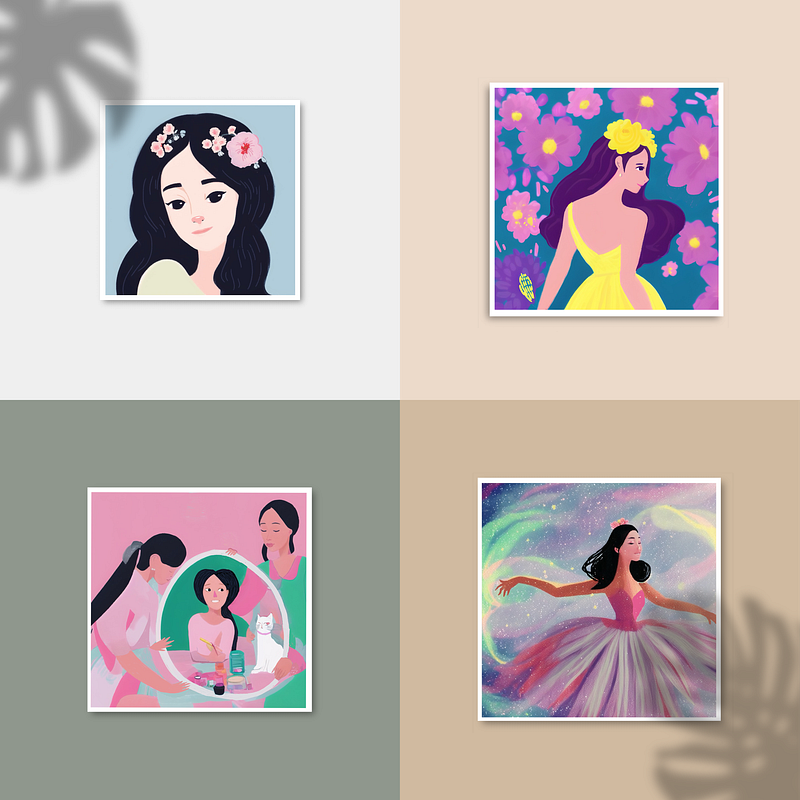
Here are the results after some slight adjustments with Procreate.
The style looks 80% like I would have drawn myself! The downside of the current approach is that I can’t control the object's composition. So I started searching how to gain more control over graphic composition.
How Do I Get the Composition Closer to My Imagination?
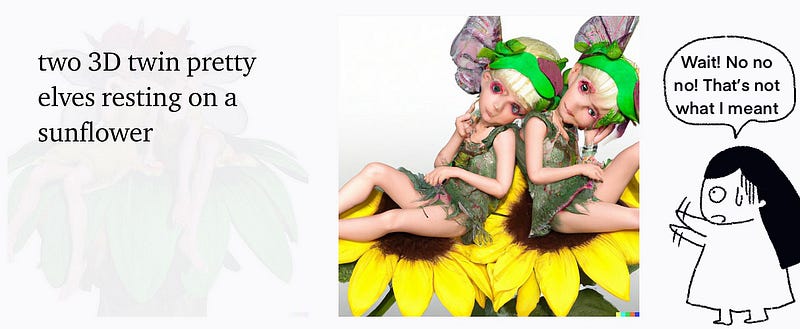
I came across this video and learned that by using ControlNet, more control over the graphic’s composition is possible.
My first tryout was quite a disaster, I realised with my flat and simple style, the lines limit the creativities — it took it too literally.
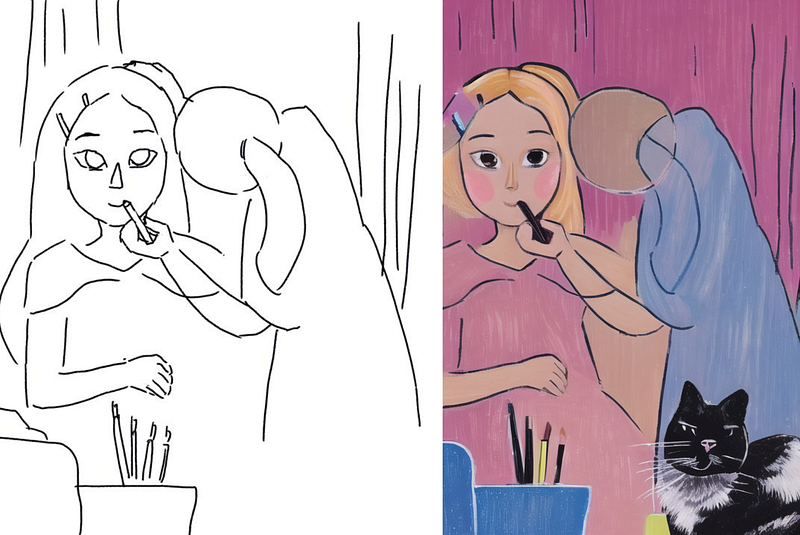
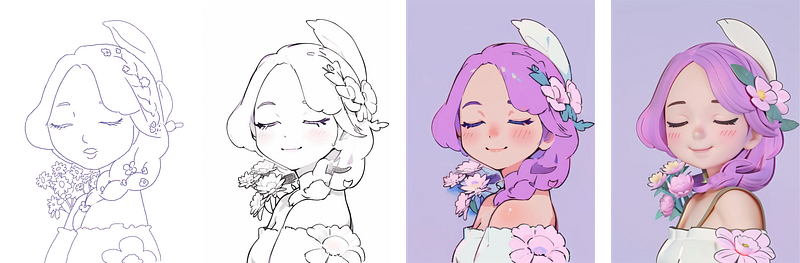
Therefore, I tried to first transfer my line drawing (picture 1) into a style downloaded from civit.ai that is similar to my style but with richer details (picture 2), then turn it into my flat painting style (picture 3) using the img2img function (img2img tutorial) by keeping the same prompt but use the training model I just created with my style. In the end, I needed to fix the face manually. I could have done it in Stable Diffusion too, but with my flat style, I figured it would be quicker if I just fixed it in Procreate.
Here is the process, some of the flowers got lost in translation but the overall colouring and style are decent.

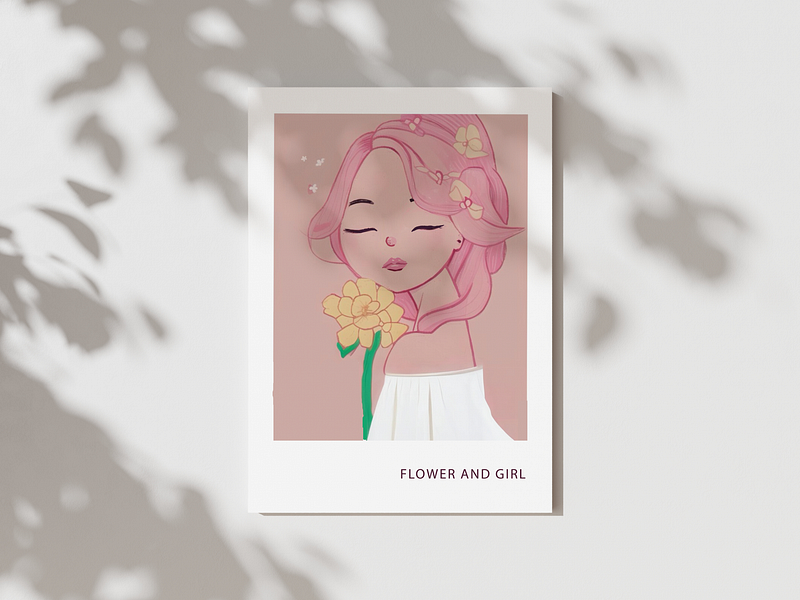
I used Leonardo.ai (tutorial) to expand the bottom part of the graphic, which is what I got.
How Do I Change Anything I Want in an Image?
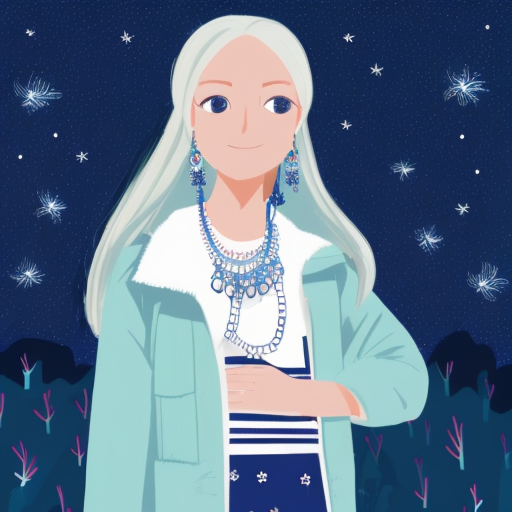
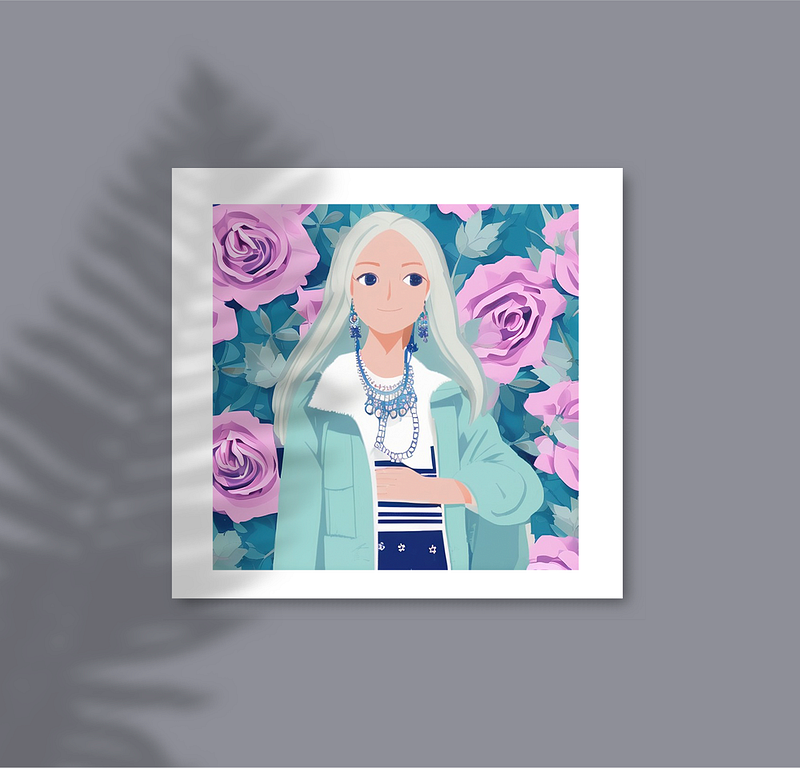
Some day you receive a nice graphic from Stable Diffusion but you don’t like some part of the graphic. For example, in the picture below I am quite happy with the female but I don’t like to dark blue background.
By researching on the internet, I found a tutorial about changing any part of my graphic.
By downloading the extension Inpaint Anything and following the steps in the tutorial, I managed to change the background to something I liked more.
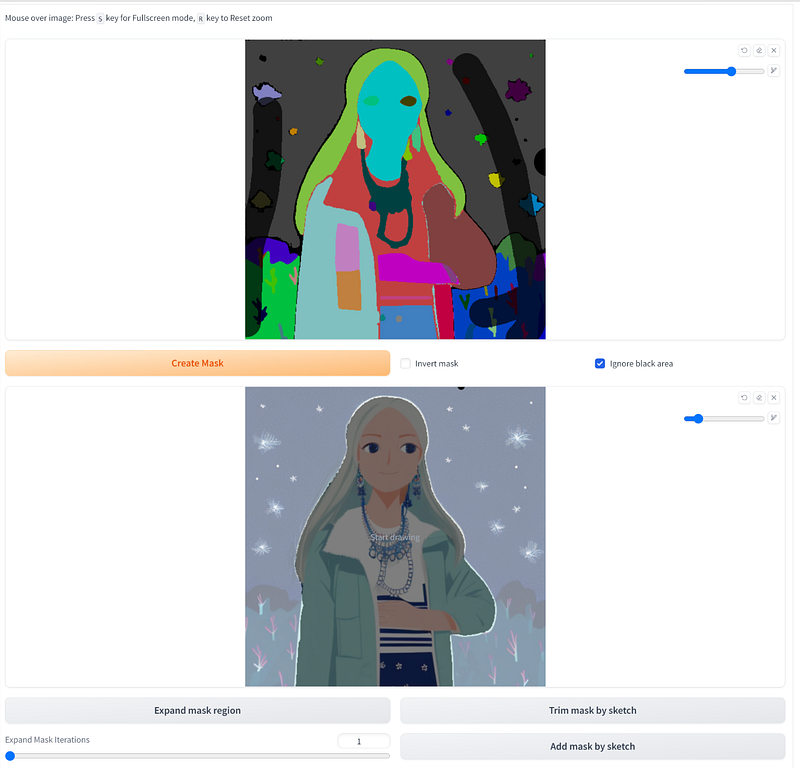
I used the prompt “Pink roses garden with leaves in different layers of blue” to replace the original background. And this is what it came out.
Conclusion
It has been fun to play with the tool and have some control over the graphics — this is pretty important for me as a graphic/visual designer.
But, I also learnt a few things during this exploration:
- Let go of some expectations while experimenting with the painting, and sometimes the tool might come up with better ideas.
- AI makes it easier to make pretty graphics, what designers can improve is their aesthetics. After all, two people with different tastes will generate totally different things from AI.
- Ideating is still an important part of the process, just clicking the mouse and waiting for a good result suddenly coming out from the AI is not efficient, research on platforms such as Pinterest can help you to get a better result quicker.
Last but not least, have fun with the tool and embrace the result with open-minded : D
In case you want to compare the generated graphics with my original style, you can check my Instagram : )
Other Methods I Tested to Mimic My Style Using AI
Stable diffusion method 2:
Later, I stumbled upon a Chinese tutorial that can turn a sketch into a colour illustration and a 3D model.
Here are the steps introduced by the author:
- Use the img2img function to transform a scribble into a finely crafted line drawing. 🏁 Checkpoint: seekyou_alpha1.safetensors; 🎨 Lora: Anime Lineart; ✍🏻 Prompt: make sure you put ‘black lines, monochrome, white background.’ 🖼 Outcome: a refined line drawing.
- Generate colour for the line drawing. If you want more control over the colour, overlay some colours on the line drawing via Photoshop and use the img2img function to refine the colour. 🏁 Checkpoint: seekyou_alpha1.safetensors; 🎛️ ControlNet: Lineart_anime; ✍🏻 Prompt: take away ‘black lines, monochrome’. Add ‘(best quality), (masterpiece), high details’ to make the graphic quality better.
- Use the colour painting and transform it into a 3D model. 🏁 Checkpoint: disneyPixarCartoon; 🎨 Lora: blindbox_V1Mix; 🎛️ ControlNet: 1. Tile-resample, and make the ControlNet more important. 2. Lineart_anime; processor resolution: increase the number to hide the line. ✍🏻 Prompt: add ‘3D rendering’.
My thoughts about this method:
👍🏻This method enables the graphic to preserve more details throughout the process. Stable Diffusion is also one of the most flexible AI tools in the market so far. And, it is free!
👎🏻 The drawback of this method is that the graphic style leans more towards either Japanese or Disney style. (If your drawing style is a Japanese or Disney style, that’s a perfect match! )Besides, the learning curve for Stable diffusion is much steeper compared to Leonardo.ai.
Leonardo.ai:
I experimented with Leonardo to create my drawing style. Here are the steps I followed to achieve the desired outcome:
- Train a model in Leonardo.ai via the same dataset (40 drawings).
- Generate suitable prompts by inputting a few keywords utilizing the Prompt Generation function.
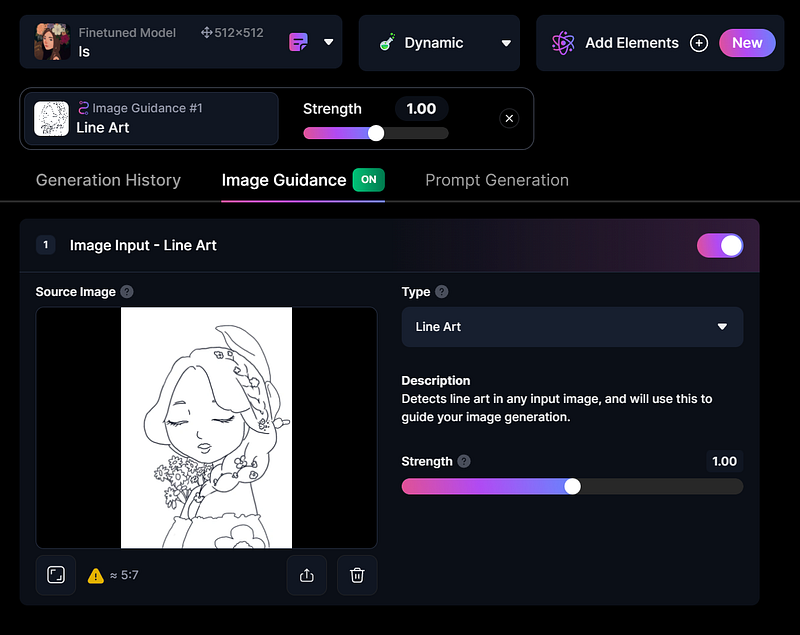
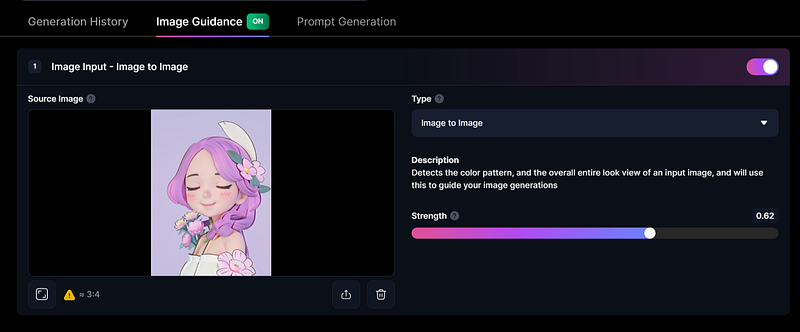
- Upload the line sketch to Image Guidance, selecting Line Art as the ControlNet type.
- Employing the fine-tuned model trained by Leonardo.ai in step 1 (note: a free account allows training of one dataset per month for free).
- Click the generate button.
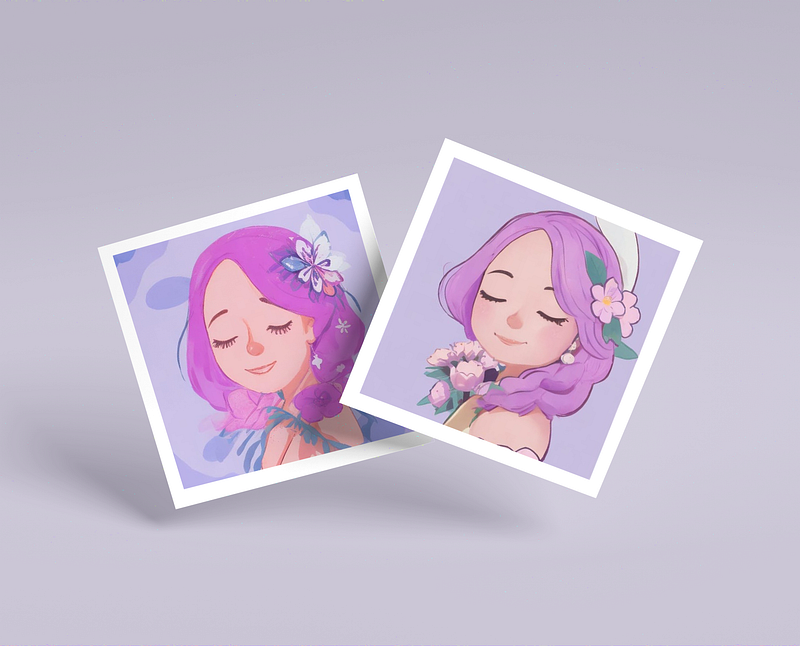
And here are the outcomes I got:
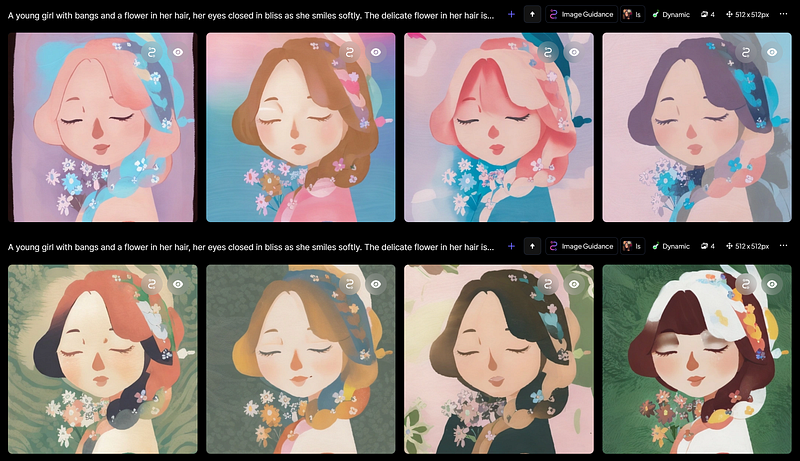
The colour is cool, but it would be nice to have more control over it.
Therefore, I started to play with the Stable Diffusion result by activating the image-to-image function. As a result, this is what I got.
My thoughts about this method:
👍🏻You can upload up to 40 images to train your style. The interface is beginner-friendly! The image above is created from the line drawing I generated. This tool is super powerful when combined with Stable Diffusion. Enjoy 150 free credits per day!
👎🏻Less functions and flexibility compared to Stable Diffusion.
Other useful links
- I came across this YouTuber while searching the tutorials, he has many solid content related to Stable diffusion on his channel!
- If you don’t have your drawings to train the model, this site has many models you can download and play with:
Hope this article is helpful for you. Let me know if you have any feedback ╰(*´︶`*)╯♡


