
Training of Robotic Manipulators on the Obstacle Avoidance task through Reinforcement Learning
Easily train a Robotic Manipulator to avoid obstacles by using the robotic-maninpulator-rloa framework

The purpose of this article, beyond explaining how to train a manipulator in the obstacle avoidance task, is to introduce the open-source framework robotic-manipulator-rloa and to explain how it works and how to use it.
In short, the robotic-manipulator-rloa framework allows the user to load a URDF or SDF model of a Robotic Manipulator (URDF or SDF files are XML file formats used to describe all elements of a robot) in a simulation environment, which will be used to train the manipulator to avoid hitting an obstacle while trying to reach a specific point in space. In order to make the training customizable, the user can configure the basic components of the environment, as well as the hyperparameters of the NAF algorithm, which is the algorithm used for training.
The NAF algorithm was previously explained at a theoretical level in this article: Applied Reinforcement Learning V: Normalized Advantage Function (NAF) for Continuous Control
Install the robotic-manipulator-rloa framework via PyPI
pip install robotic-manipulator-rloa
The installation of the PyPi package will install the following packages as dependencies:
- torch: PyTorch is used to contruct the neural networks required for the NAF algorithm.
- numpy: NumPy is used to work with numbers and arrays in an optimized way.
- pybullet: PyBullet is used to create the simulation of the training environment, and to interact with and obtain information from it.
- matplotlib: Matplotlib is used to visualize the rewards obtained by the agent along the training process.
Once the framework has been installed, a training and evaluation of the agent can be configured and executed in 5 steps, which are presented in the following sections.
1. Initialize ManipulatorFramework
Create an object of the ManipulatorFramework class.
from robotic_manipulator_rloa import ManipulatorFramework

# Initialize framework
mf = ManipulatorFramework()
The constructor of the ManipulatorFramework class initializes the hyperparameters of the NAF algorithm with the default values:
- Buffer Size defaults to 100000.
- Batch Size defaults to 128.
- Gamma defaults to 0.99.
- Tau defaults to 0.001,
- Learning Rate defaults to 0.001,
- Update Frequency defaults to 1.
- Number of Updates defaults to 1.
In case you want to configure any of the hyperparameters of the NAF algorithm, the ManipulatorFramework class has a set_hyperparameter() method, which receives as parameters the name of the hyperparameter to be modified and the new value to be set, as shown below.
mf.set_hyperparameter('buffer_size', 10000)
mf.set_hyperparameter('tau', 0.5)
mf.set_hyperparameter('gamma', 0.1)
2. Initialize the Environment
The Environment needs some information from the user to configure the training simulation. More specifically, the fields required in the initialization of the Environment class are:
- manipulator_file: path to the manipulator’s URDF or SDF file.
- endeffector_index: index of the manipulator’s end-effector.
- fixed_joints: list containing the indices of every joint not involved in the training (joints that will be static during training).
- involved_joints: list containing the indices of every joint involved in the training.
- target_position: list containing the position of the target object, as 3D Cartesian coordinates.
- obstacle_position: list containing the position of the obstacle, as 3D Cartesian coordinates.
- initial_joint_positions: list containing as many items as the number of joints of the manipulator. Each item in the list corresponds to the initial position wanted for the joint with that same index.
- initial_positions_variation_range: list containing as many items as the number of joints of the manipulator. Each item in the list corresponds to the variation range (initial_pos-range, initial_pos+range) wanted for the joint with that same index.
- max_force: maximum force to be applied on the joints.
- visualize: boolean indicating whether or not to visualize the simulated environment during training.
Taking into account these parameters, the initialization of the environment would be carried out by calling the initialize_environment() method as follows:
mf.initialize_environment(manipulator_file='kuka_iiwa/kuka_with_gripper2.sdf',
                          endeffector_index=13,
                          fixed_joints=[6, 7, 8, 9, 10, 11, 12, 13],
                          involved_joints=[0, 1, 2, 3, 4, 5],
                          target_position=[0.4, 0.85, 0.71],
                          obstacle_position=[0.45, 0.55, 0.55],
                          initial_joint_positions=[0.9, 0.45, 0, 0, 0, 0],
                          initial_positions_variation_range=[0, 0, 0.5, 0.5, 0.5, 0.5],
                          visualize=False)
3. Initialize NAF Agent
The NAF Agent is initialized in a very simple way, since most of the parameters it needs are taken from the previously configured Environment and from the hyperparameters initialized and configured in Step 1.
In fact, the only parameter received by the initialize_naf_agent() method, which is used to initialize the NAF Agent, is checkpoint_frequency, which determines how often the training status will be saved. This parameter defaults to 500.
mf.initialize_naf_agent(checkpoint_frequency=100)4. Run training
Once the Environment and NAF Agent have been configured and initialized, training can proceed. This step is carried out by means of the run_training() method, which receives three parameters:
- episodes: maximum number of episodes to execute for the training.
- frames: maximum number of timesteps to execute per episode.
- verbose: boolean indicating whether the verbose mode is activated or not. If verbose mode in on, information of each timestep will be printed on terminal. It is recommended to use this mode only in debug and development phases, as in the context of a normal training it adds too much information and prevents to see the training status in a clear way.
mf.run_training(3000, 400, verbose=False)5. Run testing
Once the training has finished, it will be possible to test the agent to evaluate if it has managed to learn the task. To do this, use is made of the test_trained_model() method, which receives 2 parameters as for the run_training() method: the number of episodes and timesteps per episode that you want to run in the test.
mf.test_trained_model(50, 750)The test process can also be carried out without having previously executed a training session, by loading the trained weights from a previous training session. These trained weights can be obtained from the checkpoints that the framework generates throughout the training, or from the ‘model.p’ file that is generated at the end of a training session. To execute a test on weights trained in a previous training, it will be also necessary to initialize the Environment and the NAF Agent in the same way that it was done when those weights were trained.
# Load pretrained weights from checkpint generated on episode 2000
mf.load_pretrained_parameters_from_episode(2000)

# Load pretrained weights from 'weights.p' file
mf.load_pretrained_parameters_from_weights_file('weights.p')
It is important to note that when the trained weights are loaded from one of the checkpoints, it will be necessary to pass as a parameter the episode from which the weights are to be obtained. As an example, the code above gets the weights of the checkpoint generated for episode 2000.
Training Execution Information
This section explains how the information about the training is displayed during the execution of a training session.
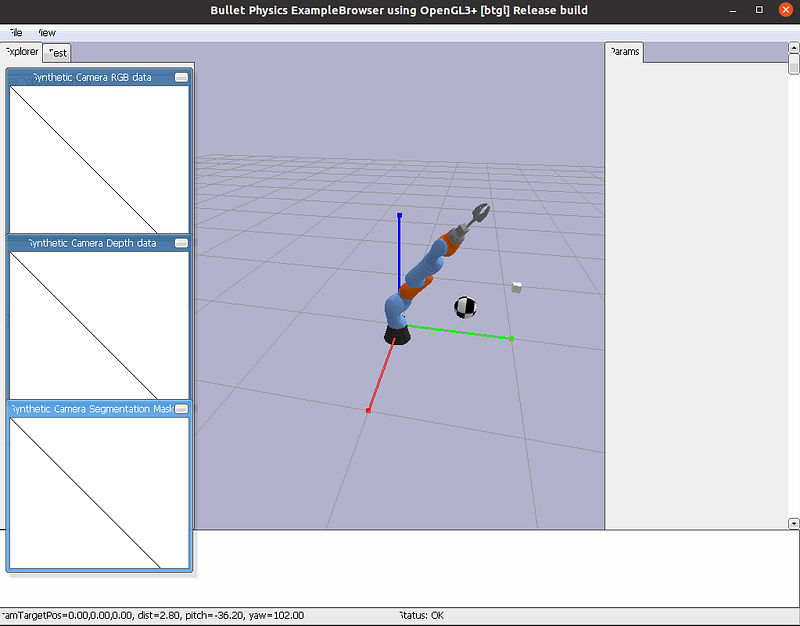
If visualize is set to True when initializing the Environment
If the visualize parameter is set to True during the initialization of the Environment, then during the execution of the training the manipulator will be visualized, as shown in Figure 1. While this mode allows you to see that the manipulator movements are good and that the training is proceeding as expected, visualization slows down the execution of the program, so it should be used in development and not in the execution of a training with many episodes.
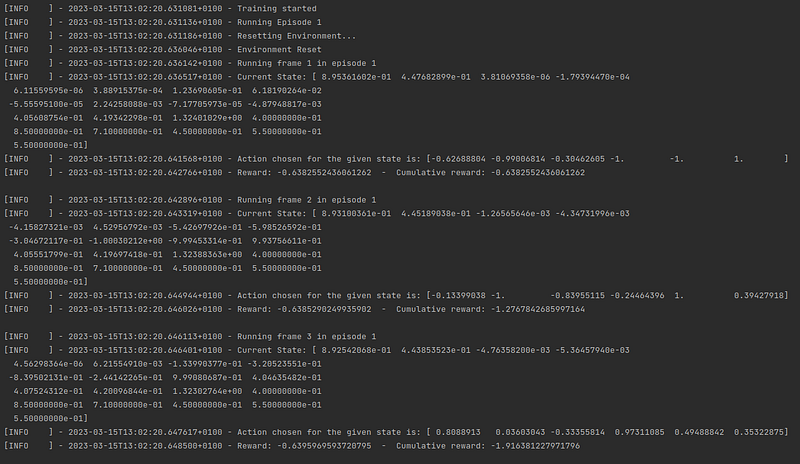
If verbose is set to True when initializing the Training
If the verbose parameter is set to True during the Environment initialization, then information about each of the timesteps of each episode will be displayed, as shown in Figure 2. Considering that a normal training can last more than 1000 episodes, and that each episode can consist of 500 timesteps, displaying the information for each timestep floods the terminal stdout, which can make it difficult to access certain information, and can be counterproductive in the context of a long training.
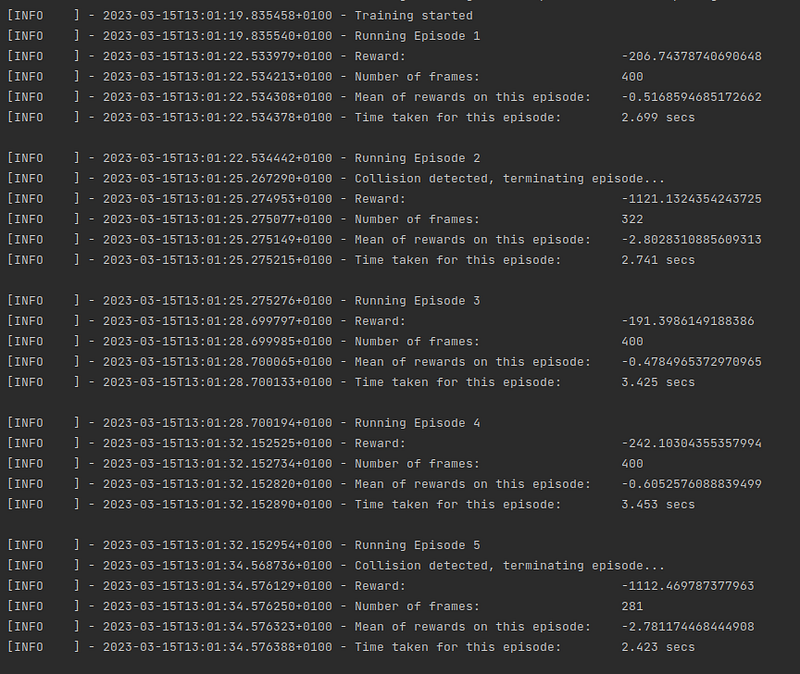
If verbose is set to False when initializing the Training
If the verbose parameter is set to False during the Environment initialization, then only information about each episode will be displayed, as shown in Figure 3. This type of execution is much more recommendable for a long training, since it allows to easily obtain the information of each one of the episodes completed during the training.
Demo Training and Testing
The robotic-manipulator-rloa package allows running training and testing demos for KUKA IIWA and Xarm6 robot manipulators, in order to show the user the necessary steps to run and evaluate a training with two different environment configurations. These trainings and tests are executed as shown below.
from robotic_manipulator_rloa import ManipulatorFramework

# Initialize framework
mf = ManipulatorFramework()

# Run demo training for KUKA IIWA
mf.run_demo_training('kuka_training', verbose=False)

# Run demo testing for KUKA IIWA
mf.run_demo_testing('kuka_testing')

# Run demo training for Xarm 6
mf.run_demo_training('xarm6_training', verbose=False)

# Run demo testing for Xarm 6
mf.run_demo_testing('xarm6_testing')
More information about the package
More information about the robotic-manipulator-rloa package can be found in the documentation, or from the project page on PyPI. As for the code, it can be found in my GitHub repository, so if anyone has any improvements and proposals for the project, feel free to let me know.
- Documentation: https://javiermtz5.github.io/robotic_manipulator_rloa/
- PyPI page: https://pypi.org/project/robotic-manipulator-rloa/
- GitHub repository: https://github.com/JavierMtz5/robotic_manipulator_rloa
I hope that the framework is helpful, easy to use and that it manages to train with good results the different manipulator robots that are going to be loaded. If this has been the case, or if anyone runs into any problems or unexpected behavior, I would really appreciate it if you would let me know on the GitHub repository, either by starring the project or by opening an issue with the problem found.