
Train a 3-D Object Detection Model (Point Pillars) in a Jupyter Notebook
Tutorial to train a deep learning model for 3-D bounding box detection on point clouds. We use AWS SageMaker in this article.
3-D Object detection is a key capability for autonomous driving. LiDARs are commonly used as sensors for this task to get an accurate idea of how far the objects are from the car. They generate point clouds of the surrounding environment in real-time. Here’s an example:
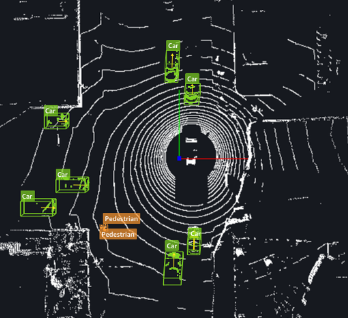
These point clouds consist of vectors with information of [x, y, z, reflectivity] for each point. Basically, every data point inside a point cloud is 3-dimensional with reflectivity as recorded by the LiDAR device. To read more about deep learning techniques in 3D object detection, please refer to this post.
About Amazon SageMaker (AWS)

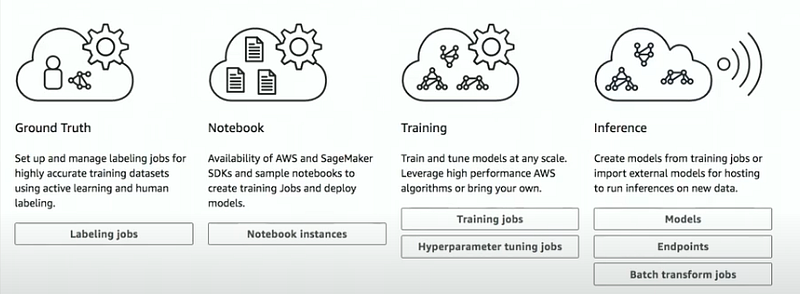
Amazon SageMaker is an end to end service provider for deep learning on AWS. So just like Google Colab or Kaggle, it has a feature to host your python jupyter notebooks directly on an EC2 instance with a pretty straightforward setup. It supports every stage of a deep learning project pipeline but in this article, we will focus on the Notebook part of the pipeline.
SageMaker isn’t the only option
Besides the fact that I already have an AWS account and my employer doesn’t mind paying for my deep learning jobs, I would never go with SageMaker since there are cheaper options available in the market. I personally have a better experience working with Google Cloud when it comes to large scale training of deep learning models. However, presently, because of my situation, I am working on AWS and this article is about that. But the steps should very well be applicable to any jupyter notebook hosted on a cloud.

Point Pillars (3D Object Detection) (Paper Link)
Point Pillars is a very famous work in the area of 3D Object detection. Compared to the other works we discuss in this area, PointPillars is one of the fastest inference models with great accuracy on the publicly available self-driving cars dataset. Its inference speed is around 62 fps which is orders of magnitude faster than the previous works in this area. You can read more about this model here. And for the purpose of this post, let’s run Point Pillars on a jupyter notebook. You can skip the SageMaker related steps if you already have opened a jupyter notebook on your cloud instance.
Running PointPillars on Google Colab might result in Google drive timeouts when loading data from google drive. Also, training Point Pillars takes a long time, which might result in timeouts on Colab/Kaggle notebooks. I haven’t tried this code on Colab Pro, so not sure if it’ll work there.
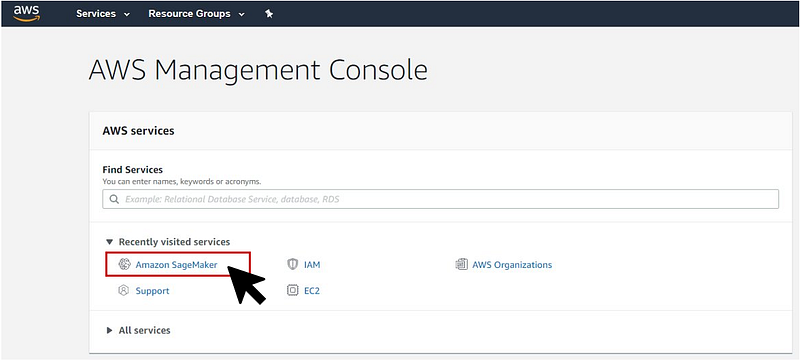
- Open your AWS Management Console and click on Amazon SageMaker.
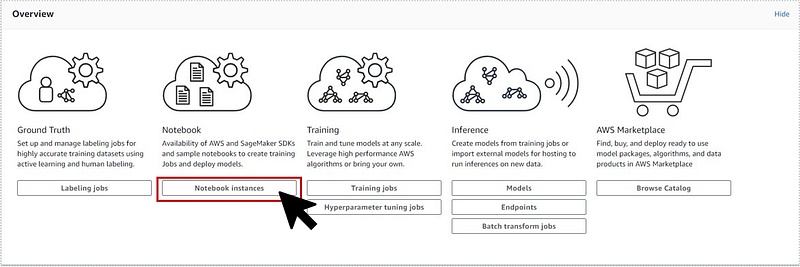
- Click on Notebook Instances.
Top 4 Most Popular Ai Articles:
1. Machine Learning Concepts Every Data Scientist Should Know
2. AI for CFD: byteLAKE’s approach (part3)
3. AI Fail: To Popularize and Scale Chatbots, We Need Better Data
4. Top 5 Jupyter Widgets to boost your productivity!
- Next, create a new notebook instance.

- Enter the properties of the notebook instance. Instance name: your_notebook_name; Notebook instance type: Choose one of the Accelerated computing instances (I chose ml.p2.xlarge). These are the GPU instance AWS offers. A detailed instance list is provided here. We don’t need to change any other default parameters for this notebook. Click on Create Notebook Instance.

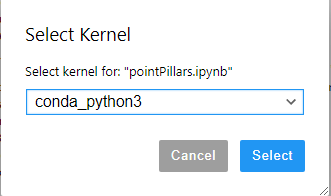
- Select the kernel for your notebook. Though SageMaker provides several pre-built kernels, there are issues with most of them. Let’s keep it simple and go with conda_python3 kernel for our notebook.
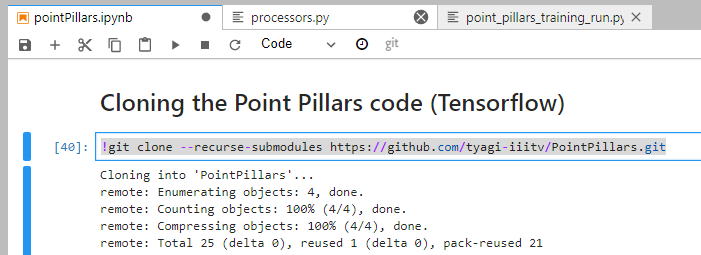
- Clone the git repo for Point Pillars. Type this inside a cell.
!git clone --recurse-submodules https://github.com/tyagi-iiitv/PointPillars.git
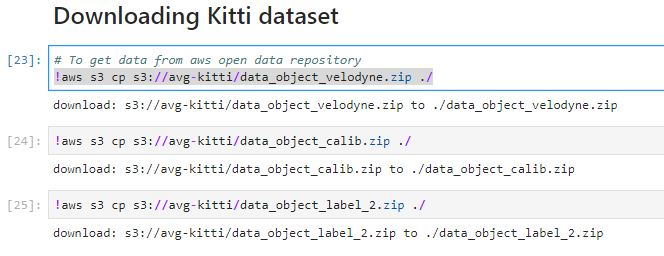
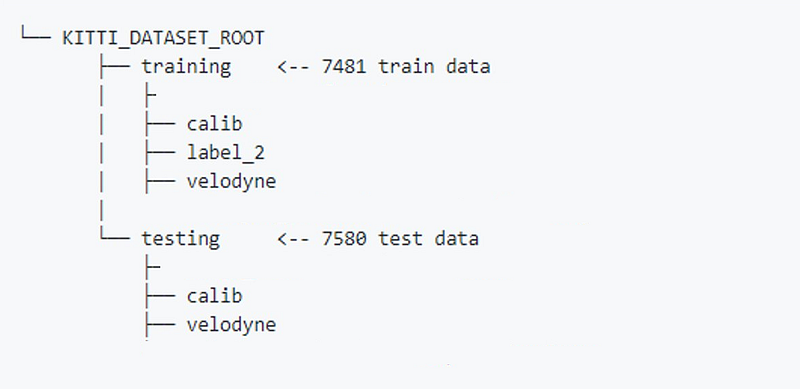
- Download the Kitti dataset for training. To train on your own dataset, record it in the same format as the Kitti dataset. If not on AWS, you can download the Velodyne, calibration, and label files from the project website and place them in the current folder as your notebook.
!aws s3 cp s3://avg-kitti/data_object_velodyne.zip ./
!aws s3 cp s3://avg-kitti/data_object_calib.zip ./
!aws s3 cp s3://avg-kitti/data_object_label_2.zip ./
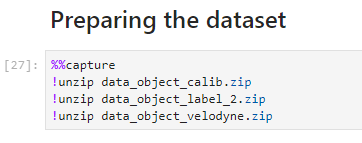
- Unzip the downloaded zip files.
!unzip data_object_calib.zip
!unzip data_object_label_2.zip
!unzip data_object_velodyne.zip
- After unzipping, there should be two folders created, named training and testing with folder structures similar to the one shown below.
- Installing Tensorflow and updating cuDNN. As of (7/24/2020), SageMaker comes with a default version of cudNN 7.5.1 which is outdated for this code and we need to upgrade this to version 7.6.4 or later. To do that, first, download the cudNN version 7.6.4 for Cuda 10.0 from this link. Yes, you’ll need to sign-up/login as a developer! Place this zip file inside the notebook instance by uploading the zip file.
Then, wait for a bit and pray that the file is uploaded because there is no progress bar to show the upload status (as of 7/24/2020). It takes around 2–3 minutes for the file to upload.

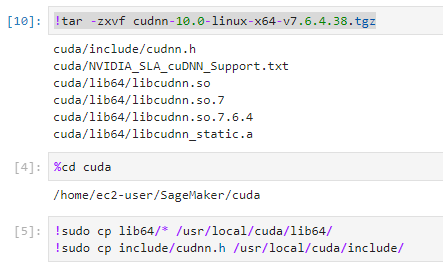
- Unzip the cudNN file.
!tar -zxvf cudnn-10.0-linux-x64-v7.6.4.38.tgzThis creates a Cuda folder. Now we have to copy the extracted files into our Cuda directory.
cd cuda
!sudo cp lib64/* /usr/local/cuda/lib64
!sudo cp include/cudnn.h /usr/local/cuda/include
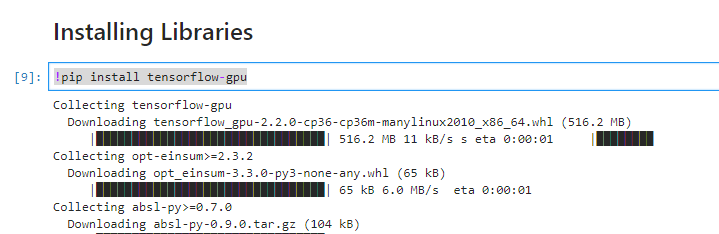
- Great, if you’ve made it this far, the good news is that the hard part is already over. Now we install our TensorFlow-GPU version.
!pip install tensorflow-gpu
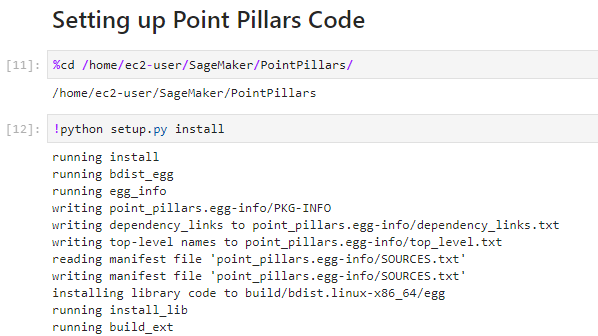
- Setup the downloaded point pillars code.
cd PointPillars
!python setup.py install
That’s it, we are ready to train our model
!python point_pillars_training_run.py
If you have configured the paths to your dataset inside point_pillars_training_run.py file correctly, the code should work. However, if you face any issues, let me know in the comments.
Please don’t forget to give a clap to this post if it helped. Thanks and happy hacking!
Don’t forget to give us your 👏 !


