
The Walnut Coffee Table Disaster
A beautiful slab of live-edge walnut, destroyed by incompetence…
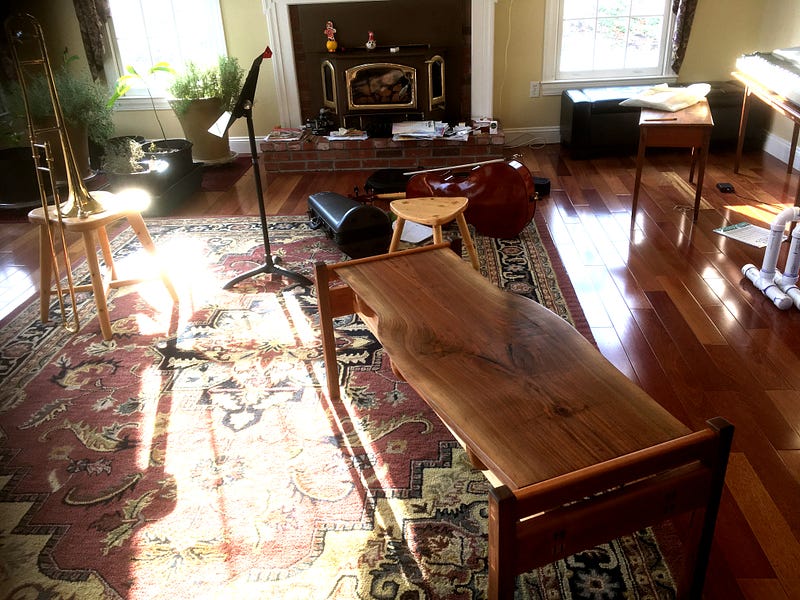
Our house is not one of those photogenic Architectural Digest kind of places. It is well lived-in, as you can see in the photo above. And over the past few years I have been slowly furnishing this room, which we called the “Ball Room” as we toured the place with our buyer’s agent, with my projects. I wrote about the keyboard stand and piano bench in the far-right corner in a previous post here:
Two stools that I made from scrap construction lumber sit in sun and shadow, one supporting my son’s trombone, and the smaller three-legged stool in front of my daughter’s cello.
And in front, as if it should be proud of anything, is the walnut coffee table I will discuss here today. My bane. My heartache.
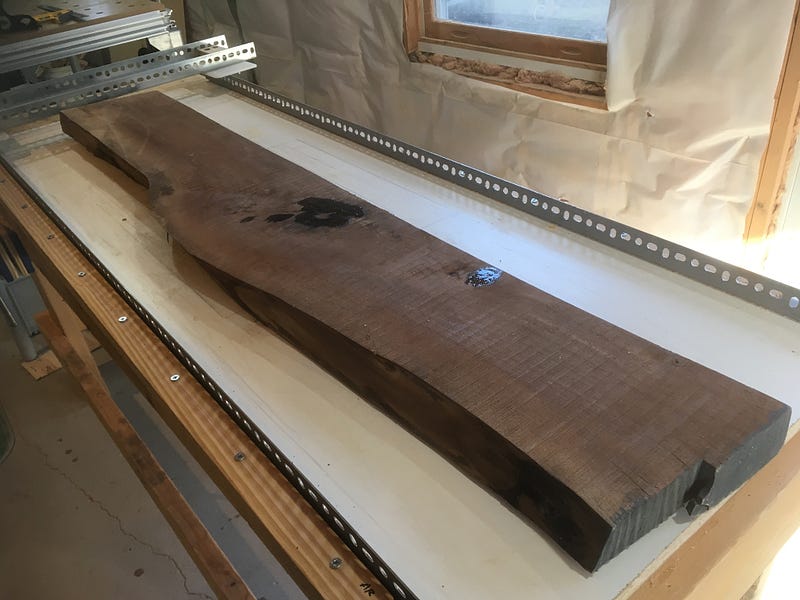
A beautiful slab of walnut, full of promise…
Everything begins full of promise.
But as a novice woodworker, I knew that starting late in life I was not going to make a career from this. I’ve already started a second career of sorts as a scientist, so I am only cobbling together scraps of time to do what I can with limited skills, tools, and imagination.
But still, I had always imagined life as a woodworker as a simple, romantic way of life, which I know is nothing like the reality. The reality is HEPA filters and dust collection, drawings and plans and invoices and insurance and customers and call-lists and marketing…. Still, as a dedicated amateur my journey began full of promise.
I knew I wanted to focus on simple, beautiful objects that showcased the wood’s beauty, not my work. Some, like one of my heroes, Sam Maloof, with the talented hands of a surgeon, can sculpt lines of aching beauty into a simple board where the wood plays merely a supporting role.
I was more of an explorer, an archaeologist, uncovering buried treasures hidden within the compressed sedimentary time of the wood itself. And that is the way I viewed this piece of walnut.
There are times when I want to use as much of the wood as possible to showcase the tree from which it came. This slab of walnut was such a case. I had it for at least a year, bought from my favorite wood supplier who I wrote about when talking about the piano bench:
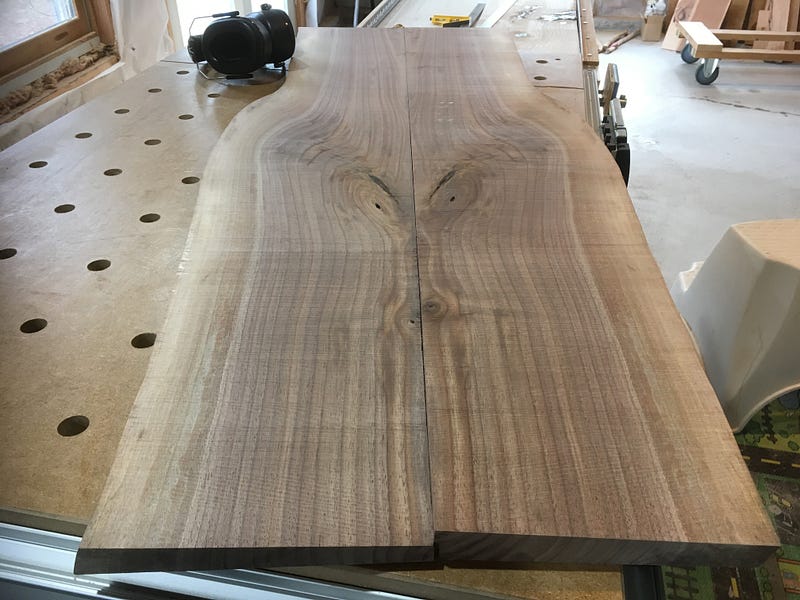
I didn’t know what to make from it, so it slept happily in my basement as I worked on other projects and pondered. It eventually dawned on me to make a live-edged table, a coffee table, emphasizing the live-edge (I only removed the loose bark), and what I hoped was a dramatic grain pattern promised by the knots I filled with epoxy in a bid to stabilize those notoriously finicky defects.
The slab was about two inches thick, plenty of material, I hoped, to resaw (saw through the thickness) so I could double the total area of wood and still have about a one-inch thick table top. I would glue the two pieces along the long straight edge which I would trim to ensure a good stong glue line. And that would give me two things I treasured. A live edge on both sides of the table. And a book-matched, symmetric pattern emphasizing whatever treasure the wood grain revealed within.
Of course, there could be nothing inside this wood, and I would not know until I resawed the piece, and sanded and finished it.
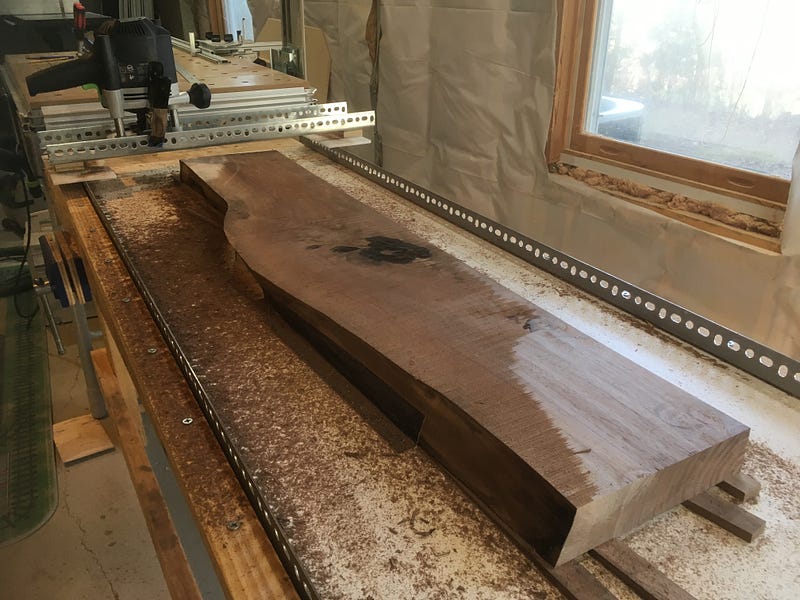
The ends of a slab of wood are often rife with splits, caused by the stresses imposed on the wood as it dries and warps. You can see the warp, the cupping of the wood in the photo above. So, my first cuts to this slab aimed to remove the splits and damaged ends.
Now I had a solid piece of walnut slab with an as-milled straight edge along one side, clean ends, and a live-edge recently debarked by me.
The next job was to remove that warp, the cupping and twist across the width and length of the long slab.
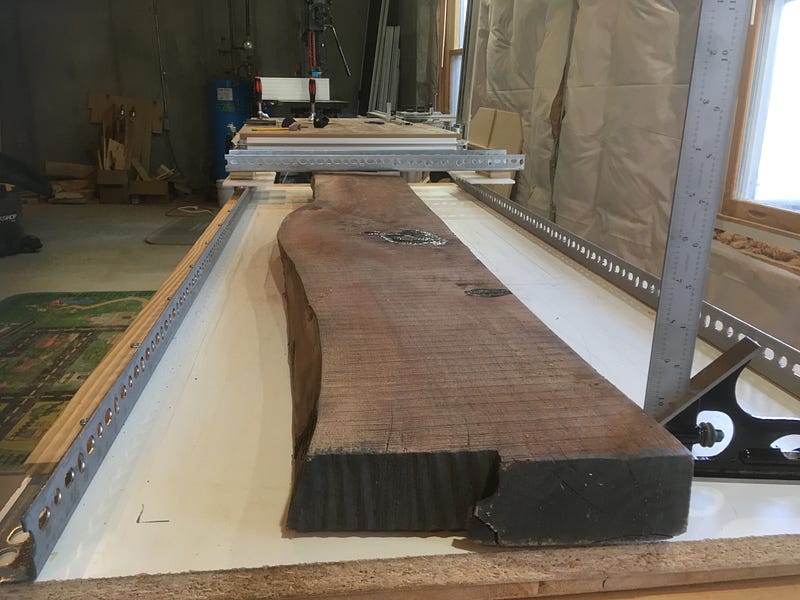
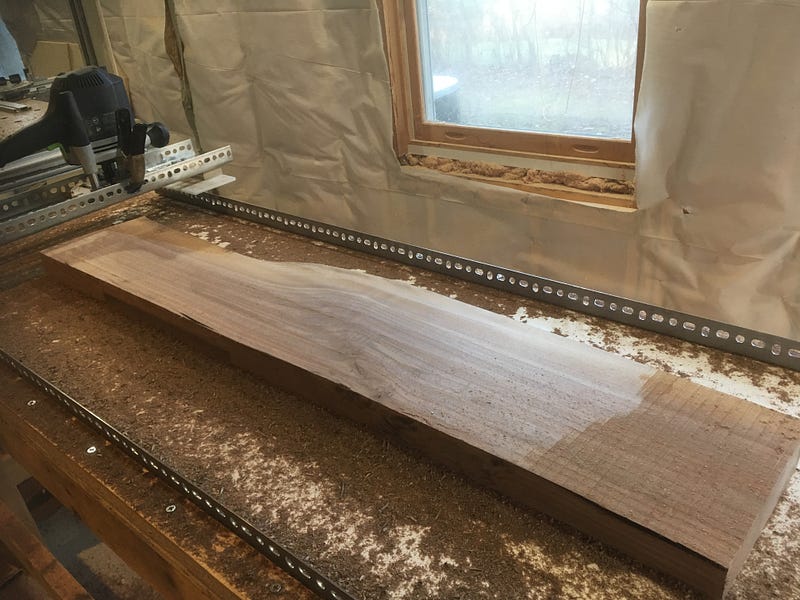
I also wanted to maximize the remaining material after planing the slab flat. The photo below shows the wedges under the ends of the slab to support it during the passes of my router (towards the top left of the photo, sitting in a sled that passes along the length of the slab on the metal rails).
The first pass of the router revealed the severity of the warp as one corner in the upper left is touched, as is the opposite corner in the lower right of the photo.
As I pass the router back and forth, I continually worry about how much material I need to remove to get two flat and parallel faces on this slab. An ironic concern as you’ll see.
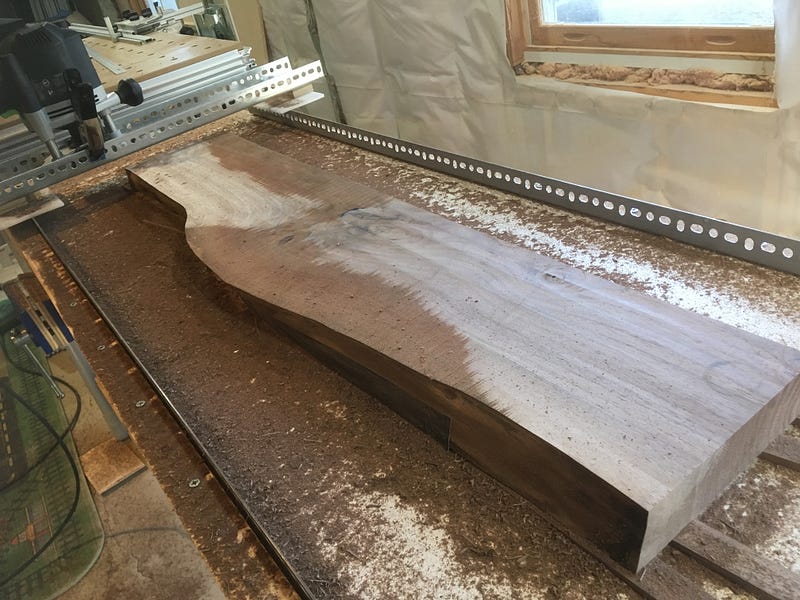
After the second pass the majority of one surface is approximately flat with some low-lying areas in the center of the live edge and one corner of the sawn edge.
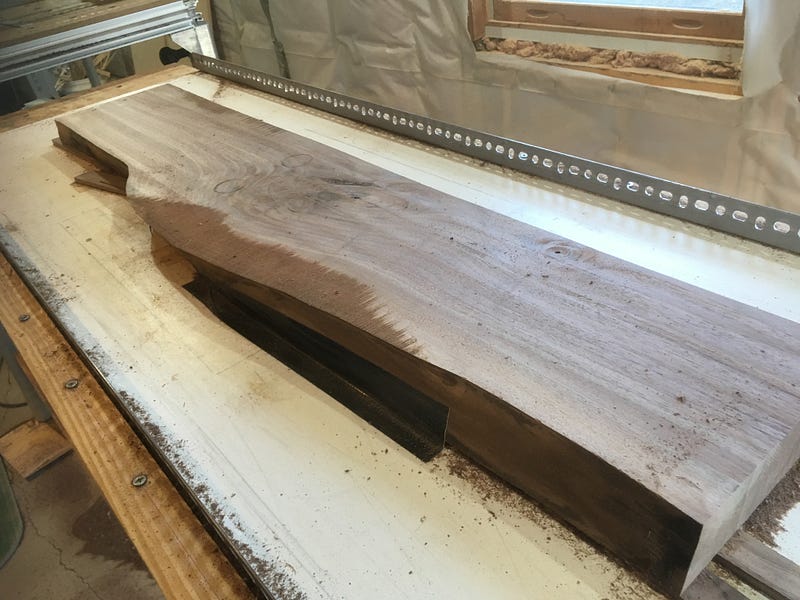
My concern about removing too much material surfaces after the third pass and only the middle portion of the live edge remains low to the flat plane.
I still needed to do the second side, so I made an executive decision to stop planning the first side, and move onto the second.
Now that most of the first side had been planed, when I flipped it over it sat flat on the router-planer fixture. I no longer needed wedges to keep the slab from rocking as the router passed over it.
I just needed enough duct tape (all projects need to use duct tape at least once), to keep the slab in place during the operations. But the weight of the slab provided most of the security.
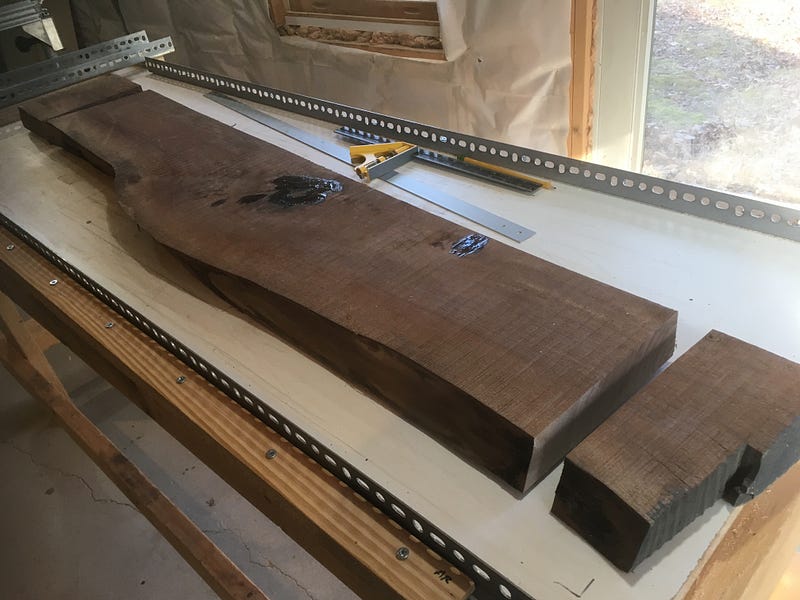
During the milling operation, where the slabs are being cut from the log, the saw blades, while coarse, are straight. So, the slab faces are flat and parallel the moment they come off the mill. During the drying, the wood cups and twists, but the wood was originally straight. So if my first router-planing passes show that the end corners were high on the first side, I know that the first passes on the second side will come from the middle.
That’s what we see in the photo below. If my first of the router took material from one end or another, or from an edge, I know that my wedging on the first side did not maximize the flatness of the board, and I am losing more material than I should.
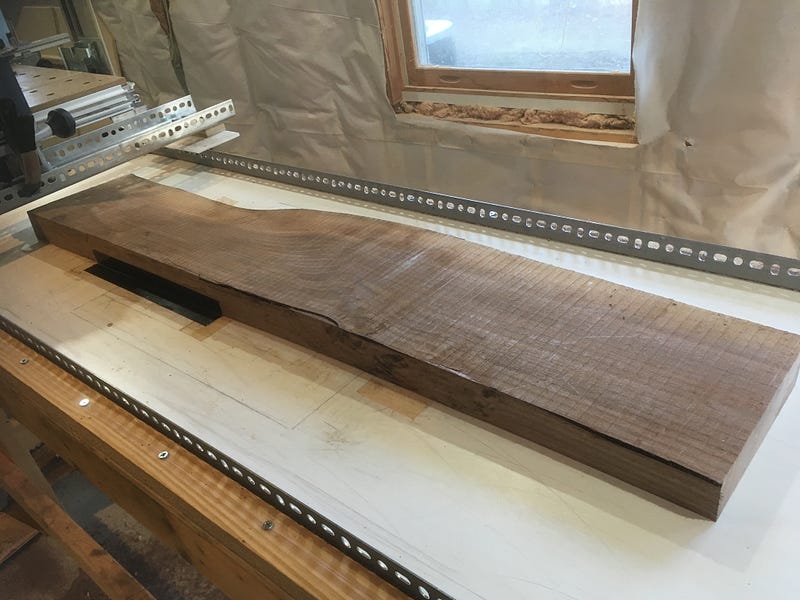
I decided after the first pass on the second side that I didn’t want to remove more material. The next steps all removed more thickness, so I was fine with the ends of the slab on the second side remaining rough. I measured the maximum thickness of the slab, and it was now about 1 ¾”, down from about 2”.
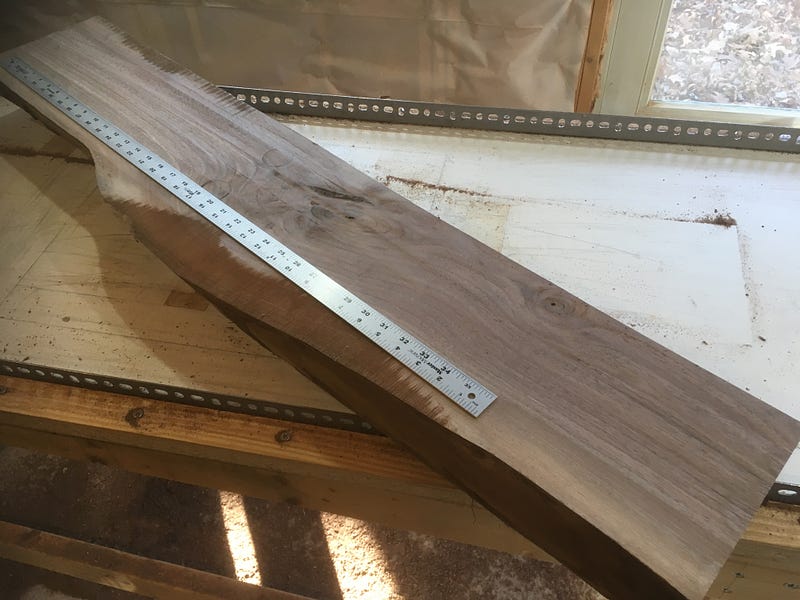
Now I wanted a cleanly sawn edge.
I used a Festool track saw, since I don’t have a tablesaw or jointer, to trim the long edge and effectively joint it.
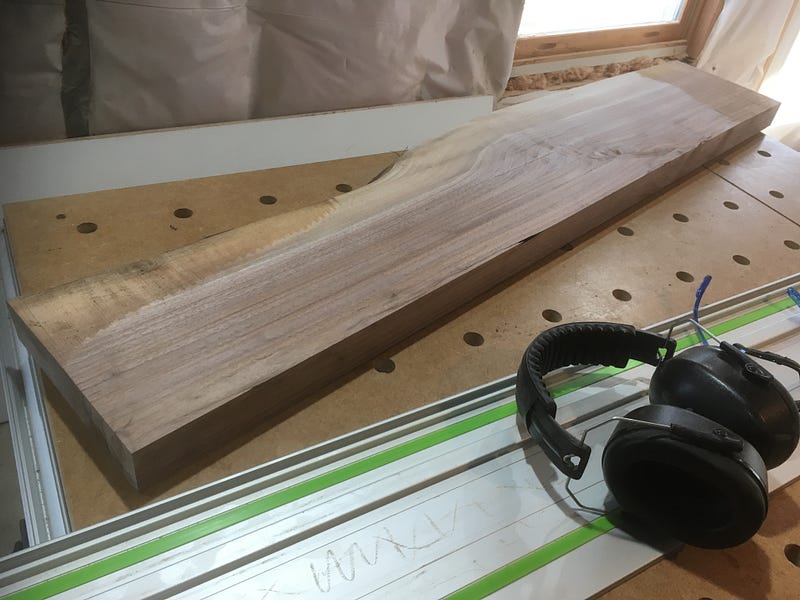
Now that I had good reference faces and a straight and square edge, I could go ahead and resaw this 1 ¾” slab to get two boards just under 7/8” thick.
This is where the disaster happened.
Can you see it?
Look at the end view.
I should have two boards that are the same thickness, with flat and parallel faces.
I was so disgusted at myself and this waste of a beautiful walnut slab that I threw them into a corner of the shop and left them there for more than half a year.
What would you have done here? Have you experienced similar disasters?
I’ll discuss my timid and incremental recovery from this disaster in the next “episode”. Thanks for reading, and please share.


