
The Steepest Learning Curve: From Python to React Native (part 1)
Front-end is the most underrated component of software development
Not a Medium member? Use the Friend Link to read this article!
Having tried out Streamlit, Dash, and Panel, I concluded that they aren’t the right tools for my ownyourdata project. Consequently, I’ve started learning React Native, a front-end framework utilized in web and mobile app development. Learning has always come naturally to me; transitioning from years of bash scripting, PL/SQL, and SQL to Python was a breeze and, as a developer, adapting to new tools, frameworks, or programming languages is part of the daily job life. Yet, I ask myself, is mastering front-end and React Native truly as effortless as the developer forums suggest?
Styles
Before getting into the learning path I’ve created for myself, let me note that I find styling and UX the most challenging tasks while learning. I can, of course, think of an input text area or a button, but which color, which size, in which area of the screen should it be? And most important of all, will it work on any device?

The application I’ve built is uglier than the .com 2000 websites and therefore styling is stressing me out. Who would use such an ugly application? But hey, in IT there’s a solution for everything: there is no need to try out all the styles possible, there are tools to help out with design and user experience. You might have heard of Figma, which was bought by Adobe for just a few bucks!
If you feel overwhelmed by the multitude of choices in styling, a UI design tool might be a good companion.
React Native Learning Path
My learning path will be based on building a ToDo mobile application with React Native and TypeScript, TypeORM for database manipulation, ensuring code formatting and testing. I will be making use of Expo Go, which simplifies a thousand times the setup for a beginner as myself.
Pre-requisite installation:
- Node.js and npm: https://docs.npmjs.com/downloading-and-installing-node-js-and-npm
- Expo Go: install it on your mobile phone
Starting A React Native Project
Just as the documentation mentions, simply type:
npx create-expo-app ToDoListApp
which will generate the project with the following structure:
- a directory
assetsin which you can add globally shared resources in your project (such as images, styles etc); - two hidden directories,
.expoandnode_modules, which contain the installation of your project, providing isolation on your machine (similar to what virtualenvs are in Python); - a file
App.js, being the entry point of your application; - a file
app.json, containing the configuration of your project; - a file
babel.config.json, used for JavaScript compilation; - a file
package.json, used for dependency management (similar to requirements/Poetry setup in Python); - a file
package-lock.json, which locks the dependencies specified inpackage.json(similar topoetry.lock) and ensures dependency version control.
In package.json we also can define npm scripts:
  "scripts": {
    "start": "expo start",
    "android": "expo start --android",
    "ios": "expo start --ios",
    "web": "expo start --web"
  }
which will be executed with npm run ... in the command line.
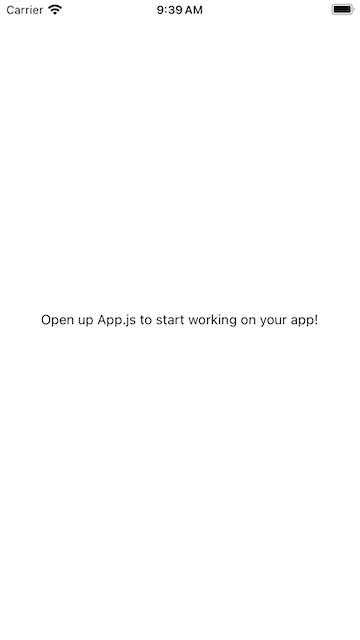
By executing npm run start the application will be started and it can be accessed either on a mobile through the Expo Go app (scan the QR from the command line) or on a mobile simulator installed on your computer. I make use of XCode on MacBook, therefore I have an iPhone simulator running locally. All I need to do is to press i in the command line and the application will spin up through Expo Go on the simulator:
JavaScript or TypeScript
As a beginner I do not have the knowledge to decide which one is better, but after reading the comparison between the two of them I’ve decided to use TypeScript. Since this is a completely new project I have two ways to go around this:
- Either create the project from scratch, by running
npx create-expo-app -t expo-template-blank-typescript; - Either migrate the files, as mentioned at https://docs.expo.dev/guides/typescript/ .
I am opting for option 1: I delete the project directory and create it again, by running npx create-expo-app -t expo-template-blank-typescript ToDoListApp , which will:
- replace
App.jswithApp.tsx, which is the TypeScript extension; - add a
tsconfig.json, which is the configuration file for TypeScript.
Do not forget to add to package.json the script to execute TypeScript checks:
"scripts": {
  ...
  "ts:check": "tsc"
},
Code Formatting
Before starting writing code it is important to install a formatting utility, such that our code is easy to read. We will be using ES Lint and Prettier, as detailed in the official documentation: https://docs.expo.dev/guides/using-eslint/
# install eslint and prettier
npm install eslint prettier eslint-config-universe --save-dev

# add eslint config
vi .eslintrc.json
i
{
  "extends": [
    "universe/native"
  ]
}
:wq!

# add to package.json the lint script
  "scripts": {
    "start": "expo start",
    "android": "expo start --android",
    "ios": "expo start --ios",
    "web": "expo start --web",
    "lint": "eslint ."
  }
By executing npm run lint the code is checked and automatically formatted according to the default formatting configuration.
In order to have a similar formatting with the Python setup, the configuration can be changed to have 4 spaces for tab, remove the ; which is ordinary in TypeScript and increase the line size to 120:
# install the eslint prettier plugin
npm install --save-dev eslint-plugin-prettier
npm install --save-dev --save-exact prettier

# add the prettier config file
vi .prettierrc.json
i
{
  "trailingComma": "all",
  "tabWidth": 4,
  "semi": false,
  "singleQuote": false,
  "useTabs": false,
  "printWidth": 120
}
:wq!

# modify lint script to use prettier and autoformat in package.json

"scripts": {
  "start": "expo start",
  "android": "expo start --android",
  "ios": "expo start --ios",
  "web": "expo start --web",
  "lint": "prettier --write '**/*.tsx'"
}
By executing npm run lint the App.tsx was formatted automatically to:
import { StatusBar } from "expo-status-bar"
import { StyleSheet, Text, View } from "react-native"

export default function App() {
    return (
        <View style={styles.container}>
            <Text>Open up App.tsx to start working on your app!</Text>
            <StatusBar style="auto" />
        </View>
    )
}

const styles = StyleSheet.create({
    container: {
        flex: 1,
        backgroundColor: "#fff",
        alignItems: "center",
        justifyContent: "center",
    },
})- There is a huge disclaimer in prettier to not use line length greater than 80, but I’ll be taking that risk :)
Auto-formatting code while writing in Pycharm can be enabled by following the Prettier tutorial.
Show Me The Data
While not many mobile applications use SQLite anymore and there’s a server in between for data communication (following the 3-tier architecture), my interest is to build an application which stores the data on the client side (on the mobile phone). I will be following the github expo-sqlite tutorial (https://github.com/expo/examples/blob/master/with-sqlite/App.js ), where expo-sqlite is the library used to communicate with a SQLite database.
The library is installed by executing:
npx expo install expo-sqlite
Then we define the database connection and model:
import * as SQLite from "expo-sqlite"
import { SQLiteDatabase } from "expo-sqlite"
// create or open an existing file db.db
function getDatabase(): SQLiteDatabase {
return SQLite.openDatabase("db.db")
}
// create the tasks table
function setupDatabaseObjects(db: SQLiteDatabase): Boolean {
db.transaction((tx) => {
tx.executeSql(
"create table if not exists items(" +
"id INTEGER PRIMARY KEY AUTOINCREMENT," +
"task_name TEXT" +
"completed INTEGER DEFAULT 0,," +
"created_timestamp TIMESTAMP DEFAULT CURRENT_TIMESTAMP)",
[],
(_, resultSet) => {},
(_, error) => {
console.error(error)
alert("Unable to create items table!")
return true
},
)
})
return true
}
// get the database and create the tasks table at application start
export default function App() {
const db = getDatabase()
setupDatabaseObjects(db)
return (
<View style={styles.container}>
<Text>Open up App.tsx to start working on your app!</Text>
<StatusBar style="auto" />
</View>
)
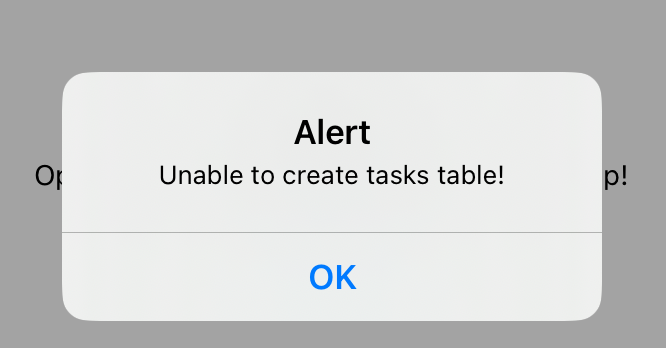
}In the above code snippet there is an error in the SQL (an extra , after completed). This will raise an alert in the application:
Use ORM, not raw SQL!
Before going further, let’s discuss about ORM, the object relational mapping which allows easy communication with the database. Instead of writing raw SQL as above, we can use ORMs to define the database models as classes and use them in our code accordingly. This not only that can bring best practices in database communication (such as transaction, session etc), but it can also save us from writing bad SQL (prone to injection). After reading about different types of ORM, with a tight contest between Prisma and TypeORM, I’ve decided to use TypeORM, just because Prisma cannot be used with React Native:
The installation is straightforward:
# install TypeORM
npm install typeorm --save
npm install reflect-metadata --save
npm install sqlite3 --save
I create a directory database under which I plan to add the model definitions and database migrations. For now, I create the Tasks entity:
import { Entity, Column, PrimaryGeneratedColumn } from "typeorm"

// define database table
@Entity({ name: "user_tasks", schema: "main" })
export class Tasks {
    @PrimaryGeneratedColumn()
    task_id!: number

    @Column("text")
    task_name!: string

    @Column("int", { default: 0 })
    completed!: number

    @Column({ type: "text", default: () => "CURRENT_TIMESTAMP" })
    created_timestamp!: Date

    // extra column for completion information
    @Column("text", { nullable: true })
    completed_timestamp!: Date
}
and configure a data source:
import "reflect-metadata"
import { DataSource } from "typeorm"
import { Tasks } from "./models/Tasks"

// since I work with Expo the db type is expo with expo-sqlite
export const AppDataSource = new DataSource({
    type: "expo",
    database: "db.db",
    entities: [Tasks],
    synchronize: true,
    logging: true,
    migrations: ["./database/migrations/*.ts"],
    migrationsTableName: "typeorm_migration_table",
    driver: require("expo-sqlite"),
})

// make sure to use the AppDataSource in App.tsx too
AppDataSource.initialize()
    .then(() => {
        console.log("Connection initialized with database...")
    })
    .catch((error) => console.log(error))
At application start up we can see in the logs how the table is created:
INFO query: CREATE TABLE "user_tasks" ("task_id" integer PRIMARY KEY AUTOINCREMENT NOT NULL, "task_name" text NOT NULL, "completed" integer NOT NULL DEFAULT (0), "created_timestamp" text NOT NULL DEFAULT (CURRENT_TIMESTAMP), "completed_timestamp" text)Important to notice that while the timestamp columns are defined as Date type, they will be created as text on SQLite.
There are multiple ways to use TypeORM to CreateReadUpdateDelete data and due to the simplicity of the database model, Repository is enough:
// get a repository for model Tasks
const tasksRepository = AppDataSource.getRepository(Tasks)
Create
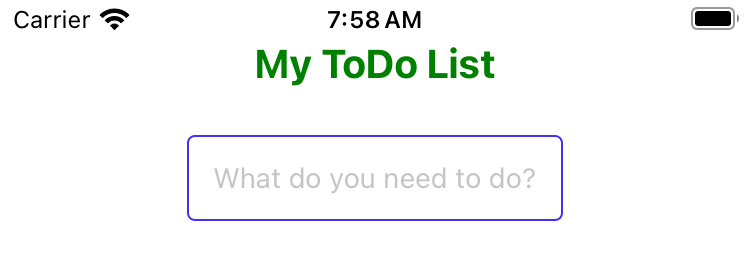
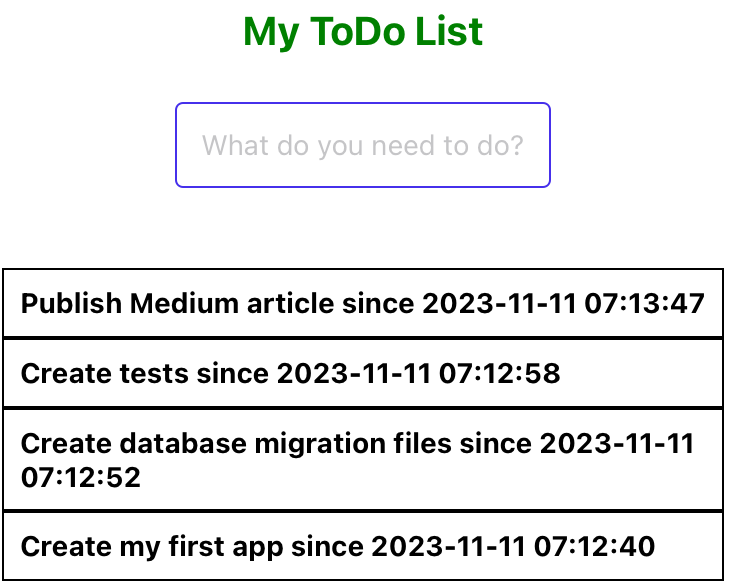
In the ToDo Application the user can insert a task name which will be saved as a task in the tasks table. Important to read about useState on the official documentation: https://react.dev/reference/react/useState.
// define the variables to store the text inserted by the user
interface InterfaceTaskInfo {
    task_name: string
}
const [taskName, setTaskName] = useState<InterfaceTaskInfo>({ task_name: "" })

const add = (text: string) => {
    if (text === null || text === "") {
        return false
    }

    // save the text inserted by the user in the tasks table
    // task_id is autogenerated on sequence
    // completed is defaulted to 0
    // created_timestamp is default to the current timestamp
    const task = new Tasks()
    task.task_name = text
    tasksRepository.save(task)
}

// create a text input
// on change the taskName variable is updated
// on submit (enter) the text is saved to the database
<TextInput
    onChangeText={(text) => {
        setTaskName({ task_name: text })
    }}
    onSubmitEditing={() => {
        add(taskName.task_name)
        setTaskName({ task_name: "" })
    }}
    placeholder="What do you need to do?"
    style={styles.input}
    value={taskName.task_name}
/>
In the console log the database queries look as:
INFO  query:  INSERT INTO "user_tasks"("task_id", "task_name", "completed", "created_timestamp", "completed_timestamp") VALUES (NULL, ?, 0, CURRENT_TIMESTAMP, NULL) -- PARAMETERS: ["Create my first app"]
INFO  query:  INSERT INTO "user_tasks"("task_id", "task_name", "completed", "created_timestamp", "completed_timestamp") VALUES (NULL, ?, 0, CURRENT_TIMESTAMP, NULL) -- PARAMETERS: ["Create database migration files"]
Read
In order to display the data we will be reading it with the same tasksRepository and the find method, together with useEffect (https://react.dev/reference/react/useEffect):
// setup the variable to hold the task data
const [taskData, setTaskData] = useState<Tasks[]>([])

// get the task data
const getTaskData = async () => {
    // order by completed and created timestamp
    const tasksQuery = await tasksRepository.find({ order: { completed: "asc", created_timestamp: "desc" } })
    // taskData will contain the database records
    setTaskData(tasksQuery)
}

useEffect(() => {
    getTaskData()
}, [])

// scroll view of the task items
<ScrollView style={styles.listArea}>
    {taskData.map(({ task_id, task_name, completed, created_timestamp, completed_timestamp }) => (
        <TouchableOpacity
            key={task_id}
            style={{
                backgroundColor: completed === 1 ? "green" : "#fff",
                borderColor: "#000",
                borderWidth: 1,
                padding: 8,
            }}
        >
            <Text style={{ fontWeight: "bold" }}>
                {task_name} since {created_timestamp.toString()}
                {completed === 1 ? " completed on " + completed_timestamp.toString() : ""}
            </Text>
        </TouchableOpacity>
    ))}
</ScrollView>
Important to take into account that the data is retrieved at start and whenever the user inserts a new record it is not refreshed. In order to refresh it I make sure to retrieve the data again in the add function:
const add = (text: string) => {
    if (text === null || text === "") {
        return false
    }

    const task = new Tasks()
    task.task_name = text
    // after a new task is saved retrieve again the data from the database
    tasksRepository.save(task).then(() => {
        getTaskData()
    })
}
This might not be the best approach, I still have to learn to think in React!
In the console log the database queries look as:
INFO query: SELECT "Tasks"."task_id" AS "Tasks_task_id", "Tasks"."task_name" AS "Tasks_task_name", "Tasks"."completed" AS "Tasks_completed", "Tasks"."created_timestamp" AS "Tasks_created_timestamp", "Tasks"."completed_timestamp" AS "Tasks_completed_timestamp" FROM "user_tasks" "Tasks" ORDER BY "Tasks"."completed" ASC, "Tasks"."created_timestamp" DESCUpdate
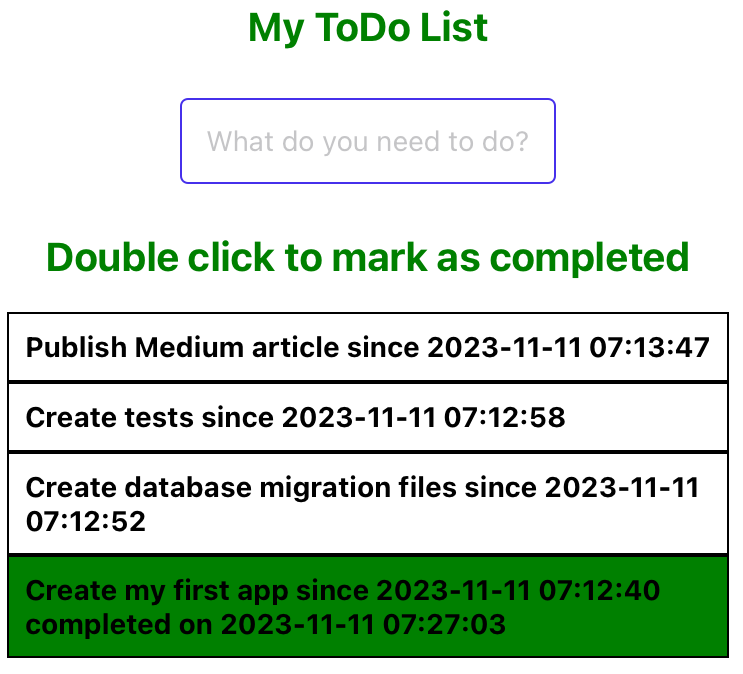
If for create and read it was enough to use the Repository, for update it is necessary to use the QueryBuilder:
// create a function which has as input a task_id
const updateTask = (task_id: number) => {
    if (task_id === null) {
        return false
    }
    // update the task
    // set completed on 1
    // set completed_timestamp to current timestamp
    tasksRepository
        .createQueryBuilder()
        .update(Tasks)
        .set({ completed: 1, completed_timestamp: () => "CURRENT_TIMESTAMP" })
        .where("task_id=:task_id and completed=0", { task_id: task_id })
        .execute()
    // refresh the task data for the task list
    getTaskData()
}

<ScrollView style={styles.listArea}>
    {taskData.map(({ task_id, task_name, completed, created_timestamp, completed_timestamp }) => (
        <TouchableOpacity
            key={task_id}
            style={{
                // if the task is completed show it green
                backgroundColor: completed === 1 ? "green" : "#fff",
                borderColor: "#000",
                borderWidth: 1,
                padding: 8,
            }}
            // if the item is pressed update it as completed
            onPress={() => {
                updateTask(task_id)
            }}
        >
            <Text style={{ fontWeight: "bold" }}>
                {task_name} since {created_timestamp.toString()}
                {completed === 1 ? " completed on " + completed_timestamp.toString() : ""}
            </Text>
        </TouchableOpacity>
    ))}
</ScrollView>
In the console log the database queries look as:
INFO query: UPDATE "user_tasks" SET "completed" = 1, "completed_timestamp" = CURRENT_TIMESTAMP WHERE "task_id"=22 and "completed"=0Delete
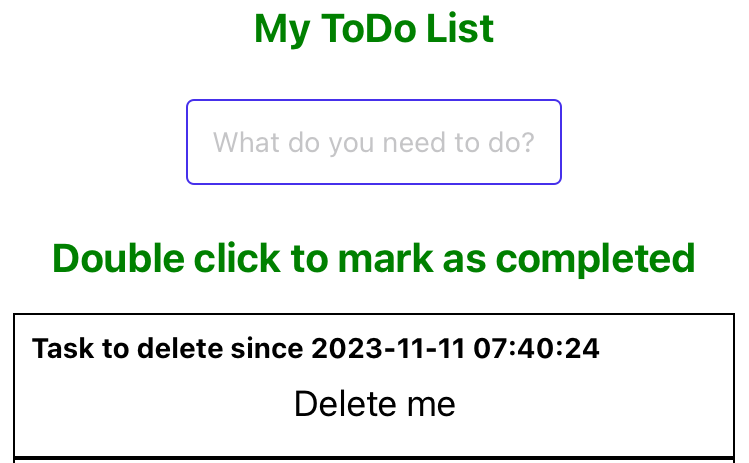
Similar with update, there’s a delete function which accepts as input the task id:
// create a delete function
const deleteTask = (task_id: number) => {
    if (task_id === null) {
        return false
    }

    // delete the record with the task id provided at input
    tasksRepository
        .createQueryBuilder()
        .delete()
        .from(Tasks)
        .where("task_id=:task_id", { task_id: task_id })
        .execute()

    // refresh the list data
    getTaskData()
}

<ScrollView style={styles.listArea}>
    {taskData.map(({ task_id, task_name, completed, created_timestamp, completed_timestamp }) => (
        <TouchableOpacity
            key={task_id}
            style={{
                backgroundColor: completed === 1 ? "green" : "#fff",
                borderColor: "#000",
                borderWidth: 1,
                padding: 8,
            }}
            onPress={() => {
                updateTask(task_id)
            }}
        >
            <Text style={{ fontWeight: "bold" }}>
                {task_name} since {created_timestamp.toString()}
                {completed === 1 ? " completed on " + completed_timestamp.toString() : ""}
            </Text>

            // when pressed delete the record from the database
            <Button
                title={"Delete me"}
                color={"black"}
                onPress={() => {
                    deleteTask(task_id)
                }}
            ></Button>

        </TouchableOpacity>
    ))}
</ScrollView>
In the console log the database queries look as:
INFO query: DELETE FROM "user_tasks" WHERE "task_id"=20To Be Continued
I often wonder whether other fields experience a similar competition regarding the perceived difficulty and complexity of tasks carried out by team members. Not only that during my career I’ve heard that “SQL is for girls” and that “HTML is not programming”, but there’s a widespread misconception that front-end work is inherently easier than back-end, with the belief that crafting the interface should require less time than developing the back-end. While this may hold true in certain scenarios (such as constructing a dashboard compared to creating the API that supplies data to it), I personally find front-end development to be more demanding when building an application from the ground up.
The above is easily supported by the complexity of a mobile application. In the first part of the learning path I am following on React Native I went through:
- starting your first react native app with expo;
- use typescript;
- enable auto-formatters with eslint and prettier;
- use TypeORM to communicate with a SQLite database;
- Create, Read, Update and Delete to do tasks.
The next parts of my learning path will focus on:
- error handling and logging;
- sync vs async;
- implement testing;
- create migration files with TypeORM and better understanding of how the connection is setup;
- implement expo routing;
- implement dashboards with Panel;
- better understanding of states;
- look into how to deploy the application in the stores.
All the above code is available on github: https://github.com/acirtep/todo-react-native .


