
The Circle Cutter
Can’t Duck This Any Longer
If I want to work on the guitar soundboard, plane it down to thickness, brace and voice it, I have to first install the rosette. This circular inlay around the sound hole can be spare and simple or incredibly ornate, but given that the spruce plate for the top starts around 1/8" thick and will finish around 1/10", prudence demands that the circular recess into which the rosette will be glued be carved and the rosette installed when the top is at its thickest.
Modern guitar makers use small “laminate trimmer” routers or dremel tools guided by circle cutting jigs to cut the rosette relief, and I own a laminate trimmer from my contractor days, but I want to do this by hand. I looked at the sweet circle cutter sold by LMI, thought about buying it despite the price, and then noticed it was out of stock, which settled the matter. I would build this tool.
I cast my net out on the sea of YouTube tutorials and pulled in a couple of likely fish. There seems to be nothing you could want to make or fix about which someone hasn’t posted a video, but the builds looked complicated and a little clunky. Lifting a couple of ideas from the videos I tabled the project and repaired to the shop to take up other matters…it turned out the answer was staring me in the face.
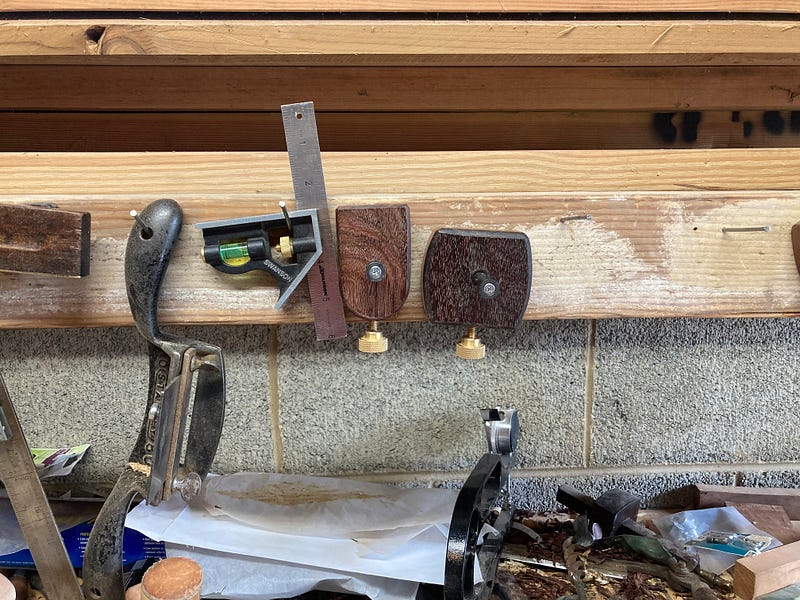
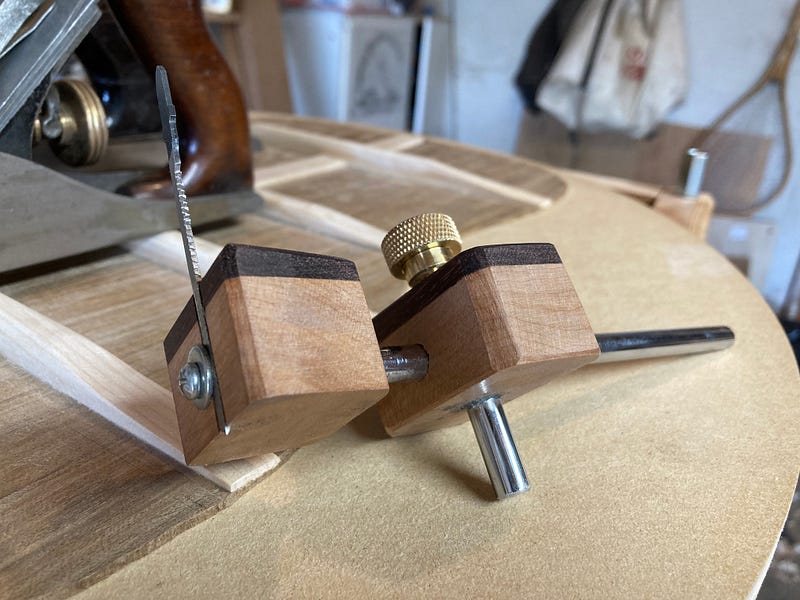
I had built a couple of marking gauges months ago, following James Wright’s (Wood by Wright) instructions. The most important of these was to buy some marking gauge kits from Lee Valley Tools. These are truly elegant; a polished steel round rod with a threaded hole in one end to which you screw the cutting wheel, and a brass thumb bolt that threads into a brass threaded insert to lock the wood “fence”.
I was pretty sure I could adapt these two features to the functions of a circle cutter; the adjustable length bar to lock in the desired radius, and the threaded end which I was sure I could use to lock a cutter in place at various cutting depths.
When I built the marking gauges I laminated a piece of quilted maple to a piece of rosewood to use as the fences, scraps from old projects that had followed me from place to place over the decades. This was good practice for my hand planes, given that I wanted mirror flat pieces to mate for the glue up. I made two gauges and had a chunk of the laminate left over; I ordered another marking gauge kit from Lee Valley and mulled over the design.
Much mulling later I had to concede that this project would have to grow organically. I just couldn’t visualize how the pieces would go together. When I had the kit in hand I cut the glued up-leftover in half and started to fit the cutter. One YouTube maker had ground a cutting edge on a jig saw blade, and those I had, so I picked a narrow one and took it to the water-cooled grinder. There I ground the teeth fairly flat and ground a pointed edge on the end.

To hold steady the blade would have to fit in its own dado slot, easy enough to mark out with a square and marking knife. Laying the blade along the score from the knife I marked the other side, again a scored cut. A little ticklish work with a very sharp chisel and I had the dado.
Marking knifes and gauges make precise work with hand tools possible. The finest pencil line is still many times wider than the score from a sharp blade, and with a knife score it’s easy to guide a chisel edge or cut a shallow shoulder on the waste side to guide your hand saw. I have no idea how you would jig up a power tool for this delicate work.

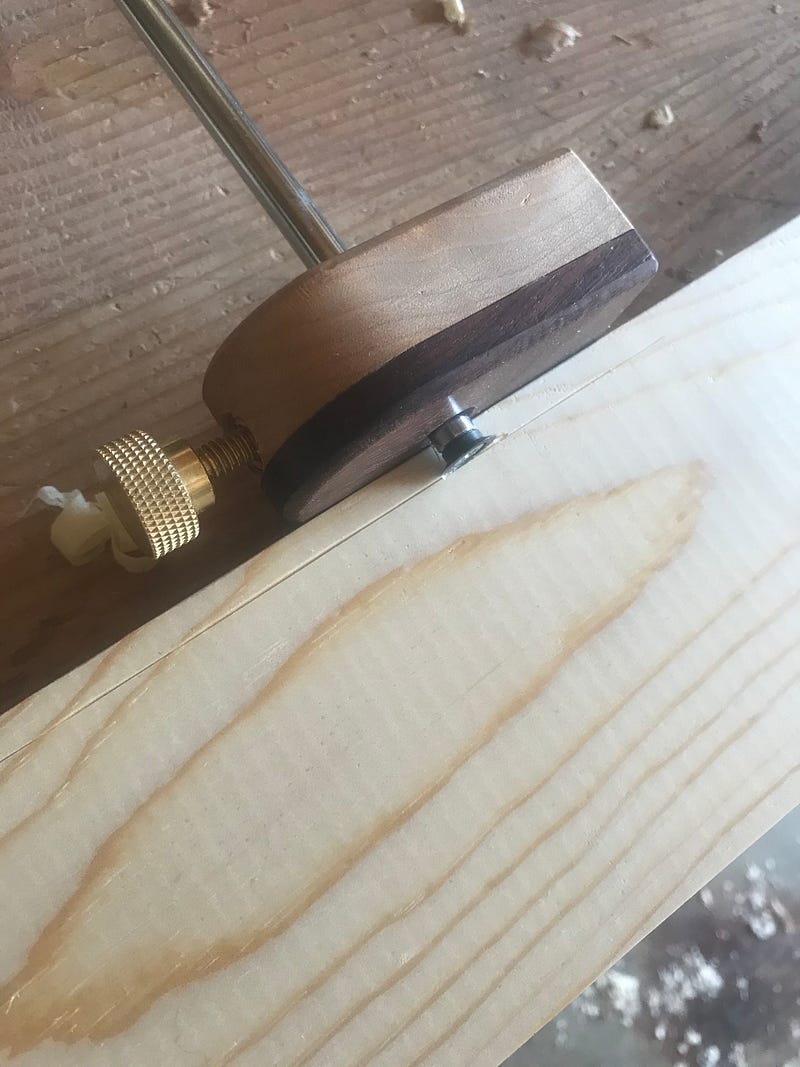
Next I had to drill the hole for the rod to pass through, dead tangential to the cutter slot. I missed by a couple of 64ths and ended up filing the end of the rod a little to allow it to pass by the cutter, no problem as I was pretty committed at this point. I had bought a couple of pan head screws and washers to serve as the blade lock. These seemed to work so I turned to drilling the other block for the pivot rod.
I missed passing square through the block pretty badly so I marked one face of the block parallel to the installed rod and then worked my way around it with a small hand plane, adjusting the faces till all were square to each other and to the rod. Had I a drill press I would have gotten the initial hole square to the block…I don’t have a drill press but I have an eye on one I can pick up pretty cheap. This is one power tool that only years of practice with a hand drill can replace, and I’ve never been a purist. I finished up the afternoon by cutting an inch off the other end of the rod to serve as the pivot pin, drilling a hole in the hub to receive it, and epoxying the pivot pin to the hub and the rod to the cutter end.
This morning I drilled the other side of the hub for the thumb bolt lock and threaded insert, cut the thumb bolt shorter to the scale of the hub, and assembled the circle cutter for trial.
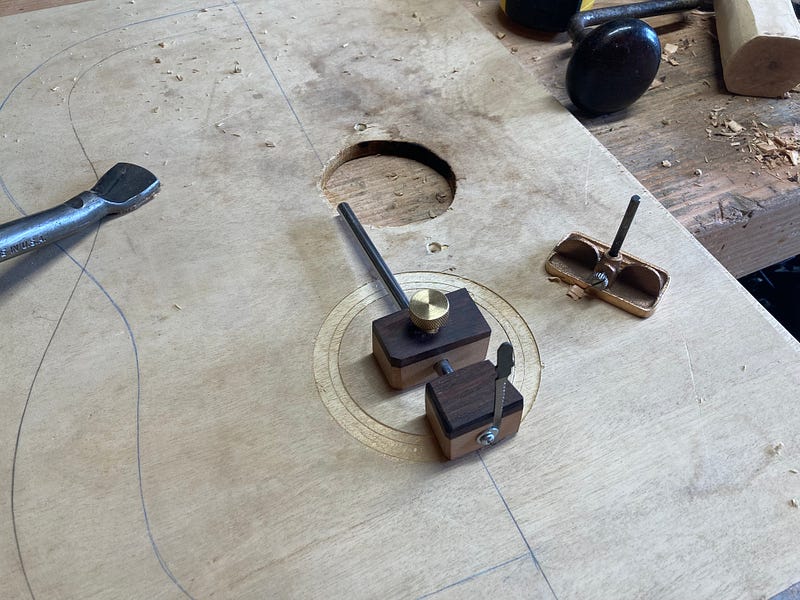
Using my plywood bending iron table for a test piece I bored a hole for the pivot pin, set the depth on the cutter, and started scoring shallow circles in the first plywood lamination. Now was the time to try the tiny brass router plane I had picked up on Ebay…and they worked together as a fine little team! Next I have to design the rosette and try to remember, KISS, keep it simple. ;)