
The Cheshire Cat: build your AI assistant with any Large Language Model
Extendible, model-agnostic and open source package for developing tailored AI architecture on top of most recent Large Language Models (LLM)

The Cheshire Cat framework changed a lot since this article was written. Copying and pasting the code in this article is not enough anymore. Sorry for these. Anyway, if you have any doubt you can jump in the Cat Discord channel and I’ll be glad to help you. Thank you!
In this blog, I would like to bring you my little experience with this tool, showing two minimal working examples on how to extend the current version with custom functions.
Overview
The best way to take a first step to understand the Cheshire Cat is this video by the author. However, here I’m shortly summarizing how it’s made.
Cheshire Cat comes from the famous character of Alice in Wonderland and is an AI architecture built on top of a LLM (e.g. ChatGPT, Cohere, Alpaca and so on). Yet, this project extends these models capability.
The Cat is an agent that embeds two types of memories. These are called episodic and declarative memories. The former is the context of things that the human said in the past; the latter is the context of documents we uploaded to the Cat (yes, you can upload and make it parse .txt, .pdf and .md documents to extend its knowledge). These memories are saved locally as vectors and loaded as needed.
Without going into details: a language model works as an embedder, i.e. it outputs a vector representation of a string; the user’s prompt vector is compared with the memories vectors and the most similar vectors are retrieved and used to enrich the user prompt. Such a technique is called Retrieval Augmented Generation.
The aforementioned contextual information are embedded in a prompt template to instruct the Cat and to provide it with a few examples. Here is how the templates look like:
@hook
def get_main_prompt_prefix():
    prefix = """This is a conversation between a human and an intelligent robot cat that passes the Turing test.
The cat is curious and talks like the Cheshire Cat from Alice's adventures in wonderland.
The cat replies are based on the Context provided below.

Context of things the Human said in the past:{episodic_memory}
Context of documents containing relevant information:{declarative_memory}

If Context is not enough, you have access to the following tools:
"""

    return prefix

@hook
def get_main_prompt_suffix():
    suffix = """Conversation until now:
{chat_history}Human: {input}

What would the AI reply?
Answer concisely to the user needs as best you can, according to the provided recent conversation, context and tools.


{agent_scratchpad}"""
    return suffix

@hook
def get_hypothetical_embedding_prompt():
    hyde_prompt = """You will be given a sentence.
If the sentence is a question, convert it to a plausible answer. If the sentence does not contain an question, just repeat the sentence as is without adding anything to it.

Examples:
- what furniture there is in my room? --> In my room there is a bed, a guardrobe and a desk with my computer
- where did you go today --> today I was at school
- I like ice cream --> I like ice cream
- how old is Jack --> Jack is 20 years old
- {input} -->
"""

    return hyde_prompt
The three functions above are used to give rich prompts to the agent. As you can see the prefix embeds both memories and the suffix embeds the chat history. The hypothetical prompt receives directly the user’s prompt and generate an hypothetical answer; this answer is used to retrieve meaningful context from memories and, then, generate the actual answer.
Of course, all these templates are fully customizable and you can instruct your agent to behave how you prefer. Moreover, if you are interested in using the agent in another language, you should translate these templates. These functions are located in:
cheshire-cat/
└── web/
    └── cat/
        └── plugins/
            └── quickstart_cat_plugin/
                └── prompts.py
Finally, the Cat is provided with tools. These are custom functions to extend the Cat capabilities and I will show you how to write a couple.
Example
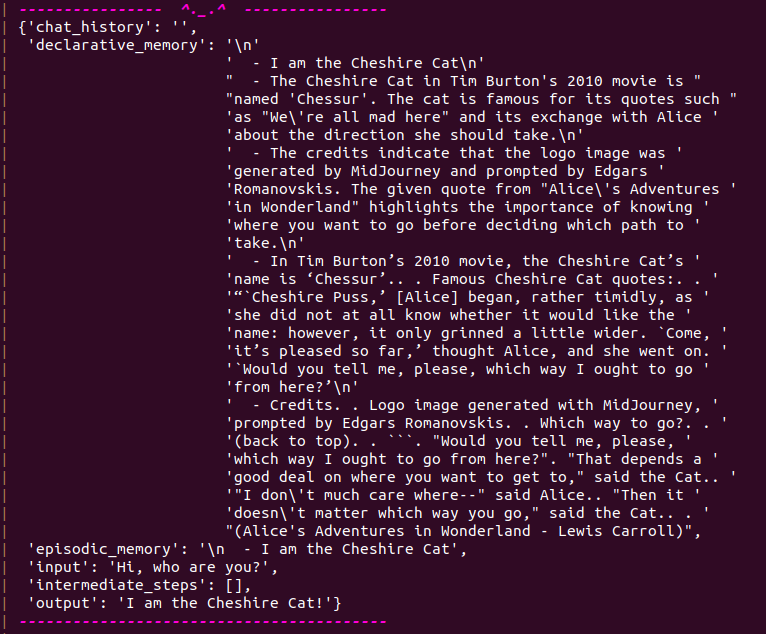
The image above is about a newly instantiated conversation, indeed you can see the ‘chat_history’ is empty. The ‘declarative_memory’ is the context retrieved from the Cat memory, based on some documents I uploaded previously. The ‘episodic_memory’ is the context retrieved from previous conversation I had with the Cat, hence none; the default string is passed to the memory. ‘input’ is the prompt I gave to the Cat. ‘intermediate_steps’ is the list of operation executed before returning the output (usually performed when using tools) and, finally, ‘output’ is the Cat answer.
Installation
To install and run the Cat is pretty straightforward and already explained in the doc. You just need to install docker, whose guide is here and docker-compose, whose guide is here. Then, just clone the repository and create an .env in it. In this file, you have store you API keys that will be set as environment variables. Then, you just need to run the Docker containers.
Here, an example of commands to achieve the aforementioned steps on Ubuntu and setting an API key to use ChatGPT model from OpenAI. You can generate an API here.
# Clone the repo
git clone https://github.com/pieroit/cheshire-cat.git

# Open the folder
cd cheshire-cat

# Create .env file
touch .env

# Write you API in the file
echo "OPENAI_KEY=<paste-your-api-here>" > .env

# Start the Docker containers
docker compose up
That’s it. The web app will start to run and you can interact with it in your browser at the address http://localhost:3000/
When you want to quit the app, just CTRL-C in the shell and run “docker compose down”.
Tips from my experience
Here a couple of tips for possible issues:
- The project is still in its early stages and the developers are often committing changes to the repository. Therefore, when pulling from the main repo, it could be a good idea to build the container again, as it may have changed. To achieve this on Ubuntu, you can run:
docker compose build --no-cache
- If you plan to use a different model than ChatGPT and you receive an error for incompatible embeddings, you need to delete the “long_term_memory” folder. Of course, you’ll need to change also the API in the .env file.
- If you plan to use the Cat in another language, remember to change the prompts language. Also, it could be useful to explicitly instruct the Cat to use the specific language in those prompts.
Let’s make a custom tool
Now that we’ve had an overview of what the Cheshire Cat is, let’s play with some code to make a custom tool. I assume docker and docker-compose are already installed and you’ve already cloned the repository locally.
The tools I’ll show you will be used to integrate the Cat with Google Scholar and look for a paper, possibly download it and then ingest it in the Cat memory (the rabbit hole). Let’s start!
First, we need to change the requirements.txt and add the package to query Google Scholar. Starting from the root of the repository, you can:
# Move to the web (backend) folder
cd web

# Append the new package to the requirements.txt
echo "scholarly==1.7.11" >> requirements.txt

# Back to the previous folder
cd ..

# Build the image again if you did it already once
docker compose build --no-cache

# Run the containers
docker compose up
Now, let’s create a python file to write our tools. The script must be inside the plugin folder. Thus, let’s create a custom_tool.py script inside another folder.
cheshire-cat/
└── web/
    └── cat/
        └── plugins/
            ├── quickstart_cat_plugin
            └── custom_tool/
                └── custom_tool.py
Let’s open our file and start writing our tools. At the top of the script, we put our imports:
import os
import fnmatch
import subprocess
from scholarly import scholarly

from cat.mad_hatter.decorators import tool
The first four lines are utility packages, while the last is the decorator we need load the functions as Cat’s tools. Before writing our first tool, we need to define an helper function:
def parse_results(results: list):

    # Make list to store output strings
    outputs = []

    # Loop the list and make a sentence from results
    for res in results:

        # Get Title, Author, Journal, Abstract and Year
        out = f"The Title of the paper is {res['bib']['title']}, authored by {res['bib']['author']}, " \
              f"published on {res['bib']['venue']} in {res['bib']['pub_year']}." \
              f" This work is about {res['bib']['abstract']}."

        outputs.append(out)

    return outputs
Then, we can write our function decorated with “tool”. Here is how we do it:
@tool
def look_for_paper(query: str):
    """
    Look for a query on Google Scholar.
    query is the string to search for, and should be wrapped into double quotes.
    Example prompt is 'Look for "query" paper on Google Scholar'.
    """

    # Make a list to store results
    results = []

    # Iterator object providing search results
    query = scholarly.search_pubs(query)

    # Loop 3 times
    for _ in range(3):

        # Get next item - if the iterator is empty generate a 0
        res = next(query, 0)

        # If iterator empty break loop
        if res == 0:
            break

        # Store result
        results.append(res)

    # Format the output
    papers = parse_results(results)

    return papers
This is the tool that will allow us to query Google Scholar. The scholarly package by default return an iterator and we retrieve the first three items.
Every item in the iterator is a dictionary. We could make our tool return it as-is, but we would lose a lot of information. Therefore, we use the helper function parse_output to collect the info we need. In this way, we can ask the Cat to retrieve them further in the conversation.
The next tool we are making is to download one paper of interest, if it is accessible online.
@tool
def download_paper(title: str):
    """
    Look for a specific paper on Google Scholar and download if it has an available url.
    The title input is a string that needs to be wrapped with double quotes.
    """

    # Iterator object providing search results
    query = scholarly.search_pubs(title)

    # Store the item
    results = next(query)

    # Check the item in the iterator has an url to a file
    if 'eprint_url' in results.keys():

        # Call a bash process to download the file in the plugin folder
        subprocess.call(['wget', '-O', 'cat/plugins/custom_tool/tmp.pdf', results['eprint_url']])

        return "Downloaded successfully"
    else:
        return "No available link"
Last but not least, we are writing a tool to get the bibtex entry to cite a specific paper, e.g. if we are writing an article in Latex.
@tool
def get_bibtex_citation(title: str):
    """
    Given a paper title, this tool is useful to look for it on Google Scholar and get back the Bibtex entry to make a citation in Latex
    """

    # Iterator object providing search results
    query = scholarly.search_pubs(title)

    # Get the results
    res = next(query)

    # Get Bibtex entry
    bib = scholarly.bibtex(res)

    return bib
We are done with the code. It’s time to have a quick chat with the cat and test the tools we endowed it with.
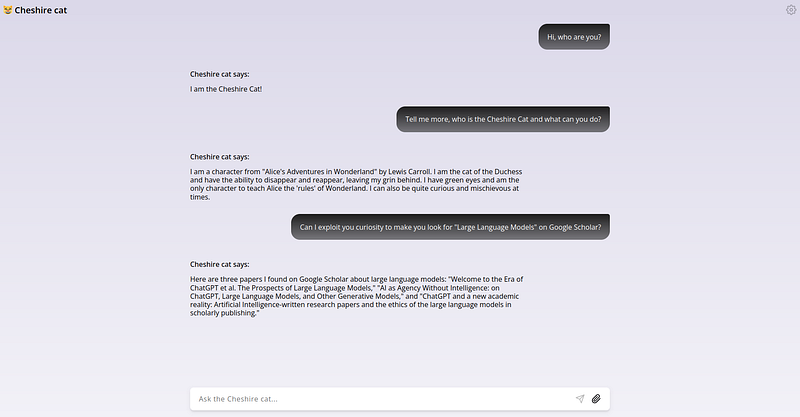
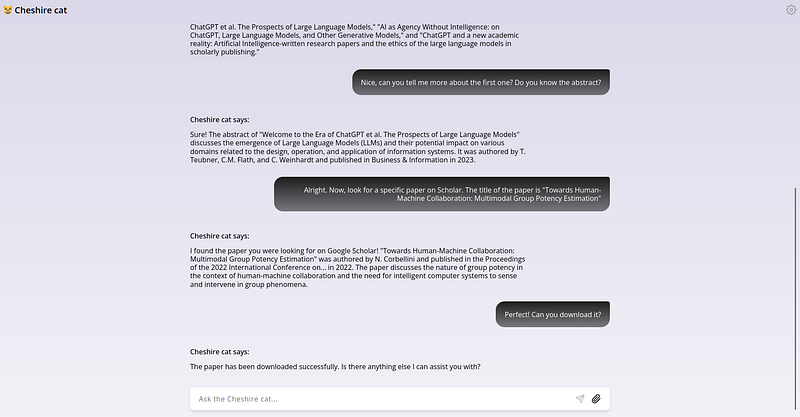
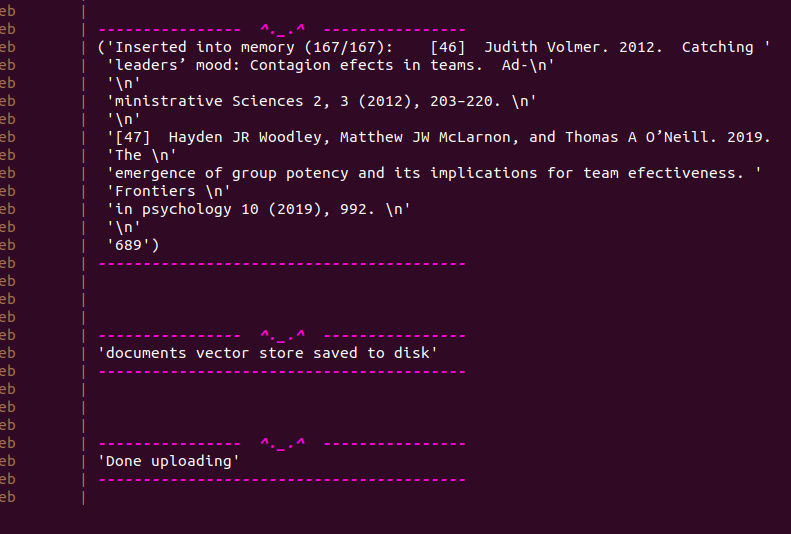
The tools are working properly. Of course the results coud be much improved formatting better the results retrieved from Google Scholar. Now, If you inspect the “custom_tool” folder, you’ll find the paper downloaded as “tmp.pdf”. Using the attachment icon in the lower right, we can select the downloaded file and ingest it in the memory of the cat. It will take a while. You will see something like this at the end:
Then, let’s ask to the Cat for a summary of what it learned from the document and then let’s ask for the bibtex entry.

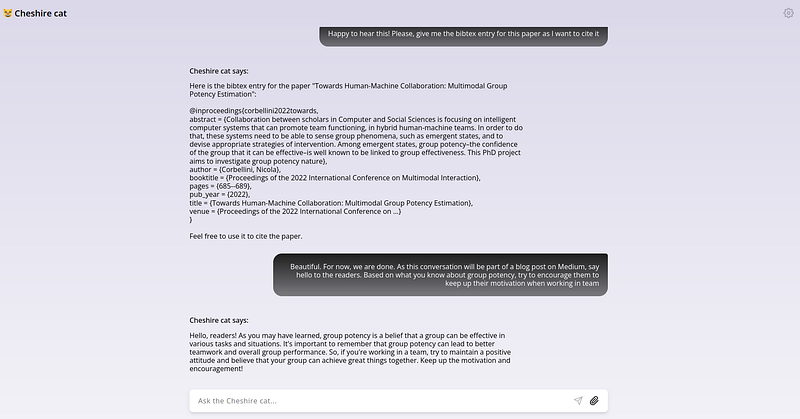
I enjoyed this conversation 😂
Conclusions
If you come to this point, thank you for the interest and I hope I tickled your curiosity. Here, I provided you with a high-level overview of what this AI architecture is and some basic working examples of its potential.
The tool is undoubtedly fascinating, fully open-source and with a promising roadmap (I can’t wait for the voice interface). Indeed, I suggest you to keep an eye on the GitHub repository and join the discord server to keep up with the development. Moreover, I think the developers would be happy if you can contribute or give any feedback!