
The Best Ways To Increase Productivity and Marketing Using Evernote
Evernote has made my work easier

Different marketers face different challenges. They typically share similar goals, but some marketers fail to accomplish their tasks on time. Sometimes, they don’t understand how to choose the right technology for their projects.
Whatever the problems and projects may be, there is always a way to improve our marketing and productivity. For many years, I have had tried different components, strategies, and marketing tactics. You will probably think that global marketing issues have changed because of different media platforms, but the struggles of marketers have not changed. In fact, today’s marketers work harder and face a lot more challenges than the ones who worked in this field in the past.
The State of Inbound Reports presented in 2017 and 2018 have made it clear that the main challenges of marketers and creative-minded people have remained the same, with slight changes in non-American regions.
What Is Evernote?
Evernote is a popular note-taking application. It has been developed by the Evernote Corporation. Using this app, I organize my tasks, create notes, and save them in the form of drawings, photos, web content, and text. These notes can be edited, tagged, exported, annotated, and searched.
People approach me to know more about the benefits of Evernote for marketers, as they think that I am an expert at using all of its features. Basically, the application helps me keep reminders on my to-do-lists. I love using my iPhone Evernote app to create notes.
Whether I have to share my notes with someone or need to brainstorm on a whiteboard, all my texts and photographs remain saved in Evernote. You can also use Evernote to keep the scripts for interviewing your customers. When you and your marketing team are working on a particular project, this app can help you exchange the best resources privately.
Here are the best ways to increase productivity and marketing utilizing the Evernote app.
1. Prepare a Library for Social Media Updates
Every marketer needs to know what’s happening on social media. Facebook, Twitter, Instagram, and LinkedIn are a good way to promote certain products, but trends keep changing and new things and strategies are introduced almost daily. Having a social media updates library means marketers will remain informed about the latest ideas and techniques. This could increase their productivity and might help them create the best marketing campaigns.
Here’s how to do it using Evernote:
- Create notebooks dedicated to Facebook updates, LinkedIn updates, Twitter updates, and so on.
- You can add different types of details depending on your projects.
- Use stacks and tags to organize things in an appropriate way.
- Pull out all of your updates from Evernote and add them to your social media accounts.
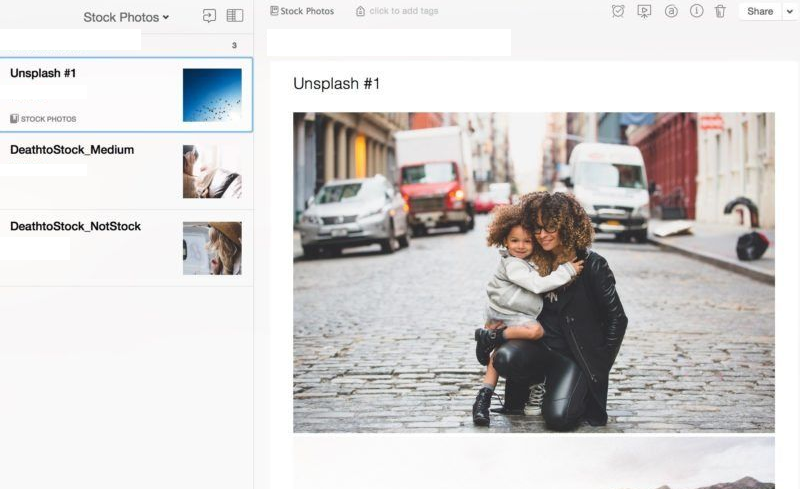
2. Prepare a Stock Image Library
If you are creating a content marketing plan, it will not be considered complete without great visual elements. I have had created various stock image libraries using Evernote. These libraries help me organize my images and access the best photo resources. You could also organize your photos depending on the workflow. One good way is creating a Stock Photos notebook that will consist of different Quora images, landscape images, real-life images, and other similar options. The best places to grab images are:
- Startup Stock Photos
- Death to the Stock Photo
- Unsplash
- Pexels
3. Set Up a Social Media Calendar
A social media calendar is the app or spreadsheet used to schedule social media posts. I use it to plan which content will be shared with the target audience, monitor the performance of different marketing campaigns, and track deadlines. Evernote supports three different formats: spreadsheet, software service, and printed paper. If you want to create a weekly or monthly social media plan, please remember:
- Create the Notebook with daily or weekly notes.
- Schedule all of your articles and updates in a way that you don’t have to open a social media account to publish them individually.
- Once it is done, the next step is to jump into Evernote to add everything to the to-do-list.
Buffer has helped me save a lot of time. You can also use it to streamline the process by copying different photos and text from Evernote, pasting them directly to Buffer, and adding them to the social media queue.
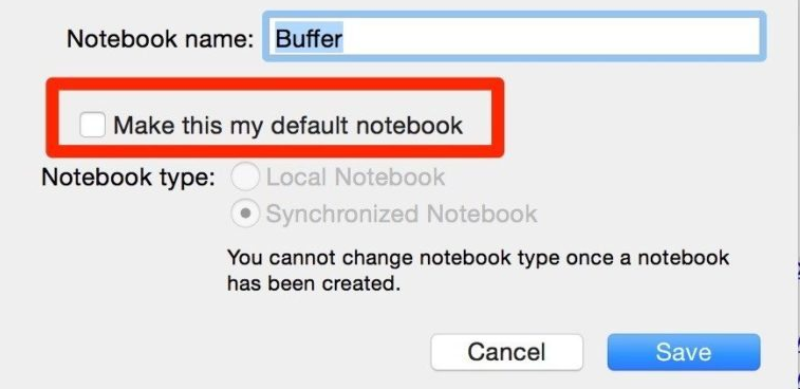
4. Try a Default Notebook
One of the most important things I have found is that a default notebook can save a lot of time and makes us more productive than ever. Evernote lets me set the notebook where I can save all my photos and texts. It is easy to review those texts before forwarding them to a customer or team member. I sometimes organize them alphabetically for quick and easy access. If you also set a default notebook, you will be able to plan things for the whole week or month in advance. In order to do so, you should follow these simple steps:
- Right-click on the notebook in the Evernote list and choose the option Notebook Settings.
- Next, you have to click on the option Make this my default notebook.
3. Collect the information from your desktop and import it to Evernote.
In this way, you can save as many text files and images and can access them with a single click whenever you want.
5. Use the Web Clipper of Evernote
The Web Clipper of Evernote is also called Extension. I have installed it on my Chrome browser. If you don’t use Chrome, go ahead and try it with Firefox or another browser of your choice. The advantage of using this extension is that it lets me save anything I find on the internet.
If you are fond of saving images, weblinks, and articles for offline use, you should also try the Web Clipper as this will let you copy and paste the most important data from the web to Evernote. It is where you can take advantage of a default notebook. I clip all of my important web pages and organize them.
6. Evernote’s “Read It Later” Option
Evernote’s reason to exist as a popular app is that it is a place to dump everything I need to store. You could use its read it later option to save as many articles as you like. The following process has to be followed.
- Open and examine the URL you had saved in the notebook, or search any web page you want to capture.
- Convert it into a simplified form.
- Click on the Save Clip button.
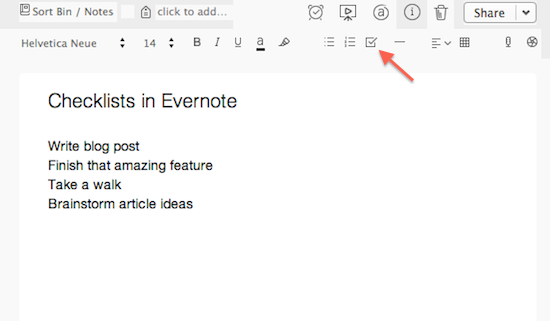
7. Checklists To Stay Organized
I love checklists. The good news is that Evernote can help marketers, content creators and businessmen create great checklists. Here are the easiest ways for desktop and mobile users.
On a desktop device
- In the note, you can quickly make a list. Use the cursor to highlight the items of your list and click the Checklist icon present in the toolbar.
- Another way is to click the Checklist icon and begin typing the list. After hitting Return, you will see that a new checklist item has been created.
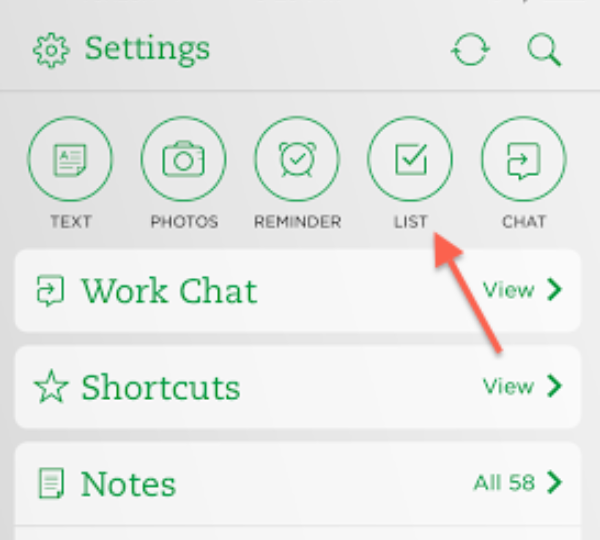
On a mobile device
- Open the note and go to the List icon. Here you will see a pop-up box of different options like the checklist. Begin typing the list and hit Return. Mark the item Completed once you’ve done the work.
- You can go to the home screen of Evernote to find the option of List. Tap it and the app will start a new note automatically.
Evernote is my favorite because it allows me to create checklists using any type of device.
8. Setup Evernote To Receive Email Newsletters
For me, it is one of my major goals to end the day with an empty inbox. This allows me to have enough space for new messages. After utilizing Evernote, a lot of my time is saved because I don’t rely on the email organization structure. Instead, I have shifted myself to newsletters. If you want to follow in my footsteps, remember the following points:
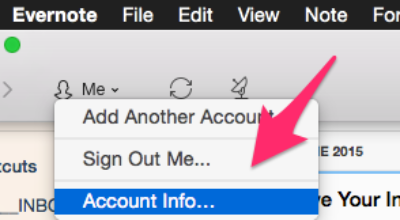
Click on the Me option from the dropdown and select Account Info.
Now click on the More Account Settings button.
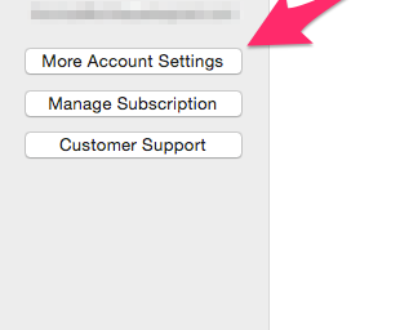
Once the web page is opened, go to the Email Notes to find your personalized email address. Emails sent to this address are automatically converted into notes and stay there till you read and delete them.

From this specific area, you can subscribe to your favorite newsletters without implementing any sophisticated subscription method. Like normal subscription messages, you will have to click on the Confirm button to receive emails in your Evernote account.
9. Exchange Notes/Information With Your Team
You may have a lot of work-related details to be shared with your marketing team. I suggest you create spaces in your business account and utilize Evernote to privately exchange notes or information. Here’s a quick snapshot of how I share things with my own team.
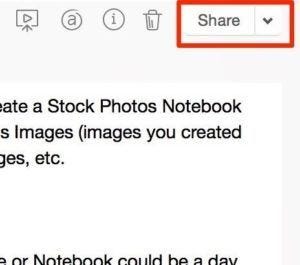
- Open the note you’d like to share.
- Click on the Share button.
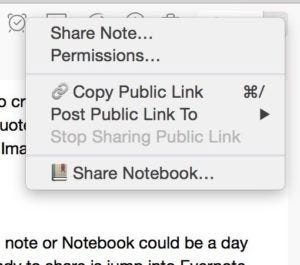
- Enter one or more email addresses.
- Set the permission level.
- Click on the Send Invitation button.
- Use time tracking in Evernote.
- Click on the Start Timer button and TMetric will begin recording your working time. When you want to stop it, simply click on the Stop Timer button.
- You may edit the time entry according to the name of your task and the tags you’re using.
- When the TMetric task has been disassociated from Evernote, you can view the time report.
Evernote has always helped me keep track of my day-to-day data in the form of notes. It also allows me to create tables that I could use in different documents or on social media. You can also use its time tracking option to get the maximum results in a short time. This enables me to monitor the performance of different social media campaigns and lets me become more productive.
10. Create a Table of Contents
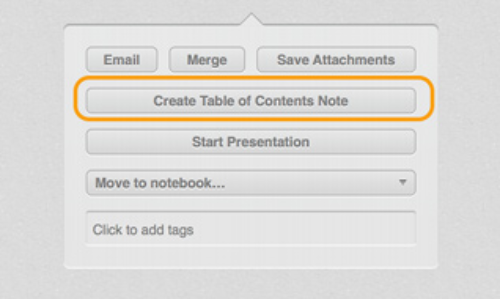
I often create a table of contents. It allows my customers to go directly to a particular section of the online document. I copy the note links of individual notes and paste them into the existing or new notes. You can also create a table of contents to make your work look good. The best part is that this table will contain multiple links to Evernote content and outside content. Here is the actual method:
- Choose different notes while holding down Ctrl+click in Windows and Cmd+click in Mac.
- Click on the Create a Table of Contents Note option. This will create a new list of individual links for every note.
Evernote lets me associate my notes and table of contents with big presentations and access frequently-used notes.
11. Use Tags To Organize Notes
Using Evernote, I can easily and quickly add tags to my notes to make them searchable and readable. The software lets me add as many tags as I want. I mostly use the following two methods.
First method
This suits me when I have to add tags using my personal computer or Mac device.
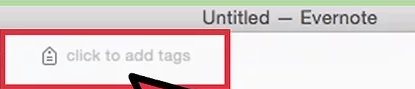
- I launch the desktop application of Evernote and click on the New Note icon present at the top.
- Then I select the Click to Add Tag option from the note editor and enter the tag, followed by pressing the Enter button.
Second method
This method is ideal for those who use iPod touch or iPhone devices.
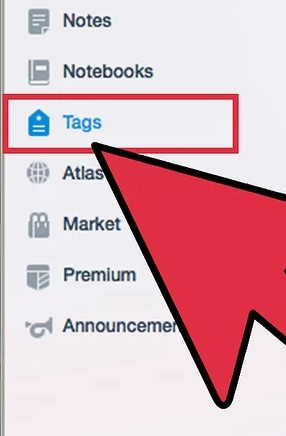
Launch the Evernote application from the home screen of your device. Go to the Notes section at the bottom of the screen.
Choose the note you will add tags to. Tap the Tags input field and insert the tags using commas.

Click on the Save button present at the top of the screen.
These are some of the simplest and easy-to-follow ways to improve your productivity and marketing with Evernote. There are many other applications too, but I have not found a great and reliable alternative to this note-taking app.
Thank you so much for reading the post. If you have any comments, suggestions, or questions, feel free to get in touch.