

📈 The best productive Swiftlint stack with a baseline system
Swiftlint has been around for almost 9 years but still doesn’t support the baseline feature. At Shopmium, here is the best workaround strategy we pushed in order to fix this lack of a significant feature when we are working on a Swift project with a large legacy codebase and we want to add Swiftlint to prevent writing code smells. 🔀 Check out my article that list the 4 bests tools to integrate in your iOS githooks including Swiftlint
A baseline is a “fixed” configuration of a project at a given moment.
What is the baseline by the way ?
A baseline is a “fixed” configuration of a project at a given moment. Basically, in our case, a file could contain all different warnings of the whole project, and when Swiftlint runs, it will first look at this file. If a warning is already present in the ‘baseline’, it won’t raise a warning; it will be “muted”. Powerful baselines (such as Detekt or Ktlint) system allow the linter to unmute a warning if a single piece of the line saved has changed. This feature may pop in one day a PR is currently opened.
Swiftlint doesn’t have a baseline feature, and in the 8-year-old project, we integrated and faced more than 6.5k warnings 😨, but without a baseline, we could not spend time on it. Here are the four parts of the strategy we adopted (which could also be applied outside of a context of dealing with the lack of baseline).
- Step 0: Choose wisely your linter rules
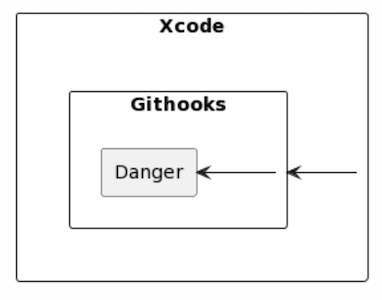
- Step 1: Setup Swiftlint on Xcode
- Step 2: Setup Swiflint in the pre-commit githook
- Step 3: Swiftlint Danger plugin on CI Side
Step 0: Choose wisely your linter rules
We deactivated some rules that could be complicated to maintain without risking breaking the code behavior, and we couldn’t check and add a //swiftlint:disable:next everywhere. So, we analyzed and removed some rules by commenting them with a comment: #To reenable with a baseline. We reduced 3k warnings with that.
Use the standalone tool instead of the SPM. It’s more reusable and faster. No need to download it after a clean of the DerivedData
Step 1: Setup Swiftlint on Xcode
First of all, I recommend installing SwiftLint outside of Xcode. By installing it as a command-line tool instead of using the SPM package or CocoaPods, you can avoid downloading it every time after cleaning derivedData or when opening Xcode.
brew install swiftlint #as simple as this :D
The first hack is to not run SwiftLint on all files but only on unstaged and staged files in Git. This way, you won’t have warnings on files you’re not currently working on. If the file is a legacy one and long, it may present a challenge, but it’s also an opportunity to add some ‘swiftlint:disable:next’ directives if you can’t fix it immediately (with a strategy to address them later 💪). Here is the script I implemented in my build phase.
As a team, we accepted for our strategy to allow — no-verify when we don’t want to mute or fix inherited warnings (The CI is more important)
Step 2: Setup Swiflint in the pre-commit githook
In this article, I explained how to add SwiftLint to the pre-commit hook of your Git repository. Since we didn’t integrate SwiftLint as an SPM/Pod tool but rather as a standalone, we can utilize the same version of the tool without installing it twice. It’s just an additional step, and to be fair, it’s ‘optional’ if you already have Step 1 in place, but redundancy is often beneficial (and it only takes a few seconds). Here is the code for the pre-commit hook.
As a team, we’ve adopted the strategy of allowing the use of — no-verify 😱 when we don’t want to mute or fix inherited warnings (especially when they are unrelated to your PR context), and let’s move on to step 3 to understand how it will be addressed! For example, if I’ve run SwiftFormat on the entire project and SwiftLint raised 70+ warnings, I’ll take a look, fix a few of them, and then push with the ‘no-verify’ flag.
The danger plugin will give you the warnings ONLY on the modified code posted on your PR: It’s like a baseline
Step 3: Swiftlint Danger plugin on CI Side
Having Swiftlint on CI is a gate which MUST be present for your iOS/Swift project. And Danger (an article on the best danger-plugin is currently under ✍️) must be a tool you should use (to me it’s a must have). This is the last piece and the most important because natively, it support a kind of a baseline feature (natively in Danger plugin APIs).
Here is the sample of the Dangerfile to allow to have the Swiftlint warnings ONLY on the modified code (which is like a baseline), as inline comments of your source code. If you don’t push with no-verify, you shouldn’t have warnings on CI side 😏.
Conclusion
In summary, this SwiftLint stack enables you to have the best of both worlds for shipping the best possible code:
- Faster: Pre-commit and Xcode integration enable you to have warnings locally, without SPM.
- Safer: Three levels of security: IDE, Git-hooks, C.I.
- More productive: A baseline system that allows you to address as many legacy warnings as possible while also focusing on new code by providing the option to locally ignore legacy warnings.
You liked this content ? You can 👏, comment, or share. Feel free to re-use the code, improve it on my gist ❤ and look at my others publications which deals about mobile native technology on both iOS or Android.


