
The Best Isolation Exercises to Build Each Muscle Group
Build a symmetrical, aesthetic and muscular physique with these thirteen exercises that target each muscle group.
Do you want to build muscle? You should be doing some isolation exercises in the gym.
Yes, compound exercises should be the foundation of any fitness routine. But heavy compound lifts are fatiguing and fatigue works against us in the gym when it comes to getting stronger and building muscle.
So, some degree of isolation training will be necessary to optimise muscular development.
There are dozens of muscle groups in the body, some very small muscles aren’t relevant to physique development, but these thirteen are.
To build muscle, increase your strength and create a symmetrically muscular, “toned” and aesthetic physique, you should be doing these isolation exercises in the gym.
What are isolation exercises?
Isolation exercises target one specific muscle, muscle group or joint. In reality, very few (if any) exercises will only use one muscle group, but isolation exercises specifically target one area and don’t use multiple joints.
Isolation exercises can also help to target areas of the body that are overlooked in compound exercises, such as the side and rear deltoids.
Although the basis of a workout should be compound lifts (multi-joint), isolation exercises certainly have their place.
Rather than focusing on moving as much weight as possible, the focus of isolation exercises is improving technique, the mind-muscle connection and feeling a pump.
Compound vs Isolation exercises
In contrast to isolation exercises, compound exercises use more than one joint or muscle group at the same time.
Compound exercises tend to give you the best ‘bang for your buck’ when it comes to strength training and building muscle. This is because several muscle groups are used together and these exercises can be used to load a lot of weight, compared to isolation exercises.
Workouts should begin with these heavy compound multi-joint movements.
When should we use isolation exercises?
Hey, I thought compound lifts are the best, why should we bother with isolation exercises?
I had this perspective for a long time. Then as I got older, I learnt about injuries and overtraining.
There are only so many heavy compound exercises we can do in a workout, 6 days a week, 50 weeks a year until we break down…
It’s inevitable.
You might not lift that consistently, but some do. And even so, regardless of your consistency, your energy and strength in a single workout will fatigue with heavy compound exercises.
So, include some isolation exercises to increase how many hard sets (training volume) you can do without creating recovery demand for our other muscles or joints.
To stimulate the best muscle-building results and strength gains, around half the exercises in a workout should be isolation exercises, and these should be performed after your compound exercises.
Shoulders
One of the more noticeable body parts on a person, even in clothing, is the shoulders. It is essential to train shoulders for that broad v-tapered look that so many men train for and for those toned arms that many women want.
The shoulder, or deltoid, is a ball-and-socket joint that connects your arm to your torso. Your deltoids help move your arms in different directions and also protect and stabilise your shoulder joint.
Our deltoids are made up of three heads:
- Front deltoids (Anterior) help move your arm forward.
- Side deltoids (Lateral/medial) help move your arm out to the side, as well as up and down.
- Rear deltoids (Posterior) help move your arm backward.
Avoid isolating front deltoids — they already get a lot of work from the heavy pressing movements that should be the backbone of an exercise routine (overhead press & bench press)

Rear Deltoids—face pulls
The rear deltoid is perhaps the most neglected muscle in the gym.
Why? Because we don’t see it in the mirror and it’s just not a very glamorous muscle group to exercise.
But it shouldn’t be ignored! As well as helping to give your shoulders that 3d look, it’s important to overall shoulder health, and posture, to ensure the ball joint of the shoulder sits in the socket properly. All the pushing exercises we do in the gym can create a front-to-back shoulder imbalance, pulling the shoulder forward and potentially leading to possible shoulder impingement and rotator cuff issues.
We absolutely shouldn’t ignore the rear deltoid!
To effectively strengthen the rear deltoids, they must be isolated. A 2013 study by Button and colleagues indicated that rear deltoid isolation exercises are far more effective for targeting these muscles than compound exercises like a row.
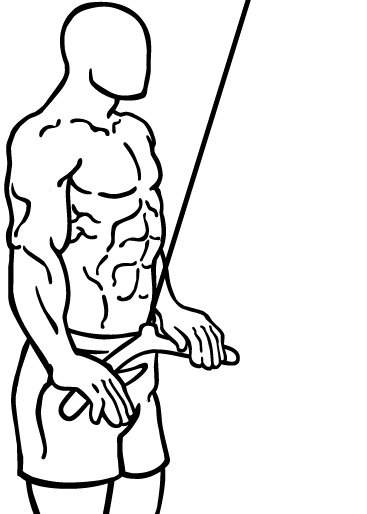
The isolation exercise that we’re using to target these rear shoulder muscles is the face pull.
The rear delt’s primary function is transverse shoulder abduction. Face pulls combine transverse abduction and external rotation, making it perfect for isolating our rear deltoids and also strengthening the rotator cuff.
It should be beneficial for should health to use as an assistance exercise on a push day, to help eliminate the potential for this issue.
Exercise tips: set the cable up at shoulder height with a lighter weight that you feel like you can easily do for 15 or so reps. Trust me, people often go way too heavy and have to yank the weight with other muscle groups around the rear deltoids.
Use the two-sided rope attachment and grab the handles with a neutral grip, with your thumbs in contact with the handles, not your pinkies.
Take a couple of steps back to take a stable stance a few feet back from the cable and lightly retract your shoulder blades so your upper back is in a strong position.
To begin a rep, drive your elbows up and back, as you pull the rope toward your forehead.
Depress your shoulder blades and externally rotate your arms outward through the positive phase, your arms ending in a position similar to a double bicep pose.
You should feel your rear deltoids work with a slow and controlled contraction.
After pausing quickly to hold the contraction, slowly release the rope in a slow and controlled manner for the eccentric phase, letting the shoulder blades come forward slightly.
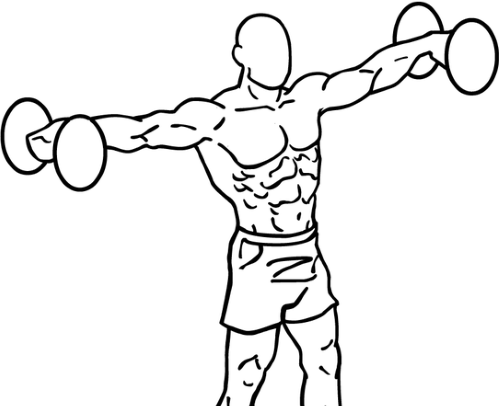
Side (medial, lateral) Deltoids — dumbbell lateral raise
One of the most important isolation exercises if not the most important from a physique development perspective is the lateral raise.
Why?
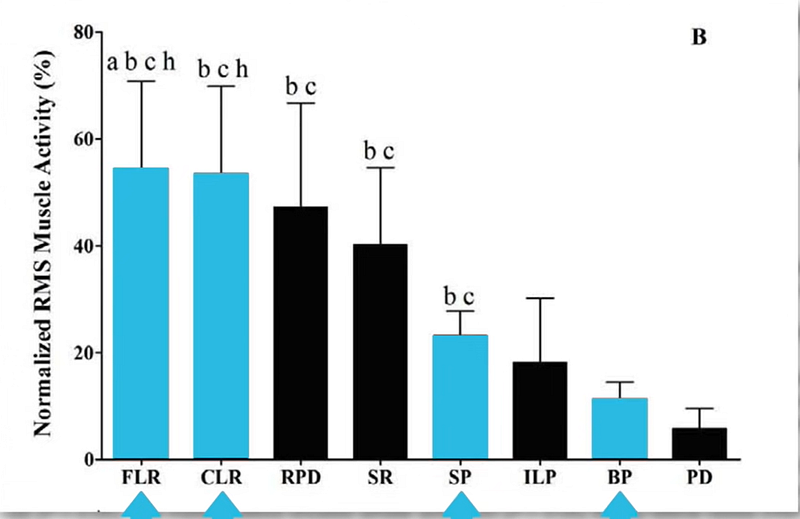
Because none of the heavy compound lifts activates the side deltoid as well as isolating it with a lateral raise. A 2013 study found that the free weight lateral raise elicited very high levels of side delt activation compared to the shoulder press and bench press.
Our side deltoids are primarily activated through shoulder abduction - raising your arm out to the side.
And, we don't want to miss the side deltoid as it is a key muscle to create the look of wide shoulders and the illusion of a smaller waist
Although the cable variations are also very effective, I’ve chosen the dumbbell lateral raise as it is more easily accessible for everyone with even very basic equipment at home.
Exercise tips: As with most single joint isolation movements, use a lighter weight for a lateral raise, in a higher rep zone — something around 10 to 20 reps.
Put your index finger up against the head of the dumbbell to help grip the weight. Your pinky finger should be closer to the middle of the handle to increase internal rotation, to make the side delt work harder.
Going heavy is a common mistake.
Try to keep your glutes flexed throughout the range of motion, to prevent excessive hip movement
Heavy loads often result in a form breakdown and use momentum to move the weight. You should probably take 10–20% off how much you think you can do easily for 15 reps, and start with that.
From the beginning of the movement and on the way down, some degree of shoulder flexion will occur as the dumbbells come slightly in front of your torso and some scapular upward rotation.
With your shoulder blades retracted, initiate the concentric phase by leaning out and up with your elbows. Try not to lift the dumbbell straight out to the side. It should be around 15 to 30 degrees to the front of your body.
Think about flexing your side delts to move the weight and try to keep your forearms and upper arm soft. Sweeping the weight out will help keep the tension on the deltoids and minimise your traps taking over.
Raise your pinky slightly higher than your thumb to create internal rotation on the positive (up) movement. Pause at the top of the movement, before controlling the eccentric phase at around 1.5 times slower than the concentric.
To make it tougher, try to hold constant tension on the muscle by starting the next set without coming to a complete stop. However, you should still pause quickly to stop the use of too much momentum (swinging).
Arms
Male or female, most of us go to the gym to get more muscular or toned arms.
It takes some people a couple of years to realise there are other exercises besides a bicep curl!
Our arms are made up of two key muscle groups - the biceps and triceps.
There are also our forearms, but they will receive a lot of work already just through gripping heavy weights and doing compound exercises such as pull-ups.
Plus, most of us are short on the amount of time we have to train in the gym. Working out your forearms directly is taking precious time away from another muscle group that will make more of a difference to your overall physique.
So, we won’t worry about the forearms.
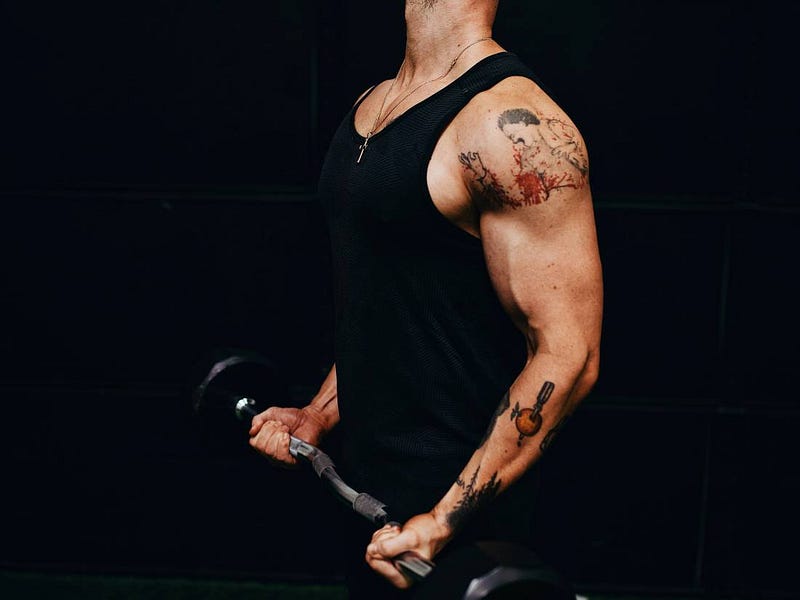
Biceps
If you hand someone a dumbbell, instinctively the first exercise they’d do is probably the bicep curl.
For guys especially, we all want bigger biceps.
The biceps are comprised of two heads, the short head (which sits on the inner portion of the upper arm) and the long head (which sits on the outer portion of the upper arm).
Mechanically, our biceps have three functions — elbow flexion (curling), forearm supination (turning palm up) and shoulder flexion (lifting shoulder up). So, to best activate the bicep, we need to incorporate all three of these movements.
Research indicates that to best target both heads of the bicep, we should combine curls where the shoulder is more extended (behind us), with exercises where our shoulder is more flexed (in front) of us.
Curls with the upper arm positioned behind us emphasise the long head of the biceps with a greater stretch and curls with the upper arm in front of the torso target the short head more.
Heavy compound lifts just don’t activate the biceps at the optimum level to maximise their growth. Therefore, to get bigger arms, we have to curl.
Furthermore, hypertrophy (ability to build muscle) of the bicep cannot be maximised unless we emphasise the eccentric phase.

Biceps Short-Head— EZ bar curl
Your go-to movement for growing your biceps should be a curl. between dumbbells, a barbell or EZ-bar — they’ll all do the job.
The big advantage of the barbell or EZ bar curl is the ability to increase the weight more easily to progressively overload. Most gyms will have 1.125 and/or 2.25 kg plates to add to each size, whilst the available t dumbbells might go up in bigger progressions which could compromise proper form.
I'm recommending the EZ bar curl here as it will feel more comfortable than a straight bar on many peoples' wrists during a curl.
Exercise tips: Use a supinated (underhand) grip shoulder width apart, and load the bar with light to moderate weight, aiming for around 8 to 20 reps.
Loading our biceps too heavily will result in a form breakdown as other muscles help heave the weight up and the use of momentum to "cheat" sets.
There shouldn't be much movement from your knees, hips or lower back, as it creates momentum. However, it is okay to use a little momentum to squeeze the last couple of reps, whilst maintaining eccentric control.
A recent study by Schoenfeld and colleagues found that focusing on squeezing the biceps during curls resulted in a better ability to build muscle.
Therefore, instead of trying to lift as much weight as possible, focus on improving your mind-muscle connection and squeezing the biceps as you curl.
With a strong stance, shoulder width apart, and a braced core with slightly bent knees, use a loose grip on the bar to increase biceps involvement and minimise activation of the elbow flexors of the forearm.
Tuck in your elbows comfortably close to your sides and flex the shoulder to bring your arms forward by about 10 degrees. Because the biceps short head attaches to the front end of the scapula, tilting them posteriorly will pull more tension onto the biceps
Squeeze slightly with your pinky and ring fingers rather than your pointer and middle fingers to help activate the bicep short head.
Curl the bar out in front of you in an arc rather than straight up and at the top of each rep, and on the eccentric again you want to slowly lower the bar out in an arc. Actively resist the weight from "falling" down.

Biceps Long-Head — incline dumbbell curl
To target the peak of your bicep (the long head), we need to perform a curl where our upper arm is held behind the body. Bicep curls with the arm behind the torso place the muscle under a greater degree of stretch such as an incline dumbbell curl or drag curls.
We’ve just covered many of the fundamentals of bicep curls — many of the same technique recommendations as the EZ bar curl applies to any variation of the bicep curl.
“During performance of exercises where the upper arm is held behind the body, the long head is placed in a greater position of stretch compared to the short head and therefore is able to generate maximal force.” — Schoenfeld, 2010
Exercise tips: Set a bench up on an incline of around 60 degrees.
The aim is to do higher reps to fatigue the bicep, so choose a lighter weight so that you can finish 15–20 reps. However, it shouldn’t be too easy! The last few reps should be a push.
Sit down with your upper back against the bench and your elbows back.
Instead of our arms being slightly in front of the torso, they're about 20-30 degrees behind the body. Make sure that you keep your elbow back and shoulder extended forward.
Do both arms at once to save time and generate fatigue in a more efficient manner and from a metabolic stress standpoint, you’re allowing tension to completely stop as you switch arms.
Start each rep from a dead hang, squeezing your ring finger and pinky as you curl the weight up. Pause quickly at the top, before slowly releasing the weight down for the eccentric.
Activation of the bicep is highest at the top of the range of motion for an incline curl and lowest at the bottom. Therefore, don’t worry too much about the bottom half of the exercise, but really focus on squeezing the bicep with a quick pause at the top of the concentric phase.
Triceps
The triceps are the less glamorous sibling to the biceps, but probably contribute more to overall arm size.
There are three heads to the triceps, a lateral or outer head, a medial head that runs down the middle and a long head that sits on the inside of the arm.
Since all three heads cross the elbow joint, the primary function of all three triceps heads is to straighten the elbow out through extension.
For overall triceps mass, the long head may be the most essential for creating that overall appearance of arm mass — especially from behind.
The medial head is far less noticeable than the other two heads, so we’ll skip that muscle. To target the other two heads, we should include a triceps exercise one where your arm is more overhead such as a skull crusher, and one where your arm is down at your sides such as a triceps push down.

Triceps Long-head — skull crushers
Because the long head of the triceps is a bi-articular muscle, meaning it crosses both the elbow and the shoulder joints, it becomes stretched and more active with the shoulder in a flexed and extended position.
The optimal activity of the long head is at 90 degrees of shoulder flexion, and with the skull crusher, we have around 90 degrees of shoulder flexion. Moreover, exercises with the arms extended overhead will better target the triceps long head because it provides a greater position of stretch.
The skull crusher is therefore perfect to target the triceps long head.
Exercise tips: Use a light to moderate weight, between 8 to 20 reps. An EZ bar with a semi-pronated grip should put less strain on your wrists.
position the bar at the top end of the bench, pick it up with a shoulder-width grip, using your lats to pull the bar up overhead
Lay down with your head slightly off the end of the bench, allowing you to more easily clear your head with the bar on the way down.
Just like a bench press, your shoulder blades should be retracted and depressed before each rep, to create upper-body tightness and shoulder stability.
Move the bar back over your face to initiate the first rep and help pull tension onto the long head of your triceps.
As you lower the weight to begin a rep, try and maintain constant tension on the triceps through the range of motion, as a 2017 study found that tricep extensions with partial range of motion through the mid-range of reps led to almost twice as much hypertrophy (muscle growth) than a full range with tension being lost at the top of the movement. However, don’t compromise your range of motion too much!
Each rep should begin with the bar slightly back while maintaining a slight bend in the elbow.
Your elbows should be comfortably tucked in and locked into place so they shouldn’t be excessively flaring out or in as you extend them. However, depending on your skeleton and mobility, some degree of flare may be necessary.
The weight should be in an arc rather than straight down to your forehead, allowing you to overload the triceps by increasing torque at the elbow joint.
At the bottom of the eccentric phase (lowering), your forearms and biceps should just make contact. Pause and squeeze your triceps to initiate the concentric to move the weight up and slightly forward.
Keep your shoulder stable during the concentric to keep the tension on the triceps through elbow extension as opposed to shoulder extension. Too much movement at the shoulder will get your chest and lats involved, reducing triceps activation.
Triceps Lateral-head — triceps pushdown
A well-developed lateral head of the triceps will help give your arms that “horseshoe shape” from the side.
The best way to activate the lateral head of the triceps is with an extended shoulder position, to place more emphasis on the lateral head of the triceps.
The triceps push-down using a cable machine is a great exercise to exercise the triceps with the shoulder in an extended position.
Exercise tips: Using a straight or EZ bar, whichever feels more comfortable, hold the bar with your elbows extended forward in front of your torso.
You can use a rope but it isn’t as stable as a bar, resulting in less overall tension on the triceps. However, using a rope will help queue some people to squeeze their triceps better at the bottom of the movement.
Set the cable up so that the bar hangs at about eye level and hold the bar using a shoulder-width overhand grip. Don’t use an underhand grip as the triceps don’t contribute to supination, so underhand is only going to reduce the amount of weight you can use and lessen tension on the triceps.
Use a moderate weight that you can perform for 8 to 15 reps.
Pin your elbows in against your side to help prevent your pecs from taking over. At the start of the movement, your forearms should be making contact with your biceps, with your elbow fully flexed.
Don’t stand too upright — hinge slightly forward at the hips so you can press the bar all the way down, completing the full range of motion.
Think about squeezing your triceps to move the weight down, pulling your elbows slightly back. Elbows should remain at your sides, only moving a few inches forward to feel more of a stretch at the end of each eccentric rep.
Allowing the elbows to move slightly forward and backward will get the long head more involved through shoulder extension. However, don’t let the weight come forward so far that your lats get involved.
At the bottom position, squeeze your triceps and then reverse the movement for a controlled eccentric phase, allowing the bar to come up and slightly forward to complete the rep. Pause momentarily before starting the next rep.

Chest
How much do you bench? Changes are, if you’re a guy and you lift, somebody has asked you this question.
Therefore, the bench press is the foundation of many gym bros training regimes.
Many women don’t train their chests. Women picture Cross Fitters and think that training their chest will make them lose some of their femininity, gaining that muscular-looking chest.
This isn’t the case. You can train your chest to add some extra shape to your upper body, and still look feminine. Often women with this masculine look are also using PEDs which can lead them to develop more masculine features through the testosterone increase.
The chest or pectoral muscle (pec for short) is split into two major areas — the upper and lower chest (Pectoralis major and minor).
The chest in general receives a lot of stimulation through the bench press and the dip, both of which you should be performing. The lower chest should receive adequate stimulation to grow through these exercises.
However, the upper chest can be more neglected with these compound lifts. Yet, it’s a key component of a chiselled chest.
Therefore, I’m just recommending an isolation exercise targeting the upper chest, and not the lower chest.
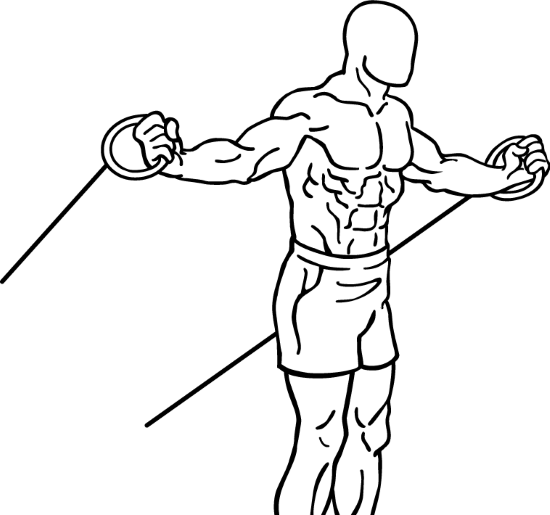
Upper Chest — low cable cross-overs
Because of the direction in which the upper chest muscle fibres run, they contribute more to shoulder flexion, meaning we activate them by bringing our arms up and across the body.
The cable cross-over is perfect for this, performing primarily horizontal shoulder adduction by bringing your arm across your body. Shoulder internal rotation can also be utilised on these exercises, helping contract your pecs even further.
Your elbow angle should be consistent throughout the movement, helping to take the triceps out of the movement and isolate the chest.
If you don’t have access to a gym, you can do a dumbbell chest fly on an incline bench to target your upper chest. However, the cables have the advantage of keeping an even tension throughout the range of motion.
Exercise tips: choose a lightweight that you do for around 15–20 reps.
The cable cross-over isn’t very suitable to load up with weight to progressively overload. You’ll just end up making it a full upper-body exercise. Instead, the focus of this exercise is feeling a pump in the upper pecs and locking in the mind-muscle connection.
Set the cables up low at around knee height. When you grab the handles, your arms should be out at about a 15-to-30-degree angle.
Take one or two steps forward until you feel a slight stretch in your pecs. Plant your feet with a stable stance so you don’t lose your balance. A staggered stance with one foot in front of the other will probably work best.
Before initiating the positive (concentric) phase, just like the bench press, keep your scapulae (shoulder blades) retracted to put the pecs in a mechanically safer and stronger position.
Squeeze your pecs to initiate the rep, bringing the cables up and across your body, in a hugging motion.
At the end of the concentric, internally rotate your hands so your thumbs face inwards, to create a better contraction. Hold for a second, before slowly releasing the weight in a controlled manner for the eccentric phase, stretching your pecs as you bring your arms back down while externally rotating.
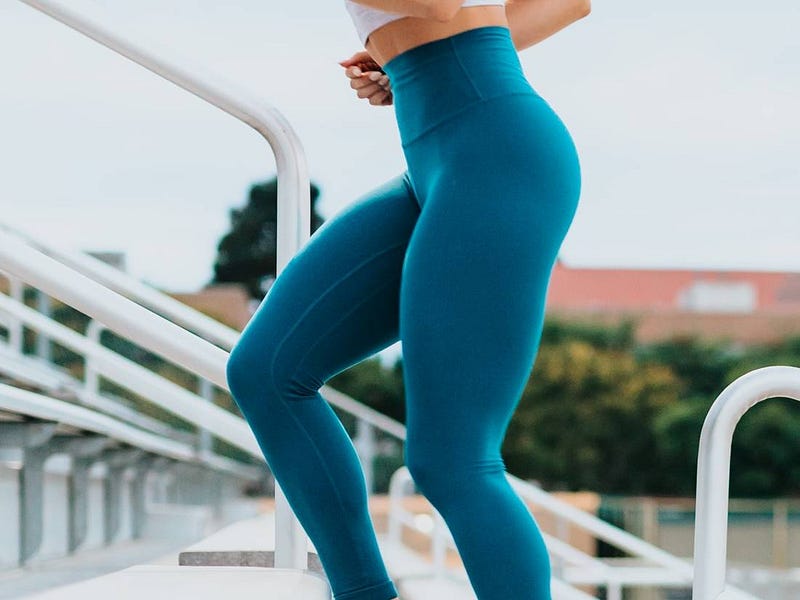
Legs
Strong muscular legs are often the first thing noticed about a fit woman's physique and equally, a man will receive a gentle tease for skipping leg day if they have an imbalanced and top-heavy physique.
As well as aesthetics, strong legs have the added benefit of improvements in functional athletic performance! Win-win!
Moreover, a balanced ratio of the quad to hamstring isolation work should further reduce the risk of ACL injuries, common in sports.
So, if you’re not training your legs, you should be.
The key muscle groups we're going to target are the Quads, Hamstrings and glutes, and we’re skipping calves.
If you want calves that badly, complain in the comments and I'll do an article specifically on calves. But really, time spent training calves is time not spent training more important muscles.
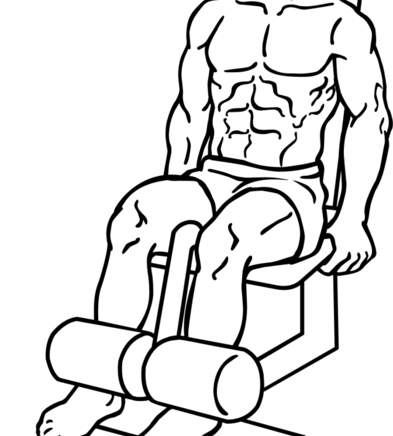
Quads — leg extensions
As its name implies, the quadriceps are made up of four muscle heads: the Vastus medialis, Vastus lateralis, Vastus medialis and the Rectus femoris.
The Rectus femoris muscle lies on top of these Vastus muscles and is the only head of the quads crossing both the hip joint and the knee joint.
The three Vastus muscles only function to extend the knee, while the Rectus femoris controls both knee extension and hip flexion. And since all four heads contribute to knee extension, it makes sense to best target the quads through exercises that extend the knee.
Like the leg extension.
A 2016 study found that the leg extension provides a similar training stimulus to the back squat despite requiring lighter loads. Therefore, you can build muscle whilst avoiding extra fatigue on your body.
If you have an ACL injury, the risk of this exercise is increased. But, for someone with a healthy knee joint, it should not have a detrimental effect when performed properly.
Exercise tips: As the leg extension only uses one joint, there is limited ability to progressively overload with heavy weights. Aim for a high rep range of around 12 to 20 reps and focus on technique and the squeeze to maximise the pump in your quads.
Play around with your foot position until you find the placement that allows you to feel the best mind-muscle connection.
Also, experiment with how far you place the seat back — position the seats slightly back so the hips are at an angle greater than 90 degrees to allow the rectus femoris head to completely lengthen.
Use the handles to help pull your butt down into the seat to lock you in and prevent the potential of power from leaking out.
Don’t bounce the weight with excessive momentum. If your butt is popping up, you’re going too heavy and you’re probably not going to have a full range of motion and achieve full flexion.
If your range of motion isn’t all the way to lock out the quads slightly above parallel, the weight is too heavy. This is often because you’ve set the pin/pad up too high on your shins.
The direction your toes are pointed could target different quad muscles but will make little difference. It might provide greater overall quads activation to vary your toe position, but beginners should just use a foot position and toe direction that feels most comfortable.

Hamstrings — leg curls
To fully activate our entire hamstrings, it is important to do an exercise that isolates knee flexion.
The hamstrings are made up of four muscles, the long head of the biceps femoris, the short head of the biceps femoris, the semitendinosus, and the semimembranosus.
Three of these muscles are biarticular, crossing both the hip and knee joints. These muscles perform both hip extension like a deadlift and knee flexion like a leg curl. However, the short head of the biceps femoris crosses just the knee joint, functioning to flex the knee, and can’t perform hip extension.
Therefore, we can only target all four hamstring muscles through knee flexion exercises.
A 2015 study by Schoenfeld and colleagues found that the lying leg curl is better than the stiff leg deadlift at activating the lower portion of the hamstrings. The upper portion of the hamstrings received similar activation.
Therefore, I’m recommending the lying leg curl to isolate the hamstrings.
However, there will be similar activation between the seated and lying down variation, so choose the one that you feel has the biggest squeeze in your hamstrings or periodically use both for variety.
Exercise tips: don’t go too heavy on leg curls. You want to be able to focus on the mind-muscle connection and time under tension to feel a strong contraction in your hamstrings.
Choose a low to a moderate weight that you can do for around 10 to 20 reps.
Your legs should be just narrower shoulder width apart. Don’t overthink foot direction — but, point your toes in the direction of the hamstring muscle you’re trying to target. Or, if you’re doing three sets, do one with toes in, one set with toes out and one with a neutral foot.
Pointing your toes out will have more activation of the outer hamstrings while pointing your toes in will target the inner hamstrings.
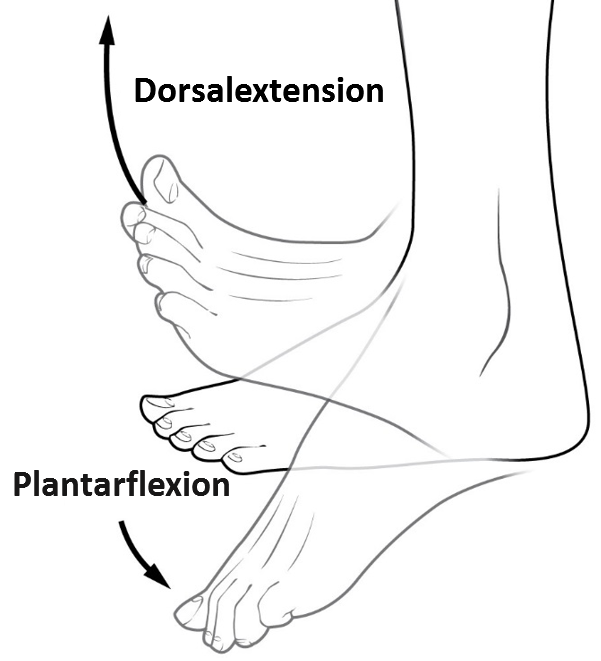
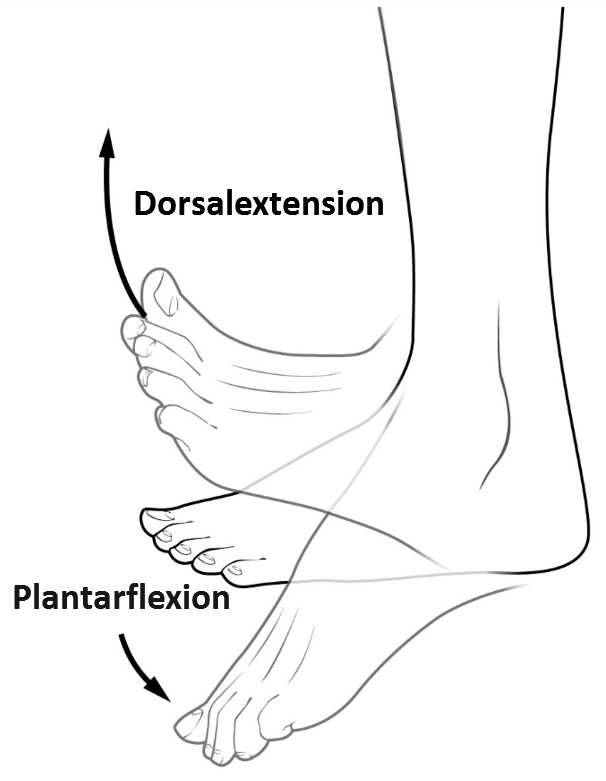
Lift the load in dorsiflexion (toes up), and lower the weight in plantarflexion (toes out).
The ankle pad should be in a position where it feels comfortable to generate as much force as possible, without restricting your range of motion.
Generally speaking, lower on the leg is better, just above the ankle. But if the pad rolls off our ankle — that’s too low. Moreover, too low means hips have to come up to compensate, limiting the amount of force you can generate.
Engage your hamstrings and squeeze your butt a little to start the rep, keeping tension on your hamstrings. Hold onto the handles hard to secure your upper body and keep tight to minimise momentum.
Aim for a nearly full range of motion — touch your butt to ensure a full range of motion and peak contraction. If you can’t touch your butt, reduce the amount of weight.
Pause momentarily, but don’t worry about how long you hold it. Then, slowly release the weight for a controlled eccentric phase — try to count to two. Feel the stretch and then pause quickly before exploding into the next concentric phase.
Don’t quite don’t go all the way down on the eccentric to extend your knees to lockout — this can hyperextend the knee, putting more strain on joints and ligaments etc.
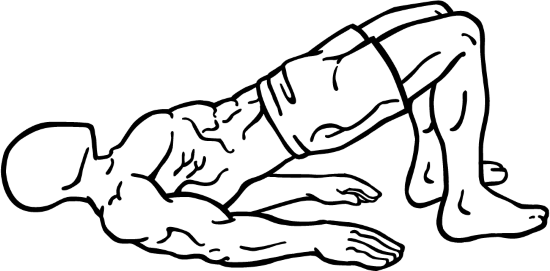
Glutes — Barbell Hip Thrust
The exercise of choice for any woman (or man) wanting to grow their booty is the barbell hip thrust.
It has a huge capacity to overload the glutes and establishes a strong mind-muscle connection.
The hip thrust extends your hips from a bent position to a straight position. It loads the glutes beyond the neutral hip position, where vertically loaded movements such as the squat lose tension at the top when the glutes are in or near full hip extension.
A 2016 study by Contreras and colleagues found that the hip thrust creates higher glute activation than the back squat.
“Evidence suggests that individuals seeking to maximize their gluteus maximus development should incorporate barbell hip thrusts into their regimen.” — Contreras et al., 2016
Dr Contreras also compared the results from training twins, one doing hip thrusts and the other squats; the twin doing hip thrust saw significantly more glute growth than the twin doing squats.
Exercise tips: choose a bench or box that matches the height of your tibia or lower leg and set it up against a rack wall or other stable and supportive base.
Wrap a thick pad around the bar for cushioning — especially if you’re a guy, the bar will feel awkward as the load gets heavier and heavier.
You can either load up the bar quite heavily (150kg plus if you’re a guy), for 5 to 10 reps if your primary goal is to build strength.
Use a moderate to a high rep range of around 10 to 15 reps if your main goal is hypertrophy (building muscle)
Position yourself between the bench and the bar, with the bar and pad centred on your hips. Place your upper back up against the bench, with a slightly wider than shoulder-width stance and approximately 10-15 degrees of foot flare.
Use a couple of warm-up sets to adjust your stance with feet and hip placement, so that you have a 90-degree angle at the top of each rep with your legs.
Flex your glutes to initiate the thrust and squeeze them to help move the weight up and fully extend your hips until you can’t move the weight up any further and lockout.
You should feel a strong contraction in your glutes. If there's not, you're doing it wrong.
Throughout the positive movement (the thrust), tuck your chin into your rib cage, looking towards your toes. Not looking up! Keep your abs engaged and tight and use your hands to stabilise the bar from wobbling from side to side.
Tinker with your stance, hip position, and degree of foot flare, to find a position that feels comfortable.
The lockout should only be momentary before lowering the weight in a controlled fashion for the negative rep, slowly stretching your glutes eccentrically under the load.
The exercise tempo is a quick explosive positive (concentric), while the negative rep should last for about two seconds, focusing on feeling a slow stretch.
Place a resistance band or glute loop around the knees to help to activate your glutes further through hip abduction.
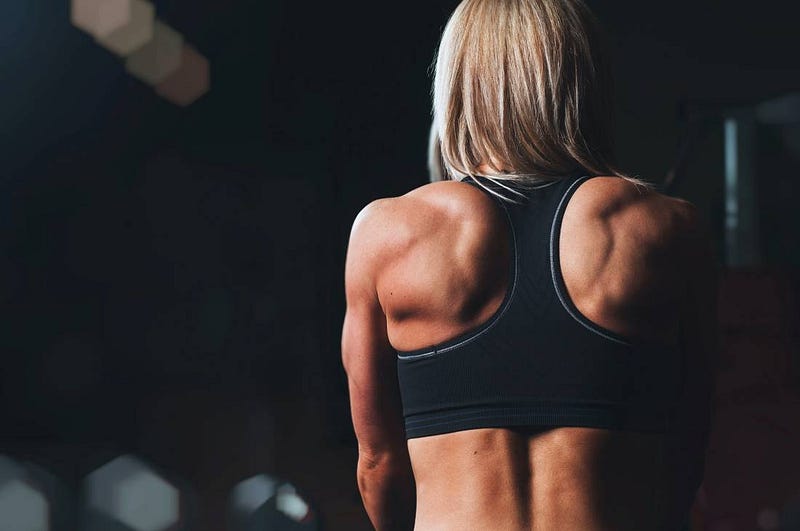
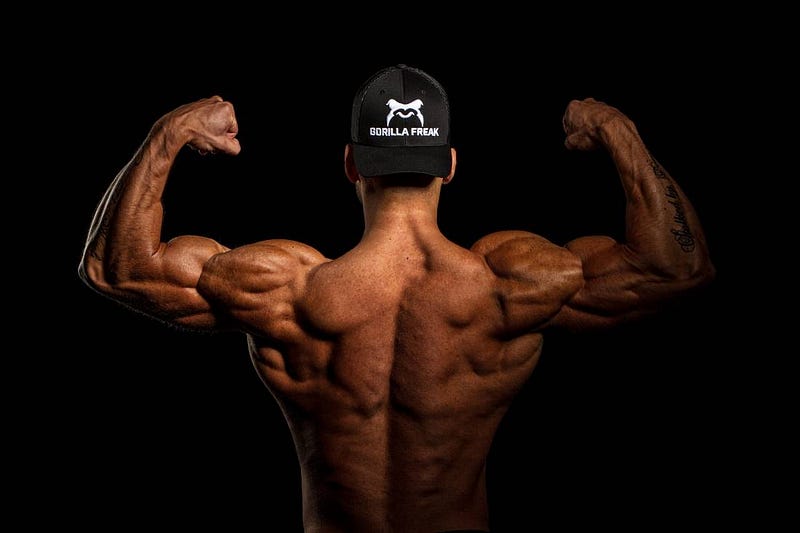
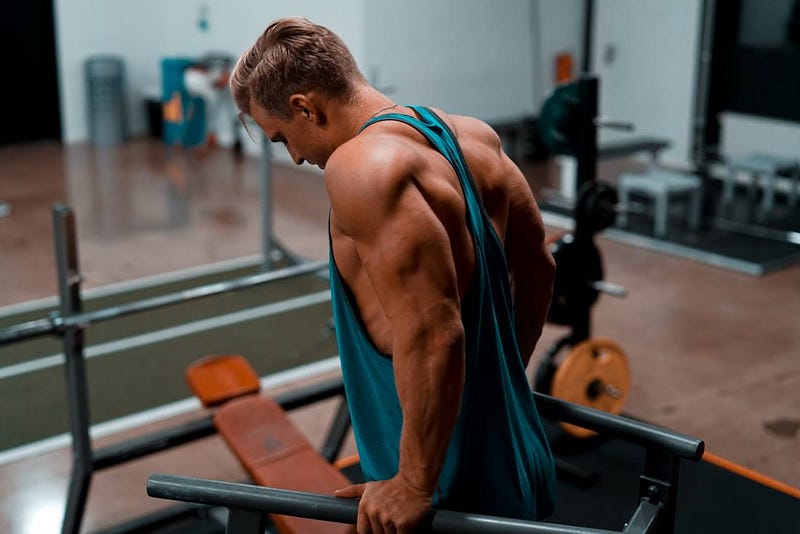
Back
Highly developed back muscles are key to looking "yolked" and that aesthetically pleasing V-taped upper body.
However, many gym-goers neglect their backs they prefer to work on muscle groups they can see in the mirror.
As well as looking odd, it can lead to muscle imbalances and bad posture.
The three key muscle groups of the back to target in the gym are the lats, upper traps and mid traps.

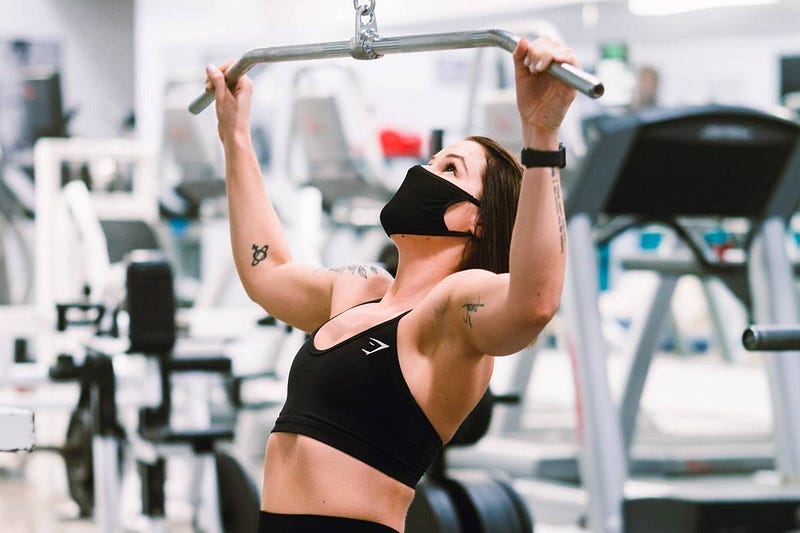
Lats — lats pull-down
Research indicates that for developing our lats, activation is similar between the lat-pulldown and the pull-up. The pull-up is far more fatiguing, however.
[Taken from one of my previous articles about building a v-shape taper]
Whilst the pull-up is the key heavy movement to grow your back, the focus for pull-downs is feeling the mind-muscle connection with the lats.
Similarly, to pull-ups, pull-down biomechanics include shoulder abduction. We work the lats as we bring our arms down to our sides. As the bar is pulled towards us slightly instead of straight down, there will be some shoulder extension, which also works the lats as well as the long head of the triceps.
To a lesser extent than pull-ups, our biceps and brachialis are also worked in the pull-down through elbow flexion, as the elbow is forced to bend to bring the weight down.
Exercise tips: A huge mistake I often see people make with pulldowns is loading the movement too heavily. If the weight cannot be properly controlled, the lower back and momentum will take over and the lats won’t be worked effectively.
We want to focus on the mind-muscle connection to feel our lats working. Therefore, we should use moderate weight in the rep range of 10–15.
Use a medium pronated (overhand grip), at about 1.5 shoulder width. According to a 2014 study in the Journal of Strength and Conditioning Research, it provides the best combination of strength potential and activation of the lats.
Typically, a wider grip has more lats activation, but a narrow grip allows for a heavier load. So, we go somewhere in between.
“A medium grip may have some minor advantages over a narrow or wide one; however, athletes and others engaged in resistance training can generally expect similar muscle activation… with small to wide grip widths (1–2 times the biacromial distance).” — Andersen et al., 2014
Before starting the movement, tuck your knees into the pad tightly, with your feet on the floor and core engaged. Hold the bar with your upper back starting with thoracic extension, to further create a secure and powerful foundation for the lift.
Pull the bar down to start the movement, retracting your scapula by tucking the shoulder blades down as you pull your elbows down and in towards your sides.
Pause the bar on your upper chest at the bottom of the movement and then reverse the motion. Resist the negative to feel the stretch in your lats on the way up. Pause at full elbow extension at the top of the movement to complete one set.
Avoid the variation where you pull the bar down behind the neck, as research indicates that pulling to the front of the next stimulates the lats better and allows us to use heavier loads to progressively overload.
Pulling behind the next also puts our shoulders vulnerable position, meaning less chance of injury
Upper Traps — Barbell Shrugs
Pencil neck?
Then train your traps.
The upper trapezius muscle is perhaps the most important muscle to look “yolked”.
The upper trapezius muscles are targeted through scapular elevation — lifting the shoulder blades like a shrug.
Moving your shoulder blades closer to the neck through scapular upward rotation is handled by the upper and mid traps almost exclusively. So, to effectively isolate the traps, we need to focus on this scapular upward rotation component of the lift.
According to a 1994 study by Johnson and colleagues, the upper traps don’t run straight up and down as previously thought but run much closer to horizontal. Rather than shrugging straight up and down, think about shrugging your shoulders up and in as if trying to touch your shoulders to your ears.
Moreover, because of the orientation of our upper trap fibres, they will be recruited more effectively with the arms in about 30 degrees of abduction.
If your gym has a trap bar, that’s a great option for shrugs as the hand position forces your arms slightly out to the side putting your shoulder in a more abducted position
Exercise tips: Load the barbell with moderate weight, aiming for around eight to fifteen reps.
Loading the shrug more heavily will often impair your ability to take the weight through a full range of motion — especially at the top end of the range.
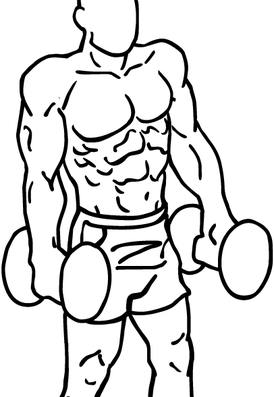
Using dumbbells as pictured above is also a good variation of the shrug exercise.
Holding the bar with a medium to wide double overhand grip (1.5 to 2 times shoulder-width) will better target the traps, set up a bar in a power rack just above knee height.
You can use straps to truly overload the traps with the weight you may not be able to lift with grip strength alone. However, as it's a great exercise to improve grip strength, I prefer strap-free.
With a neutral lower back and engaged upper back, lean forward by hinging at the hips by about ten degrees. You should also have a slight bend in the knees.
Elevate your scapula by lifting your shoulders up and inward, like you’re trying to touch your shoulders with your ears.
As you start a rep, push your arms from the shoulder slightly outward as if doing a lateral raise, to help drive your shoulders up and inward.
Shrug all the way up until you reach the point where you can no longer elevate your scapula any further. Squeeze quickly at the top without holding for too long, and reverse in a controlled manner, actively stretching your traps and resisting the load on the way down.
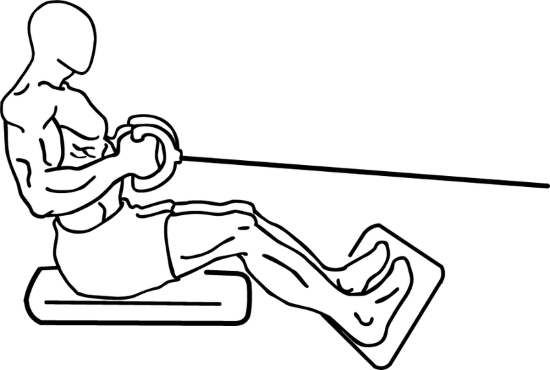
Mid traps — Wide grip seated cable row
Many people mistakenly think that our traps are only the muscles sticking out on either side of our neck. However, our traps actually insert much lower into our back, with the mid to lower traps contributing greatly to the “thickness” of our physique.
The seated cable row is a fantastic piece of equipment to stimulate the different muscles in our back.
The choice of bar and elbow position during the pull can greatly alter which muscles in our back are targeted.
To use the row to get our mid-traps more involved, we should use a wide grip and high elbow position to emphasize transverse shoulder abduction and scapular retraction.
Exercise tips: Choose a weight you won’t struggle with. performed with moderate weight in the range of 10–15 reps.
Feeling a contraction through a mind-muscle connection should guide you rather than moving as much weight as possible with bad form. Focus on pulling the shoulders back and squeezing your shoulder blades together, then letting your lats stretch out on the negative rep.
Hold the handle with some slack and don’t start the movement until you’re in the correction position.
Plant your feet firmly on the footrest, with knees slightly bent. Keep your core tight throughout, your trunk upright, and your chest up. Avoid letting your lower back curl over.
Your legs will help initiate the movement by ensuring that you’re in a tight, stable position. Pull the cable towards you, just above the belly button for the concentric phase, squeezing your shoulder blades.
At the end of the pull, your shoulder blades should be squeezed together. You should also be upright at 90 degrees to your legs, not bending back. Keep your core strong.
Pause for a second and then slowly release the cable and lean forward as it shortens through the eccentric phase. Pause again before starting the next rep.
Don’t let the momentum work too hard, focus on letting the tension slowly release and feel the stretch.
Final Words
This article has explored some of the best isolation exercises that you can do for each muscle group.
The muscle groups we’ve looked at are the side and rear deltoids, short and long head of biceps, upper chest triceps long head and lateral head, quads, hamstrings, glutes, lats and upper and mid traps.
The exercises I have recommended are the face pulls, dumbbell lateral raises, EZ bar curl, incline dumbbell curl, triceps pushdown, Skull crushers, low cable cross-overs, leg extensions, leg curls, barbell hip thrust, lats pull-down, barbell shrugs, and wide grip seated cable row.
All the exercises should be available with basic equipment in your local gym.
If you really can’t attend a gym (you should), use bands to replace cable machines. Buy the heaviest dumbbells practical, and a few lighter ones to help you progressively overload by doing sets in different rep ranges.
Before we end, I should mention that you may have noticed that I missed the abdominals. Well, I don’t think abs are that important. The foundational compound lifts such as the squat, deadlift, and overhead press, will provide sufficient stimulus for you to grow strong core muscles.
Similarly to training your calves, spending time training abs is time that could be spent training other muscles that have a greater impact on your overall physique.
Thank you for reading.
If you enjoyed the content, you might be interested in this article where I provide five fitness tips from my 15 years in the gym.
Read More Medium Articles
Non-Medium members can only read 3 articles a month.
Become a Medium Member for unlimited access to my content and articles from thousands of other writers, for just $5 a month.
Subscribe to be notified when I publish new content.