
The Absolute Basics of iOS CallKit: Send & Receive a Call
If you want to make an iOS video or voice chat app with a native UI, then the sole option for an iOS developer is Apple’s CallKit. Introduced in 2016 at WWDC session 203, CallKit handles the display for incoming or outgoing calls, dialing, third party calling services like WhatsApp, or any Voice over Internet Protocol (VoIP) service on the iPhone.
CallKit’s complex class declaration, however, is daunting. It is an event based kit so call-related actions are routed through your provider and its delegate that must be configured. There is a CXProvider class, which manages sending or receiving calls through a CXProviderDelegate. It is a really powerful delegate as it handles both incoming as well as outgoing calls in less than a few lines of code.
Create an Xcode Project
- Choose “Single View App”
- Open
Info.plistand add to the category forRequired background modes, which should be present by default of typeArray, and set its value as:App provides Voice over IP services
Receive a Call
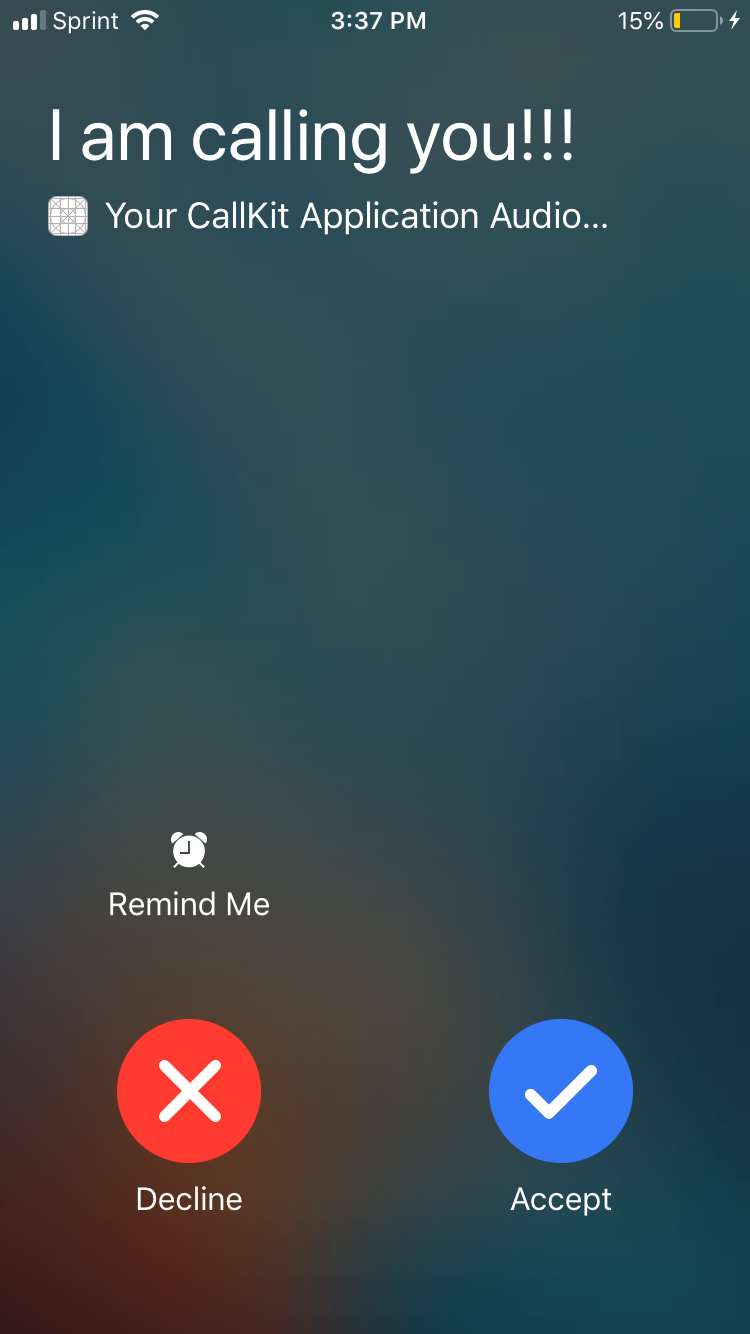
It is extremely easy to simulate calls in iOS applications. CallKit’s default CXProviderDelegate renders incoming calls with the following code:
import UIKit
import CallKit
class ViewController: UIViewController, CXProviderDelegate {override func viewDidLoad() {
let provider = CXProvider(configuration: CXProviderConfiguration(localizedName: "My App"))
provider.setDelegate(self, queue: nil)
let update = CXCallUpdate()
update.remoteHandle = CXHandle(type: .generic, value: "I am calling you!")
provider.reportNewIncomingCall(with: UUID(), update: update, completion: { error in })
}func providerDidReset(_ provider: CXProvider) {
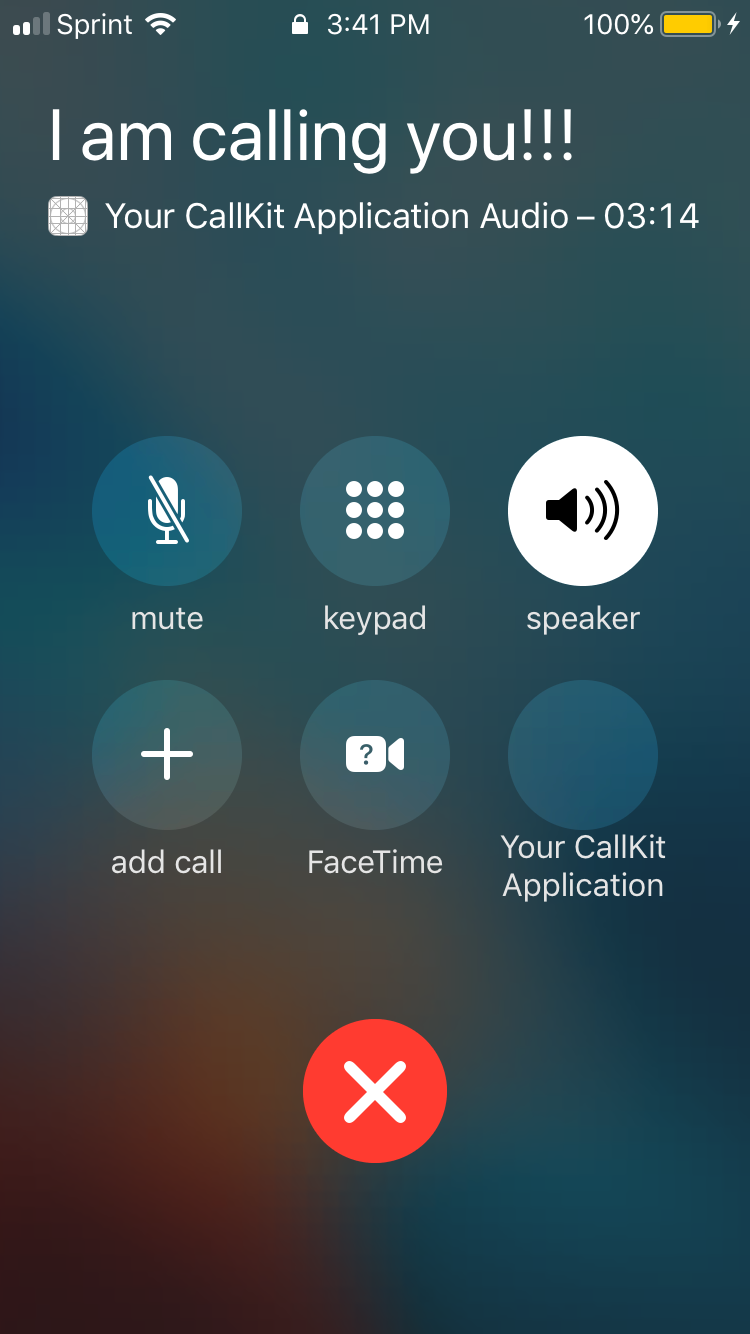
}func provider(_ provider: CXProvider, perform action: CXAnswerCallAction) {
action.fulfill()
}func provider(_ provider: CXProvider, perform action: CXEndCallAction) {
action.fulfill()
}}
If you hit build, your application shows an incoming call immediately. To better understand the code required for simulating an incoming call, read the notes for each of these steps:
- Import
CallKit. - Set the view controller’s delegate as the CXProviderDelegate in
viewDidLoad(_:)through the delegate’ssetDelegatemethod. - Create a local variable for CXProvider called
provider. - Set a value for your user’s unique
remoteHandlefor CXHandle - Randomly assign set a value for the call’s unique UUID by way of
UUID(). - To display the call evoke
reportNewIncomingCall, an instance method that you call onprovider. - Implement the required methods:
providerDidReset,CXEndCallAction,CXAnswerCallAction.
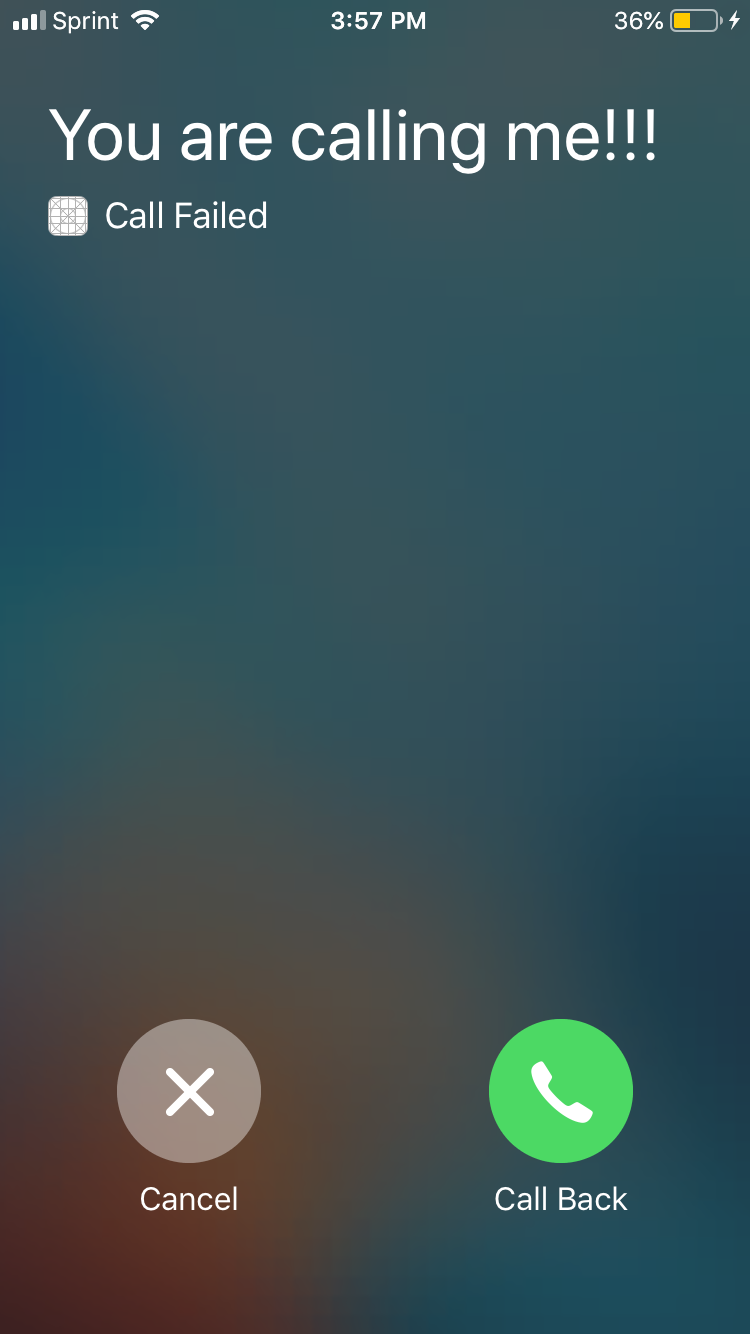
Send a Call
It is extremely easy to simulate the reception of a call in iOS applications. CallKit’s default CXProviderDelegate also renders outgoing calls with the following code:
import UIKit
import CallKit
class ViewController: UIViewController, CXProviderDelegate {override func viewDidLoad() {
let provider = CXProvider(configuration: CXProviderConfiguration(localizedName: "My App"))
provider.setDelegate(self, queue: nil)
let controller = CXCallController()
let transaction = CXTransaction(action: CXStartCallAction(call: UUID(), handle: CXHandle(type: .generic, value: "You are calling me!!!")))
controller.request(transaction, completion: { error in })
}func providerDidReset(_ provider: CXProvider) {
}}
What’s next?
You simulated an incoming call. You simulated an outgoing call. As is the case with any component of the iOS SDK, you can fully customize your implementation of these two simulations to realize actual calling functionality in your applications with respect to your specific use case, as these are the absolute basics of CallKit. If you would like to download a codebase with the code working already, check out this repo: https://github.com/ericgiannini/callkit-basics