
The 20 Best Ways to Add Attractive “Bling” to Your Medium Article
Because no one will recognize the brilliance of your words if your formatting bores them to sleep
Writing is communicating. Unlike spoken communication, when we write, we can’t rely upon inflection, gestures, or other non-verbal cues to direct and focus the listener’s attention. There are a whole host of other tricks we can use instead, however.
In this article, I’m going to show you the twenty best ways of capturing, directing, and managing your reader’s attention. How? With “bling” — otherwise known as formatting.
How this article is laid out
To make it easier for you to understand all of your options for adding bling to your article, I’ve organized the article by where the options are located. Then, within each set of options, I describe all of the things you can do with those options.
I will cover:
The new line dialog, which lets you:
- Add still images from any source
- Add photo montages
- Add animated GIFs
- Search for photos based on a keyword
- Add embedded videos or screen shots from YouTube, Twitter or other sources
- Add ellipses (…) to break up your sections
The selected text dialog, which lets you:
- Emphasize text, in bold, italic, or both
- Add hyperlinks
- Create a heading
- Create a subheading
- Create a kicker
- Create block quotes
- Create pull quotes
- Create drop caps
Inline text commands, which let you:
- Create bullet lists
- Create numbered lists
- Add a separator
- Embed links to stories
- Embed links to people’s profiles
- Format computer code
So let’s get started!
6 cool things you can do from the new line dialog
The new line dialog is what appears when you hit Enter to get a new line, and click on the plus symbol to the left of the new line. It looks like this:
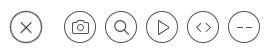
You can click on the circle with an X in it to remove the new line dialog. Otherwise, it will disappear when you select any of the other options.
Add still images from any source
To add still images from any source, you will first need to download a copy of the image onto your personal computer. This can be done by right clicking on the image and selecting “Save image as” from the drop down menu.
To add the previously saved image to your Medium article, click on the circle with an icon of a camera in it. A navigation dialog will appear, allowing you to select the saved image file. You can select .jpg, .gif, or .png format files.
One the image has been selected, click on the Open button to upload the image to Medium and insert it into your article.
A selection bar will appear above the image. Depending on the size and type of the image, different options for size and position will appear on this bar. You can click through all of the different options until you like how the image is displayed.
Small images will always be displayed in the center of the text area. Larger images can also be stretched to the width of the text area, outside the width of the text area, and to the width of the screen. You may also have an option to offset an image, which puts it on the left side of the text area, half in the text area and half in the white space to the left.
There will be a line beneath the image for you to enter copyright information. Even if you created the image, you need to credit yourself for copyright. Many publications on Medium will not run articles that include images without copyright information.
Add photo montages
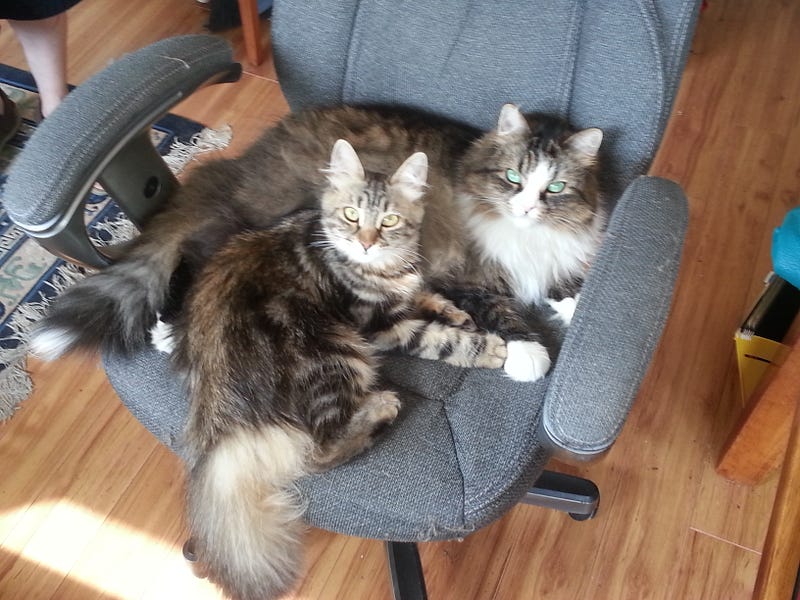
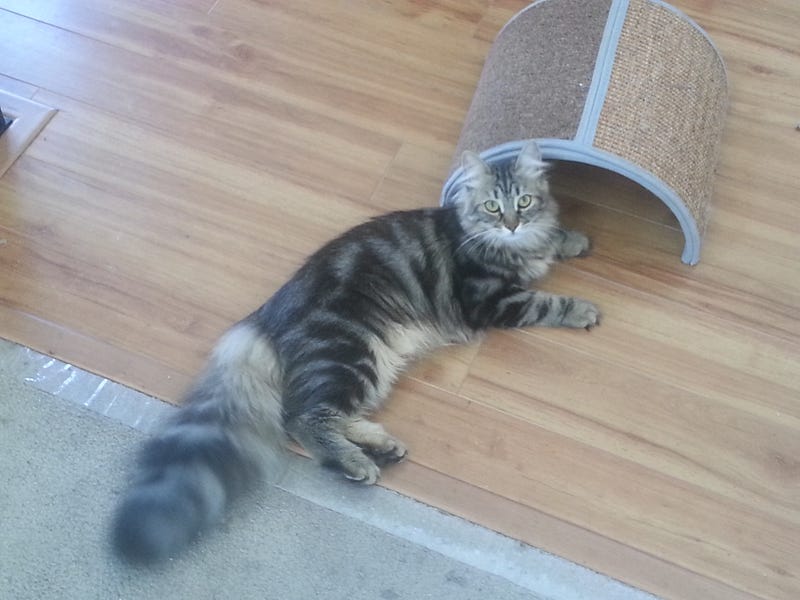
What’s a photo montage, you ask? That’s when you include a bunch of photos in a group, taking up the space that a single image would normally occupy. For example, this photo montage of my cats, showing how the kitten has grown over the years:

To create a photo montage, all of the photos you are using must be in the same folder in your computer.
To add the photo montage to your Medium article, click on the circle with an icon of a camera in it. A navigation dialog will appear, allowing you to select your images. You can select .jpg, .gif, or .png format files.
Select the first image you want. Then hold down the Ctrl key and select the next image, continuing in this way until you have selected all of the images in the order you want them displayed. Click on the Open button to upload the images to Medium and insert them into your article.
If, after you have uploaded them all to your article, you decide you don’t want some of them in the montage, you can delete individual photos. Click on the photo you want to remove to highlight it in a green box. Then hit Delete.
The remaining photos will automatically change size to fill the available space.
There is a common line, centered beneath all the photos, for a copyright statement. If the photos come from different places, list the copyrights in the same order as the photos.
Add animated GIFs
You can add animated GIFs the same way you add a still image from your computer.
Click on the circle with an icon of a camera in it. A navigation dialog will appear. Select the animated .gif format file. Then click on the Open button to upload the animation to Medium and insert it into your article.
Note that your animation must be less that 25 MB in size.
Search for photos based on keyword
What if you want to add an image, but don’t want to mess around with saving it on your computer, or entering the copyright information?
Click on the circle with an icon of a magnifying glass in it. It will bring up a text field, and prompt you enter a search keyword. Type in the word or phrase you are looking for, and hit Enter.
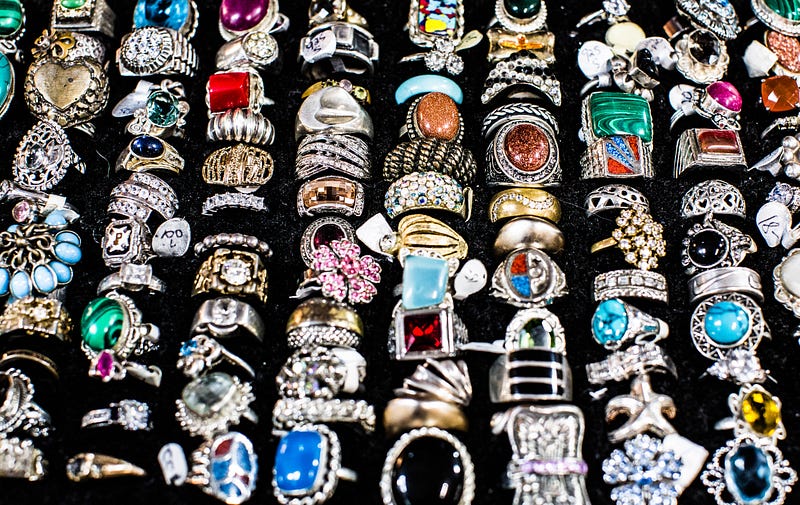
Medium will bring up pages of matching images from Unsplash. Scroll up and down to see all of the images on each page. Click Next or Previous (above the images) to navigate through the pages. When you find an image you like, click on it. Medium will automatically add it into your article, and take care of the copyright information.
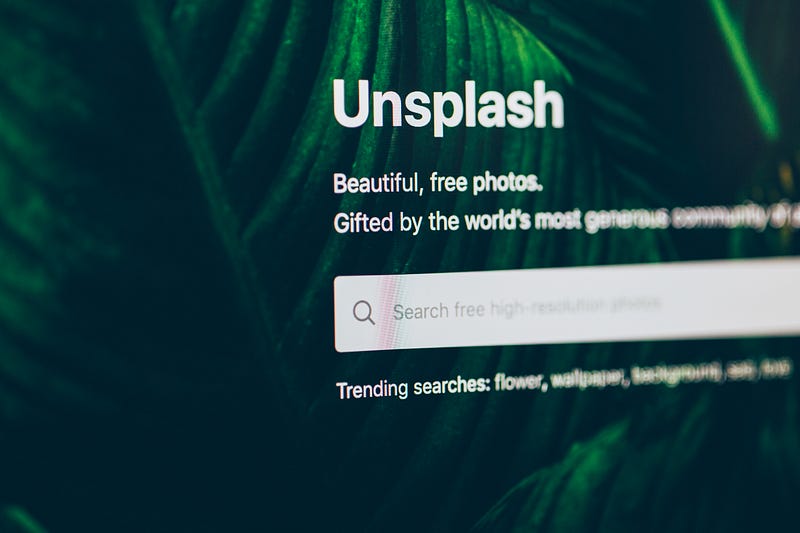
The above image is one that came up when I searched on the keyword “search”. Keep in mind that the images are sorted by popularity, so the first ones you see are going to be used the most. If you want something unique, you’ll need to look many pages into the results.
Add embedded videos or screen shots from YouTube, Twitter or other sources
To embed a video, click on the circle with the Play icon in it. (It says “Add a video” if you hover the mouse over it.)
Paste the link to the video and press Enter. After a brief delay, Medium will embed the video.
To embed screen shots, such as from Twitter or Facebook, click on the circle with the <> icon in it. Paste the link to what you want embedded and press Enter. After a brief delay, Medium will embed it.
Add ellipses to break up your sections
If you want some visual separation between sections of your article, you can add ellipses (three dots). To add the ellipses, click on the circle with the two dashes in it.
If you want to break up your sections with your own separator design, create a graphic image file and upload it the same way you would any other still or animated image.
8 cool thing you can do from the selected text dialog
The selected text dialog is what appears when you select any text in your article. It looks like this:
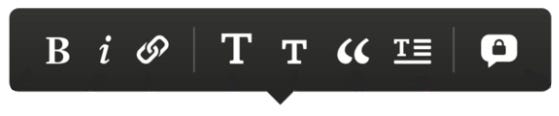
If you select any of the options in the selected text dialog, they will turn green. As soon as you navigate away from your selected text, the dialog will disappear.
Emphasize text
To emphasize text, you can make it bold, italic, or both.
To make your selected text bold, click on the B in the selected text dialog. To make your selected text italic, click on the i in the selected text dialog. To make your selected text both bold and italic, click on both the B and the i, in any order.
Add hyperlinks
To create a hyperlink, click on the image of the linked pieces of chain. It will bring up another dialog box. Paste the URL you want the selected text to link to in this dialog box and press Enter. Hyperlinks appear as underlined sections of text.
Create a heading
A heading is a very large, bold section of type in your article. It is separated from the text above it by a large area of white space.
To turn any paragraph into a heading, select the text, and click the large T in the selected text dialog. To turn it back to regular text, click the large T a second time.
Create a subheading
A subheading within the body of your article is a slightly larger, bold section of type in your article. It is separated from the text above it by the normal amount of white space between paragraphs, and from the text below it by the normal amount of white space between lines.
When a subheading appears below the title of your article, it is called a subtitle. In that case, it appears in gray, and in a slightly different font.
Both of these subheadings are created the same way. Select the paragraph of text that you want to make into a subhead, and click the small T in the selected text dialog. To turn it back to regular text, click the small T a second time.
Create a kicker
A kicker is a special description that appears above the title of your article. In general, you will only use a kicker if your article is part of a series, to identify the series.
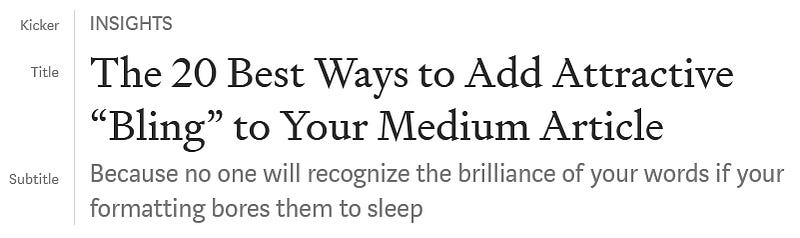
The kicker is actually another use of subheading. To create it, move your cursor to the beginning of your title, and press Enter.
Your title will immediately change font, and no longer be identified as the title. Do not panic. This is part of the process.
On the blank line above the title, type your kicker. Select it, and click the small T in the selected text dialog.
It will change font and color to that of the kicker. The title will return to being in Title font.
Create block quotes
Block quotes are italicized sections of text with a vertical line to the left of them. They are used for lengthy quotes, or quotes from an external source.
“As long as we are engaged in storytelling that moves the culture forward, it doesn’t matter what format it is.” — LeVar Burton
To create a block quote, select the highlighted text, and click the quotation mark in the selected text dialog.
Create pull quotes
Unlike block quotes, pull quotes come from a different section of the same article. It will replace the original formatting of the section, and make it larger, gray, and italicized.
To emphasize text, you can make it bold, italic, or both.
To create a pull quote, copy the text you want to quote onto a new line. Select the text, and click the quotation mark in the selected text dialog twice. The first time you click the quotation mark, the selected text will become a block quote. The second time you click the quotation mark, the selected text will become a pull quote.
Create drop caps
This is an example of a drop cap. This particular style isn’t used very often, but it can look quite elegant if done well.
To create a drop cap, select the first letter of the first word in your paragraph. Click the drop cap icon (the T with bars next to and under it).
If you really want to be unique and different in your formatting, you can create customized capital letter images. Save these images as .jpg format. After you create a drop cap, click on the dropped cap to highlight it with a green box. Drag your JPG image of your customized capital letter onto the green box. It will replace the standard drop cap with your customized drop cap.
Be aware that if your first word contains only two letters, the drop cap will become a drop word.
6 cool things you can do with inline text commands
Bullet lists
To create a bullet list, start a new line by typing an asterisk (*) or a dash (-), then typing a space. Medium will automatically convert that into a bullet list.
Every time you hit Enter after that, Medium will automatically create a new entry in your bullet list. To get rid of the bullet and go back to normal paragraphs, hit Backspace.
Numbered lists
To create a numbered list, start a new line by typing a number 1 followed by a period and a space. Medium will automatically convert the formatting into numbered list format. Type the rest of that entry.
When you hit Enter, Medium will automatically create the next sequential entry in your numbered list.
Keep in mind that anything other than text (such as images or embeds) will stop the numbered list. If you want a numbered list that includes non-text elements, you will need to number them yourself. Omit the period after the numbers, and Medium will not reformat anything.
Add a separator
I already covered up above how to use the new line dialog to create ellipses between sections of your article. But if you would rather have a faster way to do that, you can simply hit Ctrl+Enter at the end of your final paragraph. That lets you create an ellipses separator without needing to create a new line.
Embed links to stories
You can, of course, create hyperlinks to other Medium stories using the hyperlink option on the selected text dialog. But you can also embed a little ad card to connect to a story, complete with title, subtitle, and story image.
To embed a link like this, copy the URL to the story. Paste it on a new line in your article, and press Enter. After a short delay, Medium will reformat it into the ad card style.
Embed links to people’s profiles
To add a link to someone’s profile, type the @ sign. It will appear in green, and a dialog box will show up next to it. Start typing the person’s name, until you see their profile listed in the dialog box. Click on the profile.
The profile link will appear like this: Jennifer Dunne
When you include a link to someone’s profile in your article, they will get a notification.
Format computer code
Sometimes, you want to be able to show computer code. You can do this inline by typing a back tick (the symbol below the ~ on most keyboards). It looks like a single quotation mark that’s going the wrong way. Then type another back tick to end the computer code.
If you want to create a block of formatted computer code (or anything, really, that is in a monospace font with a gray background), start a new line and type three back ticks in a row. To end the block, type three more back ticks.
Conclusion
There are lots of cool ways that you can add bling to your articles with formatting.
The new line dialog lets you do 6 cool things. The selected text dialog lets you do 8 cool things. And I showed you 6 other cool things you could do with inline text commands.
There’s no excuse to have a boring article ever again. Bling it up!
Ready to have a better tomorrow?
I’ve created a cheat sheet to help you increase your confidence and get control of your life. If you follow this daily, you will level up your life very quickly!


