
7 Steps to predict Image with TensorFlow on Google Colab
In the previous post, i have introduced how to run Image Classification example with TensorFlow in PyCharm. Now i am trying summarise how to run the same code on Google Colab, which is a hosted Jupyter notebook environment that is free to use.
The goal is just to get the experience about how to use Colab to run the TensorFlow Code. As in the TensorFlow Development Certification Exam, we will use Colab to train the model.
TL;DR
One can use following steps to train model with TensorFlow on Google Colab:
Step 1: Login Colab. Step 2: Create new notebook Step 3: Rename the project name Step 4: Use GPU in Colab. Step 5: Copy python code to Colab. Step 6: Run the code on Colab. Step 7: Predict on new data Summary
Step 1: Login Colab.
Open Google Colab webpage and sign in with your google account. https://colab.research.google.com/
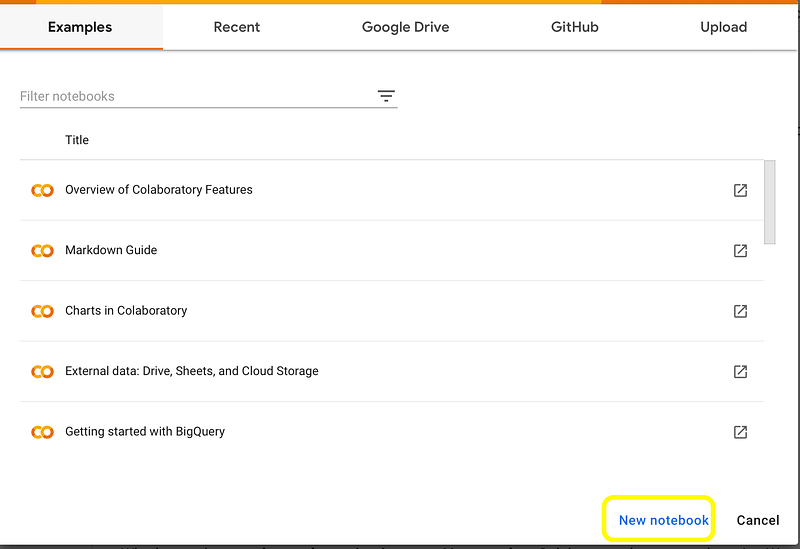
Step 2: Create new notebook
Just click on “New notebook” on the bottom right, when the popup window is shown by loading the Colab webpage.
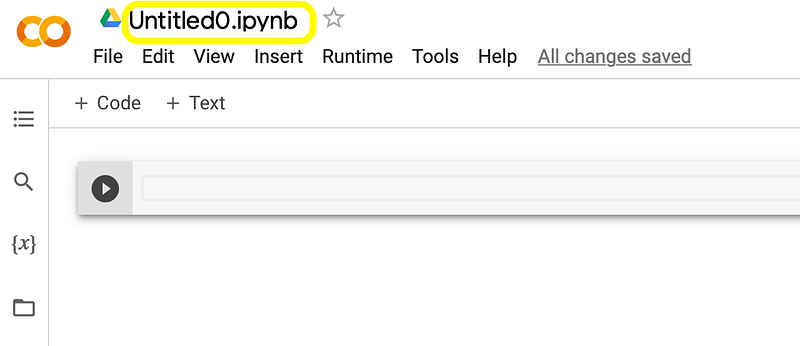
Step 3: Rename the project name
A new webpage will be created and shown under colab driver.
Please rename the project name (.ipynb) from top left of the webpage.
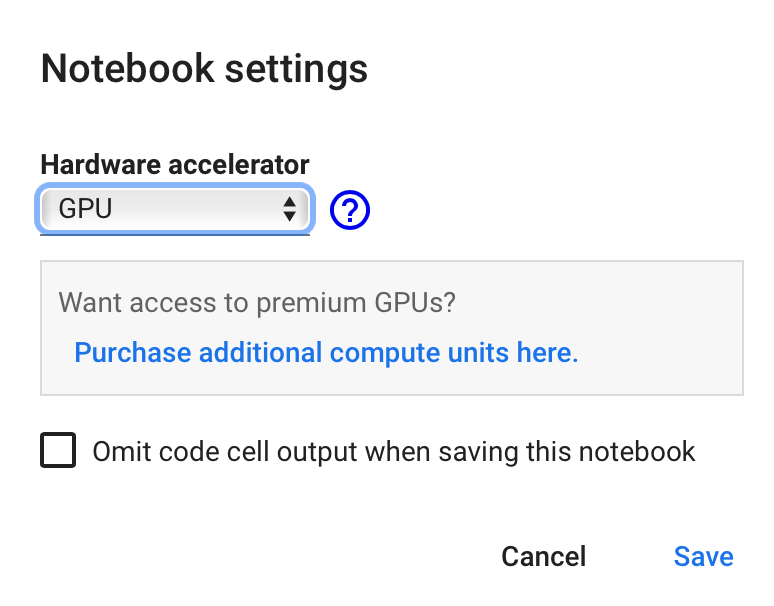
Step 4: Use GPU in Colab.
Click on Colab Menu “Runtime”->”change runtime type”, choose GPU as Hardware accelerator, then click on “Save”.
Step 5: Copy python code to Colab.
Copy the example code for image classification from previous post to CoLab notebook. You can find my shared Colab here.
Compare to the python code from previous post, only following line is not needed to be copied into Colab notebook:
if __name__ == '__main__':Step 6: Run the code on Colab.
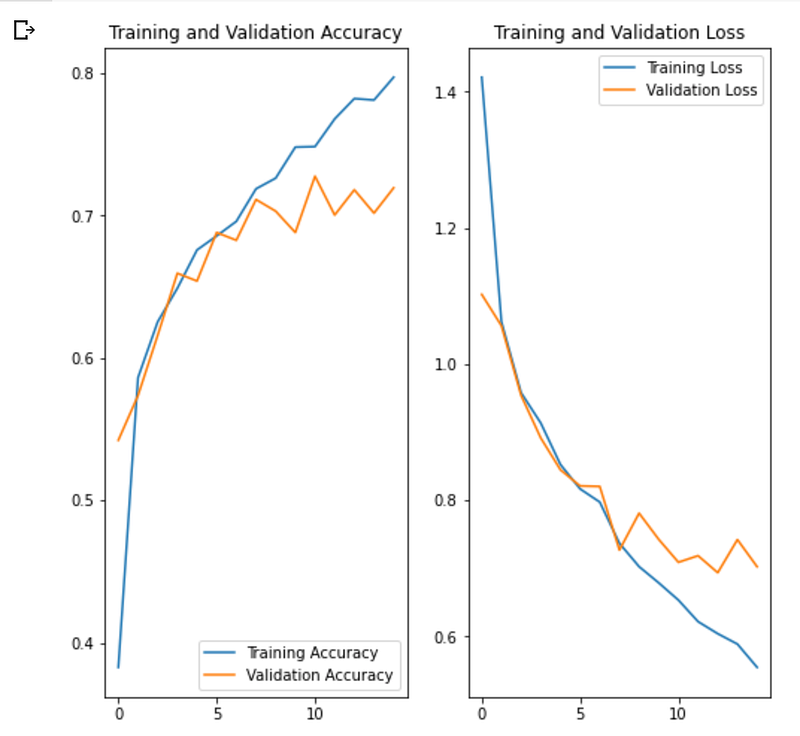
After run the notebook on Colab, we see that the model has been trained and improved, the training and validation accuracy is much more better after optimisation.
Following chart shows the Training and Validation Accuracy and Loss after the used data augmentation and add dropout to fight overfitting.
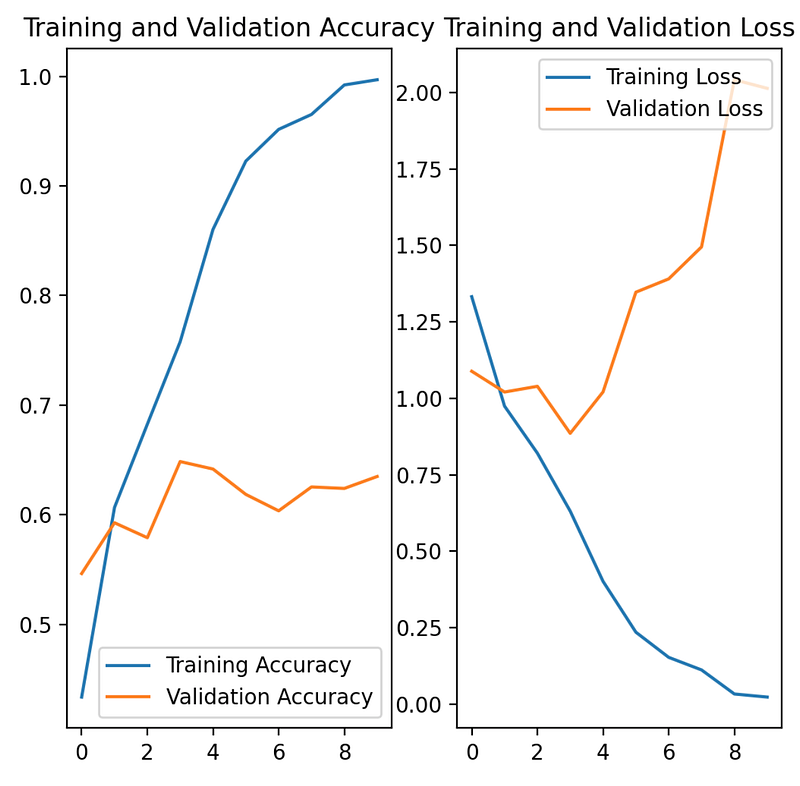
These value are improved compare to that when we not use data augmentation and dropout, which was tested in previous post and shown below.
Step 7: Predict on new data
Additional to example from previous post, we will complete the example from tensorflow website and use the trained model to predict on new data.
Following code will be added in the notebook and we get the result that the given picture was 99.35 percent confidence like what we want.
# Predict on new data
sunflower_url = "https://storage.googleapis.com/download.tensorflow.org/example_images/592px-Red_sunflower.jpg"
sunflower_path = tf.keras.utils.get_file('Red_sunflower', origin=sunflower_url)

img = tf.keras.utils.load_img(
    sunflower_path, target_size=(img_height, img_width)
)
img_array = tf.keras.utils.img_to_array(img)
img_array = tf.expand_dims(img_array, 0) # Create a batch

predictions = model.predict(img_array)
score = tf.nn.softmax(predictions[0])

print(
    "This image most likely belongs to {} with a {:.2f} percent confidence."
    .format(class_names[np.argmax(score)], 100 * np.max(score))
)
Summary
As we just wanna get hand dirty with Colab and make sure that we know how to run model on it, the test is from this point of view successful.
Also the step to choose GPU as runtime type brings performance during training model.
Maybe one day i will figure out how to export the trained model in h5 format and reuse it in PyCharm. I will then update this page when i get it work.
If you find this post is helpful, please give a like or keep following. See you next time.


