
TRAVEL TIPS. PHOTOGRAPHY.
Taking Pictures of Yourself While Traveling Solo
A guide on how to take pictures without the help of strangers
A tripod. Next to the camera and my lenses the most important piece in my camera bag. Together with a remote, I can take pictures of myself in pretty much any location from various angles. Without the need of asking for help from a stranger.
Travel photography. It started out as a documentary type of journal. Way back in the days. Today, travel photography is at a totally different level. It's people’s business. They live from creating images in exotic locations.
But we’re not going there. We’re just normal travelers and we would like to show friends and family where we have been. By having us in the frame in a specific landscape.
Selfies are the century's latest hype but selfies don’t capture everything. They mainly capture our face and a little of the background. If you want to show more than just your smile you need something else.
A tripod.
There are tripods available in all different sizes with lots of different features. But you don’t need a fancy one. You just need a small tripod that can hold the weight of your camera.
Mine is barely 20 centimeters tall but can be mounted anywhere. On a branch, a rock, a fence. It has “gorilla arms” as they are called, and they can mount my camera anywhere.
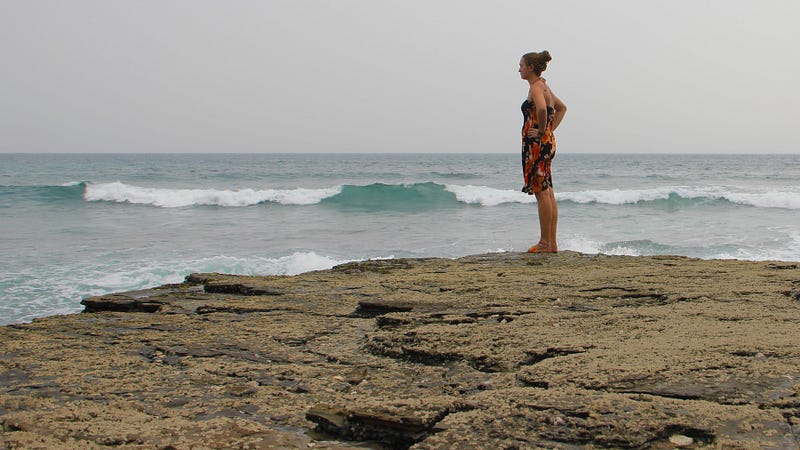
This way I can take pictures from below when placing the tripod on the ground but I can also take pictures from eye level when putting it on a branch or a boulder like in the image below.

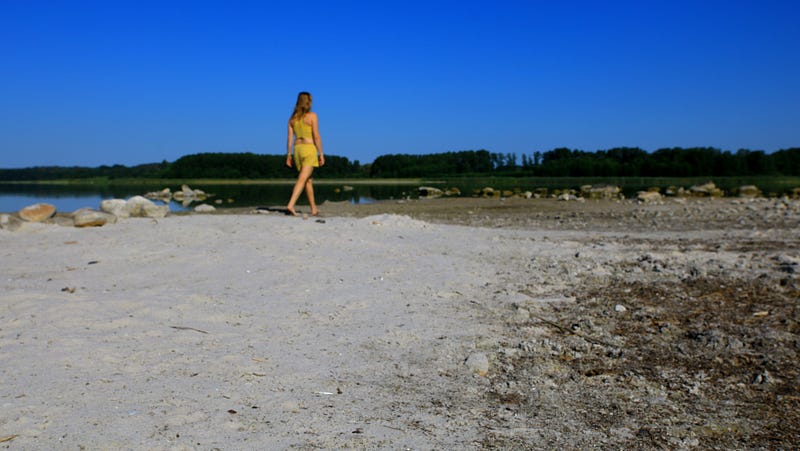
It is rather simple to set up the tripod and place the camera in a way that it points at where you want to sit or stand. Then you choose the setting of a self-timer. A delayed-action shutter release will allow you to get into the pose before the picture is taken.
My camera has the option of a 2-second or 10-second delay. I use the 10-second delay which gives me enough time to press the shutter, then walk away, place myself where I want to stand, and smile eventually.
Or look into the distance.
But some locations are trickier than others and on rocky or mountainous terrain you don’t want to be tripping while running into the desired position.
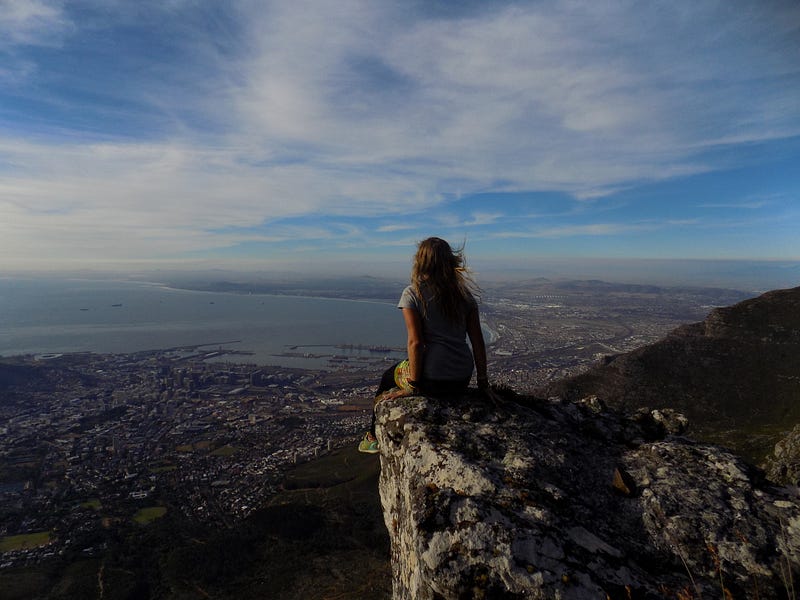
That is where my remote comes into place. I bought a remote shutter release which has a range of almost 100 meters and takes the pressure off me.
I can place the camera at a safe spot, walk away, climb to the edge of a mountain, sit down and then simply press the release button whenever I feel it’s the right moment. See below.
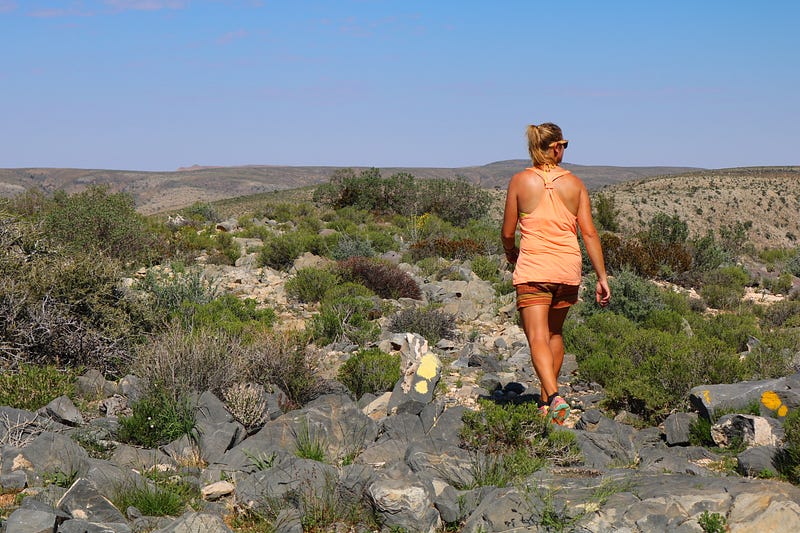
Sometimes I don’t want to be holding something in my hand or I decide a 10-second delay is enough to capture the moment. In the image below I was hiking in the Naukluft mountains in Namibia.
I pressed the button and simply walked into the frame while overlooking the scenery.
I’m not the poser type of person who just stands there and smiles into the camera. I much rather look into the distance or capture myself in the movement.
Yes, you can capture yourself, with a tripod, in action.
Without getting a blurry shot.
It’s not as easy with the self-timer but it is possible. It just takes some practice.

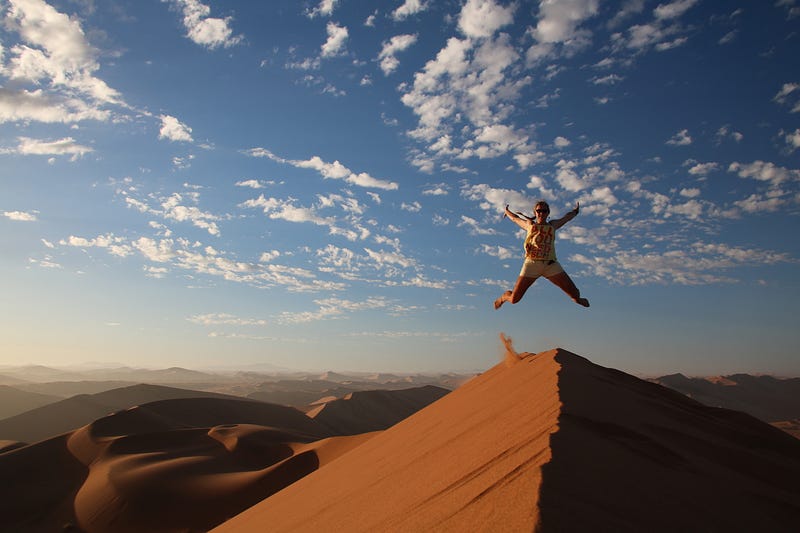
The last picture in this series is one of the best photographs I’ve ever taken with a self-timer. It made it onto the walls of a backpacker’s hostel in Namibia and I’ve used it for multiple articles as the title image.
Yes, my camera was on top of a sand dune. The tripod was almost hidden in the sand but it stood still enough to take this picture.
“Photography is a love affair with life.” — Burk Uzzle
Now you know.
In case you’re wandering off again on some solo adventure and are wondering how to prove to your family and friends you’ve really been at that epic location, don’t forget to pack that tripod.
And share some of the results with me. I’d love to see your tripod pictures.
More about photography and photography tips:
Join my email list here if you would like to read more photo essays or sign up for the Medium membership to receive unlimited access to my and other writers’ stories out here (I will receive a commission fee in return).


