
Switch to Dark Mode in Real-Time With Flutter and Google Maps
Update your map instantly when the user switches the theme of the device ! (iOS / Android)
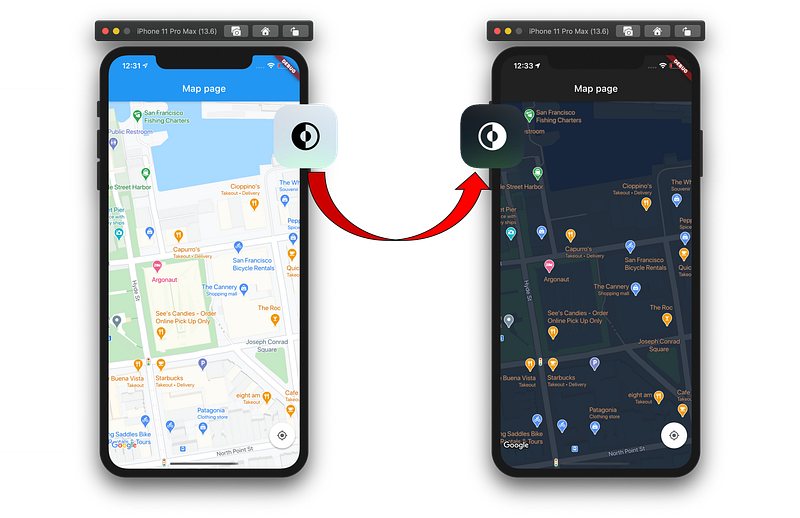
Nowadays, it is common to use applications that handle the dark mode on any devices (ex: Facebook, WhatsApp, native apps…). Since it was launched with iOS 13 and Android 10, the dark mode could be pretty hard to implement in an old project if nobody took care about that before you. That’s why you should try to manage it as soon as possible when starting a new project !
In Flutter, we can easily change the theme of our app by changing the theme of the device, this is done by adding theme and darkTheme in parameters of your MaterialApp, like so:
By doing this, your app will rebuild the Flutter widgets whenever the user changes the device’s theme. You can test it in the iOS Simulator by going in Features => Toggle Appearance. If you want to custom your themes, use custom ThemeData instead of ThemeData.light()/dark().
Perfect, we know now how to manage the theme of the Flutter Widgets in our app, now let’s create a new Widget displaying a basic Google Maps.
You can see that, if you try to switch the device’s theme, nothing happens to the map, that’s because the Google Maps’ widget is not a native component of Flutter and we need to manage it by our own.
What we are going to do is quite simple:
- Search for a Google Maps style and load it as an asset in the app.
- Handle when the user requests to change the theme.
- Adapt the style of the map depending on the changed theme.
1. Load JSON Google Maps style
First, visit the website https://mapstyle.withgoogle.com/ to choose the dark and light theme you would like to use. Click on “Finish” in order to generate the two json files that you will download.
Note: If you choose the basic light theme, it will generate a JSON file with an empty array as content “[]”, this is normal don’t care about it !
Now, import this file as an asset in your Flutter project. I recommend you to isolate this file in a new folder and add it in the pubspec.yaml file, let’s call it “map_styles/”.
assets:
- assets/
- assets/map_styles/
Then, add your JSON files in this folder, in this example I’ll name them dark.json and light.json.
Finally, in your _MapState add a method to load these files as Strings in order to load the JSON in the map later:
In initState(), call the _loadMapStyles() function which will load the json files as Strings using the rootBundle from services.dart. These Strings will be used is the part 3.
2. Handle the switching of the theme
First, we need to tell the widget to observe events from the device. Let’s use the mixin WidgetsBindingObserver in order to implement the function which manage the theme changing.
- WidgetsBinding.instance.addObserver(this) : allow this widget to be notified when the user changes the theme.
- didChangePlatformBrightness() : called when the theme is changed.
- dispose() : called when the widget is removed from the tree (important !).
3. Adapt the style !!
The only thing remaining is to update the map with the json files we created earlier.
WidgetsBinding.instance.window.platformBrightness gives the current theme of the device so we can easily set the correct style based on the brightness.
Then, use setState() when using _setMapStyle() to rebuild the widget and update the UI.
We are DONE ! ✅
Thank you for reading this article and I hope it will help developers understanding how to manage themes using Google Maps !
Note: the full code of this demo is available here.


