
Stylish GUIs with Python CustomTkinter — #1 Basics
A Graphical User Interface (GUI) is a screen that you can open up on your computer. The screen can display information like text and images. But it also makes it possible for a user to interact with the computer through text-input fields, buttons and checkboxes for example.
Python comes with a standard package to make GUIs, it is called tkinter. There also is a package that works similar to tkinter but the GUIs you make with it are more modern looking, this package is called customtkinter.

This is the first part of a series about making GUIs with customtkinter. In which we will start with the basics. The GUI above is what we will be making in this article.
These are the sections of this article:
- Making our first GUI with customtkinter
- Set the size and title of a GUI
- Set the appearance mode of a GUI
- Add text to a GUI with CTkLabel
- Add a text input field to a GUI with CTkEntry
- Add checkboxes to a GUI with CTkCheckbox
- Add a button to a GUI with CTkButton
- Set the default color theme of a GUI
1. Making our first GUI with customtkinter
Before we can use customtkinter we have to install it. This can be done with the command: pip install customtkinter.
You can read this article to learn more about packages and installing them.
After installing, we can import customtkinter in our Python file with: import customtkinter.
Then we can use customtkinter.CTk() to make a GUI which we will assign to variable root. If we then call root.mainloop() the GUI will pop up on our screen if we run the script.
Here is the full code example of the most basic GUI made with customtkinter:
import customtkinter

root = customtkinter.CTk()
root.mainloop()
And here is the GUI screen that appears when running the code:

2. Set the size and title of a GUI with customtkinter
We can easily give the GUI a title by using the title method: root.title(“Sports App”). The title will appear on the top left of the GUI.
To give the GUI a size when it opens we can use the minsize method and pass it a width and then a height. When the GUI opens you can make it bigger but not smaller than the size specified with minsize.
Here is a code example where the minsize and title methods are used:
import customtkinter

root = customtkinter.CTk()
root.minsize(400,300)
root.title("Sports App")
root.mainloop()
Now the GUI will look like this:

3. Set the appearance mode of a GUI with customtkinter
The appearance mode can either be dark, light or system. The default value is system and this makes the GUI use the appearance mode setting of the operating system.
I think the dark appearance mode looks better than the light one. So I applied it to our GUI by using the set_appearance_mode function and passing the string 'dark'.
import customtkinter

customtkinter.set_appearance_mode('dark')

root = customtkinter.CTk()
root.minsize(400,300)
root.title("Sports App")
root.mainloop()
The dark appearance mode makes the GUI look like this:

4. Add text to a GUI with CTkLabel
Now lets add some text to the GUI. This can be done with the CTkLabel class. First we make a label and then we use the pack method to place the label in the GUI.
When making the CTkLabel I first add the master argument. This is to specify in which ‘element’ you want to place the label. In our case we just want to place it in the GUI itself so we type master=root.
Then I add the text argument to pass a string with the text I want to put on the screen.
There are multiple arguments to customize a label, one of which is the font argument. It takes a 2-item tuple to define the font-type and font-size. I only define the font-size with the tuple (None,24).
After making the label we can use the pack method on it, in which I specify pady=20 to add a vertical padding (extra space) around the label.
There also exists padx for adding horizontal space. And you can use these arguments with the pack methods of elements other than labels as well.
Here is the full code example:
import customtkinter
customtkinter.set_appearance_mode('dark')
root = customtkinter.CTk()
root.minsize(400,300)
root.title("Sports App")
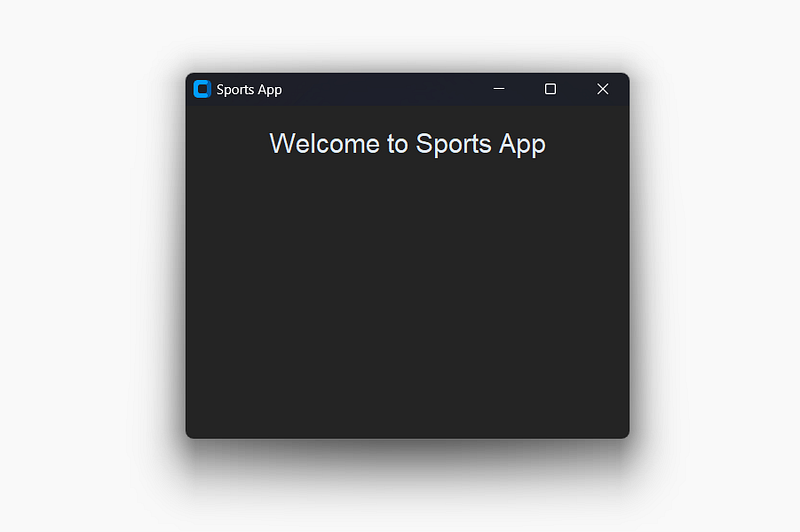
header_label = customtkinter.CTkLabel(master=root,
text='Welcome to Sports App',
font=(None,24))
header_label.pack(pady=20)
root.mainloop()Here is the GUI with text that it makes:
5. Add a text input field to a GUI with CTkEntry
To make user interaction possible there are different types of elements. One of them is a text input field which can be made with the CTkEntry class.
Again, we pass the master argument to it to place the input field in the GUI. And we also pass a placeholder_text to define a text to display when the user has not entered text yet.
With the Entry object defined we can use the pack method to make it appear in the GUI.
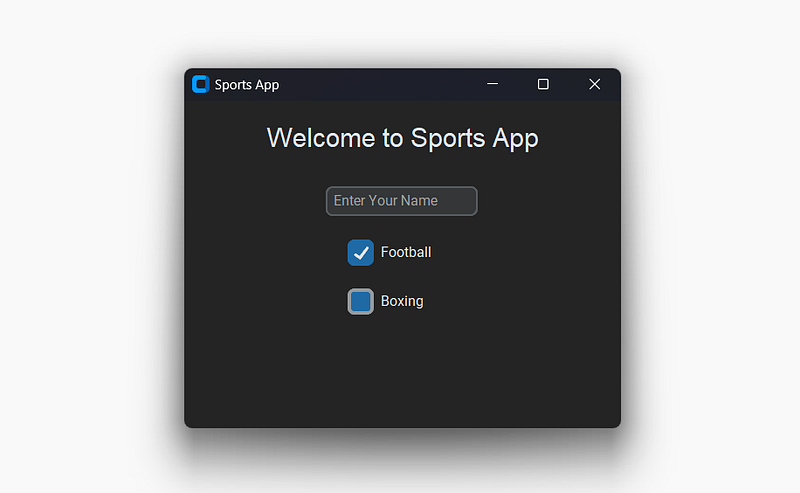
name_entry = customtkinter.CTkEntry(master=root,
                                    placeholder_text="Enter Your Name")
name_entry.pack(pady=10)
With the above lines added to our code, the GUI will look like this:

6. Add checkboxes to a GUI with CTkCheckbox
Another type of element for users to interact with is the checkbox. This element can be made with the CTkCheckbox class.
All I pass to it is the master argument and a text that functions as a label to specify what the checkbox is about. With the pack method it can be placed in the GUI.
Here is some example code to add 2 checkboxes:
football_checkbox = customtkinter.CTkCheckBox(master=root, text='Football')
football_checkbox.pack(pady=10)

boxing_checkbox = customtkinter.CTkCheckBox(master=root, text='Boxing')
boxing_checkbox.pack(pady=10)
With those lines added to our code, the GUI will look like this:
7. Add a button to a GUI with CTkButton
We can also add a button to our GUI with the CTkButton class.
The idea behind adding a button is that you connect it to a function. Everytime the button is pressed the connected function will be called and its lines of code will be executed.
A function can be connected by passing the its name to the command argument. We also specify a text argument to make a text appear inside the button. And we pass the same old master argument again.
send_button = customtkinter.CTkButton(master=root,text="Send",command=send)
send_button.pack(pady=10)
With the button code added to the code of our GUI, the GUI will look like this:
Now it is time to define the send function that will be called when the button is pressed.
In the send function we can use the get method on the name_entry entry object to get the text that was entered in the text input field.
Likewise, we can use the get method on the checkboxes to get a Boolean value that tells us whether the checkbox was or was not checked.
Here is the send function that is connected to the button:
def send():
    name = name_entry.get()
    sports = []
    if football_checkbox.get():
        sports.append('Football')
    if boxing_checkbox.get():
        sports.append('Boxing')
    print(name + ' likes: ' + ', '.join(sports))
When a user enters the name Better Everything, checks the boxing checkbox and clicks the button, it will print:
Better Everything likes: Boxing
I think buttons are very important to add useful features to a GUI. And with the get method on input elements like entries and checkboxes you can get data that is entered by the user.
Here is the full code of the GUI that we created.
import customtkinter


def send():
    name = name_entry.get()
    sports = []
    if football_checkbox.get():
        sports.append('Football')
    if boxing_checkbox.get():
        sports.append('Boxing')
    print(name + ' likes: ' + ', '.join(sports))


customtkinter.set_appearance_mode('dark')

root = customtkinter.CTk()
root.minsize(400,300)
root.title("Sports App")

header_label = customtkinter.CTkLabel(master=root,
                                      text='Welcome to Sports App',
                                      font=(None,24))
header_label.pack(pady=20)

name_entry = customtkinter.CTkEntry(master=root,
                                    placeholder_text="Enter Your Name")
name_entry.pack(pady=10)

football_checkbox = customtkinter.CTkCheckBox(master=root, text='Football')
football_checkbox.pack(pady=10)

boxing_checkbox = customtkinter.CTkCheckBox(master=root, text='Boxing')
boxing_checkbox.pack(pady=10)

send_button = customtkinter.CTkButton(master=root,text="Send",command=send)
send_button.pack(pady=10)

root.mainloop()
8. Set the default color theme of a GUI with customtkinter
The default color theme mode can either be blue, dark-blue or green. It can be set with the set_default_color_theme function. For example:
customtkinter.set_default_color_theme('green')Here is an example of what our GUI would look like if we used the green color theme.

Thank you for reading!
You can get full access to all my posts by joining Medium. Your membership fee directly supports me and other writers you read. You’ll also get full access to every story on Medium:
Here is a reading list of all parts in this series:


