
Step-by-Step Tutorial: Developing and Deploying Decentralized Applications (dApps) on the Polygon Platform
In a world where technology is taking over traditional systems, the era of centralized servers is fading away. In its place, the revolution of decentralization has begun. And right at the heart of this revolution are Decentralized Applications (dApps). This tutorial will guide you, step by step, through the process of developing your first dApp on the Polygon platform, the key to unlocking a whole new world of possibilities.
A Brief Introduction
Before diving in, let’s quickly go over what exactly dApps and Polygon are.
Decentralized applications, or dApps, are applications that run on a P2P network of computers rather than a single computer. Imagine playing a game of chess where each move is determined and verified by hundreds of observers instead of just two players. This is the concept of decentralization in a nutshell.
On the other hand, Polygon (formerly known as Matic Network) is a protocol and a framework for building and connecting Ethereum-compatible blockchain networks. Think of it as a bridge that connects isolated Ethereum-compatible blockchain networks, allowing them to work together as a single unified network.
Required Tools
Let’s gather our tools. Here’s what we need:
- MetaMask: This is a crypto wallet that will allow us to interact with the Ethereum network.
- Truffle: It’s a development environment, testing framework and asset pipeline for Ethereum.
- Polygon Mumbai Testnet: We will use this for testing our dApp.
For this tutorial, I am assuming that you have a basic understanding of JavaScript, Solidity, Ethereum, and blockchain technology.
Step 1: Setting Up the Environment
First things first, let’s install Truffle:
npm install -g truffle
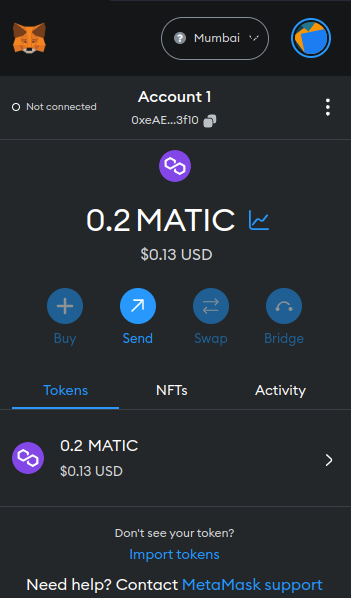
With Truffle in place, let’s configure MetaMask to use the Polygon Mumbai Testnet. Follow these instructions from the official Polygon documentation to do so.
Great! You should see something like this when you open your Metamask:
Step 2: Configuring Truffle
Let’s initialize Truffle in our project:
truffle initThe truffle init command creates a new Truffle project with the necessary configuration files and directories. Among these is the truffle-config.js file, which is essential for configuring Truffle's behavior.
Open the truffle-config.js file. You will see various configurations commented out. For now, we're interested in setting up our project to use the Polygon Mumbai Testnet.
Find the networks section in the configuration file and add the following configuration:
networks: {
  matic: {
    provider: () => new HDWalletProvider(mnemonic, `https://rpc-mumbai.maticvigil.com`),
    network_id: 80001,
    gas: 8000000,
    confirmations: 2,
    timeoutBlocks: 200,
    skipDryRun: true
  },
},
You’ll need to replace mnemonic with your MetaMask wallet's mnemonic phrase.
Please note that your mnemonic phrase should be kept secret. Do not share it with anyone or publish it online. Also, in a real-world production setting, you would not hardcode the mnemonic phrase in the truffle-config.js file for security reasons. You might use environment variables or a secure secret management system.
Also, update your Truffle configuration to match the Solidity version we’ll use:
compilers: {
  solc: {
    version: "^0.8.0",
  },
},
Finally, you’ll need to install HDWalletProvider, a Truffle package that allows us to connect to different Ethereum networks:
npm install @truffle/hdwallet-provider
At the top of your truffle-config.js file, require the HDWalletProvider:
const HDWalletProvider = require("@truffle/hdwallet-provider");With these configurations, you’re now ready to compile and migrate your smart contracts using Truffle on the Polygon Mumbai Testnet.
Step 3: Writing a Smart Contract
Let’s create a simple smart contract. This contract will just store and retrieve a string. In the root of your project directory, create a new file called HelloWorld.sol in the contracts directory and copy the following Solidity code into it:
pragma solidity ^0.8.0;

contract HelloWorld {
    string public message;
    function setMessage(string memory newMessage) public {
        message = newMessage;
    }
    function getMessage() public view returns (string memory) {
        return message;
    }
}
Step 4: Compiling the Smart Contract
Let’s compile our smart contract using Truffle:
truffle compileStep 5: Deploying the Smart Contract to the Polygon Mumbai Testnet
We create a migration script in the migrations directory:
const HelloWorld = artifacts.require("HelloWorld");

module.exports = function(deployer) {
  deployer.deploy(HelloWorld);
};
You should name the file with a number followed by a description. For example, if your contract’s name is HelloWorld, you might create a new file named 2_deploy_hello_world.js for example. The number at the beginning indicates the order in which the migration should run.
And finally, deploy your contract:
truffle migrate --network maticCompiling your contracts...
===========================
> Everything is up to date, there is nothing to compile.
Starting migrations...
======================
> Network name: 'matic'
> Network id: 80001
> Block gas limit: 20235543 (0x134c517)
2_deploy_hello_world.js
=======================
Deploying 'HelloWorld'
----------------------
> transaction hash: 0x4e5081f75cdc0082d61ad375b3636bf66a22fb88278f9a254b318d5ebffdbfc1
> Blocks: 2 Seconds: 4
> contract address: 0xe53F9E3671B631A61a26A6Cc54e46da781323311
> block number: 37673287
> block timestamp: 1688762067
> account: 0xeAE0666664347AdaE0Bd3a107713D11a610B3f10
> balance: 0.136666589580666176
> gas used: 333364 (0x51634)
> gas price: 2.500000016 gwei
> value sent: 0 ETH
> total cost: 0.000833410005333824 ETH
Pausing for 2 confirmations...
-------------------------------
> confirmation number: 2 (block: 37673289)
> Saving artifacts
-------------------------------------
> Total cost: 0.000833410005333824 ETH
Summary
=======
> Total deployments: 1
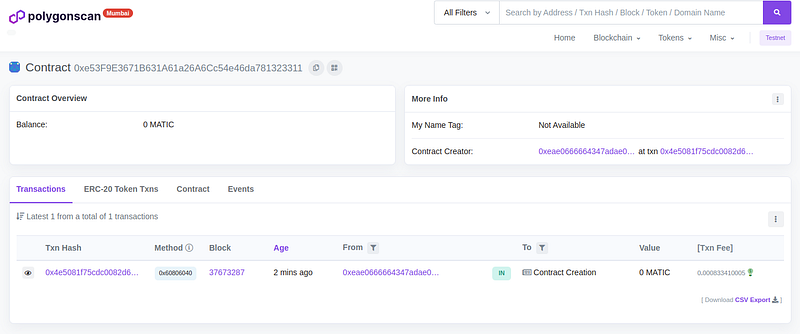
> Final cost: 0.000833410005333824 ETHOur Smart Contract is deployed to the Polygon Mumbai Testnet:
Step 6: Interacting with the Smart Contract
First, let’s create a basic HTML file called index.html in the root of your project directory:
<!DOCTYPE html>
<html lang="en">
<head>
    <meta charset="UTF-8">
    <meta name="viewport" content="width=device-width, initial-scale=1.0">
    <title>HelloWorld dApp</title>
</head>
<body>
    <h1>HelloWorld dApp</h1>
    <input id="message-input" type="text" placeholder="Type a message...">
    <button id="message-button">Set Message</button>
    <div id="message-output"></div>

    <!-- Include web3.js -->
    <script src="https://cdnjs.cloudflare.com/ajax/libs/web3/1.2.9/web3.min.js"></script>
    <!-- Include our JavaScript file -->
    <script src="app.js"></script>
</body>
</html>
Next, we create a JavaScript file called app.js:
// replace with your contract's ABI (can be found in the JSON file in the build/contracts directory)
const contractABI = [...];

// replace with your contract's deployed address
const contractAddress = '...';

const web3 = new Web3(window.ethereum);
const helloWorldContract = new web3.eth.Contract(contractABI, contractAddress);

window.ethereum.enable().then((accounts) => {
    const account = accounts[0];

    const messageButton = document.getElementById('message-button');
    const messageOutput = document.getElementById('message-output');

    // Display current message
    helloWorldContract.methods.getMessage().call()
        .then(result => {
            messageOutput.innerText = result;
        });

    // Set new message
    messageButton.addEventListener('click', () => {
        const messageInput = document.getElementById('message-input');

        helloWorldContract.methods.setMessage(messageInput.value)
            .send({ from: account })
            .on('transactionHash', () => {
                messageOutput.innerText = messageInput.value;
            });
    });
});
Please remember to replace the contractABI and contractAddress with your actual contract's ABI and the address where it was deployed. Also, ensure that MetaMask is installed in your browser, or else window.ethereum will be undefined.
You can now open the index.html file in your browser. Don't forget to connect your MetaMask to the Polygon Mumbai Testnet and the correct account.
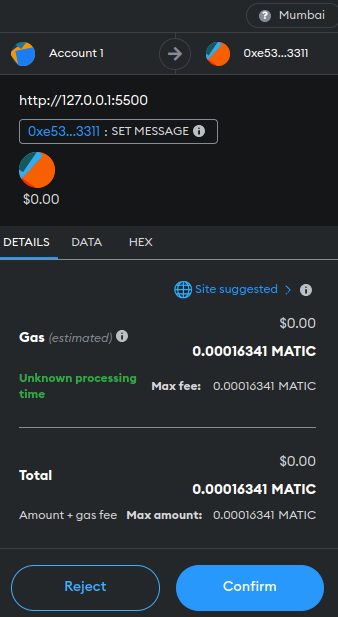
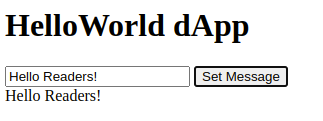
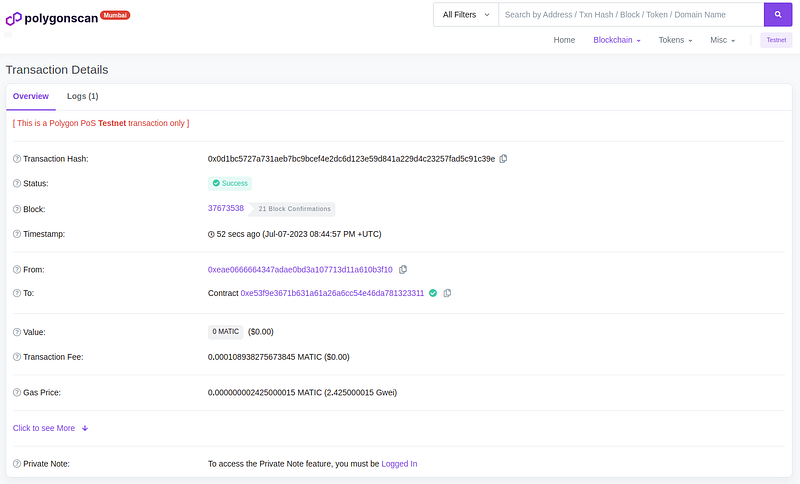
After connecting, you can interact with your deployed HelloWorld contract by typing a new message and clicking the 'Set Message' button. You should see the message updated.
Conclusion
Congratulations! You’ve now developed and interacted with your first decentralized application (dApp) on the Polygon platform, directly from your browser.
Developing dApps can be a challenging journey, but remember, it’s about learning, experimenting, and gradually enhancing your skills. Keep exploring and soon you’ll be creating more complex dApps contributing to the vibrant blockchain ecosystem.
- Polygon Wiki— This is the official documentation by Polygon Network. It covers in detail the various aspects of the Polygon Network and its development tools.
- Truffle Suite — Truffle Suite’s official website with extensive documentation and tutorials on using Truffle for Ethereum development.
- Remix Ethereum — This is an online compiler and Solidity IDE. It’s a quick way to write, test, debug, and deploy smart contracts on Ethereum networks.
- OpenZeppelin — This library provides secure and community-audited smart contract components for Solidity.
- Web3.js — This is the Ethereum compatible JavaScript API which implements the Generic JSON RPC spec. It’s used for interacting with Ethereum blockchain and smart contracts on it.
- Solidity Documentation — This is the official Solidity documentation, a great place to get a deep understanding of Solidity language.
- Etherscan — It allows you to explore the Ethereum and Polygon blockchains, transactions, addresses, and more.
- Hardhat — A development environment to compile, deploy, test, and debug your Ethereum software.
- Polygon Faucet — This is a faucet for the Polygon Mumbai Testnet. You can use it to request Matic tokens for testing your dApps on the test network.
- PolygonScan — This is the equivalent of Etherscan but for the Polygon Network. You can use it to explore transactions, addresses, blocks, and other activities happening on the Polygon Network.
Enjoyed the read? For more on Web Development, JavaScript, Next.js, Cybersecurity, and Blockchain, check out my other articles here:
If you have questions or feedback, don’t hesitate to reach out at [email protected] or in the comments section.
[Disclosure: Every article I pen is a fusion of my ideas and the supportive capabilities of artificial intelligence. While AI assists in refining and elaborating, the core thoughts and concepts stem from my perspective and knowledge. To know more about my creative process, read this article.]