
Splash screens for dark and light mode in Flutter
A guide for the Android and iOS platforms
This article will guide you through setting up a custom splash screen with a different background color and image for dark and light modes on both iOS and Android. This can be a little tricky for Flutter developers who don’t have native development experience with those platforms, but if you follow the directions below, you’ll be up and running in no time.
If you have your own color scheme and images you can adapt this tutorial to fit your own needs, otherwise follow the steps exactly as written. This tutorial will add a light and dark splash screen to the default counter app that comes with a new Flutter project.
Getting set up
Create a new Flutter project.
Enable Dark Mode in Flutter
In main.dart, add the following line to the MaterialApp widget:
darkTheme: ThemeData.dark(),Changing the light/dark mode in the device Settings should change how the app looks now.
Adding the splash screens in iOS
We’ll start with iOS first.
Getting the images
Download the following images:
Name them whatever you want.
Adding the images as assets
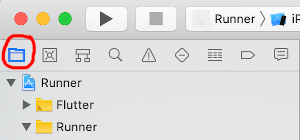
In Xcode, open the ios folder in your Flutter project. Make sure you are showing the Project navigator view:
Then go to (1) Assets.xcassets > (2) LaunchImage. In the (3) Attributes inspector on the right (a chisel-like icon), select (4) Appearances and choose Any, Dark.
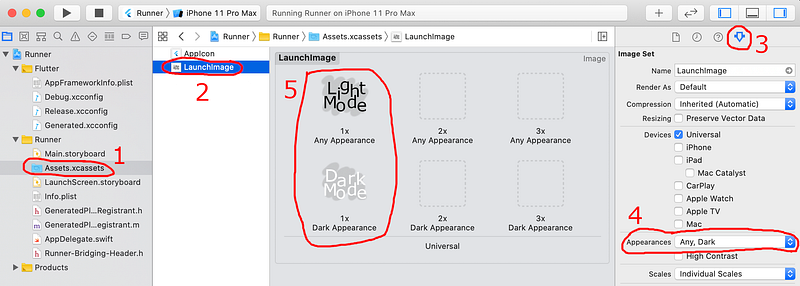
(5) Drag and drop the light mode image into the 1x Any Appearance box. Next drag and drop the dark mode image into the 1x Dark Appearance box.
Notes:
- If
LaunchImagedoesn’t exist, then right click where the 2 is in the image above and choose New Image Set. Click on it again to change the name toLaunchImage. - You should probably have three different densities for each image file (where the 2x file has twice the density of 1x, and 3x has three times the density of 1x), but I just used a single file each for light and dark in this example. If you put it in the 2x or 3x spot it would look smaller.
Using the images for the launch screen
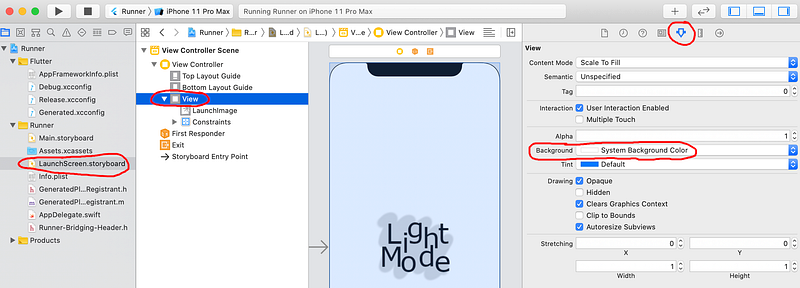
Then go to LaunchScreen.storyboard and click View. In the Attributes inspector on the right, select System Background Color for the Background. This will allow the background color to change according to the dark mode settings.
Alternate background colors (optional)
If you set the color to the system background color, then you’ll get black for dark mode and white for light mode. If you want some other light or dark shade then you need to use a different method.
Method 1 (iOS 11+): Color Set
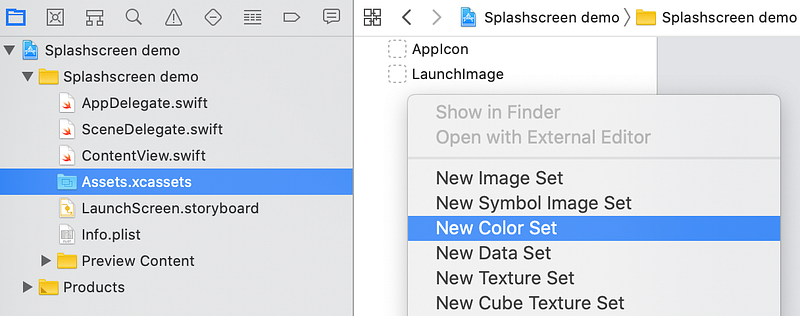
Choose Assets.xcassets and in the empty space below the LaunchImage right-click and choose New Color Set. Rename it to MyBackgroundColor.
For the Appearances choose Any, Dark:
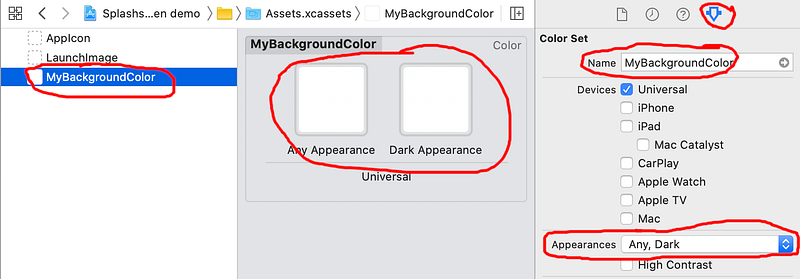
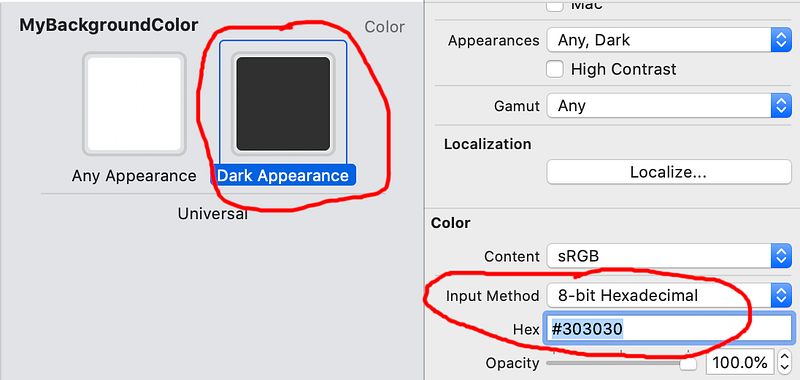
Then choose the Any or Dark Appearance, Hexadecimal for the Input Method, and enter your custom color as hex.
Method 2 (support pre-iOS 11): Image Set
Another trick you can do to change the background color is to use an image set with a light mono-colored image and a dark mono-colored image. I won’t show all the screenshots here, but these are the basic steps:
- In Assets.xcassets create a new Image Set and call it
MyBackgroundImage. - Change the Appearances to Any, Dark.
- Drag in a light image and a dark image. You’re going to stretch them, so even a one pixel image is ok.
- In LaunchScreen.storyboard add a new ImageView to the base view.
- In the Attributes Inspector set that image to
MyBackgroundImage. Set the Content Mode to Scale to Fill. - Set the constraints of
MyBackgroundImageto pin to the edges.
Anyway, we aren’t doing any of that in this tutorial, so you can go on to test how it looks now.
Testing out the iOS splash screen
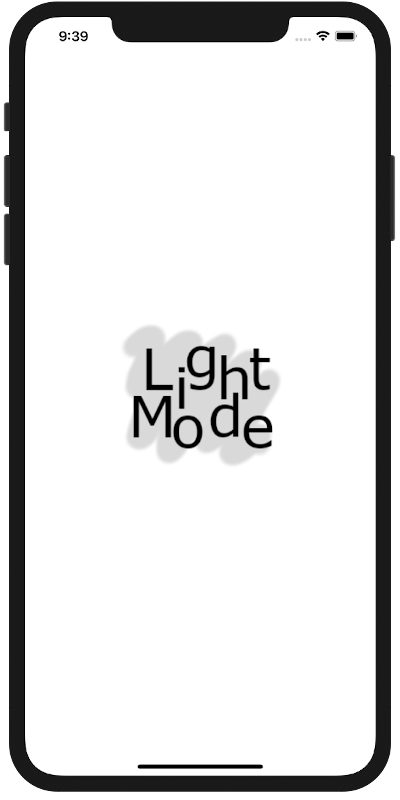
When you run the app now (which you can do directly in Xcode by pressing the triangular play button in the top left), you should* see the splash screen image show up briefly when the app starts for the first time.
* The image wouldn’t show up for me on the first few tries. I did a combination of restarting the simulator and Xcode and reinstalling the app. I’m not sure what made it work, but it finally did show up.
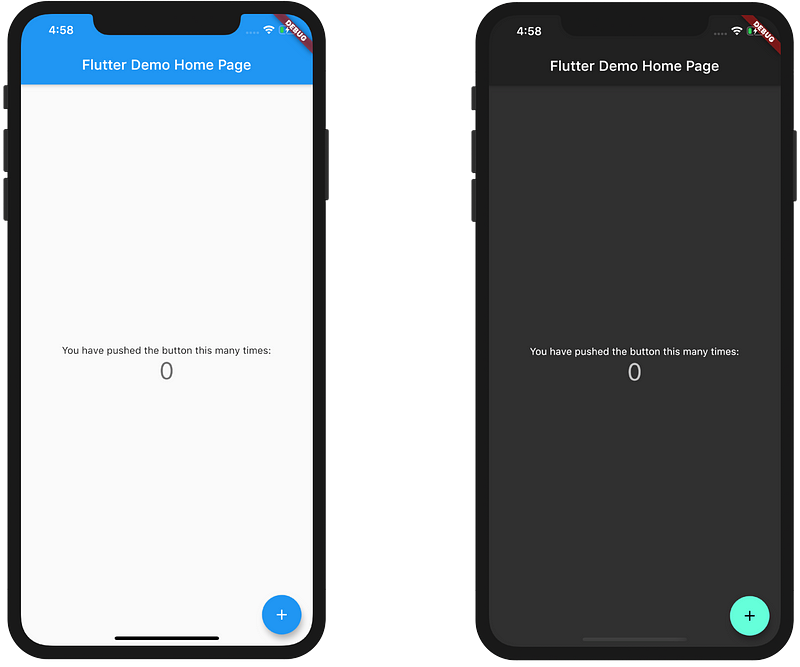
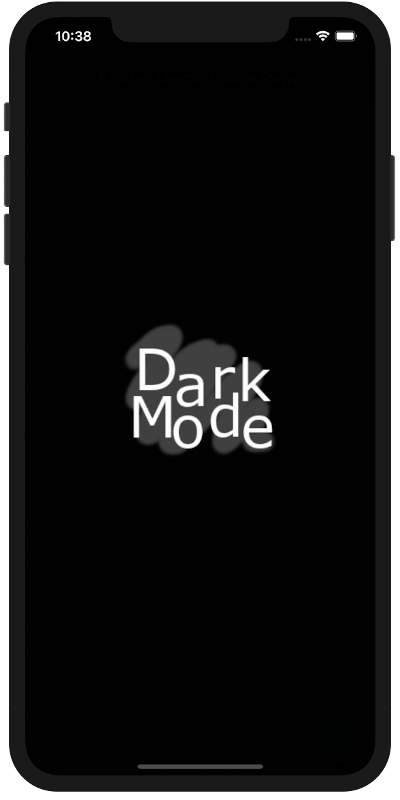
Changing the app to dark mode (Settings > Developer > Dark Appearance on the Simulator), restart the app and you should see the following:
That’s it for iOS. Now on to Android!
Adding the splash screens in Android
Light mode
Download the following image:
Name it launch_image.png.
In your Flutter project, save the image in the Android drawable folder. That’s located here:
android/app/src/main/res/drawableIn that same folder, open launch_background.xml. Replace the contents with the following code:
<?xml version="1.0" encoding="utf-8"?>
<layer-list xmlns:android="http://schemas.android.com/apk/res/android">
    <item android:drawable="@android:color/white" />
    <item>
        <bitmap
            android:gravity="center"
            android:src="@drawable/launch_image" />
    </item>
</layer-list>
Here are some things to note:
- You can choose a different color besides white for the background if you like.
- Although your file is called launch_image.png, leave off the .png extension here.
- This launch_background.xml file is referenced in the AndroidManifest.xml file.
- If you want to have different resolution images for different devices, then you will put the images in the mipmap folders. That’s beyond the scope of this article, though.
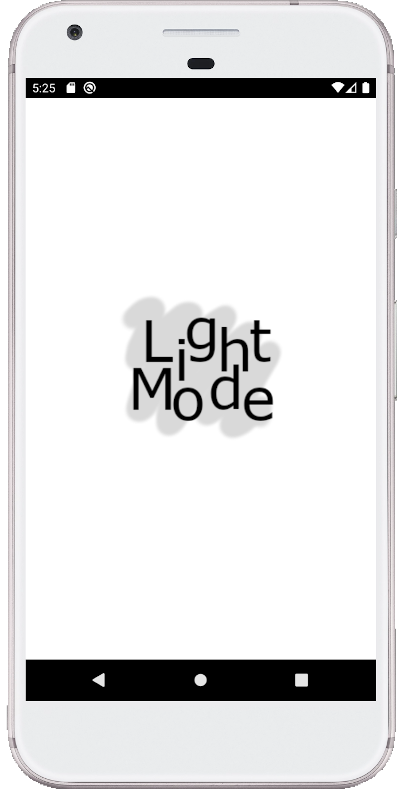
Run the app now any you should see this on startup:
Dark mode
Create a folder called drawable-night in the res folder. Then put the following image in that folder:
Name it launch_image.png.
Also in the drawable-night folder, create another file called launch_background.xml and paste in the following code:
<?xml version="1.0" encoding="utf-8"?>
<layer-list xmlns:android="http://schemas.android.com/apk/res/android">
    <item android:drawable="@android:color/black" />
    <item>
        <bitmap
            android:gravity="center"
            android:src="@drawable/launch_image" />
    </item>
</layer-list>
The difference is that the background color is black now. If you want to use your own hex color value, then you can create a colors.xml file in the values folder to define your colors. See this link for help.
Your file structure should look like this now:
res/
  /drawable
    launch_background.xml
    launch_image.png
  /drawable-night
    launch_background.xml
    launch_image.png
Android uses the folder names to select which resources to show based on the user’s dark mode settings.
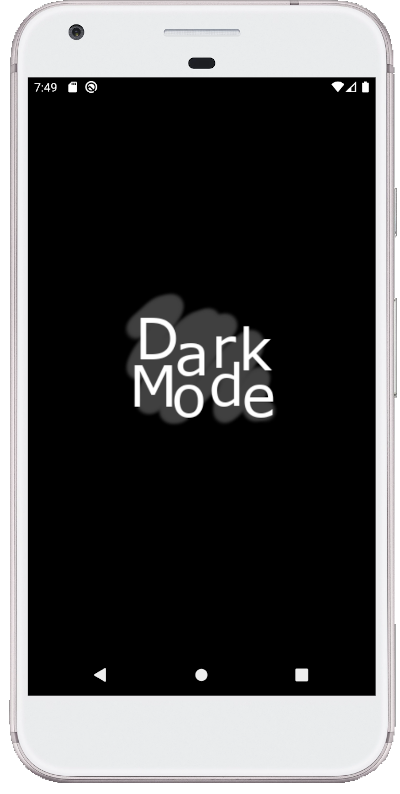
Switch your device or emulator to dart mode (Settings > Display > Dark theme), and run the app again. You should see the dark resources showing on the splash screen:
Congratulations! You have your light and dark splash screens working on Android and iOS now.


