
Spinning Up An AWS EC2 Instance and AMI, & Installing An Apache Web Server Via the AWS CLI
Hi There! This week we are coming right back at you with another project for AWS EC2, but this time, we’re automating everything! We’ll be using the AWS Command Line Interface (CLI) to run all of the scripts that we need to spin up an instance, start the instance, add security groups, install an Apache server, etc. The AWS CLI will allow us to access services within our AWS account, without having to really click around in the AWS console. Because the AWS CLI provides direct access to the public APIs of AWS services, we’ll have full AWS Management Console functionality to interact with the various IaaS services and features. Sounds interesting? If so, let’s get ready to dive into the tutorial!
Resources/PreReqs:
- As always, Confidence to get it done!
- An AWS Account: Sign Up Here
- Be sure to create an IAM user as you will not want to use the Root account
- AWS CLI Installed
- Basic understanding of Linux command input/output
- MacOS Terminal, Windows Command Prompt, or Linux Shell
Step 1
Before you can begin to use the AWS CLI, you must first configure the command line credentials.
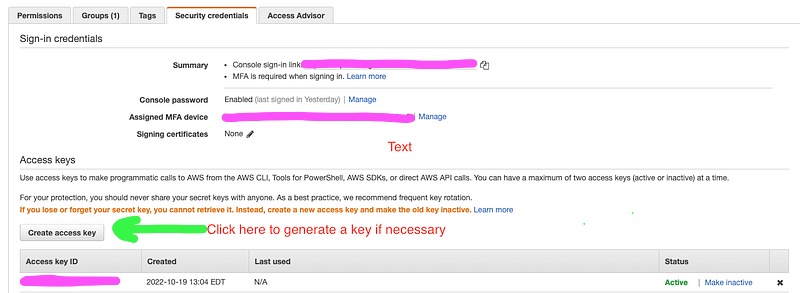
- Depending on the IAM user that you’re using, you can go into your console, visit the IAM dashboard, and click on the user for this project.
- Next, you’ll want to click on the “Security Credentials” tab, which will have the Access Key ID and Secret Key for that particular user (if previously generated). If you do not have these keys, click on “Create Access Key”, and be sure to copy and save both as you will need them later.
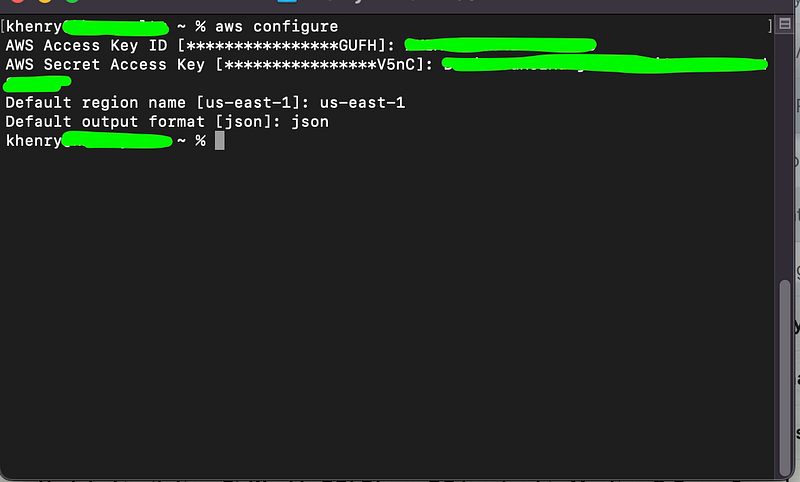
- After you’ve generated your access keys, you can either check to verify that you have AWS CLI installed by typing
aws —-version(I already had it installed), or in your terminal, proceed with configuring the CLI by typing the commandaws configure, which will prompt you for your credentials, default region, and default output format:
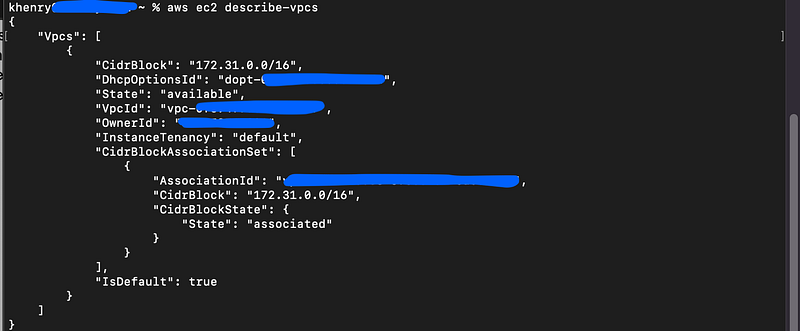
- It’s important to understand that at least one (1) VPC is provided by default, and so we should not have to worry about creating a net-new VPC as we can just leverage the default VPC AWS provides. To ensure we’re generating the correct information for the default VPC, let’s type the command
aws ec2 describe-vpcs, and be sure to copy the “VPC ID” as you will need this to create a security group in a later step:
- Before we jump into creating a security group, let’s first generate an SSH key pair as this will be needed for authentication to launch the EC2 instance, so let’s type the following AWS CLI commands:
aws ec2 create-key-pair \
—-key-name <YourKeyPairName> \
—-output text \
--query “WhateverYouWantToSayAboutTheKeys” \
—-region <YourDefaultRegion> > ./YourKeyPairName.pem
- To confirm that the command was executed successfully, let’s type the command
aws ec2 describe-key-pairs --key-name <YourKeyPairName>
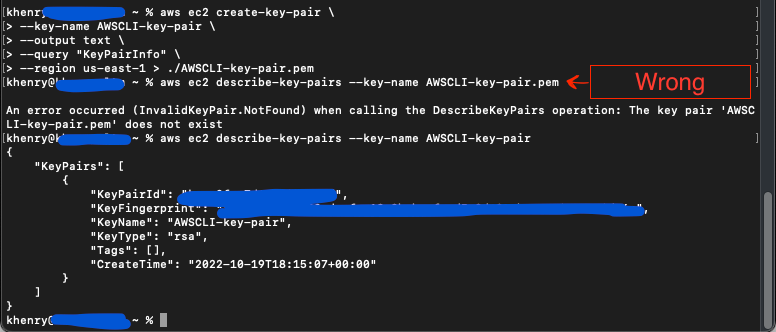
**You’ll notice above that I entered the incorrect command for the key pairs initially**
Step 2
We’ll now double back to create the security group as mentioned above. The security group can be created following the generation of the VPC ID, but I decided to create key pairs first (either approach will work). As a helpful note, a security group is also provided as a default along with the VPC, but we’re going to create one to ensure we’re only allowing traffic to access resources based on how we configure it. So in a nutshell, we’re creating our own firewall to either allow or deny traffic to reach our instance.
- Okay, to create a security group and add some basic info for it, let’s begin with the following commands, which will populate your security group ID:
aws ec2 create-security group \
--group-name <YourSecurityGroupName> \
--description “Description of Your Security Group” \
--vpc-id <YourVPCID> \
--region <YourDefaultRegion>

Be sure to copy the group ID as it will also be needed later in another step
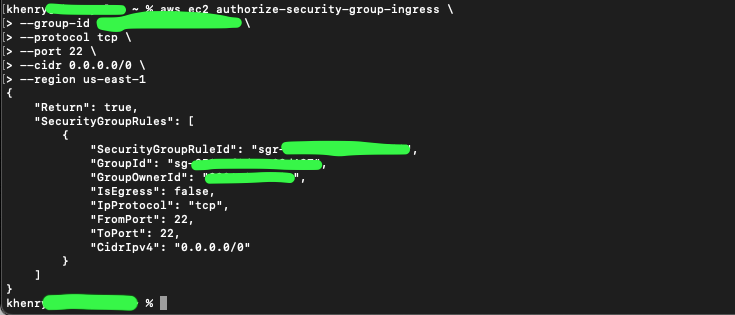
- We will now want to apply inbound security rules for the security group. Let’s start by allowing SSH traffic/connections on Port 22, using the following commands:
aws ec2 authorize-security-group-ingress \
--group-id <YourSecurityGroupID> \
--protocol tcp \
--port 22 \
--cidr 0.0.0.0./0 \
--region <YourDefaultRegion> \
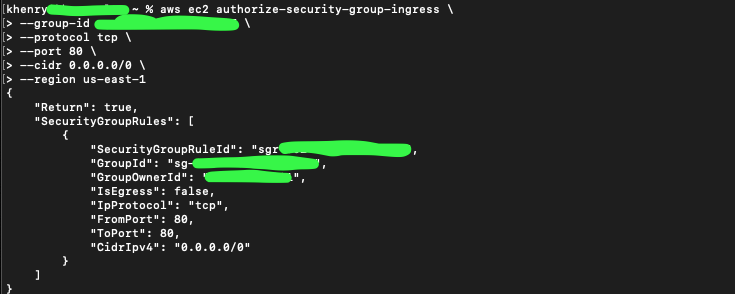
- Next, let’s run similar commands for HTTP traffic on Port 80 (to access the Apache server):
aws ec2 authorize-security-group-ingress \
--group-id <YourSecurityGroupID> \
--protocol tcp \
--port 80 \
--cidr 0.0.0.0./0 \
--region <YourDefaultRegion> \
Step 3
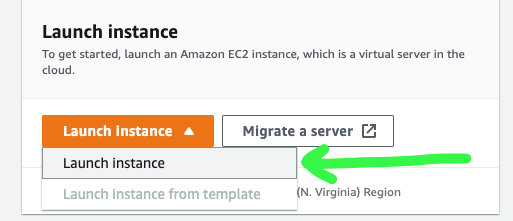
Now that we’ve created our security rules, let’s head back to our AWS Console and navigate to the EC2 Dashboard.
- Start by selecting “Launch Instance”
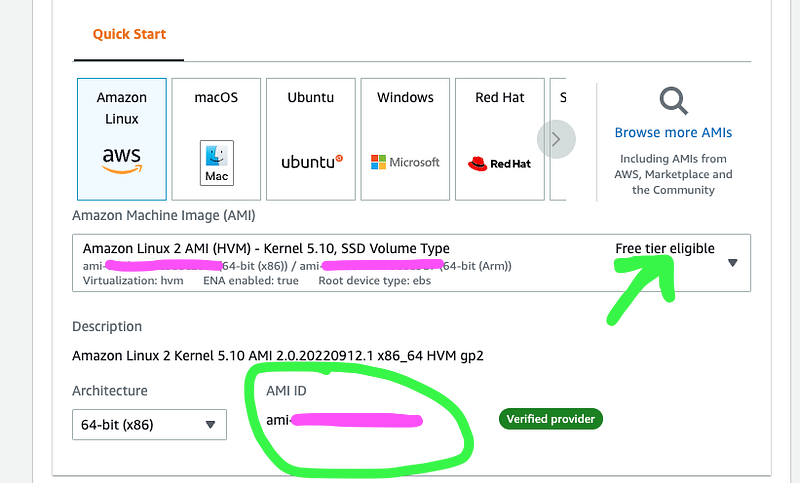
- Next, we’re going to copy the AMI ID from the Application/OS Image that we select (Choose a FREE AMI to use). An Amazon Machine Image (AMI) provides the information necessary to launch an instance. An AMI can be selected based on the region, launch permissions, and OS, to name a few. Below, I’ve selected the Amazon Linux AMI for this tutorial:
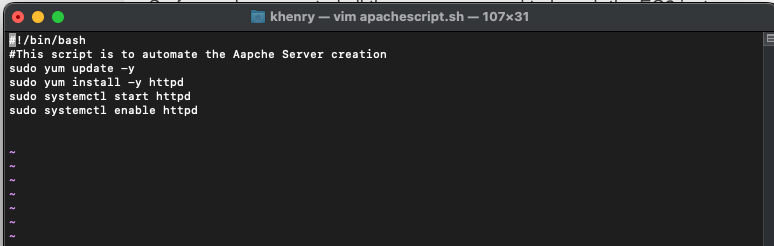
- We also have to ensure that our Apache server will be enabled upon start, and will run with no issues, so let’s get a bash script in play (also known as user data), by entering the following command:
vim apachescript.sh
**Remember to hit the “i” key to start typing, followed by the “esc” key. Type :wq to save the text that was entered**
- Now, we’re going to launch our EC2 instance using the AWS CLI (I’m so excited for this step!), so let’s type the following commands, which should populate everything that we’ve done thus far:
aws ec2 run-instances \
--image-id <YourAMIID> \
--count 1 \
--instance-type <YourInstanceType> \
--key-name <YourKeyPairName> \
--security-group-ids <YourSecurityGroupID> \
--user-data <YourScriptName>
--region <YourDefaultRegion>

- Now, because I ran into a little hiccup, I had to re-run my script via EC2 Instance Connect, which in fact ran the script. As you can see from above, the script below is the EXACT same, which makes this even more interesting!
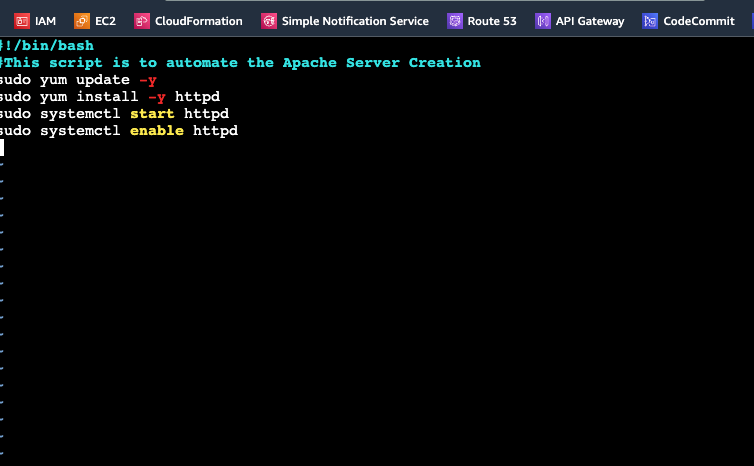
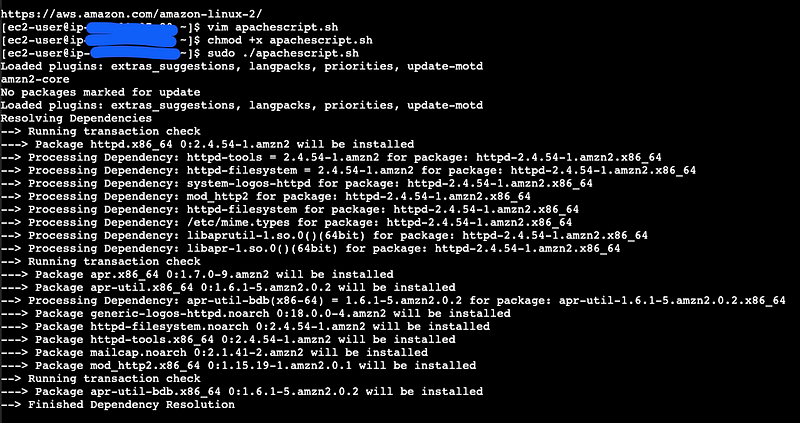
Initial thoughts are that maybe I should have run the chmod +x and sudo command for the first instance of the script as well, however, it turned out to be a firewall issue on my computer 🥴
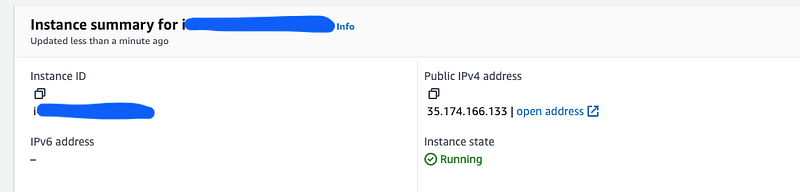
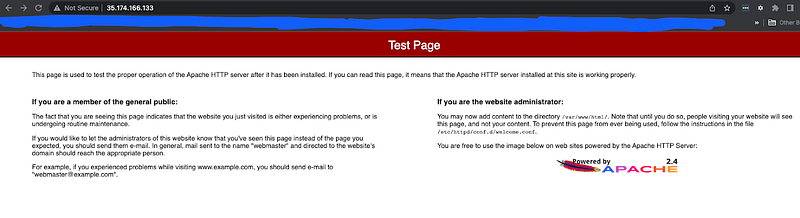
- Nevertheless, I was able to get the Apache test page up and running using the same Public IP that was generated with the initial launch of the EC2 instance!
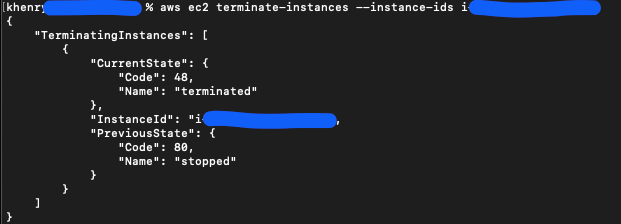
- And of course, last but not least, be sure to terminate your instance when you’re done! You do NOT want to incur charges for keeping the instance running!
🥳🥳 And that’s what we call automating, with a little heartburn at the end!
FEEL FREE TO FOLLOW ME ON LinkedIn and Medium!🖖🏽
More content at PlainEnglish.io. Sign up for our free weekly newsletter. Follow us on Twitter, LinkedIn, YouTube, and Discord.


