
Snowflake Time Travel: A Window To The Past

Let's face it, we make mistakes. Sometimes, even when we're just trying to fix a minor issue, we end up escalating it to an even greater ordeal. Like when we thought we've updated a small chuck of a table and later realised that we missed defining a WHERE clause. Or when we dropped a Production table thinking that we're connected in Dev.

So how do we recover from these? Well, we pull the data from backup, schedule a maintenance window, identify and apply the incremental changes that have happened on the table from when the last backup was taken. Yes, it is not straightforward, time consuming and inconvenient both for the users and developers. 1 mistake can be devastating and will make you say, 'If only I can go back in time'. Well, Snowflake have exactly what you needed.
Not that it will take you back in time — I'm sorry to disappoint, but it will allow you to access a version of a table at a specific point in time in the past.
Time Travel In Action
Now on the fun part. We will force a disaster and see how Snowflake can cope with it.
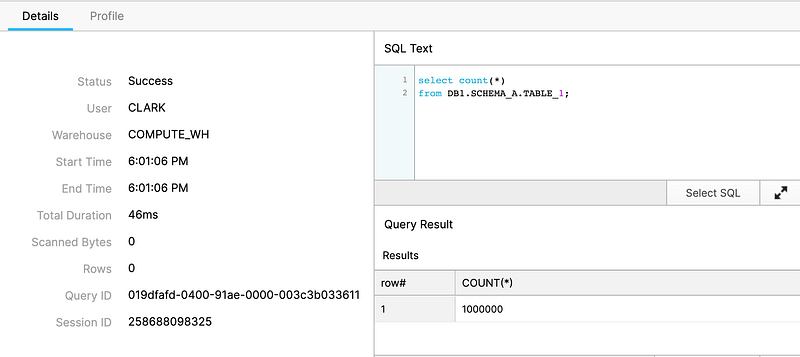
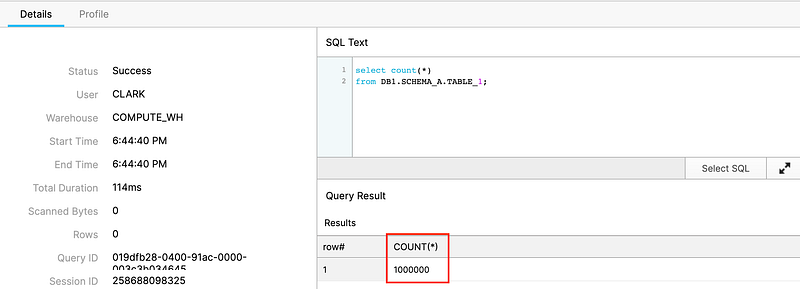
Let’s look at the TABLE_1 below and note that it has 1M rows.
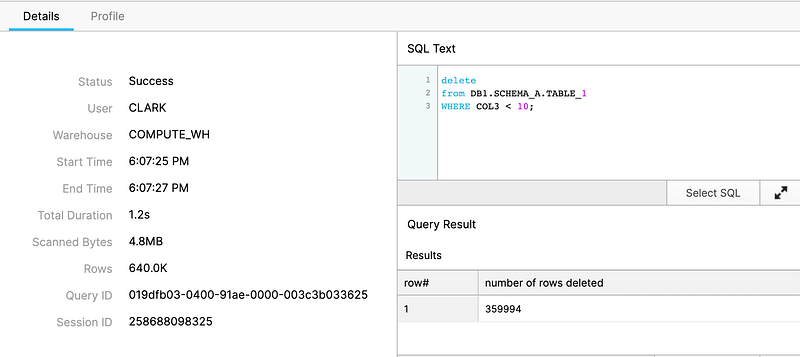
Now, let’s delete some data from it. Taking out COL3 values that are less than 10 removed a total of 359,994 rows from TABLE_1.
Let’s confirm that all COL3 values that is less than 10 has been deleted.
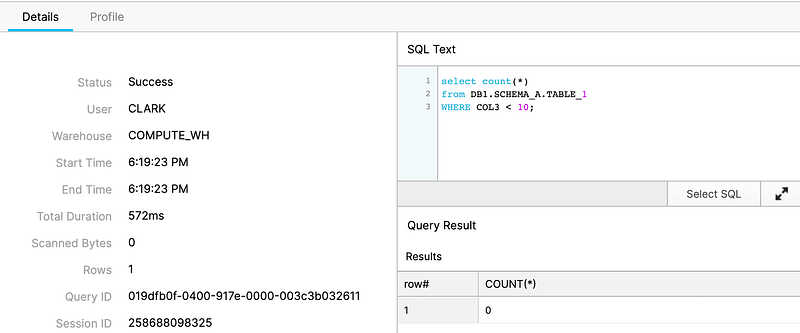
Great. It’s gone now. But what if that was not intended? How can we recover from this in Snowflake?
Take a look at the following image, where I basically ran the same query as previously, but with the addition of before(statement => ‘019dfb03–0400–91ae-0000–003c3b033625’). Notice that it also returned the data that we’ve already deleted.
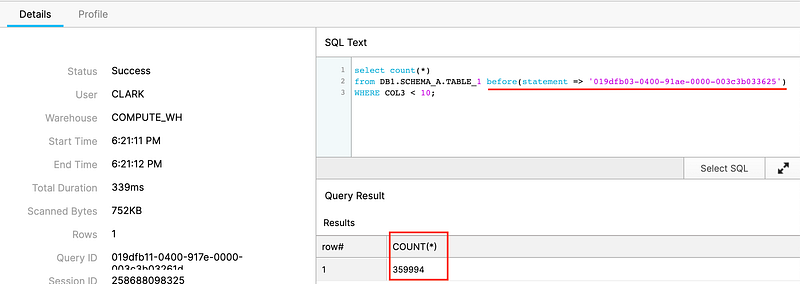
Figured out what happened there? 019dfb03–0400–91ae-0000–003c3b033625 is actually the QUERY_ID of our DELETE statement — refer from the previous screenshots to confirm this. So, in this query, we basically told Snowflake to fetch the data from TABLE_1 before the delete happened.
Now let’s try that again and this time, let’s make it more like we’re traveling back in time.
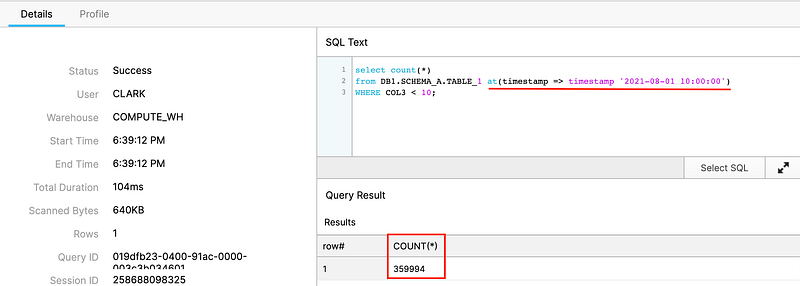
Alright, now we specified a timestamp. This query is asking for the data of TABLE_1 at 10 AM which is hours ago and definitely, before the data was deleted.
We can now use the same query to re-insert the deleted data back into TABLE_1.
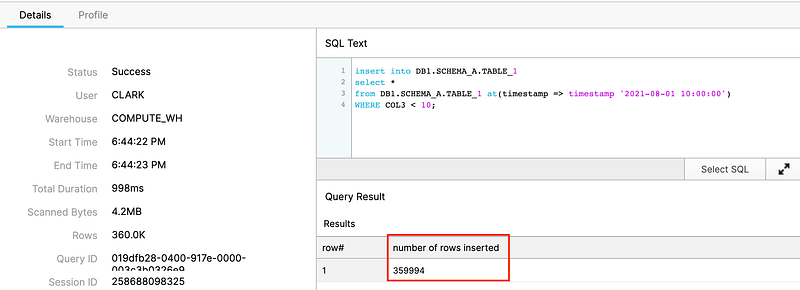
Et voilà, Snowflake was able to recover the deleted data in less than a second! How brilliant is that.
At this point, we might already have an idea of how we can recover from when a table is deleted, so let me take this a little bit further and drop an entire database.
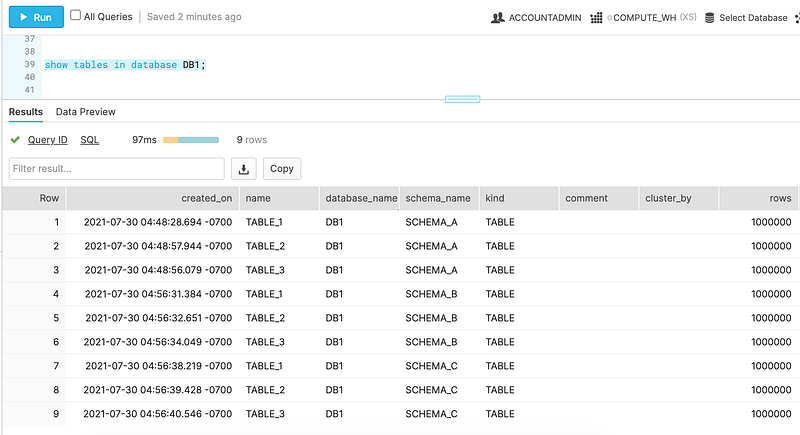
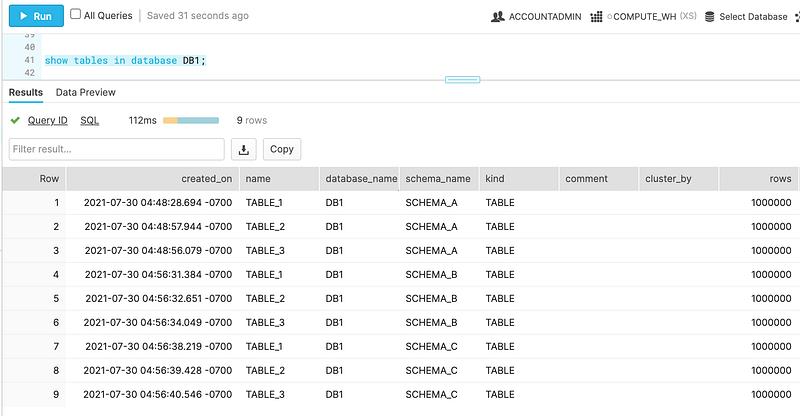
Here we have DB1 and it has SCHEMA_A, SCHEMA_B and SCHEMA_C. Each schema contains 3 tables, all of which has 1M rows.
And now let’s drop DB1.
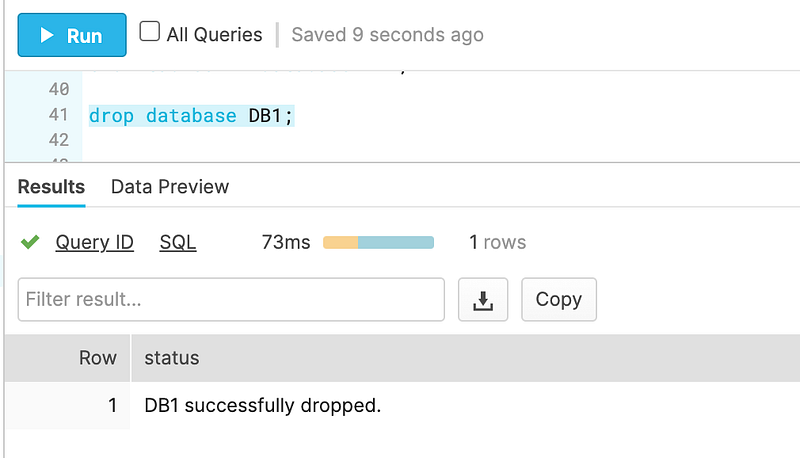
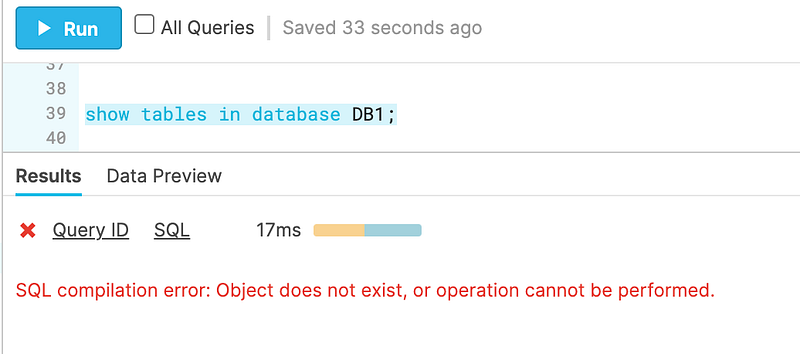
Perfect. That’s exactly how we lose our job. Deleting a Database and all of its child objects. So, how can we save ourself and recover from it?
It is much much simple than you think. Snowflake time travel also enables us to UNDROP a data object — Database, Schema and Table.
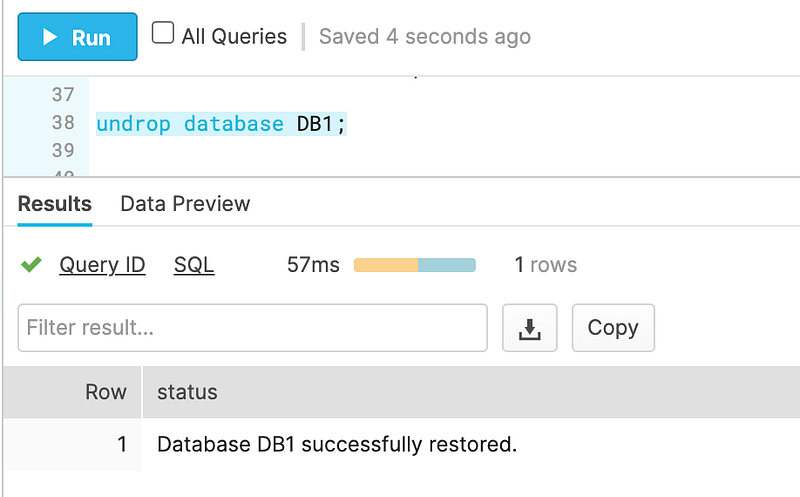
Wow. That only took 57 milliseconds. And now we can see that we’ve recovered DB1 with all of its objects intact.
How Time Travel Works
Time travel keeps a snapshot of the objects for every changes that have happened to them. This will enable us to track how the objects evolve over time. This also ensures that the data have backups and that we do not need to manage and maintain it ourselves.
Retention Period Time Travel retention period is configurable by the ACCOUNTADMIN by setting a value of 0–90 in DATA_RETENTION_TIME_IN_DAYS object parameter. The default value is 1.
Note that for Snowflake Standard Edition, the maximum time travel retention period is only 1 day. For Enterprise Edition and up, the upper limit is 90 days. Setting a value of 0 in this parameter will disable time travel.
Takeaway
Time travel is truly a game changer. It is an innovative approach in protecting businesses from losing their important data. It also gives confidence to us developers and database administrators, that it is okay if we mess up sometimes, we can easily undone it.
I hope this has been helpful to you. Feel free to visit my page to learn more of exciting features of Snowflake.