
Simple Edge Detection Model using Python
Machines use edge detection to understand the real world better

In this post, I will show you how to detect the edges in an image. Writing an edge detection program will give you some understanding of computer vision and self-driving cars. Edge detection is commonly used to understand objects in an image. It also helps the machines to make better predictions. Writing an edge detection program is a great way to understand how machines see the outside world. This will give us a better perspective when it comes to computer vision.
I covered a couple of computer vision concepts in my previous articles: face detection, face recognition, and text recognition. And today, we will work on edge detection using python.
Table of Contents
- Getting Started
- Import Libraries
- Edge Detection Function
- Choose an image
- Run the program
Getting Started
We will use two main modules for this project: Numpy, Matplotlib, and OpenCV. Matplotlib is a complete library for generating static, animated, and interactive visualizations in Python. OpenCV is a highly optimized library with a focus on real-time applications.
OpenCV
OpenCV (Open Source Computer Vision Library) is an open-source computer vision and machine learning software library. OpenCV was built to provide a common infrastructure for computer vision applications and to accelerate machine perception in the commercial products. Being a BSD-licensed product, OpenCV makes it easy for businesses to utilize and modify the code.
Refrence: https://opencv.org
Let’s start by installing the libraries.
Libraries
We have to install the libraries so that our program works properly. As mentioned earlier, we will need only two libraries.
We can install them in one line using PIP library manager:
pip install numpy matplotlib opencv-pythonAfter the installation process is completed, we can import them to our code. You can work on a Jupiter notebook or a regular text editor like Atom. I will use Atom text editor for this project.
import cv2
import numpy as np
import matplotlib.pyplot as plt
Edge Detection Function
Now, we can move to the fun part, where we will write the edge detection function. You will be amazed at how simple it is using the OpenCV package. This OpenCV detection model is also known as the Canny edge detection model. Our function is consisting of three parts: edge detection, visualization, and lastly, saving the result.
Edge Detection
def simple_edge_detection(image):
   edges_detected = cv2.Canny(image , 100, 200)
   images = [image , edges_detected]
Understanding the code:
- Canny is the method we are calling to do edge detection using OpenCV.
- Image is a parameter of the function, which means we will pass the image when calling the function. This way, you can test your program with different images easily.
- 100 and 200 are the minimum and maximum values in hysteresis thresholding.
- If you want to learn more about Canny edge detection: (Official Documentation).
Visualization
location = [121, 122]
for loc, edge_image in zip(location, images):
   plt.subplot(loc)
   plt.imshow(edge_image, cmap='gray')
Understanding the code:
- Location array is needed for the plotting part.
- And then, we are visualization both the original image and the edge detected image.
- The cmap parameter is used to change the color of the images. In our case, we are converting them to gray.
Save the Result
This final part of the function will save the edge detected image and the comparison plot. Thanks to OpenCv and Matplotlib packages; imwrite and savefig functions do the saving for us. And in the last line, the show function is going to show us the plot that was created.
cv2.imwrite('edge_detected.png', edges_detected) plt.savefig('edge_plot.png') plt.show()Choose an Image
This will be an easy image. We will find an image that we want to test our canny edge detection program. I am going to use the free stock photography page to find a couple of good images. Here is the link for their website.
After downloading the images, make sure to put them inside the same folder as your project. This will help to import them into the program easily. Let’s define an image variable and import the image. Here is how to read an image using OpenCV:
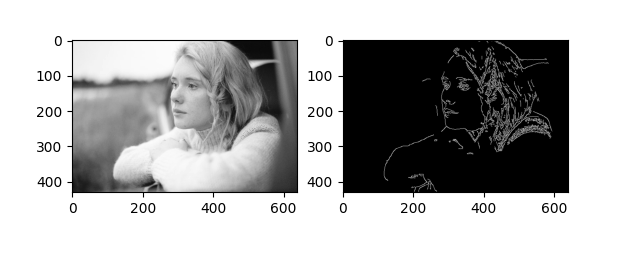
img = cv2.imread('test_image.jpg', 0)Here is an example image that I will test the model:

Run the program
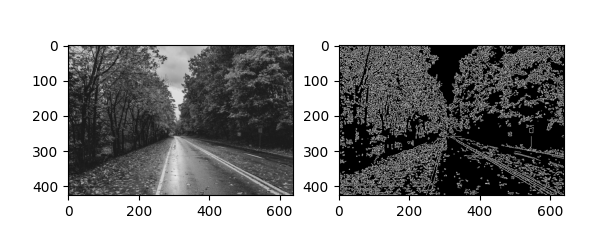
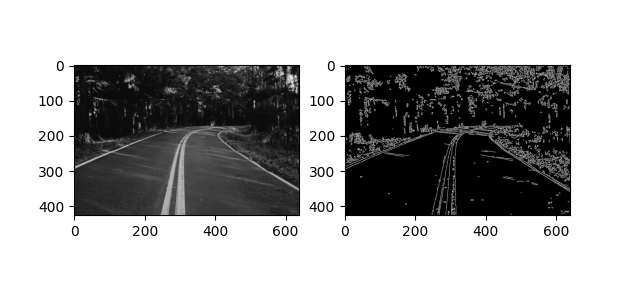
The best and the last step, it’s time to run the program. So far, there is nothing that triggers the function. We have to call the function so that the magic happens. Oh, also don’t forget to pass your image as a parameter. Let’s call the function:
simple_edge_detection(img)Here are some results:
Well done! You have created an edge detection model using Python. Python is a very compelling language, and things you can create with python is limitless. Now, you also have an idea of how to use computer vision in a real project. Working on hands-on programming projects like this one is the best way to sharpen your coding skills.
I am so glad if you learned something new today. Feel free to contact me if you have any questions while implementing the code. 😊
Follow my blog and youtube channel to stay inspired. Thank you,