
Sidebar and NavigationView on macOS in SwiftUI
In an universal iOS/iPadOS/macOS target
As SwiftUI finally compiles in a macCatalyst project as of Xcode 11 beta 4, I can share an example of how I do different home views on iOS/iPadOS and macOS in my shared MovieSwiftUI codebase.
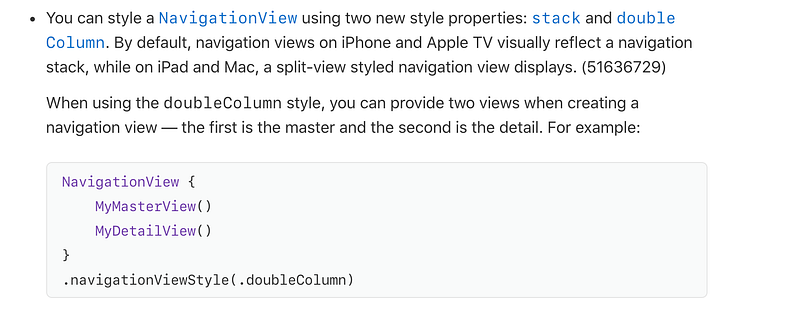
Since Xcode 11 beta 3, Apple has added stacked by default, which is a single column NavigationView with all of the pushed views stacked on top of each other. Alternatively, you can set it to doubleColumn. With this option, it’ll still be stacked on iOS, but uses the Master/Detail double column display on iPadOS and macOS. On top of that, you can add your own outlineView/sidebar on the side, if you wish to do so.
Note: If you’re doing a macOS specific target, you’ll have access to a lot of APIs which could make your application more at home on macOS. Like the .sidebar style on List (which give the nice outline view blurred style), the HSplitView, and automatic sidebar style for NavigationView. But the goal of this article is to do a demonstration of what can be achieved using a single target for your iOS, iPadOS and macOS application.
We’ll first look at at theHomeView:
This is one of the only places in my application where I use a #if targetEnvironment, but this is what I neede to provide a very different UI depending on if I’m on iOS/iPadOS or macOS.
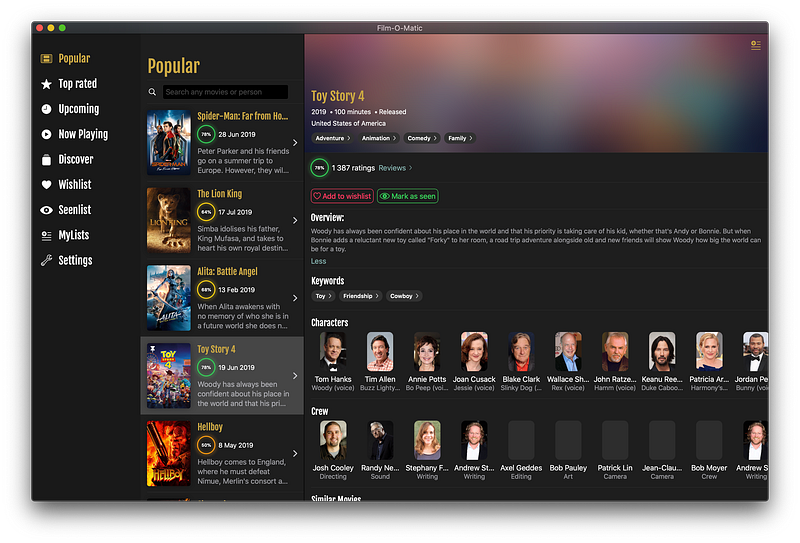
As you can see in the macOS implementation, the home view is basically a custom SplitView implemented with an HStack and a ScrollView with a fixed frame width for the sidebar. Then, the second view in its body is the actual content view which will be shown depending on the item selected in the sidebar.
Let’s look at the OutlineMenu to see how it’s done:
It’s just an enum, for each case (menu item)it defines a title, an image, and the contentView that will be used when the item is selected. Note that most of them are nested in a NavigationView.
By default the NavigationView when running your app in macOS will be using the two-column style. So it’ll display your root view as one column, and then any view presented using a NavigationLink from this root view in a bigger second column reserved for the detail view. You don’t have any code to change in your NavigationLink if you’re coming from iOS.
In the above code used in the movies list, it’s just a plain NavigationLink.
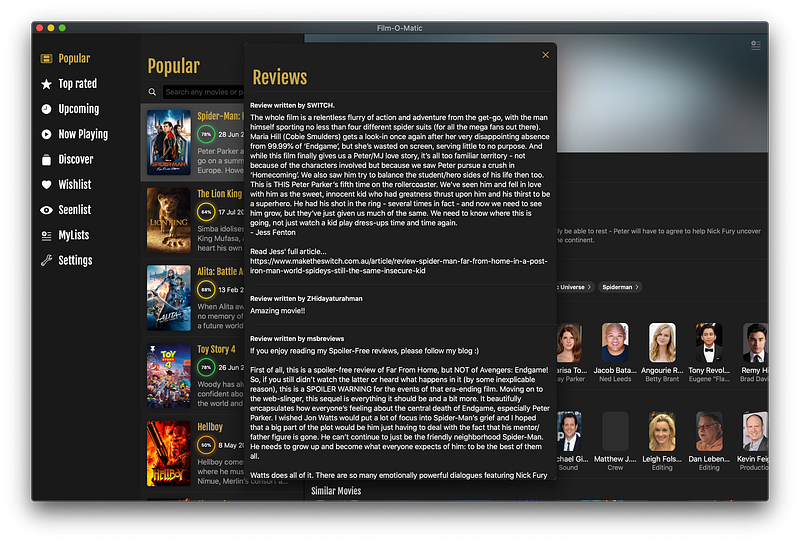
There are a few other tricks you can use. For example, if you present a view nested in a NavigationView using the .sheet() presentation method, don’t forget to set your NavigationView style to .stack, in order to achieve the result in the following screenshot:
And this is the code of the modal you see on screen:
If you don’t set it to .stack, it’ll be presented as a double-column in a sheet by default. This can be useful, but not in this case.
There are a few things missing from the app for it to really look at home on macOS. I can’t get the blurred style (yet) for the outline/sidebar view, as SwiftUI doesn’t expose an API natively to do it. My window also has a title bar that I would like to remove, but as I’m using a UIWindow and a UIHostingController, I don’t know how it can be done.
I hope you’ve enjoyed this short piece and that it’ll allow you to build a powerful cross-platform application in a single target. And if you’re a bit adventurous, I encourage you to start a dedicated macOS target. Even if I believe that the future is one target to rule them all and hope that Apple will go in that direction.
Thanks for reading!


