
Setting up Tensorflow-GPU with Cuda and Anaconda on Windows

Writing this article to help out those who have trouble in setting up Cuda enabled TensorFlow deep learning environment. If you don’t have Nvidia GPU configured in your system then this article is not for you. And you need the below items in order to configure this environment. Don’t worry I will guide you throughout the processes to install all of them.
- Microsoft Visual Studio
- Anaconda
- Python (Preferably with conda package manager)
- Tensorflow
Ensure that you have Nvidia GPU in your system
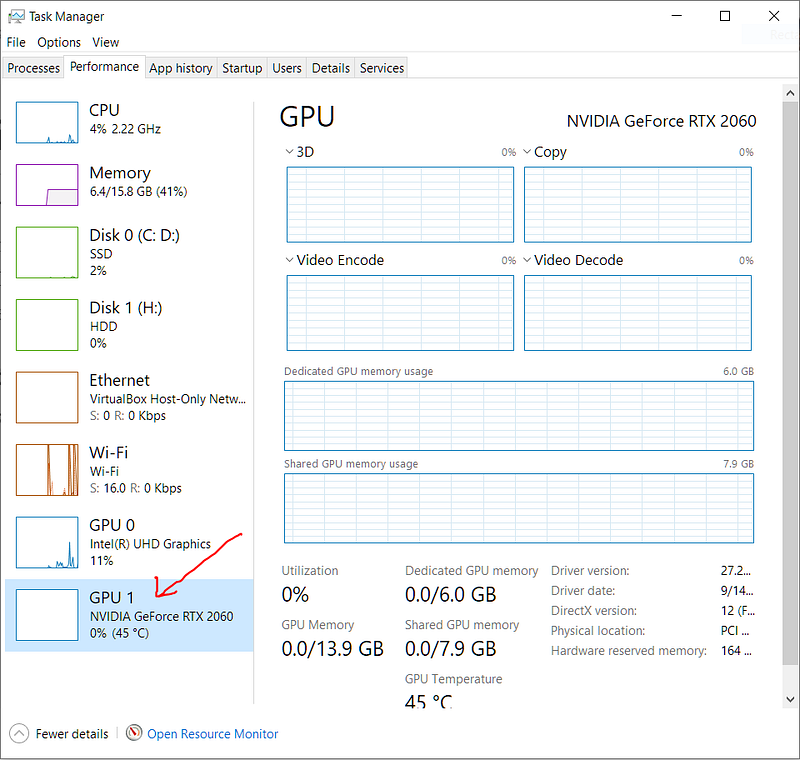
Open Task Manager and go to Performance Tab, scroll down to the bottom. If you have Nvidia GPU it will be listed below there.
Check version Requirements
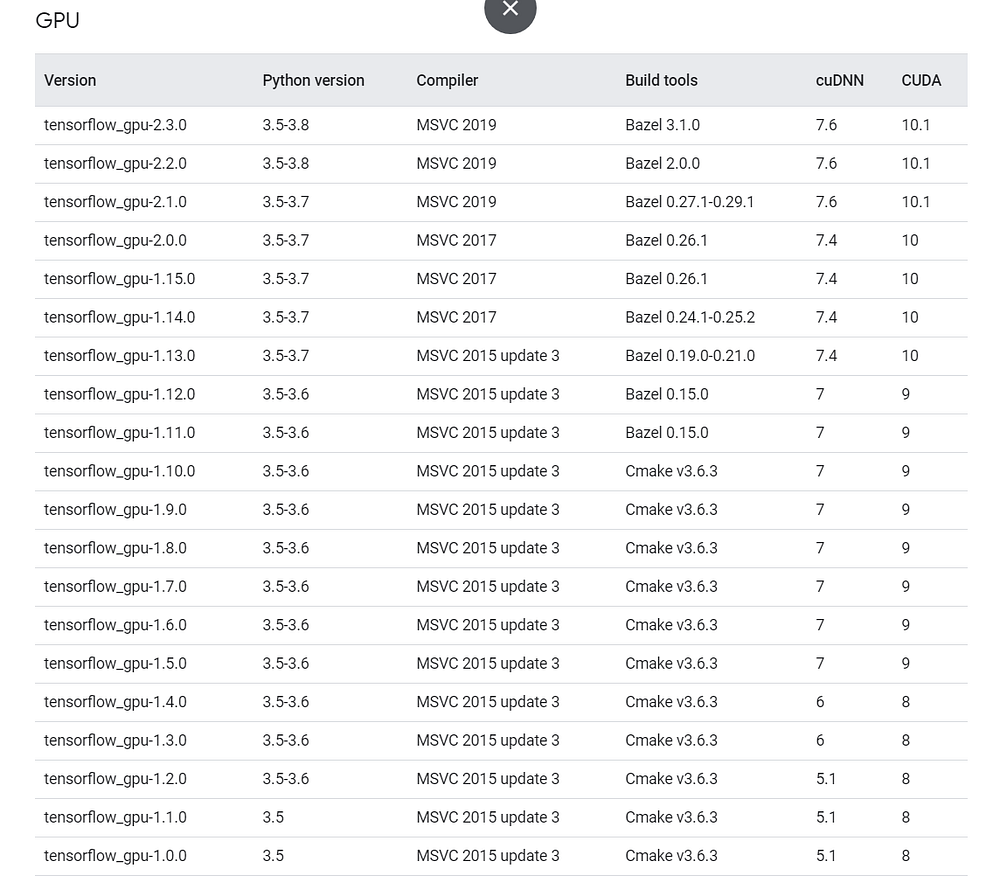
The next step before anything is to decide, which version of TensorFlow is you are going to use. If you are starting your own project then it is always good to use the latest stable version of TensorFlow. Or else if you are planning to start with someone else’s code then check which version of Tensorflow they have used and select the versions of Python, Compiler, and Cuda toolkit.
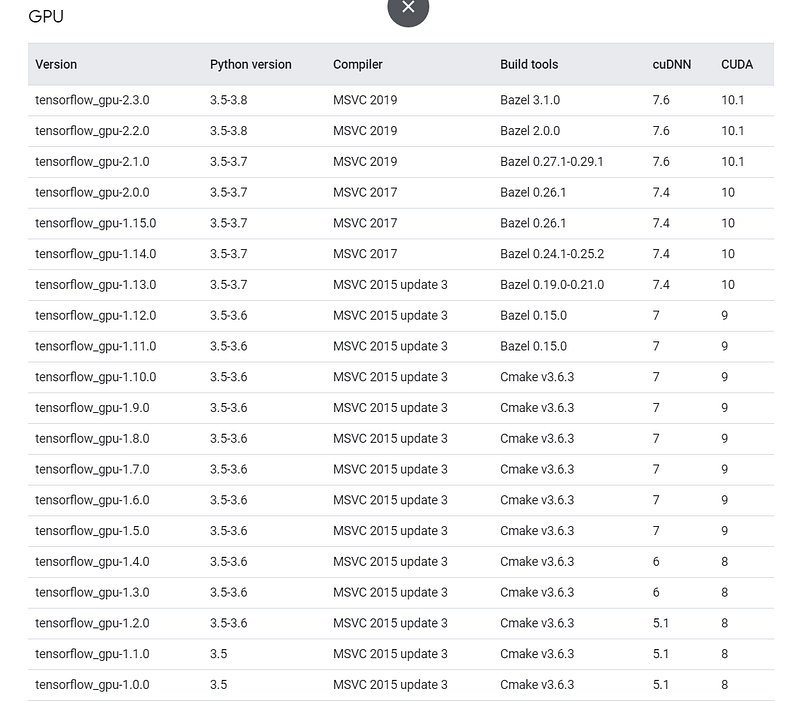
We assume we are going to install Tensorflow 2.3.0. In order to install that we need
- Python: 3.5–3.8
- Microsoft Visual Studio (MSVS): 2019
- CUDA: 10.1
Installing Microsoft Visual Studio
Cuda libraries will be compiled using MSVS as a compiler. So it is necessary to select the correct version of MSVS depending on the version of the Cuda toolkit you are selecting.
You can download the Community Version of Microsoft Visual Studio here. Install it, as usually we install any other software in Windows.
Installing Anaconda and Python
“Anaconda is a conditional free and open-source distribution of the Python and R programming languages for scientific computing, that aims to simplify package management and deployment” — Google.
We can easily manage virtual environments and packages within them with the help of the conda package manager. Download and install an individual edition of anaconda for your windows system.
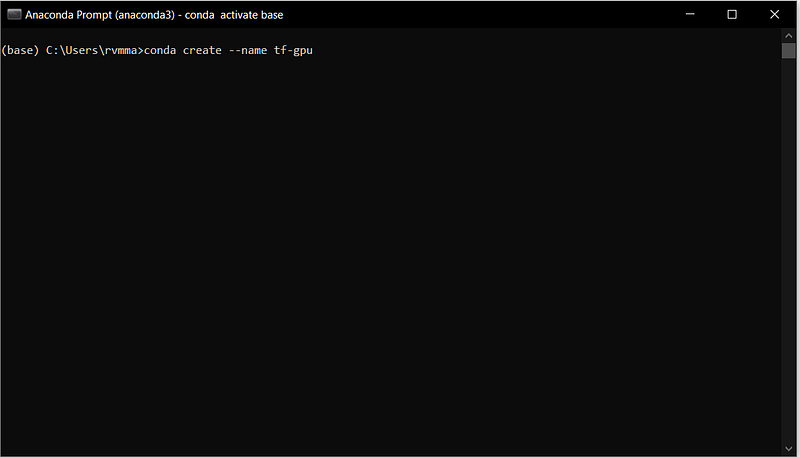
Then open the Anaconda Prompt and type the below command to create a virtual environment to install a specific version of Tensorflow.
Then execute the below commands one by one to install the required version of python
- conda activate tf-gpu
- conda install python=3.8 (Note you should specify the version of python based on the version of TensorFlow you need)
conda will automatically decide on the dependent packages and will ask whether to install them press “y” and press “enter” to install them.
Installing Cuda Toolkit and cudaDNN
If you are installing TensorFlow without using Anaconda, then you have to download and install respective versions of Cuda Toolkit and cudaDNN manually from Nvidia, and then have to set path variables for your systems.
The advantage of using anaconda is you can have multiple versions of the Cuda toolkit in your System in different virtual environments. To install Cuda Toolkit, Open Anaconda Prompt, activate the virtual environment.
- conda activate tf-gpu (if already in the environment no need to run this)
- conda install -c anaconda cudatoolkit=10.1 (Note you should specify the version of python based on the version of TensorFlow you need)
It will install all the dependent packages.
Installing Tensorflow
Finally, now we are at the last step. You can install TensorFlow using conda, but it is recommended to install Tensorflow using the pip.
- Make sure you are in your virtual environment (tf-gpu)
- conda install pip
- pip install tensorflow-gpu==2.3
Hurrey!!! we have finally installed all the required packages. To verify all installed as we planned, run,
- conda list (make sure you are in your environment tf-gpu)
It will print all the packages installed within your environment with version details.
Final Check
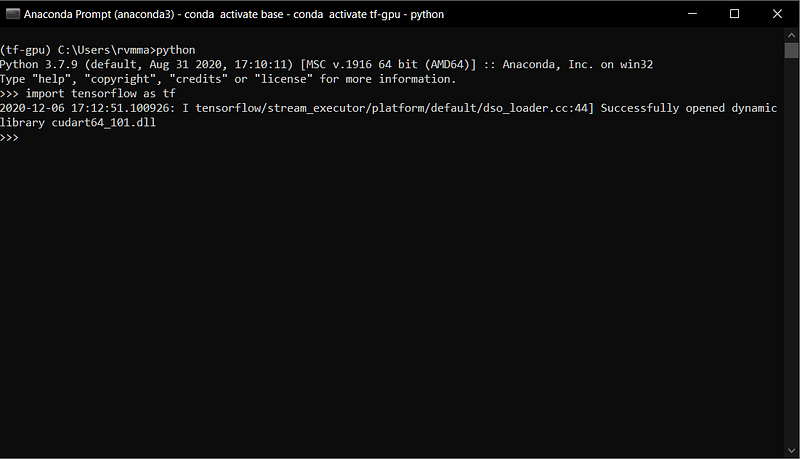
Type “python” in Anaconda Prompt, it will open the python interpreter. Try importing TensorFlow in it. You will get a message similar to this.
Hope this article is helpful for you to configure your GPU-powered Tensorflow Deeplearning environment.


