
Setting Up an IT Homelab With Proxmox

If you have some extra computer hardware, you can easily set up your own IT Homelab with a Hypervisor called Proxmox. It runs even better on surplus server gear. In my last few articles, I wrote about a virtualization technology called Hyper-V. Hyper-V, which comes with several editions of Windows, runs within the host operating system. Windows requires its own amount of memory, CPU, and drive space to run which can rob resources you could use for virtualization.
With Proxmox, you install it as the base operating system. It uses minimal resources and is built for running virtual machines.
What Is Proxmox?
Proxmox is an open-source server management platform for virtualization. With the integrated web-based user interface, you can easily manage VMs and containers, networking, and storage all in one area. Did I mention it’s free?
In this article, we are going to go over how to install it in your IT Homelab.
Where To Get Proxmox
To download the ISO for Proxmox, check out my article below. It has a link that will take you directly to their website.
Where to Download the Tools Needed for An IT Homelab | by Jonathan Ingram | IT Homelabs
Below is a link that goes over the minimum requirements for Proxmox.
Proxmox VE Hardware Requirements
Now that we know the hardware requirements and we have our downloaded ISO file for Proxmox, let’s get started!
Installing Proxmox
To install Proxmox on a computer you will need to be able to burn the ISO file to a disc or create a bootable flash drive. For the latter, I like to use Rufus.
Once you have a bootable version of the ISO, insert the disc or flash drive into the machine you plan to use as a virtualization host and power on the machine. Many manufacturers have their own way to get to the boot menu to select your disc or flash drive. Consult your PC manufacturer’s documentation on how to get to it.
Once you’ve booted from the ISO, you should see the screen below.
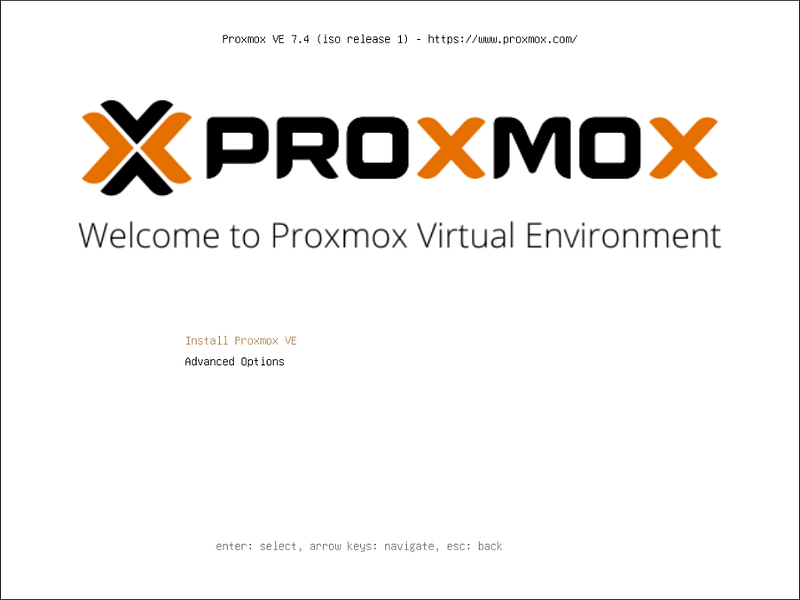
Use the up and down arrow keys on your keyboard and make sure Install Proxmox VE is selected. Press the Enter key to start the installation process. You’ll see a lot of text scrolling down the screen until the next screen appears.
Step 1 — Read the EULA
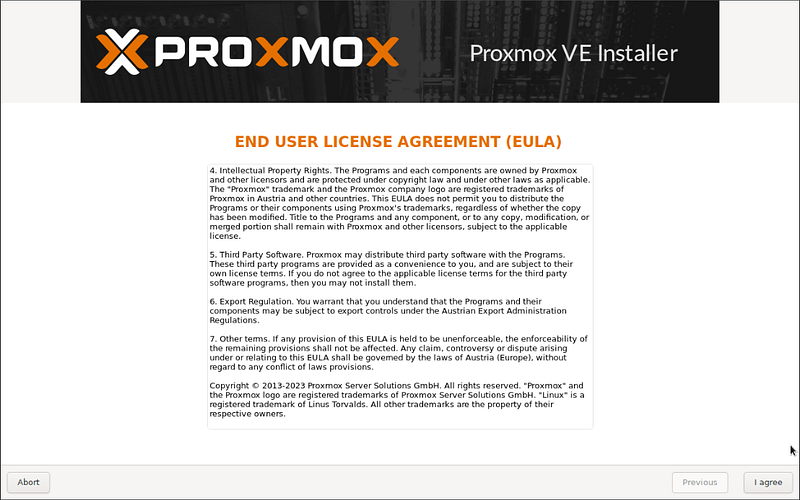
Once you’ve read the EULA, click I agree to continue.
Step 2 — Select the Disk to Install Proxmox On
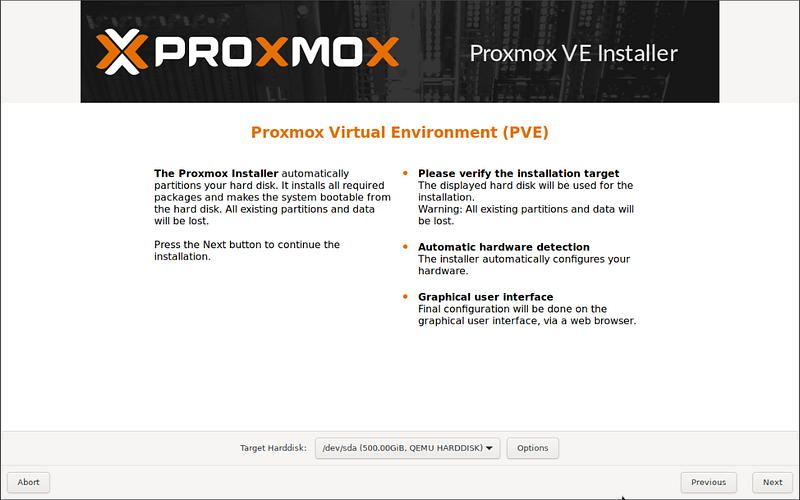
Use the dropdown menu to select the disk to install Proxmox on. Ideally, you want to install it on a separate disk from the hard drive you plan to keep your VM’s on. WARNING! This will erase everything on the disk you select. Click Next to continue.
Step 3 — Configure Time Zone and Location
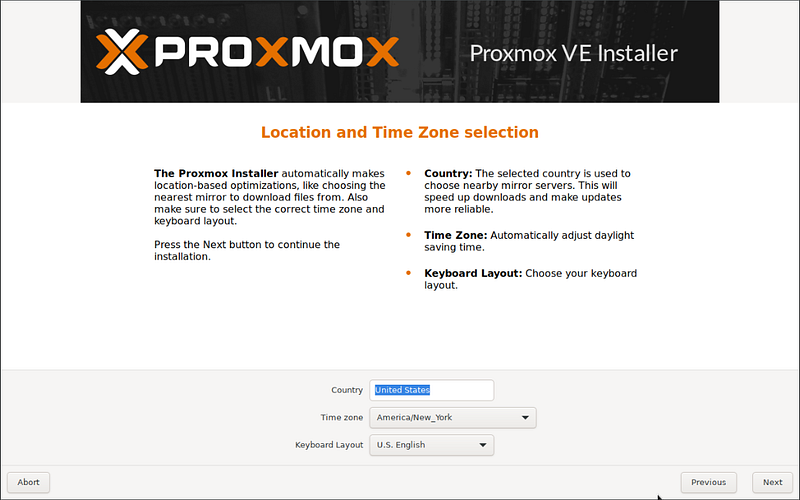
On this screen, configure your Country, Time Zone, and Keyboard Layout settings. Then click Next to continue.
Step 4 — Create Admin Password and Configure Alert Email
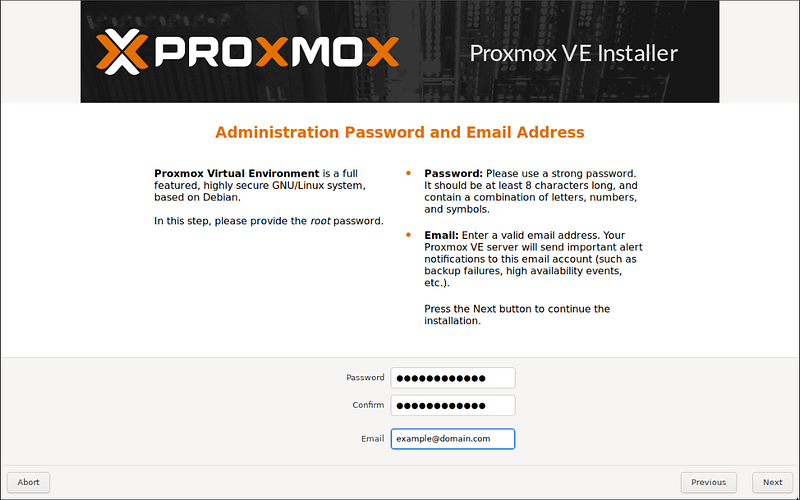
The default username for Proxmox is “root”. On this screen, we configure a password for that account and enter an email address to receive alerts from our Proxmox installation. Once the information is entered, click Next to continue.
Step 5 — Network Settings
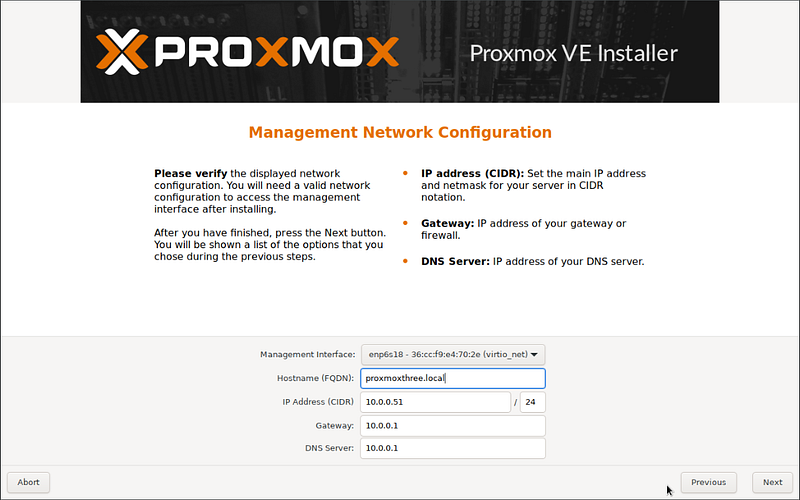
On this screen, create a hostname for your Proxmox install and pick what IP address you want to use. I would ignore the rest of the settings unless you know what you are doing. I messed this part up the very first time I installed Proxmox. Click Next to continue.
Step 6 — Summary of Settings
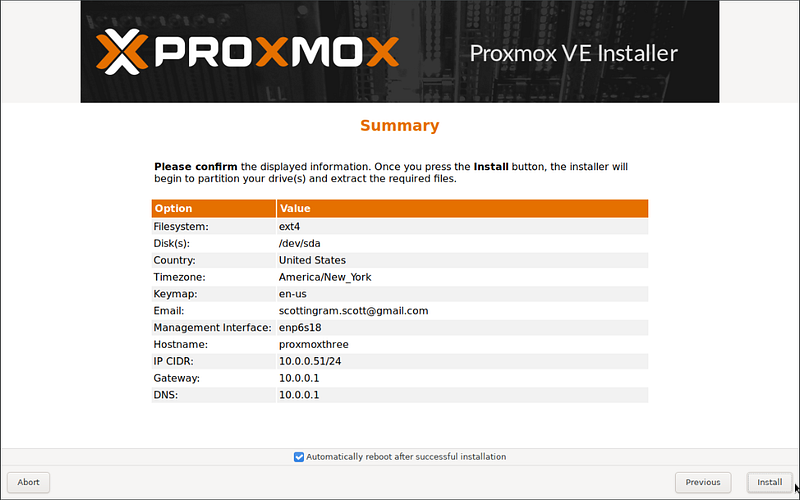
On this screen, you will see a summary of the settings you configured. Make sure Automatically reboot after successful installation is checked and click Install to begin the installation process.
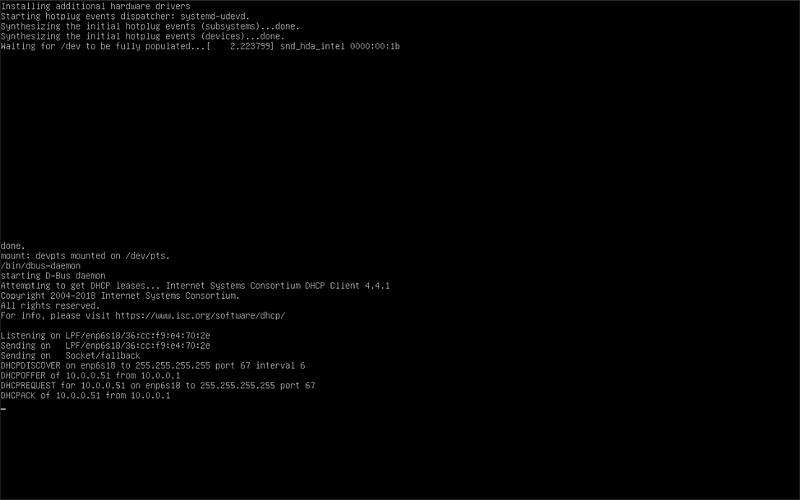
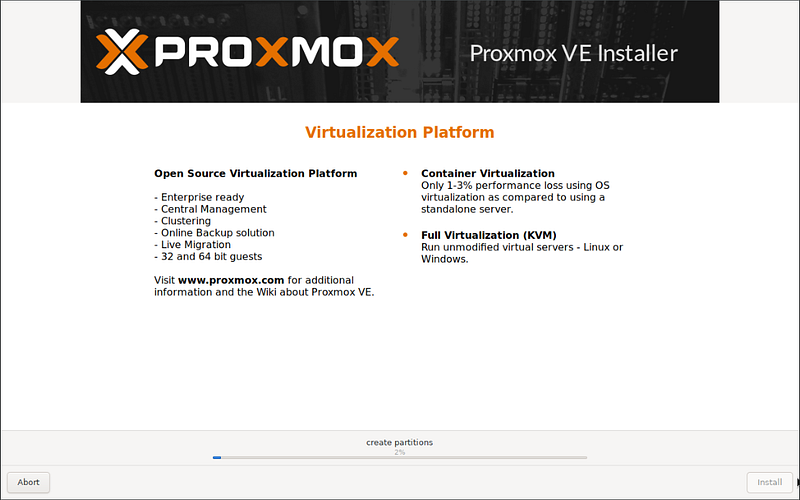
You should see the window below showing the installation progress.
When the installation is finished, you should see the screen below.
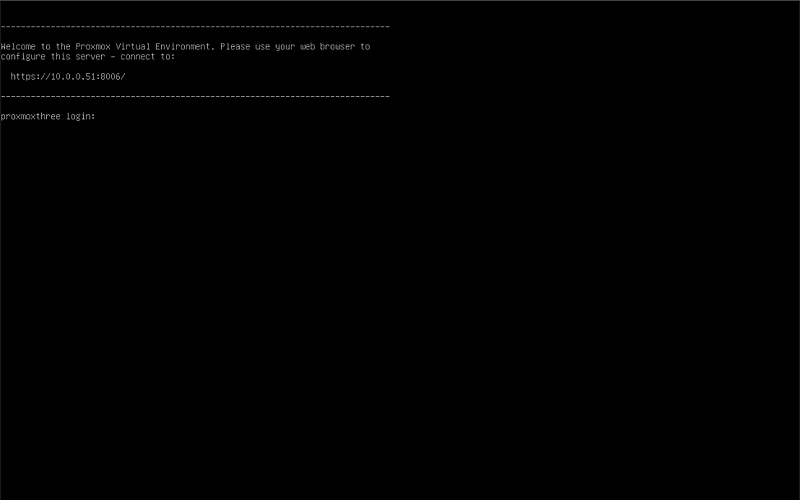
Take note of the URL. That is what you will use to access the web interface.
Step 7 — Accessing the Web Interface
Now that we have Proxmox running on a spare computer/server. Let’s navigate to its web interface. First, open your web browser and navigate to the URL you noted earlier. Your URL will most likely be different than mine pictured.
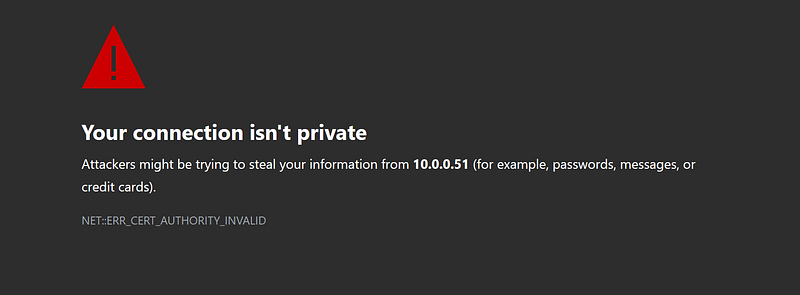
If you get a “Your connection isn’t private” warning don’t worry! This is normal.
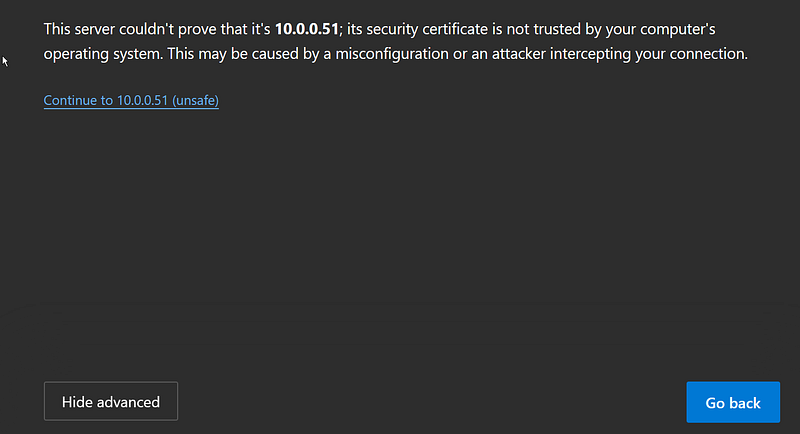
Click the Advanced button and then the Continue to… link.
When you successfully navigate to the Proxmox Web Interface, you should see a login screen.
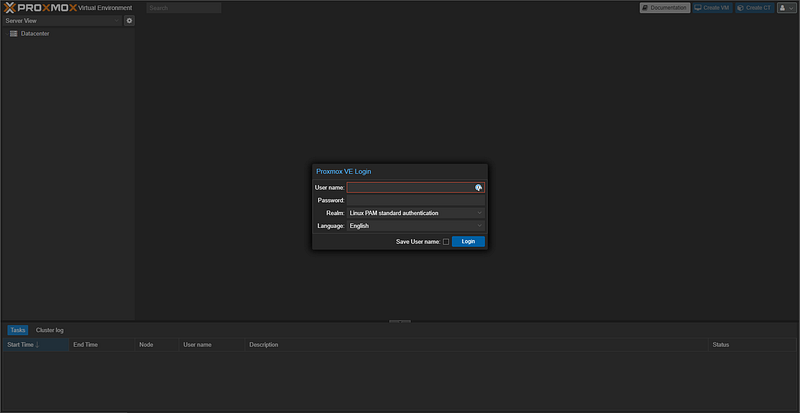
Use the default username root and enter the password you created earlier. Click Login to continue.
Every time you log in, you will see a No Valid Subscription pop-up. this is perfectly normal for a home lab setup and can be ignored.
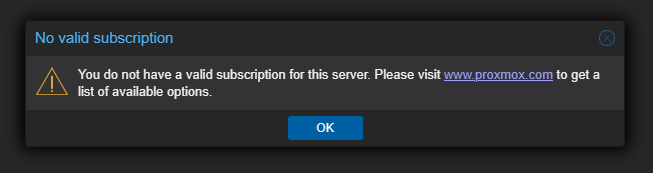
The subscription is for Enterprise environments. Click OK to continue.
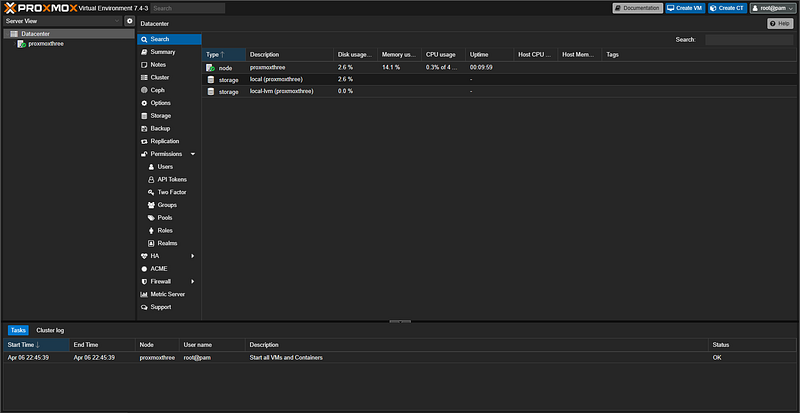
You should see the screen below. This is the Web Interface for Proxmox.
Congratulations! You did it! In the next article, we are going to learn more about the interface and set up our lab environment. Thanks for reading!


