
Setting Up a React Project Without CRA (create-react-app)
The quick start guide you have always wanted

Previously, when starting a new SPA project, developers would reach for CRA (create-react-app). These days it’s generally considered a bad idea to bootstrap a production app using it (though I’m sure there are still many that do)
To avoid using it you have many options such as NextJS, Vite, Parcel, Gatsby and friends. These might be good options, but depending on your particular project you would need to evaluate what would work best because they all have various tradeoffs that could come around and bite you later if you were not aware of them. Another good option is to start out with Vanilla React and Webpack as this gives a lot of flexibility that can then be adapted to whatever needs you may have down the track.
Therefore, the purpose of this article will give you a quick guide to setup a project without CRA using just the bare bones of what you need to get up and running. Namely React, Typescript, webpack, Babel, SCSS and react-testing-library. So lets set it up.
Step 1: Initialise Your Project
Create a new directory for your project and initialise it with npm or yarn.
mkdir the-best-app
cd the-best-app
npm init -y
Step 2: Install React, ReactDOM, and TypeScript
Install React, ReactDOM, TypeScript, and the types for React and ReactDOM.
npm install react react-dom typescript
npm install --save-dev @types/react @types/react-dom
Step 3: Set Up TypeScript
Create a tsconfig.json file in your project root to configure TypeScript options.
{
  "compilerOptions": {
    "target": "es5",
    "lib": ["dom", "dom.iterable", "esnext"],
    "allowJs": true,
    "skipLibCheck": true,
    "esModuleInterop": true,
    "allowSyntheticDefaultImports": true,
    "strict": true,
    "forceConsistentCasingInFileNames": true,
    "module": "esnext",
    "moduleResolution": "node",
    "resolveJsonModule": true,
    "isolatedModules": true,
    "noEmit": true,
    "jsx": "react-jsx"
  },
  "include": ["src"]
}
Step 4: Set Up Babel
To compile TypeScript with Babel, install Babel along with TypeScript presets.
npm install --save-dev @babel/core @babel/preset-env @babel/preset-react @babel/preset-typescript babel-loader
Create a .babelrc file in the project root and add the following:
{
  "presets": ["@babel/preset-env", "@babel/preset-react", "@babel/preset-typescript"]
}
Step 5: Set Up Webpack
Install Webpack along with necessary loaders and plugins with the following command:
npm install --save-dev webpack webpack-cli webpack-dev-server html-webpack-plugin
For TypeScript, we need to ensure the webpack configuration supports .ts and .tsx files. So in the root add a file called webpack.config.js See example below.
const HtmlWebpackPlugin = require("html-webpack-plugin");
const path = require("path");

module.exports = {
  entry: "./src/index.tsx",
  output: {
    path: path.resolve(__dirname, "dist"),
    filename: "bundle.js",
  },
  module: {
    rules: [
      {
        test: /\.(ts|tsx)$/,
        exclude: /node_modules/,
        use: {
          loader: "babel-loader",
        },
      },
      // Add other loaders here (e.g., CSS, SCSS, file-loader for images, etc.)
    ],
  },
  resolve: {
    extensions: [".tsx", ".ts", ".js", ".scss", ".sass"],
  },
  plugins: [
    new HtmlWebpackPlugin({
      template: "./src/index.html",
    }),
  ],
  devServer: {
    static: {
      directory: path.join(__dirname, "dist"),
    },
    port: 3000,
    open: true,
    hot: true,
  },
};
Step 6: Create Your React Entry Point File
Create a src directory in your project and then create the following files: index.tsx index.htmland another file called App.tsx
App.tsx
(Note that I have an import here for styles. Its fine to leave it for there, it will be added in a subsequent step)
import React from "react";
import "./styles.scss";

const App: React.FC = () => <h1>This is the app</h1>;

export default App;
index.tsx
import React from 'react';
import ReactDOM from 'react-dom';
import App from './App';

ReactDOM.render(<React.StrictMode><App /></React.StrictMode>, document.getElementById('root'));
index.html
<!DOCTYPE html>
<html lang="en">
<head>
    <meta charset="UTF-8">
    <meta name="viewport" content="width=device-width, initial-scale=1.0">
    <title>The Best App</title>
    <link rel="stylesheet" href="https://fonts.googleapis.com/css?family=Roboto:300,400,500,700&display=swap" />
</head>
<body>
    <div id="root"></div>
</body>
</html>
Step 7: Setup SCSS/SASS support
To be able to use SASS/SCSS we need to install the following:
npm install --save-dev sass-loader sass css-loader style-loader
Then we need to create a file called styles.scss in the src folder. Note that this is just a starting point, you can add additional module files later as you start creating more components. This has needs to be imported in the App.tsx file which we have done already.
styles.scss
$body-color: royalblue;

body {
  font-family: Arial, sans-serif;
  color: $body-color;
}
Next, update your webpack.config.js file to be able to bundle scss files. Add the following to the rule array:
{
   test: /\.s[ac]ss$/i, // This regex matches both .scss and .sass files
   use: ["style-loader", "css-loader", "sass-loader"],
},
Step 8: Setup React Testing Library and Jest
When starting a project, it’s always good to start with tests straight out the gate ;) So let’s setup react-testing-library. Since we are starting from scratch and don’t have a test runner set up yet, we’ll use Jest alongside React Testing Library. Install the following:
npm install --save-dev @testing-library/react jest @testing-library/jest-dom
Note as of Jest 28 jest-environment-jsdom package now must be installed separately.
npm install --save-dev jest-environment-jsdom
For usage with Typescript, we also need to install ts-jest and @types/jest and babel-jest
npm install --save-dev ts-jest @types/jest babel-jestNext we need to configure Jest. Create a file called jest.config.js containing the following:
module.exports = {
  preset: "ts-jest",
  setupFilesAfterEnv: ["@testing-library/jest-dom", "<rootDir>/jest.setup.js"],
  testEnvironment: "jest-environment-jsdom",
  // If you're using JSX in your TypeScript files:
  globals: {
    "ts-jest": {
      tsconfig: "tsconfig.json",
      babelConfig: true, // If you're also using Babel
    },
  },
  // For projects using ECMAScript modules, you might need:
  transform: { "^.+\\.(ts|tsx|js|jsx|mjs)$": "ts-jest" },
  moduleNameMapper: {
    "^.+\\.(css|less|scss)$": "babel-jest",
  },
};
Note that we need to include the moduleNameMapper section to allow for jest to be able to parse the scss files.
We also need to update our .babelrc file to include the following:
{
  "presets": [
    ["@babel/preset-env"],
    "@babel/preset-react",
    "@babel/preset-typescript"
  ]
}
We also need to update our tsconfig.json file to include jest-dom. Update the include property to be the following:
tsconfig.json
... //previous settings
"include": ["src", "src/types/jest-dom.d.ts"]
Create an example test file called App.spec.tsx containing the following:
import { render, screen } from "@testing-library/react";
import App from "./App";
import "@testing-library/jest-dom";

test("renders the correct content", () => {
  // Render the component
  render(<App />);

  // Use queries to find elements, and assert their content
  expect(screen.getByText("This is the app")).toBeInTheDocument();
});
Step 9: Add Scripts to package.json
Next we need to add some commands to package.json to allow us to run the app. So add the following:
  "scripts": {
    "start": "webpack serve --config webpack.config.js --mode development --open",
    "build": "webpack --config webpack.config.js --mode production",
    "test": "jest",
  },
And we are done! You can now run npm start to run your app, it should look something like this:

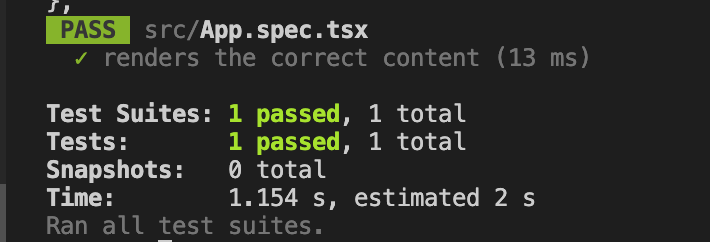
You can also run the example test with npm test and you should see the following output:
I hope you found this helpful :)
In Plain English 🚀
Thank you for being a part of the In Plain English community! Before you go:
- Be sure to clap and follow the writer ️👏️️
- Follow us: X | LinkedIn | YouTube | Discord | Newsletter
- Visit our other platforms: Stackademic | CoFeed | Venture | Cubed
- More content at PlainEnglish.io


