Set up Appium 2 to Run UIAutomator2 (for Android)
Set up and run an Appium 2 automated Android test with UIAutomator2
Appium is a free, open-source and dominating test automation framework for desktop and mobile applications. Appium, like Selenium, is WebDriver-based.
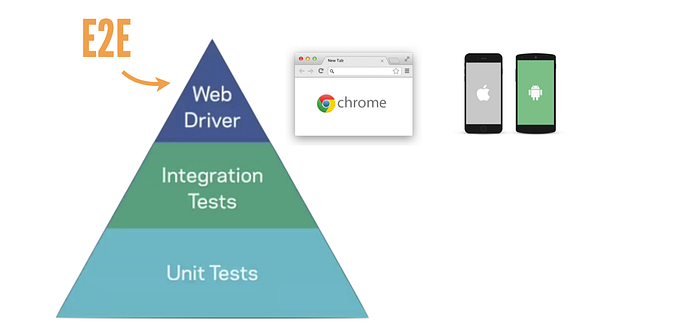
“For all of our end-to-end tests at Facebook we use WebDriver, WebDriver is an open-source JSON wired protocol, I encourage you all check it out if you haven’t already. ” — Katie Coons, a software engineer at Product Stability, in “Continuous Integration at Facebook”
As this Facebook engineer said in the presentation, by using WebDriver-based automation framework, the automation test scripts for iOS, Android and Web, the APIs are very similar. This means big time-saving! It comes as no surprise, Microsoft dumped its own Coded UI Test tool and recommended Appium and Selenium too.
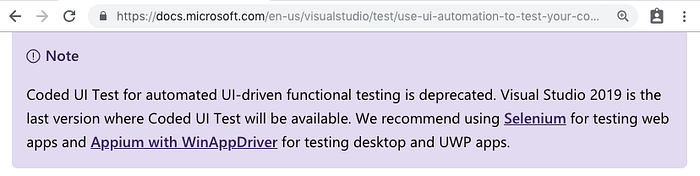
Microsoft deprecated Coded UI Test and recommend Selenium and Appium in 2018.
This tutorial will show you how to set up Appium v2 on a macOS computer to run UIAutomator2 Tests on a sample Android app.
Set up Appium Server
- Install Node.js (the latest version is 21, but I’m still on 18)
If you already have Node, you can use Homebrew to update it to the latest version with:
brew update # optional, updates brew and tells you if node has a newer version
brew upgrade node@18
If you do not have Node, install it by running:
brew install node@18Verify Node has been installed/upgraded successfully with:
node -v
2. Install Appium using npm
npm install -g appium
Please note -g flag is important. Below is a sample output.

3. Install UiAutomator2 Driver
Appium, like Selenium, drives an app via external driver software.
To show available drivers:
appium driver list
The output will look like this:
courtney@MacBook16 ~ % appium driver list
✔ Listing available drivers
- uiautomator2 [not installed]
- xcuitest [not installed]
- youiengine [not installed]
- windows [not installed]
- mac [not installed]
- mac2 [not installed]
- espresso [not installed]
- tizen [not installed]
- flutter [not installed]
- safari [not installed]
- gecko [not installed]
Install the UIAutomator2 driver, uiautomator2.
appium driver install uiautomator2
The output:
courtney@MacBook16 ~ % appium driver install uiautomator2 16s 12:39:50
✔ Checking if 'appium-uiautomator2-driver' is compatible
✔ Installing 'uiautomator2' using NPM install spec 'appium-uiautomator2-driver'
ℹ Driver uiautomator2@2.39.0 successfully installed
- automationName: UiAutomator2
- platformNames: ["Android"]4. Start the Appium server
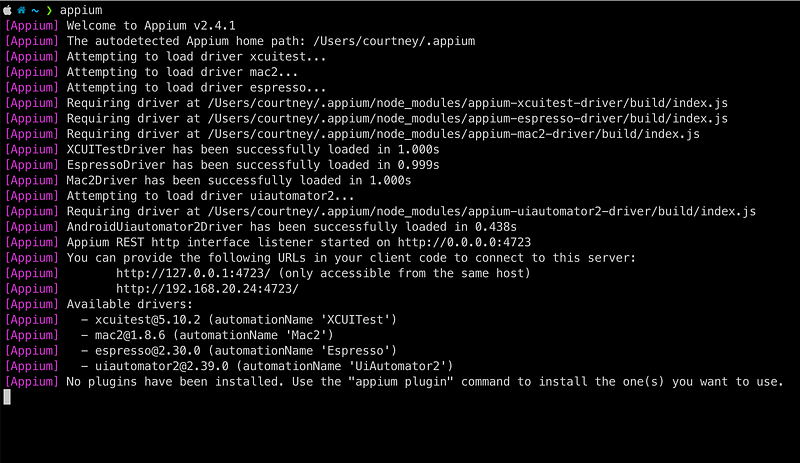
Just run a simple command to start an Appium server.
appium
Set up Android Environment
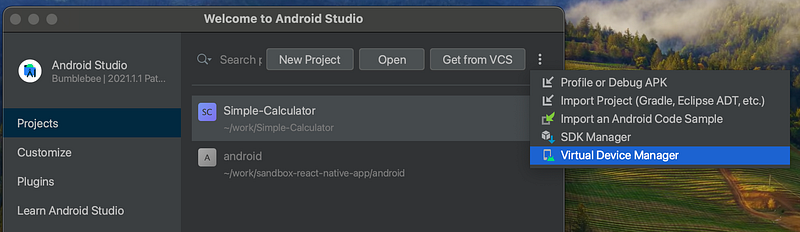
To run Android tests in an emulator, first, you need the Android emulator. The best way I know to get this is to get Android Studio installed. For many Android developers, it should already be installed. If you do not have Android Studio, it is free and downloadable here. I am using the Bumblebee version (2021.1.1), but the steps will be roughly the same for other versions of Android Studio.
Once Android Studio is installed, create an emulator. You can do this via the Virtual Device (AVD) Manager.
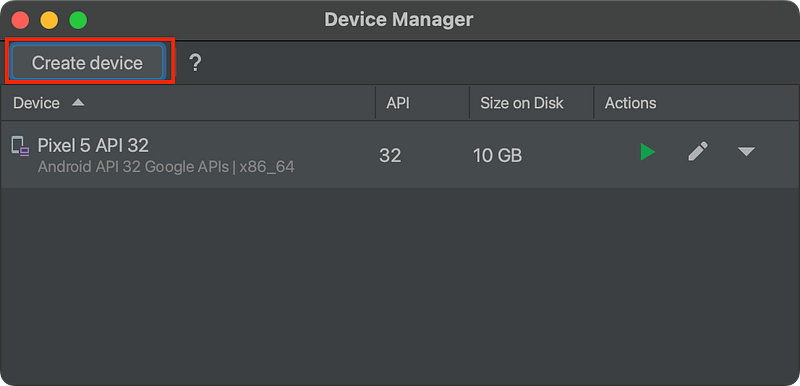
In the AVD manager, create a device and follow the steps to create a device type of your choosing. You may select the hardware (Pixel, Nexus, etc.), system image (e.g. OS) and name your emulator. Mine is named Pixel 5 API 32.
Once complete, click the green “play” button to see your simulator launch.
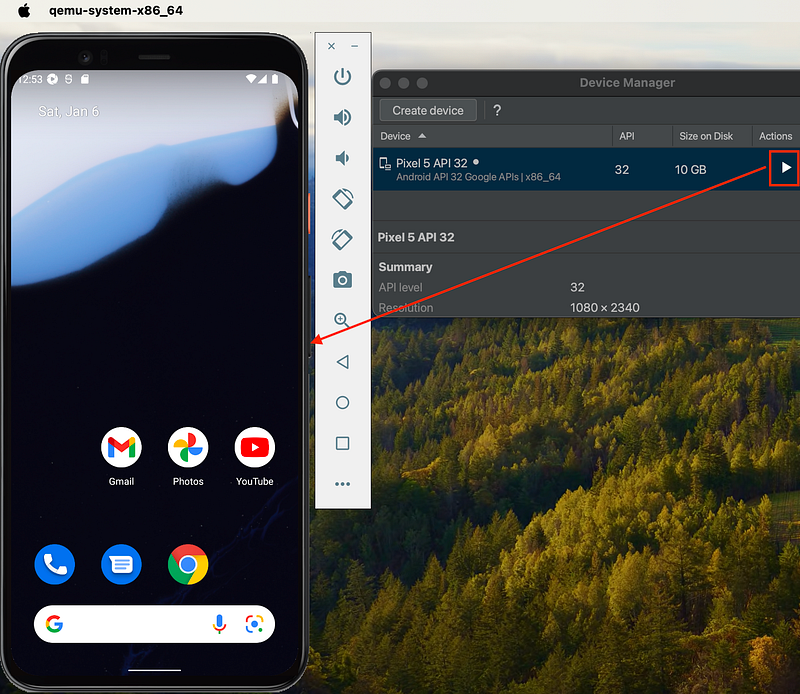
We will run our tests on this device; but to do that, we need to know the deviceId. Android Emulator’s deviceIds are formatted like emulator-<port-number> and will be needed to run our tests.
Finding your Device Id
On the command line, list all your Android devices by running:
adb devices
Example output:
❯ adb devices 12:55:08 List of devices attached emulator-5554 device
So my deviceId is emulator-5554. Make a note of this for the next section.
Download the demo Android App
I’ve chosen the Simple Calculator app as a demo app, link below:
Download the APK for the most recent release.
Appium Client
Appium works as client-server architecture. The client here means: automated tests + Appium client library, in the same language. The choices are Ruby, Java, C#, Javascript and Python. I will use Ruby, the best scripting language for test automation.
The command below installs the Appium client library in Ruby language, appium_lib.
gem install --no-document appium_libAutomation Script
Below is a simple Appium automation script (I created using TestWise) to open the app in the Android emulator.
require "appium_lib"

opts = {
  caps: {
    automationName: 'UiAutomator2',
    platformName: 'Android',
    platform: 'Android',
    platformVersion: '12',  # match your emulator's settings
    deviceName: 'emulator-5554',  # AVD deviceId goes here
    app: "/Users/courtney/ruby-android/sample-apps/calculator-fdroid-release.apk", # your path to the SimpleCalculator's APK
    appPackage: 'com.simplemobiletools.calculator',
    appActivity: 'com.simplemobiletools.calculator.activities.SplashActivity.Orange'
  },
  appium_lib: {
    server_url: "http://127.0.0.1:4723"
  },
}

driver = Appium::Driver.new(opts).start_driver
driver.find_element(:id, "com.simplemobiletools.calculator:id/btn_2").click
driver.find_element(:id, "com.simplemobiletools.calculator:id/btn_plus").click
driver.find_element(:id, "com.simplemobiletools.calculator:id/btn_5").click
driver.find_element(:id, "com.simplemobiletools.calculator:id/btn_equals").click
result = driver.find_element(:id, "com.simplemobiletools.calculator:id/result").text
puts result
driver.quit
Save this script as uiautomator2-sample.rb and run it with ruby uiautomator2-sample.rb. If the installation and set-up went correctly, you should see the Simple Calculator app open and do some simple addition in the emulator and see 7 get printed in the console.
Keen readers may have noticed that the Appium options have two additional fields,
appPackageandappActivity. These tell Appium what app we are using (matching theappoption’s file) and what activity to start from (in our case, from the first screen — the splash startup screen).
To find these values, run the following commands:
adb shelldumpsys window displays | grep -E 'mCurrentFocus'
The result will be in the format
<appPackage>/<appActivity>.
Make it an Automated Test (in RSpec)
Now that everything is set up, we can create the automated test.
First, install the RSpec gem:
gem install rspec
The below test script opens the sample app and asserts that the result of 5 + 2 is 7.
describe "Simple Calculator basic addition" do
  before(:all) do
    opts = {
      caps: {
        automationName: 'UiAutomator2',
        platformName: 'Android',
        platform: 'Android',
        platformVersion: '12',  # match your emulator's settings
        deviceName: 'emulator-5554',  # AVD deviceId goes here
        app: "/Users/courtney/ruby-android/sample-apps/calculator-fdroid-release.apk", # your path to the SimpleCalculator's APK
        appPackage: 'com.simplemobiletools.calculator',
        appActivity: 'com.simplemobiletools.calculator.activities.SplashActivity.Orange'
      },
      appium_lib: {
        server_url: "http://127.0.0.1:4723"
      },
    }
    @driver = Appium::Driver.new(opts).start_driver
  end

  after(:all) do
    @driver.quit
  end

  it "Compute Sum" do
    driver.find_element(:id, "com.simplemobiletools.calculator:id/btn_2").click
    driver.find_element(:id, "com.simplemobiletools.calculator:id/btn_plus").click
    driver.find_element(:id, "com.simplemobiletools.calculator:id/btn_5").click
    driver.find_element(:id, "com.simplemobiletools.calculator:id/btn_equals").click
    result = driver.find_element(:id, "com.simplemobiletools.calculator:id/result").text
    puts result
    expect(result).to eq("7")
  end
end
Run this rspec test from the command line.
rspec uiautomator2_appium_spec.rbOutput like below:

Test Execution
The below animated GIF shows the test being executed in TestWise: