
Securing React Applications with Auth0
A guide for bootstrapping a new React app with Auth0
If you are looking for a comprehensive guide about how to create a new React application and set it up with Auth0 as the login provider then this is the article for you. I will be walking through a full demonstration from start to finish to show exactly how it’s done and give some pointers along the way.
Why use Auth0 for a login provider?
The startup I work has been using Auth0 from the start for their applications. We have it set up as the login provider for our web applications and our React Native mobile application.
Auth0 provides value by handling all the logins, sign up, and password management for your users. You get all of this out of the box without having to build UIs for login and password management.
This saves your engineering team a fair amount of time upfront because they don’t have to build and maintain all this themselves. Auth0 is also free to use up to a certain number of daily active users which is pretty generous. Note there are some premium features that you will have access to during the initial free preview window, but won’t be able to use unless you switch to a paid account after the initial preview period ends.
Getting setup with Auth0
Before we get started with building our demo application you will need to set yourself up with an Auth0 account.
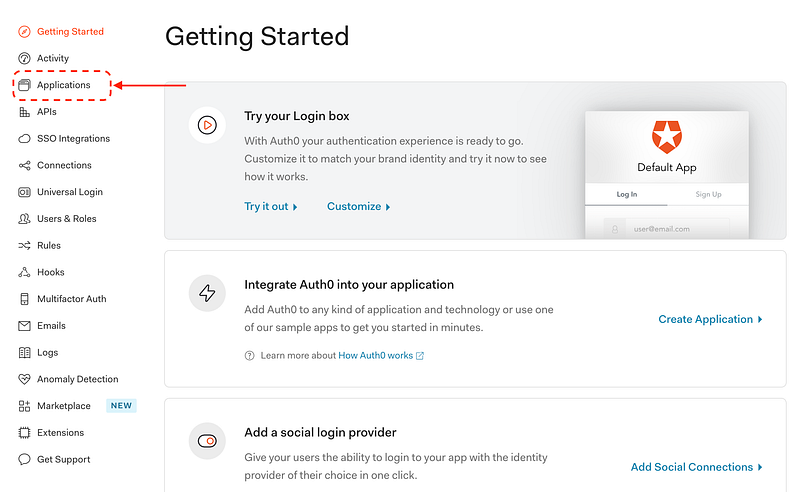
After you have successfully created an account you will land on the following screen. We will want to create a new Single Page Application. Start by clicking on the Applications option in the menu.
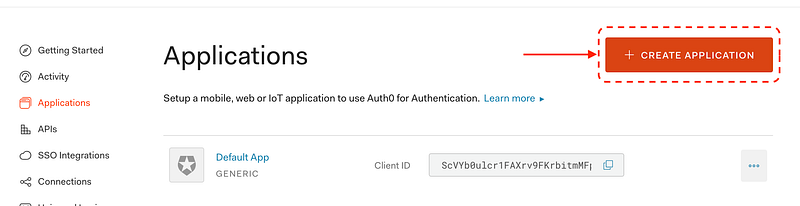
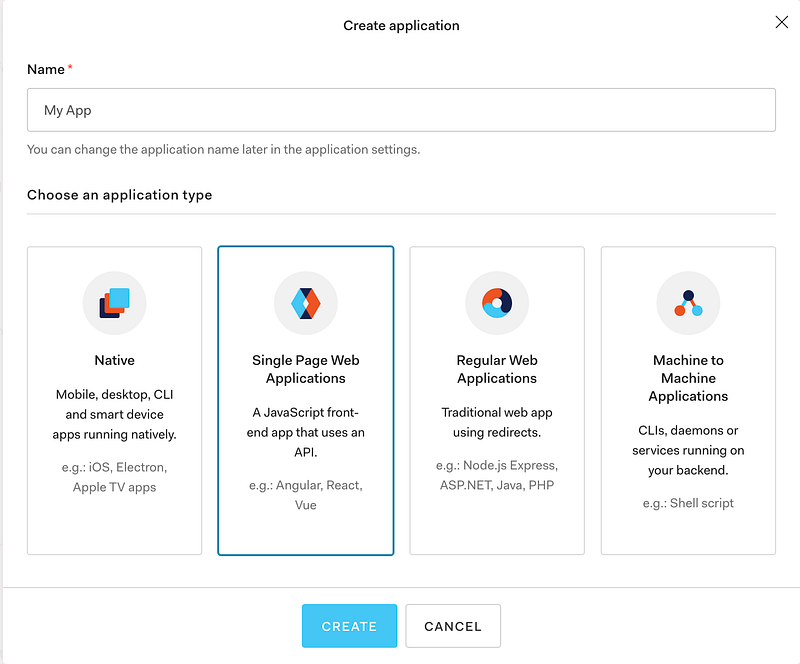
This takes you to a list of your applications. We will want to click on “Create Application”.
The dialog will ask for a name for the new app and we will want to select the “Single Page Web Applications” option.
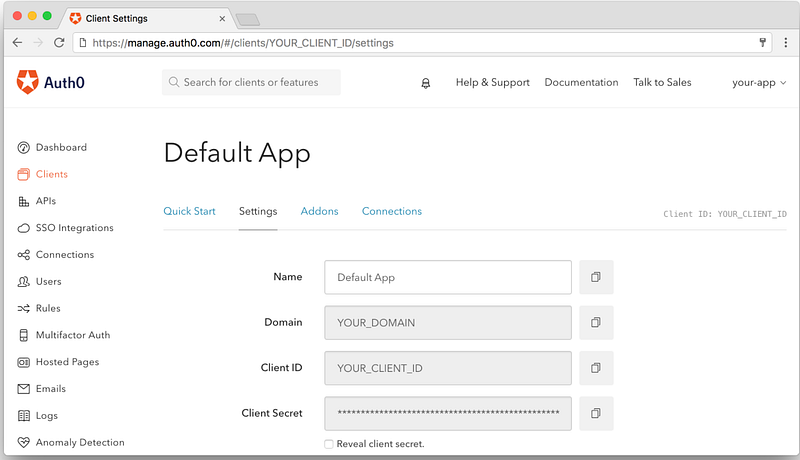
Once your application is created you can see the Domain, Client ID, and Client Secret. You will need to refer to this information later when we are building the application.
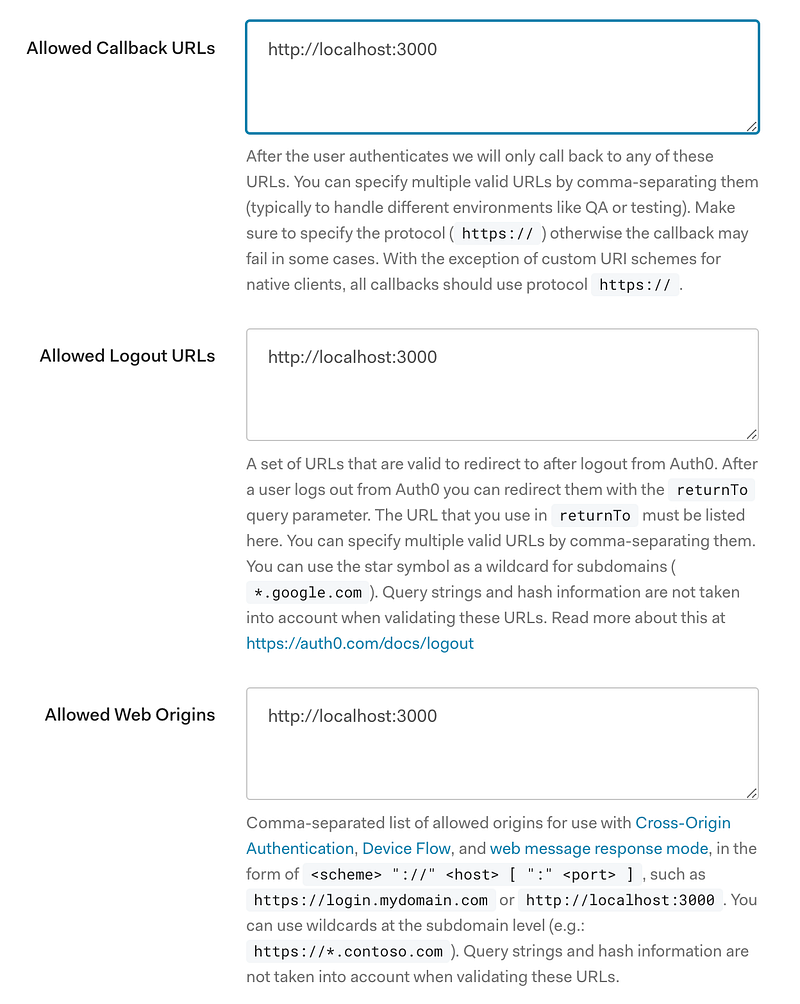
One more step before we jump into the app. There are three fields where you will need to enter the URL where you will be running your app. You can see in the screenshot below I’ve entered:
http://localhost:3000Create React App runs on port 3000 by default so that’s what I’ve entered here. If you want to run on another port you can switch to that.
Note that when you want to deploy your application elsewhere you will need to add that URL as well. You can add as many URLs as you want to as comma-separated values.
That wraps up everything we need as far as configuration. Now we can move on to setting up the demo application.
Demo Application
Now that we have everything configured we can start coding. First, we will use Create React App to bootstrap a new application and then install the Auth0 package via npm.
Run the following commands in a terminal to create the app, install the Auth0-React SDK, and finally run the app.
npx create-react-app auth0-react-demo
cd auth0-react-demo/
npm install @auth0/auth0-react
yarn start
Auth0 uses React Context to manage the state of the user’s authentication status. The first code we add is adding the Auth0 Provider to the root of the application. You will want to replace domain and clientId with the values from your Auth0 application we created before.
src/index.js
React Bootstrap and Login
We will also be adding React Bootstrap to our app just to take advantage of the pre-built components it offers and add a little style to our demo.
Run the following command in a terminal to install React Bootstrap from npm.
npm install react-bootstrap bootstrapNow that we have bootstrap components available we will update our App.js file to look like the following.
src/App.js
We add a navbar at the top of the UI and a button that will serve as our login button. To redirect to the default Auth0 login screen, we will use the loginWithRedirect function from useAuth0.
If we run our application and click the login button we should be re-directed to the login screen.

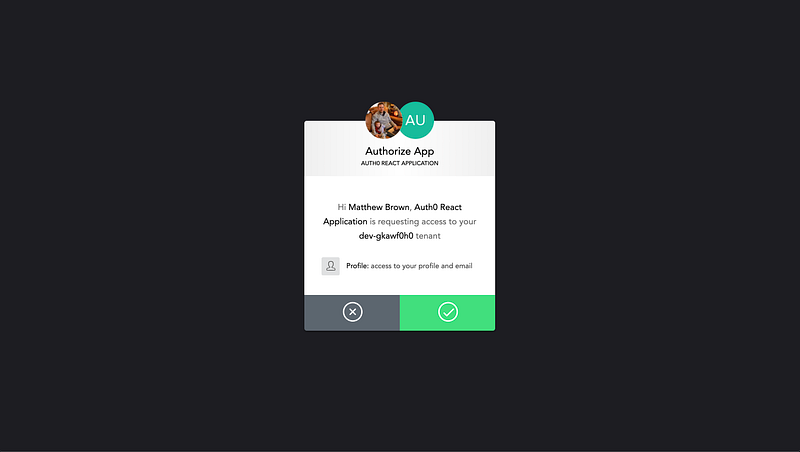
Once at the default login you have the option to sign in with a Google account or create your own login with email and password.
I selected one of my Google accounts to log in for the first time and Auth0 will ask you for permission to access your profile.
Now that you have a user signed up if you go to the Users list in the Auth0 admin you will see that user in your list like below.
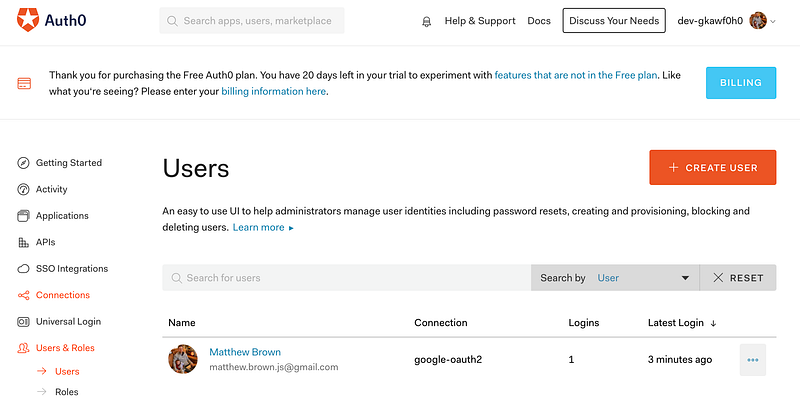
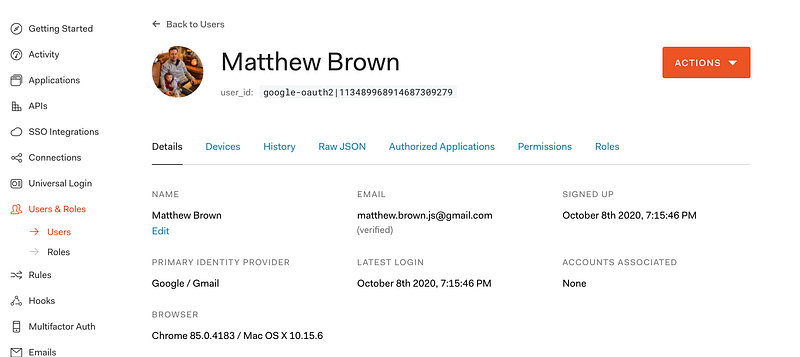
Clicking on a user in the list will take you to their details page. From here you can see the user's full information and history and also perform actions such as updating the user or resetting your password.
If you look under the email you see a verified message. If you are using Auth0 you have the option to require users to follow a verification link sent to their email before their account is actually activated. This setting is off by default.
Logout
The next step is to give our users the ability to logout of their current session. We will want to first be able to check if the user is signed in or not and toggle which button to display depending on the state of their authentication. Let’s show how this is done.
We can check out if the user is authenticated or not using the isAuthenticated flag from useAuth0. Our logic is pretty simple. If true we want the logout button so the user can end their session and if false we display the login button.
User Profile
The last piece of our demo is to display our user’s profile once they are logged in. We will create a new component for the user profile.
src/UserProfile.js
We make use of isAuthenticated again to make sure the user is logged in before we display their profile. We also get all the user details from the user object in the Auth0 context.
The last step is to simply add this new profile component to our main App.js file. After making this change the final version of the file will look like the following.
With the profile added we can now see the full user session from login to logout.
Dig Deeper with Auth0
So we have our demo fully working but this is definitely just scratching the surface with Auth0. It provides many features and services such as:
- Ability to add roles to a user profile from a database using the JavaScript rules. Just one example of the power of rules in Auth0, basically endless possibilities with these
- Many social providers such as Google, Facebook, Apple, LinkedIn, and many more.
- A long list of extensions
- Ability to set up a sign in by sending users a code via text message (I use this feature for a React Native application)
- Many more!
I hope this provides a gentle introduction to including Auth0 in your React applications. If you are looking for something to handle identity management be sure to checkout Auth0. Thanks for reading!


