
Securely Access Remote Servers with Cloudflare Tunnel: A How-To Guide
Introduction
In this guide, we will explore how to effectively utilize Cloudflare Tunnel to establish secure remote connections to servers and even access Visual Studio Code (VScode) remotely. Whether you’re an IT professional, a developer, or simply someone looking to improve your remote access capabilities, this step-by-step tutorial will provide you with the knowledge and tools you need.
Cloudflare Tunnel allows you to connect to your remote servers through SSH and work with VScode remotely with ease. We’ll cover both methods and walk you through the necessary steps to set up your connections. By the end of this guide, you’ll have a secure and efficient remote access solution at your fingertips.
Let’s get started.
Step 1: Setting Up SSH Access via Putty
To create an SSH connection over Cloudflare Tunnel, follow these steps:
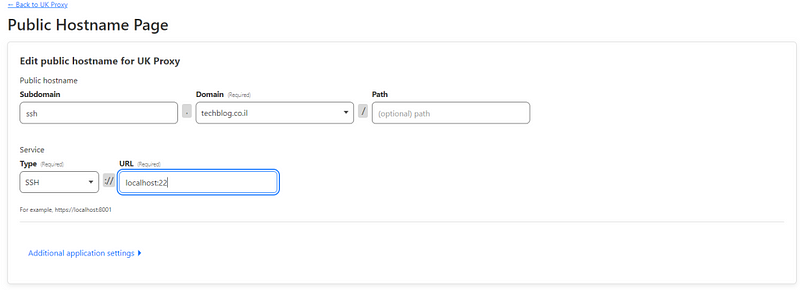
Step 1.1: Configure the Cloudflare Tunnel
- Go to your Cloudflare Tunnel settings.
- Select “SSH” as the Service type.
- Save your changes.
Step 1.2: Download and Install Cloudflared
- Download the Cloudflared binary from the Cloudflare GitHub repo.
- Save the binary file to a location in your PATH (system32 is the recommended path for saving it).
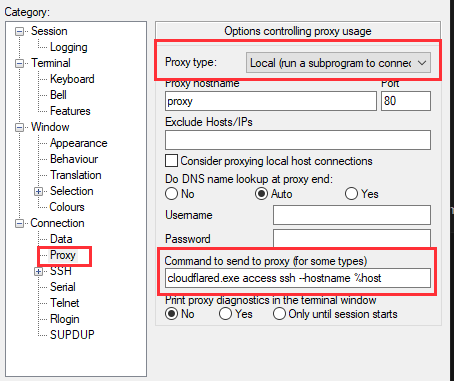
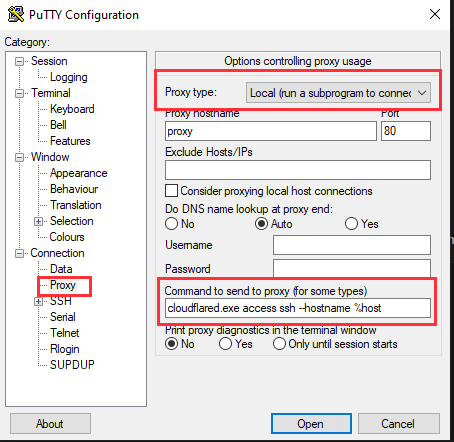
Step 1.3: Configure Putty
- Open Putty.
- Enter the URL you want to connect to.
- On the left side, go to the Proxy settings.
- Choose “Local Proxy” as the Proxy type.
- In the Command field, enter:
cloudflared.exe access ssh --hostname %host.
If you’ve followed these steps correctly, your Putty client should now connect through Cloudflare Tunnel securely.
Step 2: Accessing VScode and Remote Explorer
Now, let’s explore how to access and work with VScode remotely using Cloudflare Tunnel and Remote Explorer:
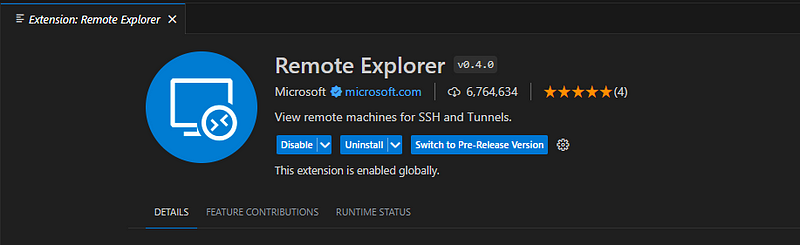
Step 2.1: Ensure VScode and Remote Explorer are Installed
Make sure you have VScode and the Remote Explorer extension installed.
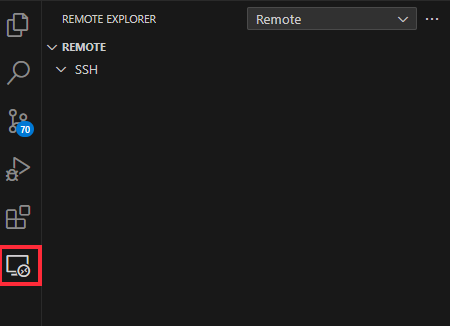
Step 2.2: Open Remote Explorer in VScode
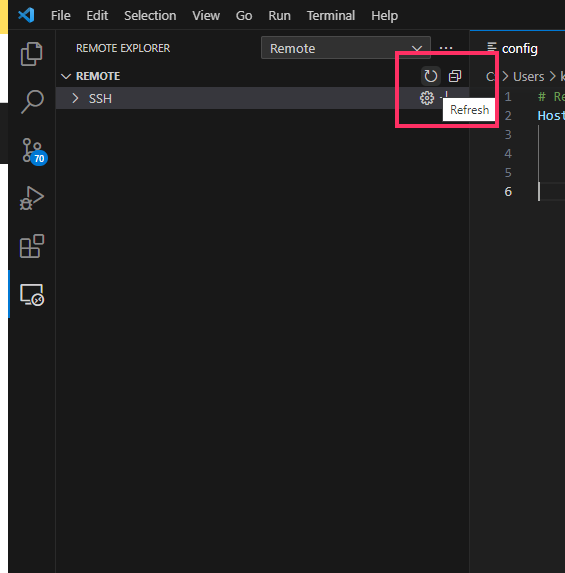
Click on the Remote Explorer icon in the left menu.
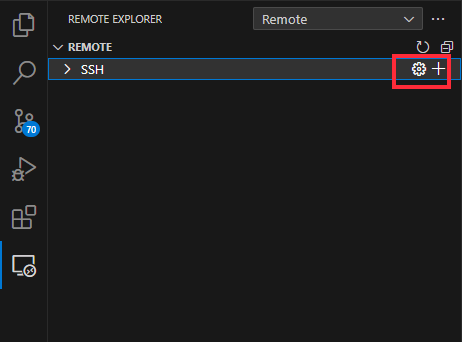
Now, click on the gear icon located to the right of the word “SSH” (under Remote).
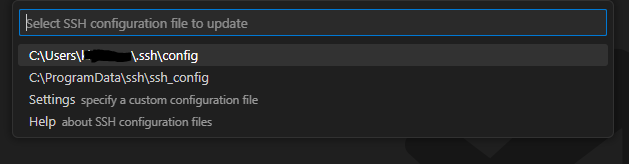
You will see a list of locations and configuration files. Choose the first option, which is located under your user folder.
You can now see that a text file containing a sample configuration has opened in the central window of VScode.
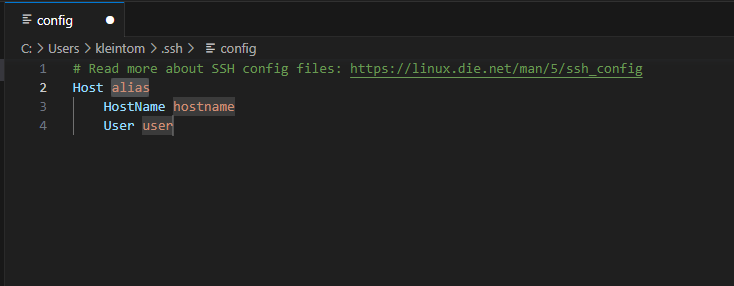
Now, edit the file and replace the code with the following:
Host "My Host"
    HostName ssh.xxx.xx
    ProxyCommand cloudflared access ssh --hostname %h
    User root
    IdentityFile "Path to certificate"
Where:
- Host: This is the name you want to assign to the connection, and it will appear in the menu.
- Hostname: The address of the server you want to connect to (the URL of the Public Hostname).
- User: The username for the connection.
- ProxyCommand: The command that activates Cloudflared as a proxy and enables the connection.
- IdentityFile: This is optional and only necessary if you are connecting using a certificate instead of a password (which is more secure).
Save the file and refresh the list by clicking the refresh button:
Now you should be able to see the server listed. If you have connected to it before, you will also see the directories you’ve previously accessed, as demonstrated in this example with “git.”
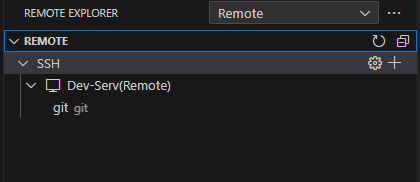
If you’ve followed these steps correctly, your server should now appear in the list. If you’ve connected to it in the past, you’ll also see the directories you’ve previously accessed, as shown in this example with “git.”

Summary
In this how-to guide, we’ve demonstrated how to establish secure remote connections using Cloudflare Tunnel. You’ve learned how to set up SSH access through Putty and how to use VScode and Remote Explorer to work with your remote servers efficiently. By following these simple steps, you can enhance your remote access capabilities and enjoy the benefits of a secure and streamlined connection to your servers.


