
Say Goodbye to OpenAI: Create a Chatbot That’s Truly Your Own Superpower — Part 1
Learn how to create a free chatbot using HuggingFace Python and Streamlit
Streamlit 1.24 released some new modules dedicated to Chat interface: basically we have now a powerful toolkit out of the box to create chatbot layouts and functionalities.
Looking at the release documentation and tutorial gave me the usual bad taste: again it is focused only on integration with OpenAI ChatGPT. How is it possible that there is no vision about open-source projects and Large Language models?
It took really a lot of effort, but I decided to translate the step by step tutorial into a full open source project.
In this article, Part 1 of a series, I will guide you to use Python and Streamlit to create an AI powered ChatBot using only free Hugging Face LLM with inference APIs. In part 2 I will apply the concept to Language Models running on your consumer hardware, working also with CPU only computers. Believe me that you will be amazed by the results!
What we will create…
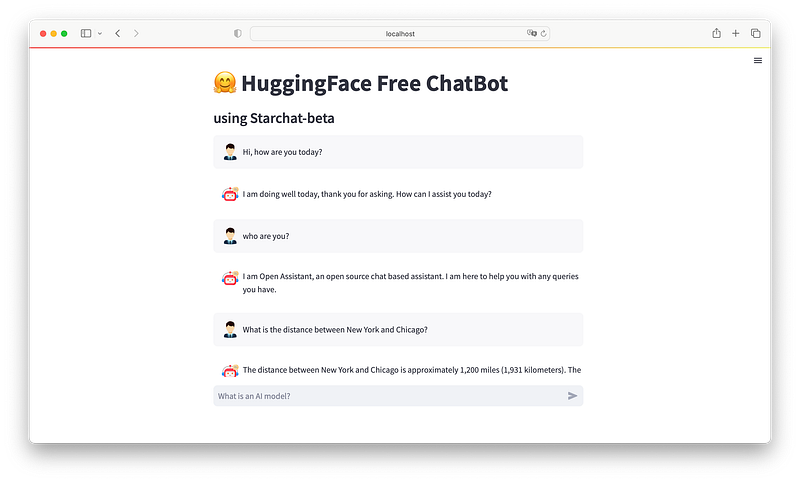
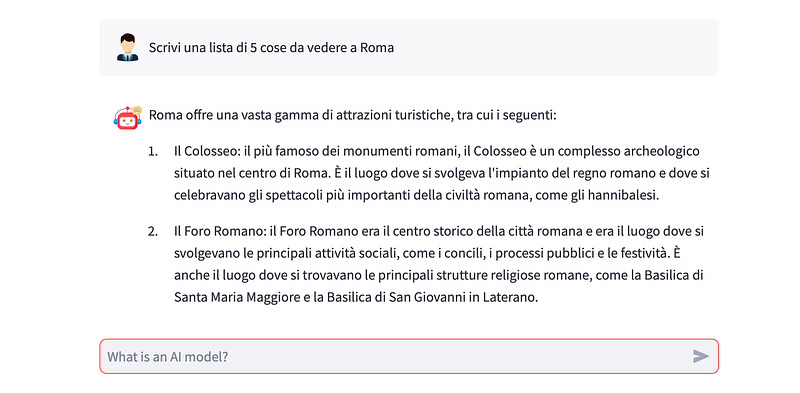
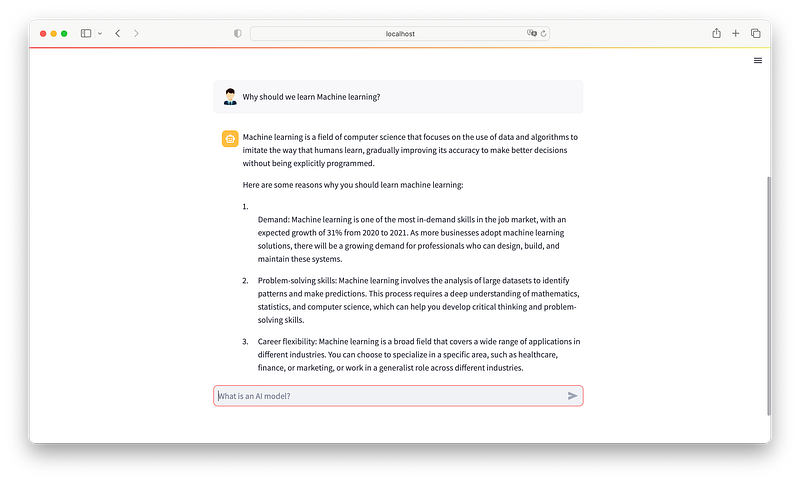
We will use Python, Hugging face LLM, LangChain and Streamlit to create an AI app with full Chat interface. It will look like this
In Summary here the steps for this project:
1.Preparations of environment and package dependencies
2.Create the function to interact with Hugging Face Model
3.Take the Streamlit tutorial and adapt it to HF
Let’s begin without any further delay.
1.Preparations of environment and package dependencies
We don’t have to install a lot of libraries. As a good practice, let’s create a virtual environment to handle this project.
Create a brand new directory (mine is YourHFChat) and run the venv creation instruction:
➜  mkdir YourHFChat
➜  cd YourHFChat
YourHFChat ➜  python3.10 -m venv venv #I am using python 3.10
To activate the virtual environment:
source venv/bin/activate  #for mac
venv\Scripts\activate     #for windows users
With the venv activated run the following pip installs for the required packages:
pip install transformers     #interaction with LLM
pip install huggingface_hub  #hugging face library for python
pip install langchain        #powerful toolkit to level up the game
pip install streamlit==1.24.0  #latest version of streamlit with Chat interface
As you can see we are not installing pytorch or tensorflow: this is because we are going to use only API inferences on free Hugging Face model. To do so you need to be registered on Hugging Face and create an API token (your personal authorization key for API requests to the LLMs).
On the official Hugging Face page for the API Inference we have the instructions for getting the API Token.
But what are 🤗 Hosted Inference API? An API, short for application programming interface, is a set of rules and protocols that allows various applications to communicate with each other even if they are written with different languages.
So let’s create an Account on Hugging Face (if you don’t have one yet) and then we will create our first API token
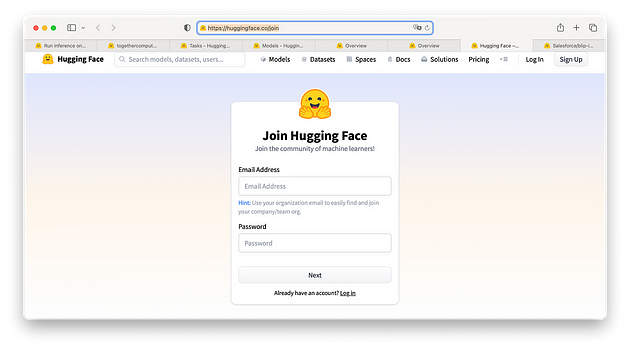
After you are logged in get a User Access or API token in your Hugging Face profile settings.
You should see a token hf_xxxxx (old tokens are api_XXXXXXXX or api_org_XXXXXXX).
Remember!
If you do not submit your API token when sending requests to the API, you will not be able to run inference on your private models.
Create a new python file in your main directory and call it app.py
Now, to verify that everything works fine, let’s import the libraries and run it:
# libraries for AI inferences
from huggingface_hub import InferenceClient
from langchain import HuggingFaceHub
import requests# Only for Internal usage
import streamlit as st
# Internal usage
import os
Save it and then from your terminal window, with the venv activated, run
python app.pyIf you are getting nothing… means that it is working fine 😁
NOTE: we are importing also Langchain because text generation inference pipelines are not yet supported by Hugging Face: 🦜️🔗 Langchain will fix this problem for us.
We are all set.
🧙♂️ Learn how to start to Build Your Own ai with This Free eBook
2.create the function to interact with Hugging Face Model
As briefly mentioned above we are going to use only inference API calls: but you need to know that text-generation is for now a task not supported by Hugging Face through API. We will make use of Langchain to fix this issue and prepare a function to call the LLM and get the response.
Hugging Face release few months ago its own ChatBot and everyone is able to test it at ⭐ StarChat Playground 💬.
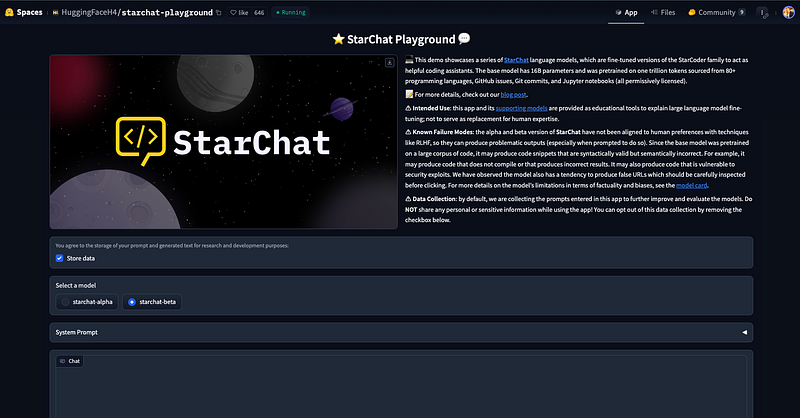
The official page describes it as:
💻 This demo showcases a series of StarChat language models, which are fine-tuned versions of the StarCoder family to act as helpful coding assistants. The base model has 16B parameters and was pretrained on one trillion tokens sourced from 80+ programming languages, GitHub issues, Git commits, and Jupyter notebooks (all permissively licensed).
I am very curious so I decided to use one of the two available models for our own chatbot. Starchat Beta has an Inference API, so we are going to try it!
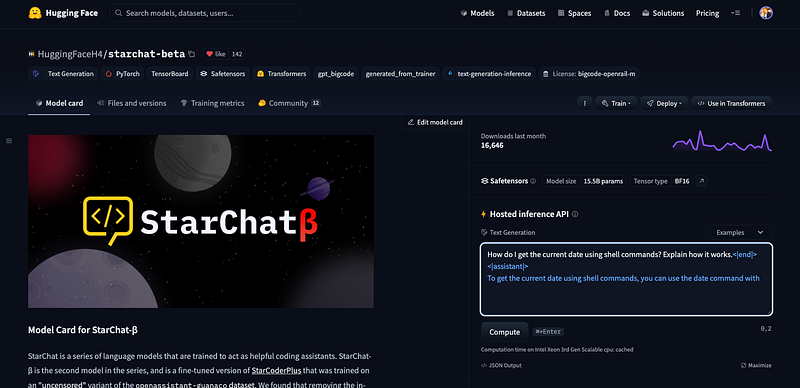
NOTE: I tried around 50 chat-like models, but many of them didn’t successfully replied to the API call, or were very poor in terms of quality.
You can test yourself StarChatBeta on the above url.
Let’s create a function
def starchat(model,myprompt, your_template):
    from langchain import PromptTemplate, LLMChain
    os.environ["HUGGINGFACEHUB_API_TOKEN"] = yourHFtoken
    llm = HuggingFaceHub(repo_id=model ,
                         model_kwargs={"min_length":30,
                                       "max_new_tokens":256, "do_sample":True,
                                       "temperature":0.2, "top_k":50,
                                       "top_p":0.95, "eos_token_id":49155})
    template = your_template
    prompt = PromptTemplate(template=template, input_variables=["myprompt"])
    llm_chain = LLMChain(prompt=prompt, llm=llm)
    llm_reply = llm_chain.run(myprompt)
    reply = llm_reply.partition('<|end|>')[0]
    return reply
The positional arguments are the model (I left it like this so that if you want to test any other model you will be able to do it, you need to fix only the line related to the stop (llm_reply.partition(‘<|end|>’)[0]) and the model_kwargs), the prompt (that is in reality your input and the template (every chat-like model usually requires a specific format for the instructions).
We then import the required libraries and pass as an environmental variable the HF API token.
NOTE:the model arguments here are a little bit more specific than usual. I simply read through the model card page
The model was fine-tuned on a variant of the
OpenAssistant/oasst1dataset, which contains a diverse range of dialogues in over 35 languages. As a result, the model can be used for chat and you can check out our demo to test its coding capabilities.
In the instructions to how to use the model with pipeline it is clearly mentioned the special code to be used…
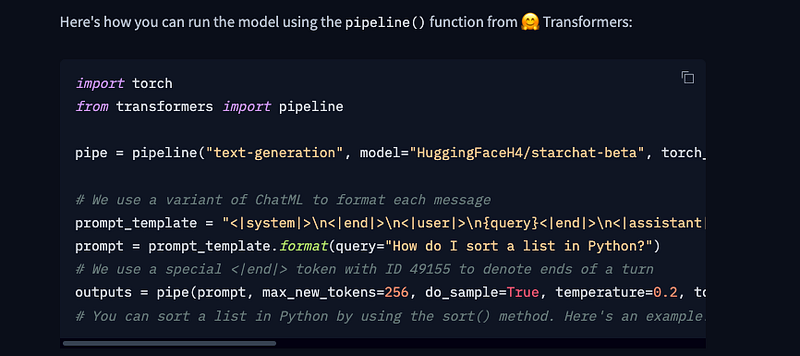
After this we use LangChain to declare and link together the prompt template, the llm call and the prompt: as input variable of the prompt template we are going to use a variable that we call myprompt (that is why I am calling it in the same way of our positional argument myprompt).
template = your_template
prompt = PromptTemplate(template=template, input_variables=["myprompt"])
llm_chain = LLMChain(prompt=prompt, llm=llm)
Finally we call the Chain with the command:
llm_reply = llm_chain.run(myprompt)
You may have noticed that we are truncating the generated text: after several trials and error I saw that the model keeps on generating (hallucinating…) after the eos token. I decided to return only the text before the eos. You can test yourself and see if it is possible to further tune the model arguments 😁
reply = llm_reply.partition('<|end|>')[0]Let’s put together the calls and the function and try to see if it is working. In the same python file after the import lines add your HF token, create the function and add the call:
import streamlit as st
from huggingface_hub import InferenceClient
from langchain import HuggingFaceHub
import requests
# Internal usage
import os
# Set HF API token  and HF repo
yourHFtoken = "hf_xxxxxx" #here your HF token
repo="HuggingFaceH4/starchat-beta"
### INITIALIZING STARCHAT FUNCTION MODEL
def starchat(model,myprompt, your_template):
    from langchain import PromptTemplate, LLMChain
    os.environ["HUGGINGFACEHUB_API_TOKEN"] = yourHFtoken
    llm = HuggingFaceHub(repo_id=model ,
                         model_kwargs={"min_length":30,
                                       "max_new_tokens":256, "do_sample":True,
                                       "temperature":0.2, "top_k":50,
                                       "top_p":0.95, "eos_token_id":49155})
    template = your_template
    prompt = PromptTemplate(template=template, input_variables=["myprompt"])
    llm_chain = LLMChain(prompt=prompt, llm=llm)
    llm_reply = llm_chain.run(myprompt)
    reply = llm_reply.partition('<|end|>')[0]
    return reply
myprompt = "List 3 benefits of vegan food"
my_template  = "<|system|>\n<|end|>\n<|user|>\n{myprompt}<|end|>\n<|assistant|>"
res  =  starchat(repo,myprompt, my_template)
print(myprompt)
print("---")
print(res)
Save it and then from your terminal window, with the venv activated, run
python3.10 app.py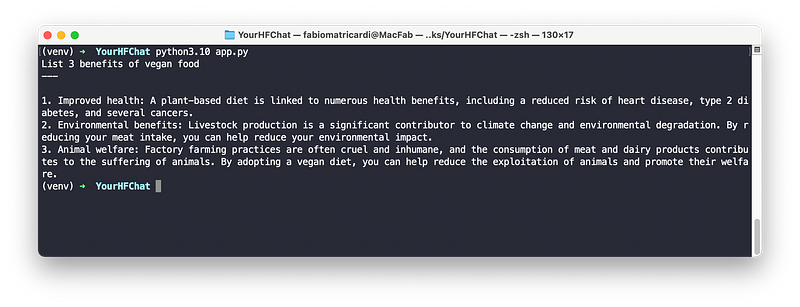
Ok sounds good. Let’s level up the game and create the streamlit chat app
3.Take the Streamlit tutorial and adapt it to HF
As mentioned in the Introduction Streamlit 1.24.0 has a dedicated set of widgets for chat app creation.
In the tutorial you have all the explanation of the main two classes: chat_input and chat_message.
I copy/pasted the code from Build a ChatGPT-like app and modified it to work with Hugging Face inference API.
Let’s walk through it: you can code along but do not worry, the code is in my GitHub repo for this article.
Create a new python file called st-superchat.py: the first lines are coming from the previous one (except for the time.sleep that we need for the typewriter effect):
import streamlit as st
from huggingface_hub import InferenceClient
from langchain import HuggingFaceHub
import requests
# Internal usage
import os
from time import sleep
In this first part we are only setting up the general variables of the app including avatars for the user and the bot, a function to log all the chat history in a text file and the HF token and repo. The starchat function is also included here:
Note: the images are in the Github repo, but you can use any Emoji
#AVATARS
av_us = './man.png' #"🦖" #A single emoji, e.g. "🧑💻", "🤖", "🦖". Shortcodes are not supported.
av_ass = './robot.png'
# Set a default model
if "hf_model" not in st.session_state:
st.session_state["hf_model"] = "HuggingFaceH4/starchat-beta"
### INITIALIZING STARCHAT FUNCTION MODEL
def starchat(model,myprompt, your_template):
from langchain import PromptTemplate, LLMChain
os.environ["HUGGINGFACEHUB_API_TOKEN"] = yourHFtoken
llm = HuggingFaceHub(repo_id=model ,
model_kwargs={"min_length":30,
"max_new_tokens":256, "do_sample":True,
"temperature":0.2, "top_k":50,
"top_p":0.95, "eos_token_id":49155})
template = your_template
prompt = PromptTemplate(template=template, input_variables=["myprompt"])
llm_chain = LLMChain(prompt=prompt, llm=llm)
llm_reply = llm_chain.run(myprompt)
reply = llm_reply.partition('<|end|>')[0]
return reply
# FUNCTION TO LOG ALL CHAT MESSAGES INTO chathistory.txt
def writehistory(text):
with open('chathistory.txt', 'a') as f:
f.write(text)
f.write('\n')
f.close()
# Set HF API token
yourHFtoken = "hf_xxxxxx" #here your HF token
repo="HuggingFaceH4/starchat-beta"
### START STREAMLIT UI
st.title("🤗 HuggingFace Free ChatBot")
st.subheader("using Starchat-beta")The last 2 lines are setting the main title of the app and a subheader.
The next section create session-state variables so that the chat history is kept in case of application re-run. Streamlit needs these variables if you want to call dynamic inputs/outputs within the app. Note that we assign as well the avatars to the two different roles.
# Initialize chat history
if "messages" not in st.session_state:
    st.session_state.messages = []
# Display chat messages from history on app rerun
for message in st.session_state.messages:
    if message["role"] == "user":
        with st.chat_message(message["role"],avatar=av_us):
            st.markdown(message["content"])
    else:
        with st.chat_message(message["role"],avatar=av_ass):
            st.markdown(message["content"])
The next part is the core of the Chat app. Here we accept the user input and while displaying it we write as well the text into the chat-history file. In the assistant part we call our starchat function (that we created in the previous section of this article) to create the response of the AI. Note that we are splitting the entire text into words to generate a blinking cursor to simulate typing 😁
Finally we log the assistant text into the chat-history file and as well in the session-state variables (in case we re-run the app)
# Accept user input
if myprompt := st.chat_input("What is an AI model?"):
    # Add user message to chat history
    st.session_state.messages.append({"role": "user", "content": myprompt})
    # Display user message in chat message container
    with st.chat_message("user", avatar=av_us):
        st.markdown(myprompt)
        usertext = f"user: {myprompt}"
        writehistory(usertext)
        # Display assistant response in chat message container
    with st.chat_message("assistant"):
        message_placeholder = st.empty()
        full_response = ""
        res  =  starchat(
                st.session_state["hf_model"],
                myprompt, "<|system|>\n<|end|>\n<|user|>\n{myprompt}<|end|>\n<|assistant|>")
        response = res.split(" ")
        for r in response:
            full_response = full_response + r + " "
            message_placeholder.markdown(full_response + "▌")
            sleep(0.1)
        message_placeholder.markdown(full_response)
        asstext = f"assistant: {full_response}"
        writehistory(asstext)
        st.session_state.messages.append({"role": "assistant", "content": full_response})
Save the file, and with the venv activated run the following command
python3.10 -m streamlit run st-superchat.pyI suggest you this method because with the virtual environment the base command streamlit run yourapp.py is often not working 😏
Your default browser will open and we are ready to chat with a powerful free AI at our service.
Conclusions
With this the first Part is done ✅. The intent is to become free from payed AI and leverage all the power of the open source LLM. In the next part I will guide you through the process of creating a chatbot with local inferences, running on any consumer hardware that does not require any GPU!
I hope this articles was helpful. Discovering the powers of open source Language Models is amazing: and why don’t learn how to perform all the AI task by ourself without running existing commercial software?
AI free LLM on Hugging Face can perform all the task we need.
You can find the entire code in my GitHub repository
If this story provided value and you wish to show a little support, you could:
- Clap 50 times for this story (this really, really helps me out)
- Get my Free Ebook to Learn how to start to Build Your Own ai
- Sign up for a Medium membership using my link — ($5/month to read unlimited Medium stories)
- Follow me on Medium
- Read my latest articles https://medium.com/@fabio.matricardi
Part2 is now live! you can go on reading here
Artificial Corner’s Weekly Newsletter
Don’t miss the latest ChatGPT tips, tutorials, and developments in AI. Join our newsletter with 30K+ people.


