
Running Playwright Tests on GitLab CI: A Step-by-Step Guide

Playwright, a powerful end-to-end testing library, has gained popularity for its ability to test web applications across different browsers. Integrating Playwright tests into your GitLab CI/CD pipeline can enhance your development workflow by automating the testing process. In this article, we will walk you through the steps to set up and run Playwright tests on GitLab CI.
Prerequisites
Before diving into the CI configuration, make sure you have the following prerequisites in place:
- Playwright Installation: Ensure that Playwright is installed in your project. You can install Playwright using npm:
npm install --save-dev playwright
- Playwright Test Scripts: Have Playwright test scripts written for your application.
- GitLab Repository: Your project should be hosted on GitLab.
Setting up GitLab CI Configuration
GitLab CI/CD uses a configuration file (.gitlab-ci.yml) to define jobs and workflows. Follow these steps to set up the configuration for running Playwright tests:
1. Create a .gitlab-ci.yml File
Create a new file named .gitlab-ci.yml in the root of your GitLab repository.
This is the .gitlab-ci.yml file that I am using for the project
In this yml file, I’ve used a docker image to run on the GitLab ci.
image: mcr.microsoft.com/playwright:v1.40.0-jammy2. Stages
Specify the different stages and jobs in your CI pipeline. For a Playwright test, you may have stages like build and test. Define jobs within these stages.
stages:
  - playwright-test
3. Test Jobs
In the jobs, we specified the command to install the packages and run the tests.
In the package.json file, I have specified the command to run the test with the headless Chrome browser. we can configure based on our requirement
Also, I have specified the test execution as a manual to avoid running all the time on the GitLab CI.
script:
    - npm install
    - npm run test
  when: manual
In the build job, install the project dependencies, including Playwright.
build:
  stage: build
  script:
    - npm install
4. Artifacts
We have artifacts in place and we kept them for a day to save some space on the storage. We can configure it according to our requirements.
The artifacts are kept always and we can configure them based on conditions. We need to specify the path of the artifacts which is basically a report.
  artifacts:
    when: always
    paths:
      - playwright-report
    expire_in: 1 day
7. Complete .gitlab-ci.yml
The complete .gitlab-ci.yml file should look like this:
stages:
  - playwright-test

test:
  image: mcr.microsoft.com/playwright:v1.40.0-jammy
  stage: playwright-test
  script:
    - npm install
    - npm run test
  when: manual
  artifacts:
    when: always
    paths:
      - playwright-report
    expire_in: 1 day
8. Commit and Push Changes
Commit the .gitlab-ci.yml file and push it to your GitLab repository. If we don't have the always parameter it will trigger the CI always. In my case we need to run it manually on the gitlab. Play button will allow to run the test.

Monitor the CI Pipeline
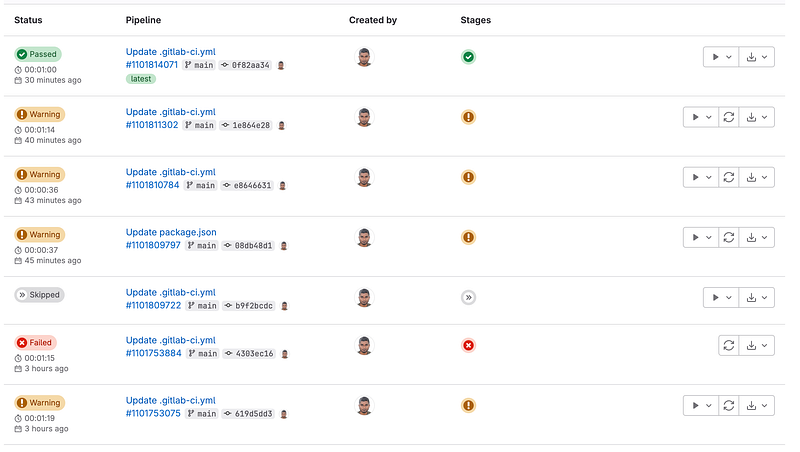
Passed Pipeline
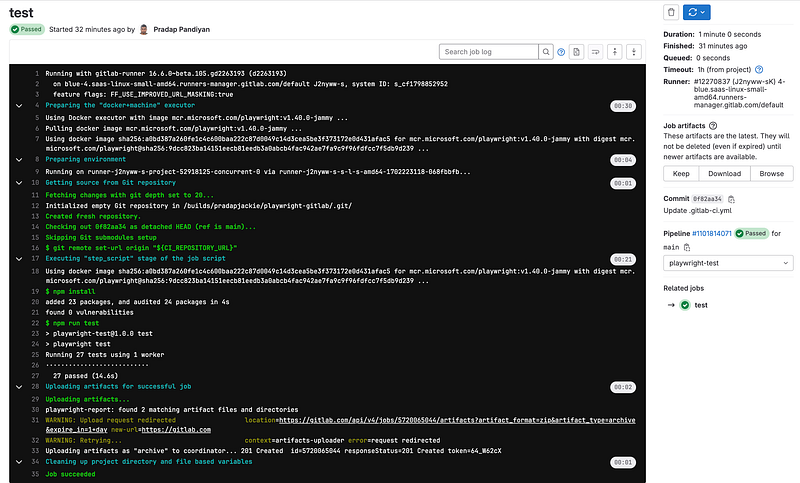
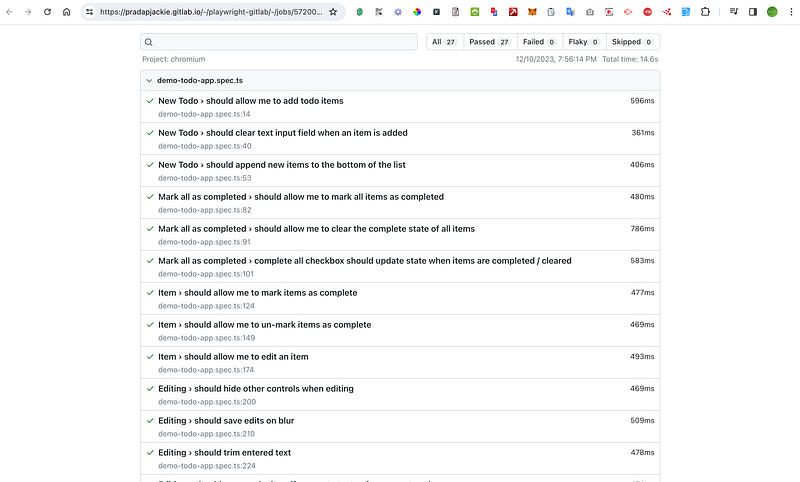
There is a download button to download the artifacts/reports. There is a button to browse and see the report on GitLab. These reports are deployed on the GitLab server.
If we have different stages there is a dropdown to see all the stages of the test.
Thats a wrap, I believe this could help you guys build the test on the Gitlab CI pipeline.
I have created a project on GitLab and added the code here.
Feel free to hit clap if you like the content. Happy Automation Testing :) Cheers. 👏


