
Running MySQL in Docker : A Walkthrough
If you need to host MySQL locally, but you don’t want it all the time, then Docker will be perfect for you

I was recently working on a project that required MySQL, but I wasn’t going to be needing it every day, and so I was a little hesitant to install it on my main development machine.
Enter Docker.
Docker is amazing at setting up containers that you can use whenever you need them and getting MySQL to work in Docker was easy.
If you’ve never used Docker before, or worked with MySQL, then this article will be perfect for you — we’ll go through everything to get it set up for you. We’ll cover getting Docker running locally, setting up MySQL and phpMyAdmin, and look at how scripts can be automatically executed.
The basics — getting Docker running
Your first step is getting Docker itself running on your machine.
Head on over to Docker’s Get Started guide to get Docker installed. I’m using Windows, so I opted for downloading and installing Docker Desktop. The documentation for installing this is great, and there’s loads of information out there if you have any problems getting it running.
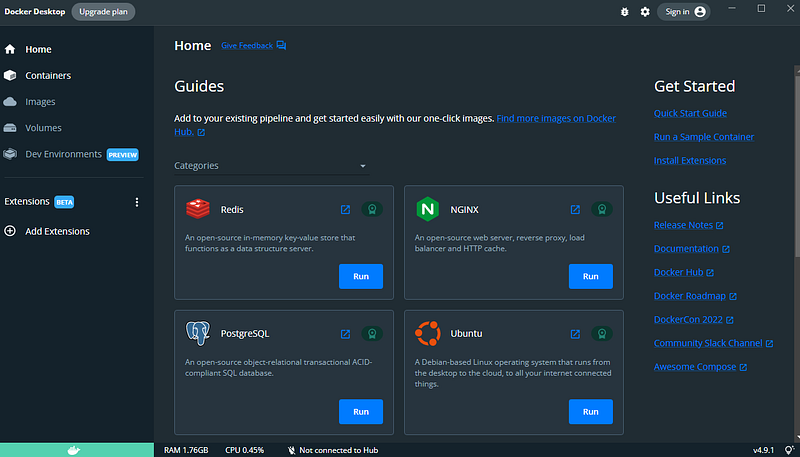
Once running, you can access Docker Desktop. If you’ve never used Docker before, I’d recommend going through their ‘Get Started’ links — it’s good for covering the basics for how Docker works:
Setting MySQL up
Now we’ve got Docker running, we can set MySQL up. There is an official image for MySQL, and we’ll use that to get it running.
It’s easiest to do this from the command line. So open that up.
Now, we can pull this MySQL image. This downloads the image so that we can use it locally:
docker pull mysql

Once downloaded, we can run it. You might be tempted to run the image with the default options, like this:
docker run --name=mysql-test -d mysql
The command is successful, but if you check the container that’s been created (via Docker Desktop) you can see that it’s in an ‘Exited’ state, and there’s an error about some missing options:

Fortunately, it’s clear what’s going on — we’re running the database without any way to connect to it, so we need to provide the root password, allow empty passwords, or set a random root password.
We’ll set a dummy root password ourselves, since we’re only using this as a local test environment.
First, let’s remove what we’ve created so far in Docker, so that we’re starting from scratch. To remove a container, and any associated volumes, use this command:
docker rm mysql-test -v
This removes the container, and the volume that was created at the same time.
Now, let’s run MySQL again, but this time set a root password of ‘123qwe’:
docker run -e MYSQL_ROOT_PASSWORD=123qwe -—name=mysql-test -d mysql
Excellent. Again, the command is successful:

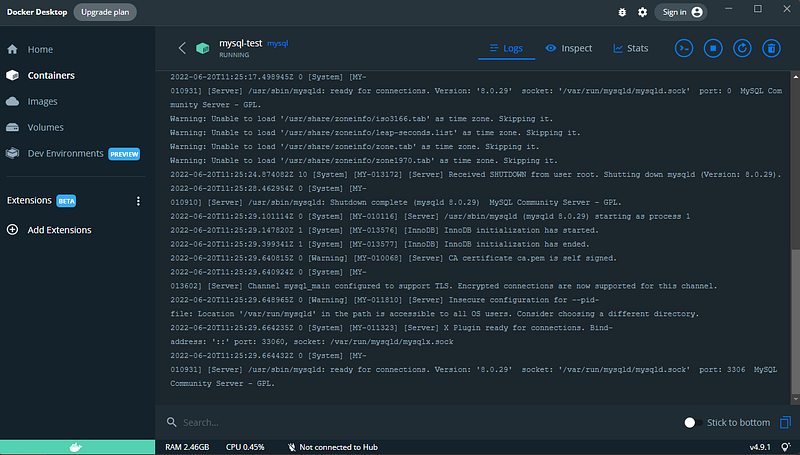
And when we check Docker Desktop, we can see the database initialising itself:
Ok, let’s see if we can access this database (spoiler: we can’t). Let’s write a quick unit test in C# (using Dapper and MySql.Data) which attempts to list all tables across all schemas:
Running this test fails. We get an error:
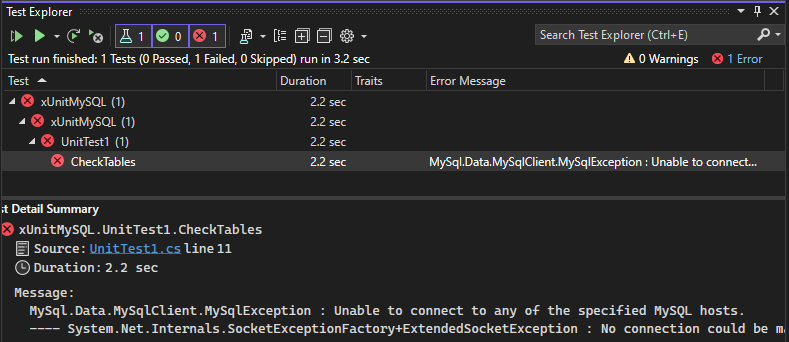
Let’s have a look at the full error:
MySql.Data.MySqlClient.MySqlException : Unable to connect to any of the specified MySQL hosts. — — System.Net.Internals.SocketExceptionFactory+ExtendedSocketException : No connection could be made because the target machine actively refused it. 127.0.0.1:3306
The test is unable to access the MySQL instance because the IP and port is being refused. Now, we know that 127.0.0.1 is pointing back to this same machine, so that’s right. And we know that the default port used by MySQL is 3306 (which we can confirm by checking those logs of MySQL in Docker Desktop, which show that it’s listening to that port). So, what could be wrong?
The problem is that things running inside of Docker stay within Docker unless you tell it otherwise. So, your MySQL instance is indeed listening on the right port, but Docker isn’t letting you connect to it outside of Docker itself.
Let’s recreate our MySQL container, but this time, tell Docker to open up port 3306 and pass the requests through to the container itself.
We can do this with this command:
docker run -e MYSQL_ROOT_PASSWORD=123qwe -—name=mysql-test -p 3306:3306 -d mysql
Note that we’re writing 3306 twice — the first number is the port that Docker will listen to. The second is the port that it will use internally. So, if we wanted to use a non-default port outside of Docker, but still keep on using the default port internally, we could write it as something like -p 1500:3306, which allows us to use port 1500 in our host machine to connect to MySQL, but still use 3306 within MySQL itself.
So, let’s run this command. First, let’s remove the existing container. Since the container is running, we’ll need to stop it first, then remove it:
docker stop mysql-test
docker rm mysql-test -v
Now, let’s run our new command, setting the ports:

It’s created, and once we wait for the instance to start up, let’s run our test again:
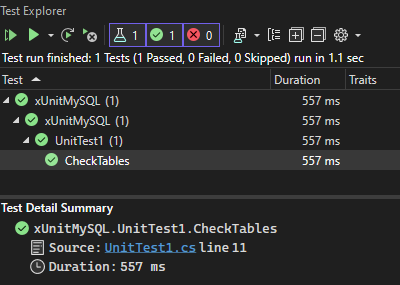
Excellent. The test has passed, which means we can connect to it.
Let’s review what we’ve done:
- When creating a MySQL container, we need to provide at least one way of accessing it — such as setting a root password
- We need to tell Docker which port we want to use, so that requests from outside of Docker can be made successfully
Using phpMyAdmin
A common tool for managing MySQL is phpMyAdmin. Fortunately there is an image for this tool as well, which means we can run this within Docker. That’s great because I don’t really want to have to install PHP on this machine.
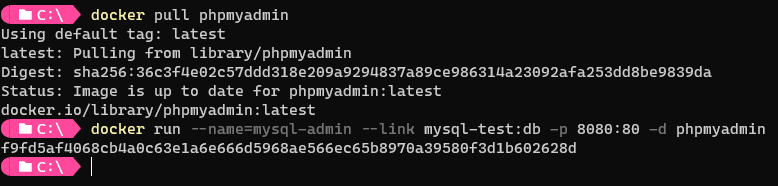
Let’s start by pulling this image:
docker pull phpmyadmin
Once that’s finished, we can set this up.
There are a couple of configuration options we need to set up:
- We need to link this new container to our existing MySQL container, so that Docker allows them to talk to each other
- We need to set a port up so that we can access the phpMyAdmin UI from our host machine
We can do this with this command:
docker run --name=mysql-admin --link mysql-test:db -p 8080:80 -d phpmyadmin
In this command, we’re giving our new container a name of ‘mysql-admin’, we’re linking it to ‘db’ in ‘mysql-test’. We’re setting the port to listen to 8080 and map that to use port 80 internally. We’re using ‘-d’ to run in detached mode (so the command line isn’t blocked by the running of the container itself). And we’re using the ‘phpmyadmin’ image.
Let’s now try and access it. We’re using port 8080 outside of Docker, so we need to set that in our URL. In your browser, access this address:
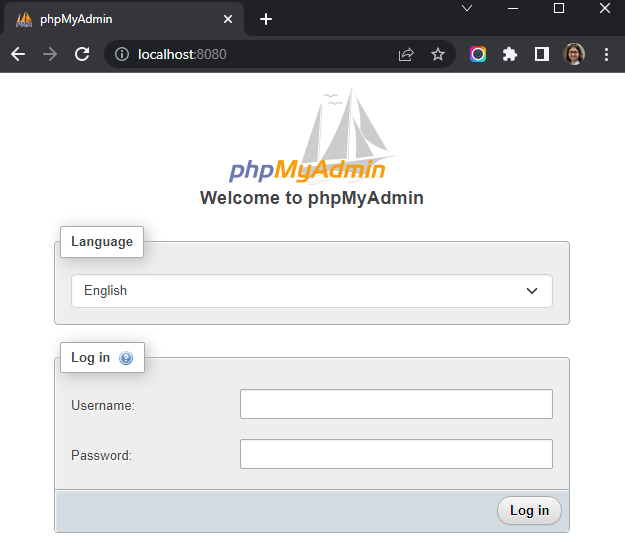
Now we can log in with our credentials that we set when first setting up MySQL. Set the username as ‘root’ and the password as ‘123qwe’.
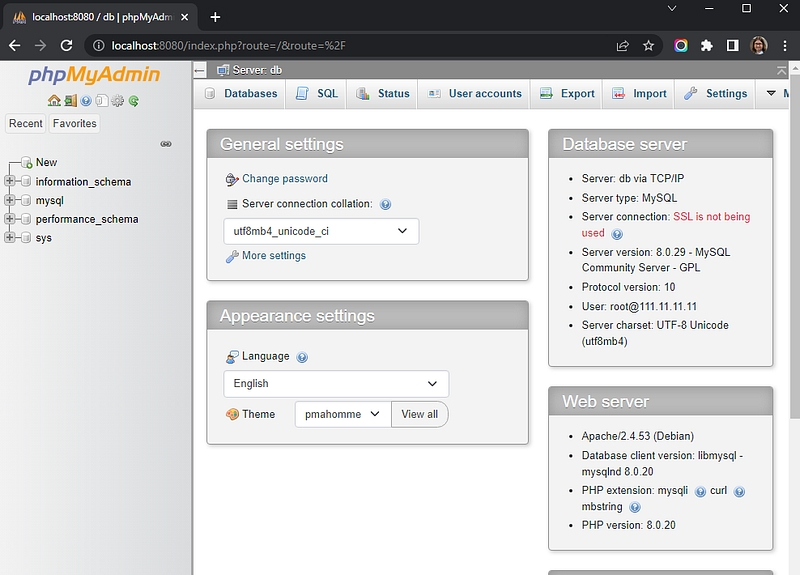
And we’re in. We’re now running phpMyAdmin within Docker, talking to MySQL also in Docker.
Using Docker Compose
We’ve seen how we can set up MySQL with individual commands, but sometimes it’s useful to collect all these commands together and run them all at the same time. This is especially useful as you add more and more containers and have more configuration options you need to remember to set.
This is where Docker Compose comes in.
We can write a simple file, in yaml, that lists how you want everything to be set up, and you can run this with a single command.
Let’s look at how this file might look:
Here we can see we’ve set up our 2 services, linked them together, and set the ports. Note that for this port mappings we’re prefixing it with 127.0.0.1 — this is limiting this port availability so that it’s only accessible when called from your local machine, and not anything else that might have access to your machine on your network.
We’re also referencing an environment file — mysql.env. This is another simple file with any environment variables that we want to use. In our case, we’re just using this to set the root password, so this file is like this:
If we place both these files next to each other, and navigate there in the command line, we can set everything up with a Docker Compose command:
docker compose up --build -d
Here we’re running docker compose, and using the --build flag to make sure Docker builds the commands. This is important to remember if you are making changes to your docker-compose.yml file — it’s easy to miss this flag (unless you’re running an explicit docker compose build command) when running it, and so potentially skip over any changes you’ve made.

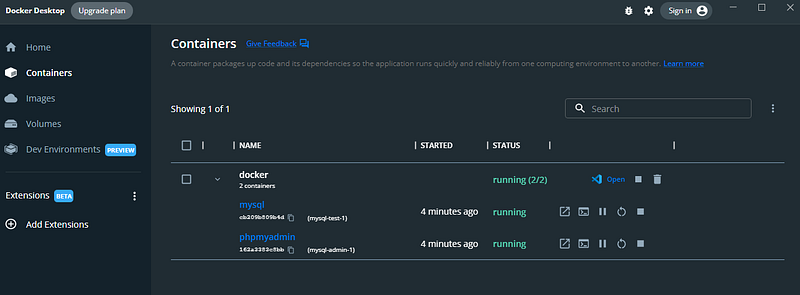
And that’s it — MySQL and phpMyAdmin is set up and running.
Checking Docker Desktop shows that our containers are both running:
To take down these containers, you can use Docker Compose again:
docker compose down -v
Running this stops and removes anything set up via docker compose:

And they’re gone. The containers, and any associated volumes, have been removed.
Using Docker Compose we can group our containers together and handle the setup and tear-down easily and quickly. This also makes it easier when setting these containers up as part of a CI/CD pipeline. For example, if you have a pipeline that needs some resources like this (e.g., a MySQL database to run tests against), then you can control it all via this docker-compose.yml file and set your pipeline to run it in exactly the same way that you’re doing it locally.
Running scripts on startup
A common requirement for running MySQL in Docker like this is to have an initial script executed which creates a new schema/database for you to use. For example, say you’ve got some unit tests written that verifies how your database works (such as using DBConfirm), you’ll want to create your database within Docker so that you can then access it later on in the pipeline.
Let’s say we have 2 scripts we want to run, which set up 2 databases that we want creating. These are called sakila_script.sql and sample_schema.sql. We can place these files next to our docker-compose.yml file, and reference them like this:
See how we’re defining a volume for each script. We’re copying them into a special location for MySQL — docker-entrypoint-initdb.d. When the docker container is being set up, any scripts found here will be executed. We’re renaming the files 1.sql and 2.sql because the scripts are executed in alphabetical order, not the order they were added, so it can be easier to name them like this so that we can see which is being executed first.
Let’s update our docker-compose.yml file with these new volumes and run it.

If we now check phpMyAdmin, we can see that these 2 databases have been added:
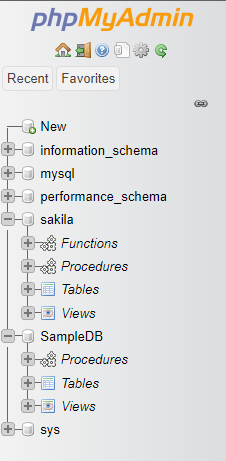
Using this technique, you can make sure your databases are set up exactly how you want them.
Summary
Here we’ve seen that we can easily use Docker to host MySQL databases, and related tools, in just a few simple commands. These commands can be grouped together as part of a docker-compose.yml file, so that even complex setup configurations can be executed with a single command.
These techniques not only help when you’re developing on your local machine, but also apply to setting up extra build steps as part of a CI/CD pipeline, allowing your builds to have access to the same resources that you’re using locally.


