
Run OpenWRT on your router and connect to eduroam via ethernet
Create a private shared network for multiple devices and connect it to eduroam via ethernet.


Intro
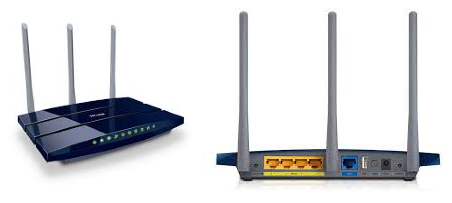
When I moved to my student dorm in Prague, I found myself in a situation when I wanted to run a scraper on my Raspberry Pi and run numerical simulations on an old laptop and still connect to the internet and quickly move files around. I could have one private network which is not connected to the internet and still connect to eduroam WiFi we have everywhere at my student dorm. I was doing exactly that for several weeks, but I found it highly unpractical. There is also eduroam available via ethernet in every room. So I bought a new TP-Link router, as shown below.
Setting up OpenWRT
We want to eliminate the default OS, which the TP-Link provides, and we will be flashing OpenWRT instead. If you have a different router, you have to search for the exact steps by yourself. The general idea is the same. We flash the OpenWRT .bin file via a web interface. Go to the OpenWRT webpage for supported devices. And search for the binary for TP-LINK TL-WR1043ND; there will be different versions. You have to look at the backside of your router. I have EU/4.0 version.

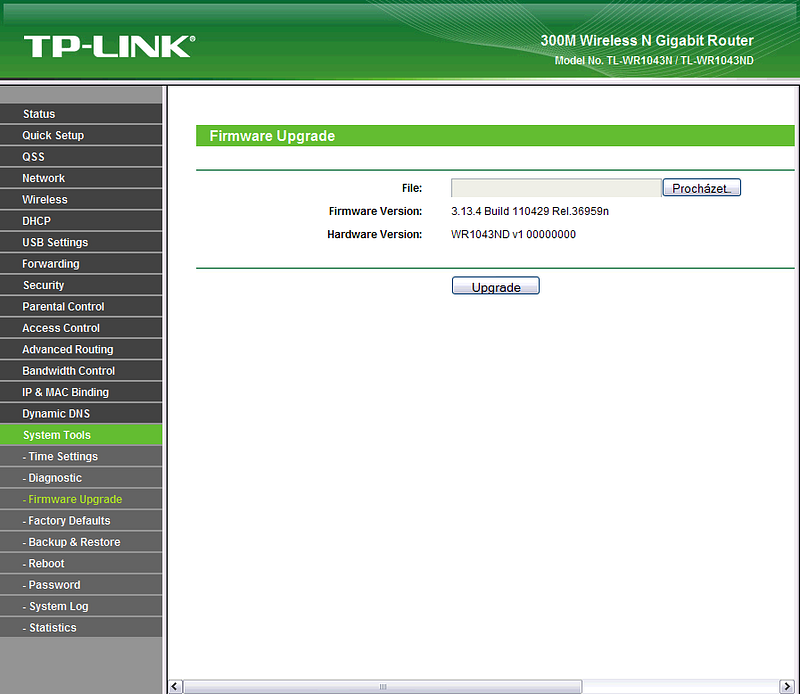
Download the correct versions of the firmware and check multiple times it is the correct version. First, we will be flashing “Firmware OpenWrt Install URL” .bin file. Navigate to 192.168.0.1 page and upload there the .bin file and upgrade the firmware.
This may take up to several minutes. My router’s flash memory is big enough to support LuCI, which is the new web interface. If you don’t have sufficiently big flash memory, you will need to do the second update via ssh.
Go to 192.168.1.1 LuCI web page; default login should be root and an empty password. Navigate to System->Flash Firmware, select the “Firmware OpenWrt Upgrade URL” .bin file and update the firmware again. This step may take several minutes. After that login to your router with an empty password
$ ssh root@192.168.1.1and change it with
$ passwdSetting up eduroam authentication
European universities provide an 802.1X/WPA Enterprise encrypted WiFi connection called “eduroam”. Furthermore, student dormitories in Prague got fast ethernet with 802.1X PEAP authentication. We will need a package called “wpa_supplicant” that doesn’t come with OpenWRT by default for authentication.
There are two options for how to install this package. You can set up the WAN network in the LuCI interface to connect it to your laptop, such as sharing your existing network connection. After that, log in via ssh to your router via LAN ports and run following
$ opkg update
$ opkg remove wpad-basic
$ opkg install nano
$ opkg install wpa_cli
$ opkg install wpa_supplicant
$ opkg install hostapd
hostapd is wpad-mini replacement. This is the easy way. However, there may be reasons why you can’t directly connect your router to the internet. In this case, go to the OpenWRT packages page and search for every package and download the one suitable for your architecture. You will find your architecture with
root@OpenWrt:~# opkg print-architecture
arch all 1
arch noarch 1
arch mips_24kc 10
For my router, the packages can be found here and here, but you have to search for yourself with the right version of OpenWRT and the right architecture. Additional package libubus20210603 has to be downloaded. Now you have to copy these packages manually
$ scp wpa-cli_2019-08-08-ca8c2bd2-7_mips_24kc.ipk root@192.168.1.1:/root/
$ scp libubus20210603_2021-07-01-38c7fdd8-1_mips_24kc.ipk root@192.168.1.1:/root/
$ scp libubus20210603_2021-07-01-38c7fdd8-1_mips_24kc.ipk root@192.168.1.1:/root/
$ scp wpa-cli_2019–08–08-ca8c2bd2–7_mips_24kc.ipk root@192.168.1.1:/tmp
Now switch to your ssh session and install uploaded packages and remove wpad-basic
root@OpenWrt:~# opkg remove wpad-basic
Removing package wpad-basic from root...
root@OpenWrt:~# opkg install wpa-cli_2019-08-08-ca8c2bd2-7_mips_24kc.ipk
Installing wpa-cli (2019-08-08-ca8c2bd2-7) to root...
Configuring wpa-cli.
root@OpenWrt:~# opkg install libubus20210603_2021-07-01-38c7fdd8-1_mips_24kc.ipk
Installing libubus20210603 (2021-07-01-38c7fdd8-1) to root...
Configuring libubus20210603.
root@OpenWrt:~# opkg install wpa-supplicant_2019-08-08-ca8c2bd2-7_mips_24kc.ipk
Installing wpa-supplicant (2019-08-08-ca8c2bd2-7) to root...
Configuring wpa-supplicant.
root@OpenWrt:~# opkg install hostapd_2019-08-08-ca8c2bd2-7_mips_24kc.ipk
Installing hostapd (2019-08-08-ca8c2bd2-7) to root...
Configuring hostapd.
Now create file wpa_supplicant.conf with following
ctrl_interface=/var/run/wpa_supplicant
ctrl_interface_group=0ap_scan=0
fast_reauth=1network={
key_mgmt=IEEE8021X
eap=PEAP
# ca_cert="AddTrust_External_Root.pem"
identity="***************"
password="***************"
phase2="auth=MSCHAPV2"
priority=2
}and create wpa file with following
#!/bin/sh /etc/rc.common
#
# Author: Daniel Herman, 2021
#
# Based on Example script
# Copyright © 2007 OpenWrt.org
#START=32
STOP=16EXTRA_COMMANDS=”status”
EXTRA_HELP=”status Print the running process”boot() {
sleep 20
start "$@"
}start() {
echo “Starting eduroam authentication using wpa_supplicant”
cpuinfo=`grep -m 1 “system type” /proc/cpuinfo | cut -d: -f2`
echo Detected Device Info: $cpuinfo
wpa_supplicant -i eth0.2 -D wired -c /etc/wpa_supplicant.conf -B -dd | tee /tmp/wpa_supplicant.log
sleep 5
}stop() {
echo “shutting down eduroam authentication”
killall wpa_supplicant && echo “wpa_supplicant was terminated”
sleep 2
}status() {
ps | grep wpa_supplicant | grep -v “grep wpa_supplicant”
}Now upload created files to your router
scp wpa_supplicant.conf root@192.168.1.1:/etc/wpa_supplicant.conf
scp wpa root@192.168.1.1:/etc/init.d/wpa
Switch again to your session and make your /etc/init.d/wpa service executable, test your connection, enable service and reboot
root@OpenWrt:/etc# cd /etc/init.d/
root@OpenWrt:/etc/init.d# chmod +x wpa
root@OpenWrt:~# wpa_supplicant -i eth0.2 -D wired -c /etc/wpa_supplicant.conf  -dd
Successfully initialized wpa_supplicant
eth0.2: Associated with xx:xx:xx:xx:xx:xx
eth0.2: CTRL-EVENT-SUBNET-STATUS-UPDATE status=0
eth0.2: CTRL-EVENT-EAP-STARTED EAP authentication started
eth0.2: CTRL-EVENT-EAP-PROPOSED-METHOD vendor=0 method=25
eth0.2: CTRL-EVENT-EAP-METHOD EAP vendor 0 method 25 (PEAP) selected
eth0.2: CTRL-EVENT-EAP-PEER-CERT depth=0 subject='C=CZ, L=Prague, O=Charles University, CN=radius1.eduroam.cuni.cz' hash=*******
eth0.2: CTRL-EVENT-EAP-PEER-CERT depth=1 subject='C=NL, ST=Noord-Holland, L=Amsterdam, O=TERENA, CN=TERENA SSL CA 3' hash=*******
EAP-MSCHAPV2: Authentication succeeded
EAP-TLV: TLV Result - Success - EAP-TLV/Phase2 Completed
eth0.2: CTRL-EVENT-EAP-SUCCESS EAP authentication completed successfully
eth0.2: CTRL-EVENT-CONNECTED - Connection to xx:xx:xx:xx:xx:xx completed [id=0 id_str=]
root@OpenWrt:~# /etc/init.d/wpa enable
root@OpenWrt:/etc/init.d# reboot
After a while, log in again via ssh and check the connectivity with ifconfig and /etc/init.d/wpa status. Finally, update and install nano for convenience
root@OpenWrt:~# opkg update
root@OpenWrt:~# opkg install nano
That’s it; now you have a fully functional local network connected to the internet via eduroam ethernet.


