
Reverse Engineering Bare Metal Firmware Images — Part 2
Dissecting Firmware Images Only Knowing The Target Device
If you have not read part 1, you can view it here: https://readmedium.com/reverse-engineering-bare-metal-low-level-kernel-images-with-qemu-getting-started-c705b7b14d35
Now that we have our environment set up, we are now ready to reverse the binary! For this, I will be demonstrating how to do a basic ret2text exploit using a CTF challenge I wrote for UMDCTF, Furor. You can download a copy of this here: https://github.com/UMD-CSEC/UMDCTF-2021-Public-Challenges/tree/master/Pwnables/furor
Since there are a lot of concepts to cover just with solving this CTF challenge, we are going to break this into two articles: one focused on initial high-level reversing and another focused on in-depth reversing of ARM and exploitation.
More specifically, what we will demonstrate in this challenge is:
- Figuring out how to find crucial information about bare-metal firmware images
- Understanding how to find information about the target device
- How to set up Ghidra such that it understands how to find information (e.g., making it easier to find our target functions).
What we will cover in the next article is:
- Reversing ARM code
- Using our debugging environment to test exploits
- Performing a full exploit
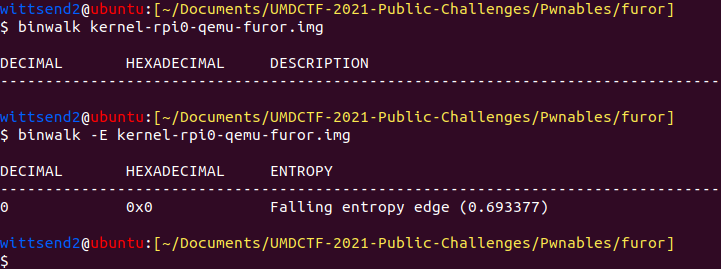
The first thing I like when starting to reverse engineer anything is to determine what it is. Although we have a good idea of what it is from the title of the article, we aren’t going to have this context in the real world most of the time. Firmware images are a bit weird in the sense that they can contain multiple files within it, or be a binary blob. To get a general sense of what the image is, I like to use some Linux utilities like file, Binwalk, etc. Generally, if a firmware image contains multiple files or is of a standard format, it gives you output details. Unfortunately, Binwalk doesn’t give us much information.
I then try to execute the image through QEMU to see what happens (I also gave instructions on how to run this in the challenge description, so they knew to run the command). This then gives us the output. Therefore, the firmware image itself contains code. It isn’t always the case that firmware images are programs themselves as a lot of the time, they contain files and a complete operating system.

As we can see here, it looks like all the firmware image does is take two forms of input: a character to begin running the program and a string for the password. Afterward, it appears to just exit. To give some context, we know that this challenge is some sort of exploitation challenge because it under the Pwnables category (during UMDCTF). We still don’t know what kind of exploit is required or where the flag is located yet, but it is probable that the exploit is some sort of buffer overflow or format string vulnerability. To confirm this is the case, we need to reverse the firmware image, and then debug it using “malicious” payloads. To start, I like to use some Linux utilities to see if I can get any more clues. A useful utility is Strings as it can sometimes give clues about what we need to do.

Now, this flag that we see is obviously not the correct flag, as it would be too simple of a challenge. In addition, it mentions that the real flag is on the server. As a result, what we would likely need to do is craft an exploit that prints out this flag and then run it on the server. The next thing I would do is put the firmware image in Ghidra as I would like to begin understanding how the firmware image is laid out.
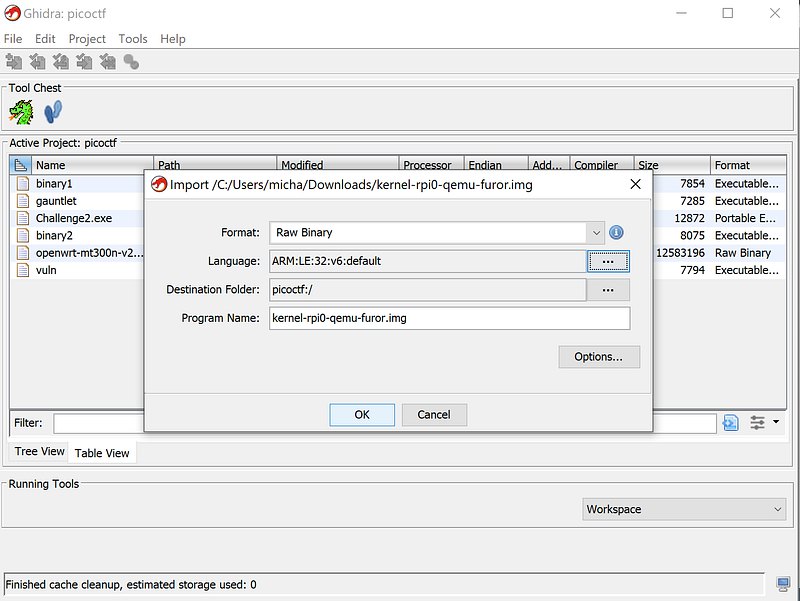
There are some things that we need to keep in mind when reversing firmware images. Firmware images themselves do not have symbols, they are considered binary blobs. When compiling them, they produce an ELF file that can be used to import symbols; however, the CTF challenge does not provide them. Therefore, we need to do some detective work to determine the architecture. The image below shows what Ghidra automatically sets when trying to import furor.
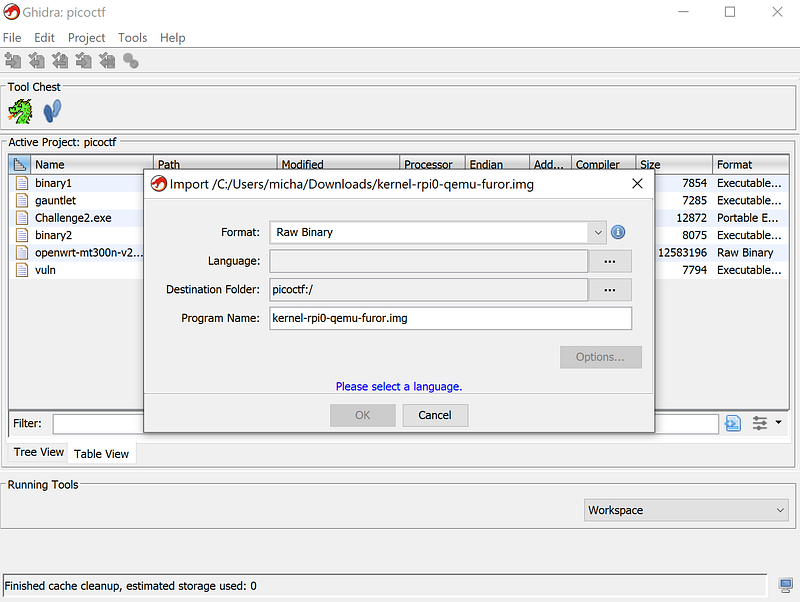
Determining target architecture is pretty simple as the challenge description says what device the Firmware is designed for (Raspberry Pi Zero). We need to determine what processor the Raspberry Pi Zero uses through datasheets, and this will tell us what version of ARM we are using.
The version of ARM being reversed is extremely important because each new version adds new features. The chart below shows the new features added in each version since ARMv5
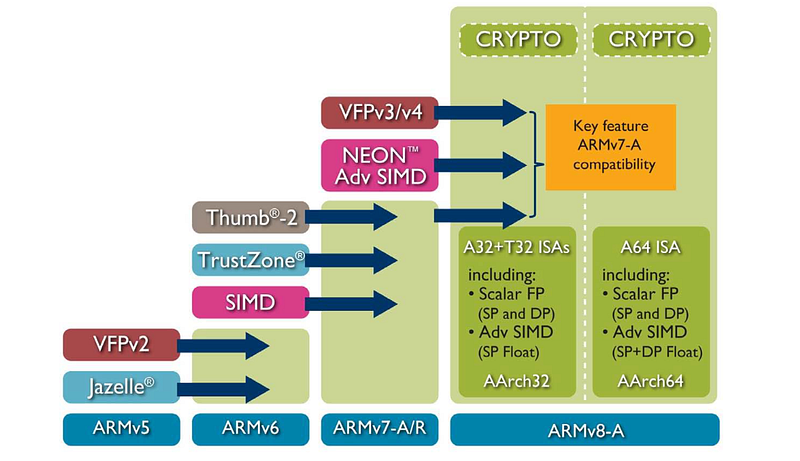
Some key things to note with this: in ARMv6 Thumb-2 was introduced. ARM and Thumb are two different encodings of instructions that an ARM processor supports. Thumb-2 is a superset of Thumb, which combines both 16-bit and 32-bit instructions. This was added to get the best balance of binary size and speed of execution. It can result in applications using less power while getting more performance. The other important thing to note is that starting with ARMv8, the architecture supports 32-bit and 64-bit versions of the architecture as well (same difference as i386 and x86_64). VFP, SIMD/NEON, Jazelle, and TrustZone are security or performance features that we will not go into in this article.
Now that we understand a little bit about the differences of ARM versions, let's figure out what architecture the Raspberry Pi Zero is using. A simple Google search tells us that the Raspberry Pi Zero’s processor is a Broadcom BCM2835 SoC. From here, we can search for the datasheet for the processor.
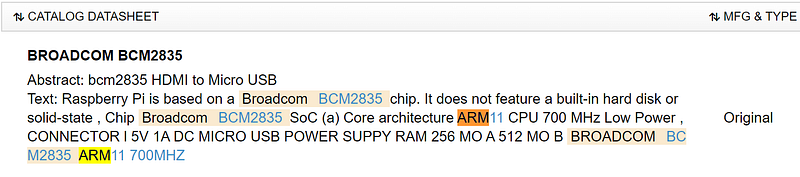
A quick search shows us that it uses ARM11. I know what you are going to say: “this doesn’t make sense as you just said ARM only goes up to version 8”. From a quick Google search, we can figure out that this is another versioning scheme that differentiates the core of the processors. Here is a useful link to give more context: https://en.wikipedia.org/wiki/Comparison_of_ARM_cores
From further research, we can conclude that ARM11 uses the ARMv6 architecture. This is useful information for us as this will tell Ghidra how to read binary blob. Since ARM 11 is a mixed-endianness version of ARM, we don’t know initially we are working with big or little-endian. My suggestion is to try one, and if something looks off, go with the other.
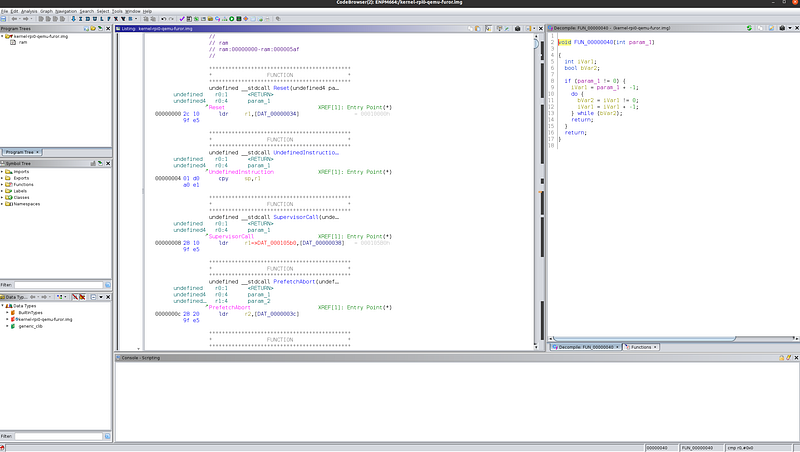
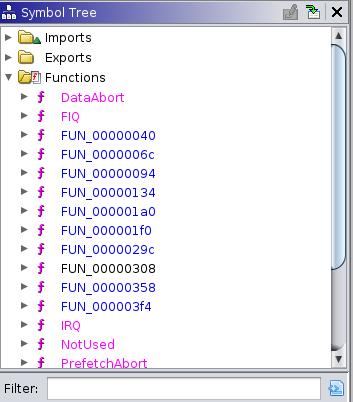
Now that we have Ghidra open, we need to figure out where execution begins. The issue we are going to run into, as mentioned earlier, is that there are no symbols, so Ghidra only tells us the offset of which functions are located.
Since this is a small firmware, a trick we can do is figure out where strings are referenced. By doing this, we can somewhat deduce what functions we are working with (like puts, gets, or maybe main, etc).
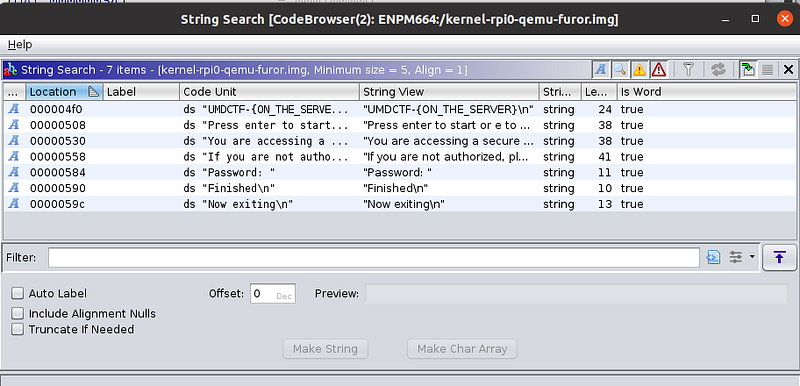
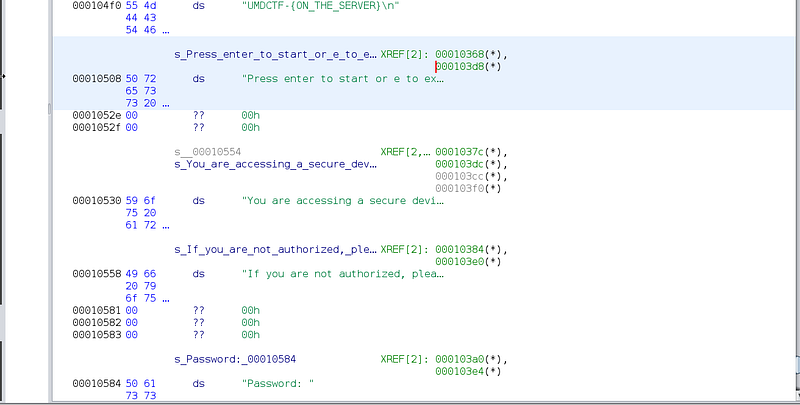
Through Ghidra’s strings utility, we can find the location of where various strings are located in the binary (specifically their offset).

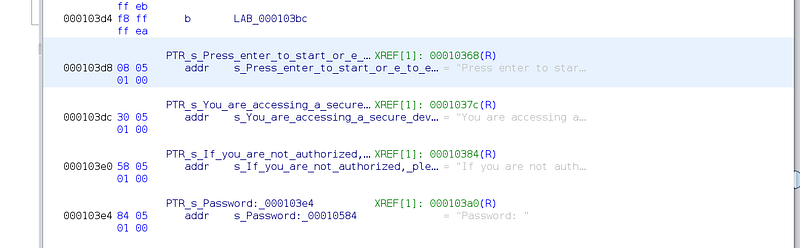
Another thing that we find is that we come across functions, which seems like they reference these strings, but at an offset of 0x00010000 (versus an offset of 0x00000000).
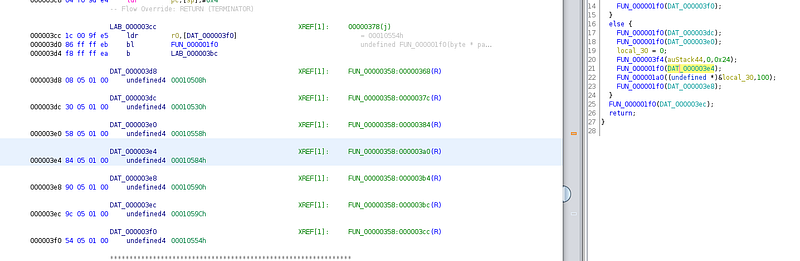
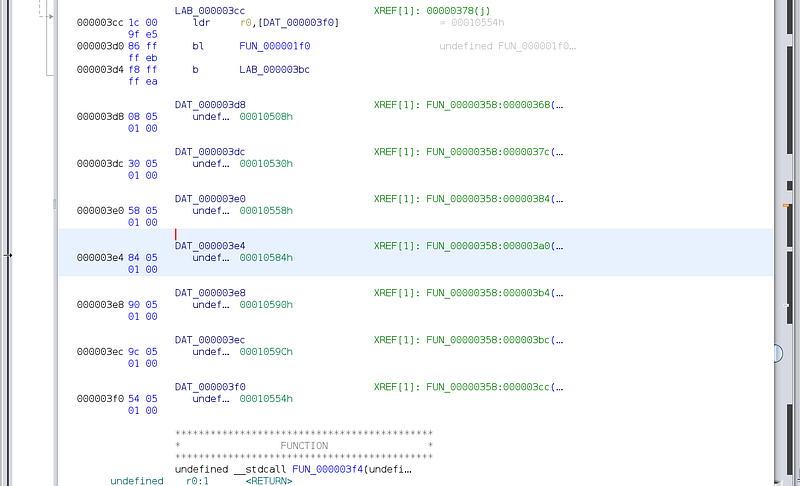
This tells me that we need to tell Ghidra to change the base address that we are working with, as the binary is compiled with a different base address.
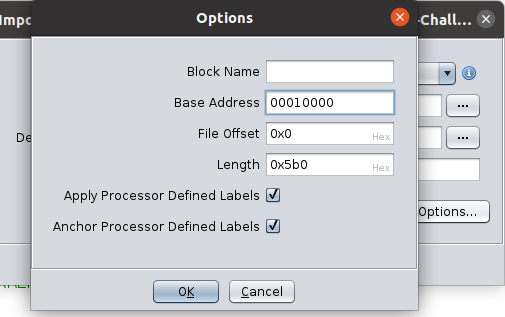
The way to fix this is by importing the firmware image into Ghidra again, except when we do this we set the base address to 0x00010000. This will be under the Options…
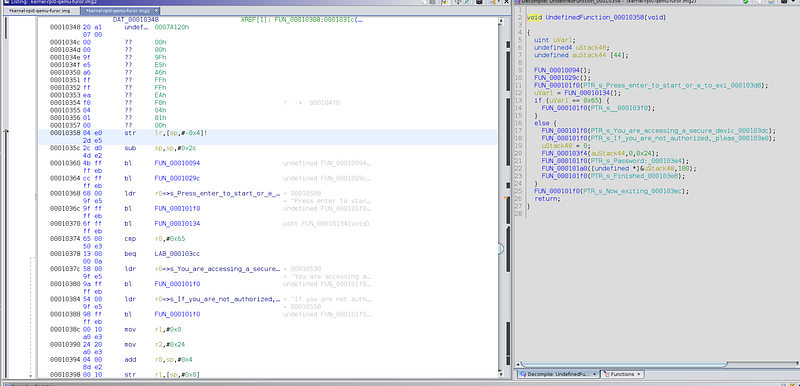
If we go back, we can see that the references will point to the right text. This makes it significantly easier to reverse engineer because we will be able to see what is actually being worked with. Specifically during function calls, as it will say which string is being passed in as a parameter.
Now we have some idea of what we are looking at. We can start taking a deeper dive into reversing the assembly code and figuring out the behavior. This will lead us to be able to successfully exploit the binary. This will be covered in the next article.
If you have not already, follow us on Medium and Twitter as we will constantly post new content.
Link to Twitter: https://twitter.com/RagnarSecurity